Get a Better Recording Workflow in Logic Pro X
Creating an efficient and flexible recording workflow when recording in Logic Pro X will give your music the opportunity to shine. Mark Cousins gets tracking… Just like building a house, the foundation of any successful production begins at its most formative stage – the recording. The art of track laying has a unique set of […]
Creating an efficient and flexible recording workflow when recording in Logic Pro X will give your music the opportunity to shine. Mark Cousins gets tracking…

Just like building a house, the foundation of any successful production begins at its most formative stage – the recording. The art of track laying has a unique set of skills and procedures: from the simple logistics of creating and managing different takes, through to your ability to create a comfortable and conducive atmosphere that lets musicians deliver their best performance.
However, while you’ll find plenty of advice and guidance on a range of post-production tasks – like using a compressor, for example, or fine-tuning a reverb – there’s often a distinct lack of guidance when it comes to track laying in Logic.
In this workshop, we’re going to take a look at a range of features within Logic Pro X that can be used to manage a multitrack recording session. Although there’s a range of prescriptive features for single-track overdubs (like Quick Swipe recording a vocal, for example), what’s missing is a clear methodology in respect to recording a multitrack performance.
The techniques explored have developed using Logic Pro X to record and mix a range of large instrument groups, although they can easily be adapted to a variety of recording tasks using Logic.
The Latency Issue
No exploration of recording workflow in Logic (or any other DAW, for that matter) would be complete without a cursory mention of latency. Put simply, latency is the delay between signals arriving at the input of your audio interface and (via a trip through your computer’s CPU) the same signal leaving the output.
For most production activities, latency is rarely an issue, but when a musician is listening to themselves on headphones, any noticeable delay can be distracting. Unless you intend to utilise the low-latency mixing provision in your audio interface, the first step of any tracking session in Logic Pro X is to optimise your Buffer settings as part of Logic’s audio preferences (Logic Pro X > Preferences > Audio).
Lowering the buffer setting will in turn lower the latency of your system, so, assuming you’re using a fast connection protocol (better than first- or second-generation USB, in other words) and a speedy computer, you should be able to reduce latency to near-negligible amounts. When you’re finished tracking, simply restore the latency to a more CPU-friendly setting of around 256 samples.
Hearing is Everything
For both you and musicians to work effectively, it’s important that you gain some distinction between the mix you want to hear and the mix they need to play to. The lazy approach is to simply duplicate what you’re hearing in the control room (what is often referred to as the monitor mix), but this solution might be in sharp contrast to the balance of instrumentation the musician(s) want to hear.
Their mix, for example, will favour large amounts of click and less of themselves in contrast to the rest of the track. For you, though, the instruments you’re recording will be of more interest that any pre-recorded elements, or the click, for that matter.
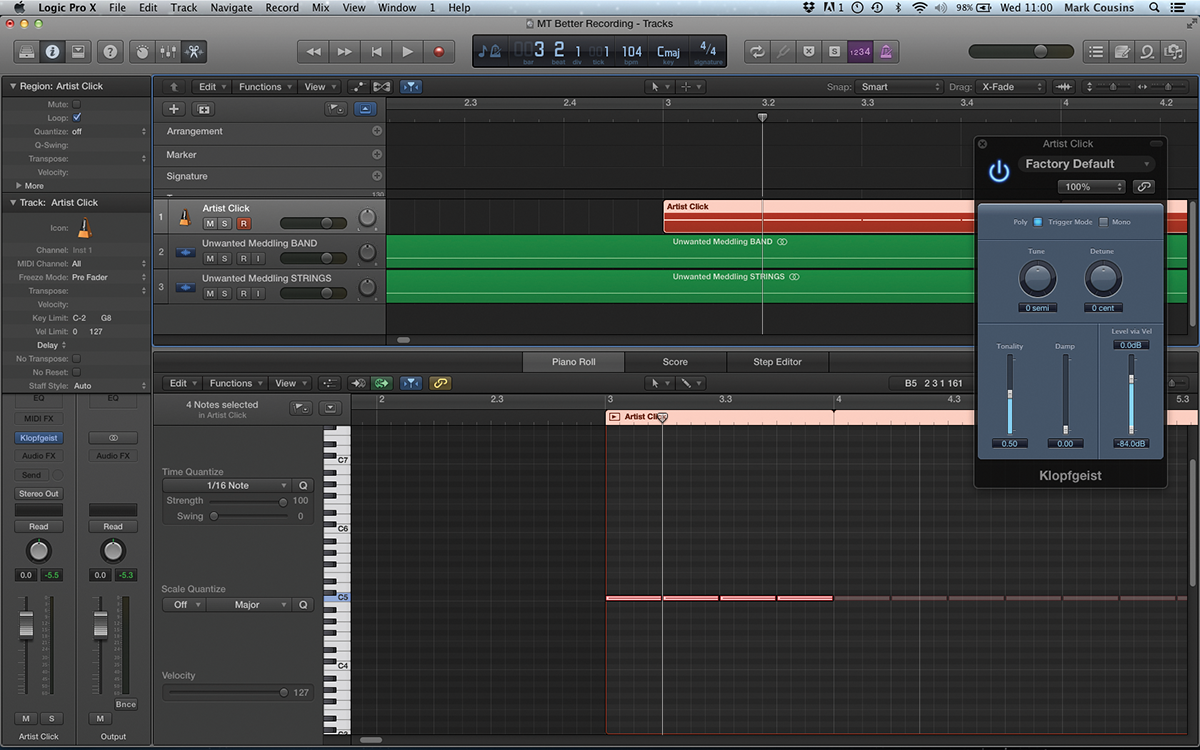
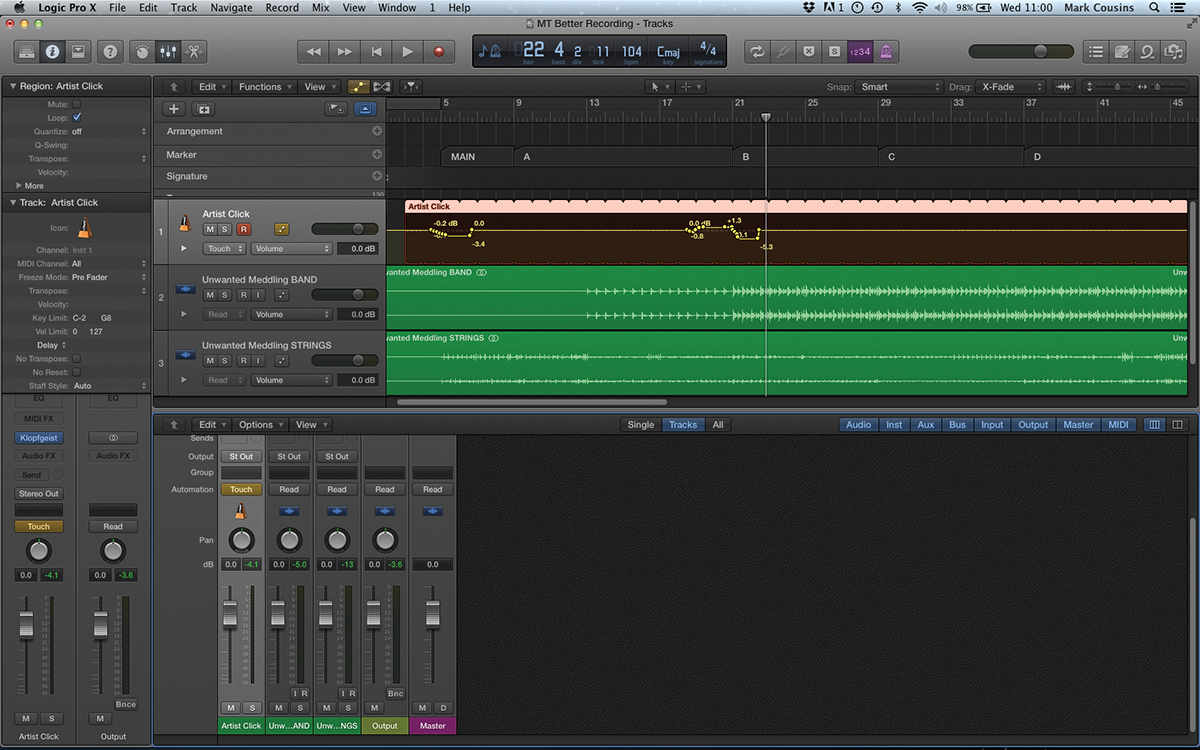
Although it takes a little more time, creating two mixes – a cue mix and the monitor mix – will benefit the long-term success of your session. For a start, consider creating an additional click, independent from Logic’s own internal metronome, as a means of providing the musicians with a click at all points of the recording (irrespective of whether you’ve remembered to active the metronome!).
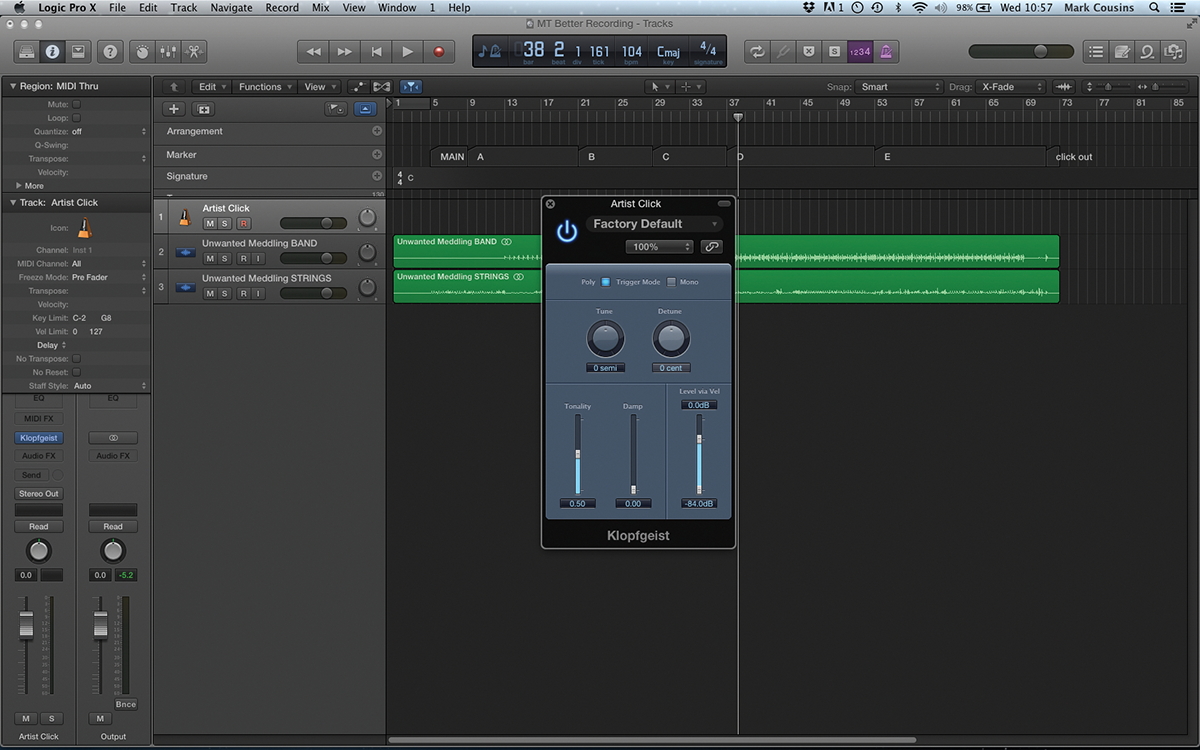
Logic’s Klopfgeist instrument is a programmable version of the same click used for the internal metronome. In this case, simply create the appropriate MIDI trigger, remove it from your mix, and route Klopfgeist to the same output as your headphones.
When it comes to the rest of the instrumentation in your recording, create a series of pre-fade bus sends from your Logic mixer. A pre-fade send means that the signal level is consistent irrespective of the output level set on the main fader.
You can turn down the backing track, for example, and the musicians will still hear it. Likewise, increasing the level of their instruments in your mix, for example, won’t suddenly temporarily deafen the musicians with their own performance.
Although your mixer will get initially more complicated, it replicates the same features used of a dedicated studio console to manage a typical profession recording session.
Track to Success
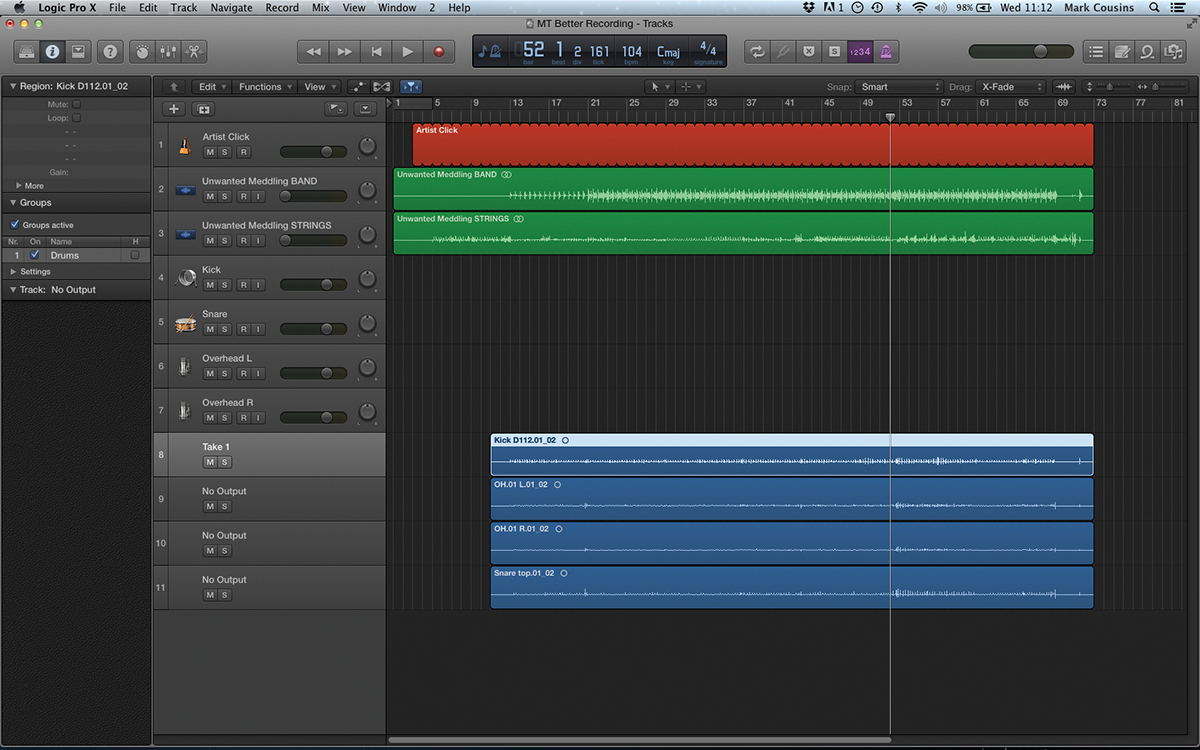
As you’ll see from the walkthroughs, there are a variety of techniques you can employ to work with multiples of tracks more effectively. So, creating a ‘Master Template’ project is useful as a means of importing (via the All Files Browser) multiple tracks: all pre-named, colour coded and with appropriate icons, in just a few mouse clicks.
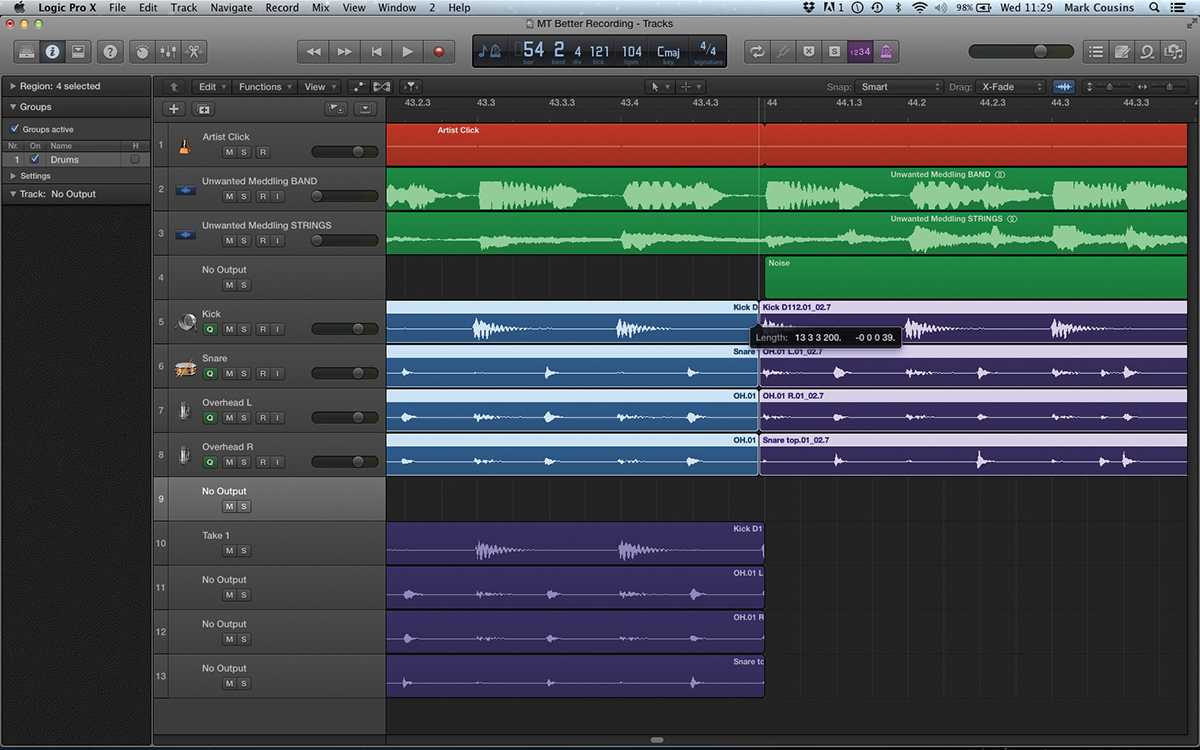
Making use of a variety of grouping techniques – including fader groups in the Tracks area and take groups in the Project File Browser – also lets you manage and edit multiple channels and audio files with the same ease as a single file.
As an alternative to quick swipe comping, we’ll also look at some simple editing techniques that let you quickly assemble a collection of takes into a finished performance. While you might not have the time to create a completely finished edit ‘mid session’, it’s certainly a worthwhile means of knowing whether you’ve got all the recordings you need, or whether a last take will make a real difference.
Whether or not you intend to adopt all the techniques demonstrated here, the workshop also illustrates how a range of elements within Logic – namely the Tracks area, Fader Groups and the Project File Browser – can be kitted together to form a productive and efficient workflow. While it’s easy to get lost in the minutiae of production, it’s important to look at your broader means of working and how Logic Pro X can further enhance your productivity.
Focus On Low-Latency Monitoring
In addition to manual adjustments to the buffer settings, Logic also includes an additional latency prevention method available via Record > Low Latency Mode. In essence, the Low Latency Mode should be used as an addition to the basic buffer settings, as its primary aim is to negate excessive additional latency brought about through the addition of plug-ins.
Once active, Logic will bypass any plug-ins on the active record channels that add unwanted additional latency.
By default, Logic will bypass the plug-ins if more than 5ms of additional latency is introduced, although you can increase this time by adjusting the Limit setting as part of the Audio preferences (under the General tab).
Step-by-Step – Improve your Recording Workflow – Tracking a Session
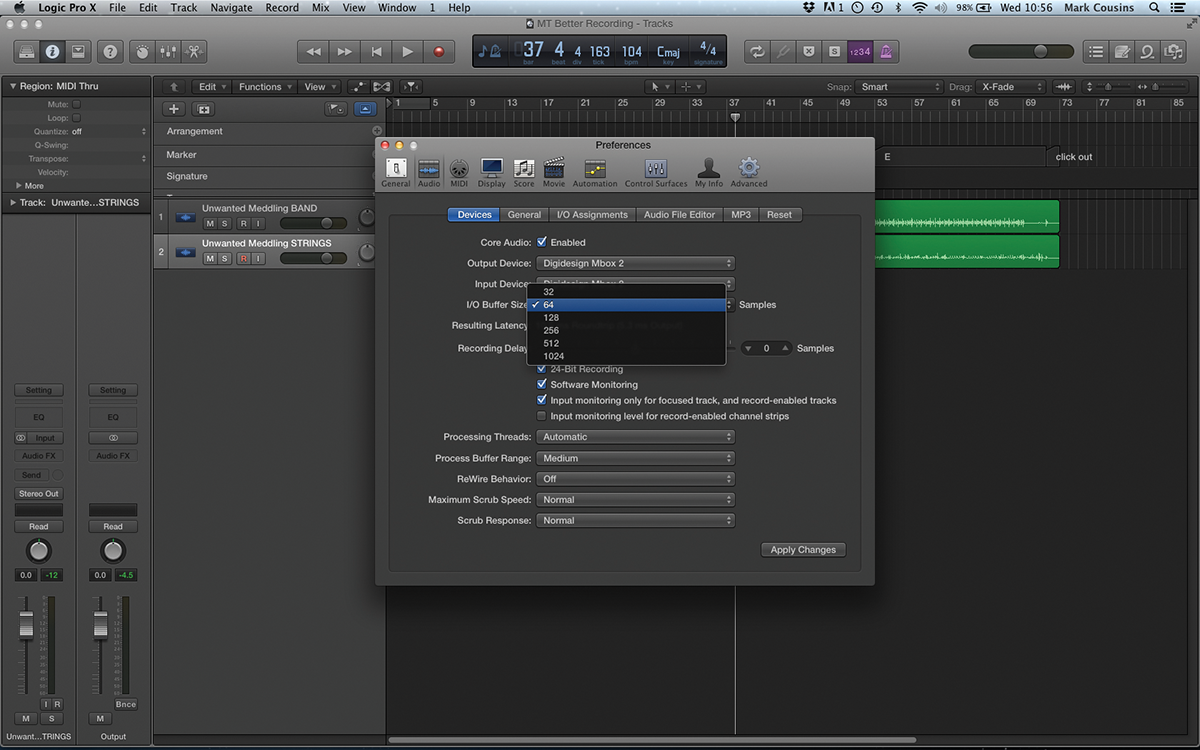
1: For the purposes of the tracking session, reduce your I/O Buffer size to around 64 samples. This will reduce the overall latency amount in your system and negate the delay for musicians hearing themselves in the cans.
2: Let’s now create a click that’s unique to the musicians and separate from Logic’s internal metronome. Create a new instrument track and instantiate the Klopfgeist instrument. This is the same instrument used to create Logic’s click.

3: Create the MIDI for your click track, running for the duration of the song. To replicate Logic’s metronome you’ll either need a single G5 note followed by 3 C5 notes, or just a series of C5 notes at maximum velocity.
4: To avoid excessive click bleed, you might want to automate the level of the click track (depending on how your musicians feel). Lower the click at quiet points and/or increase it during passages where the musicians need plenty of click assistance.
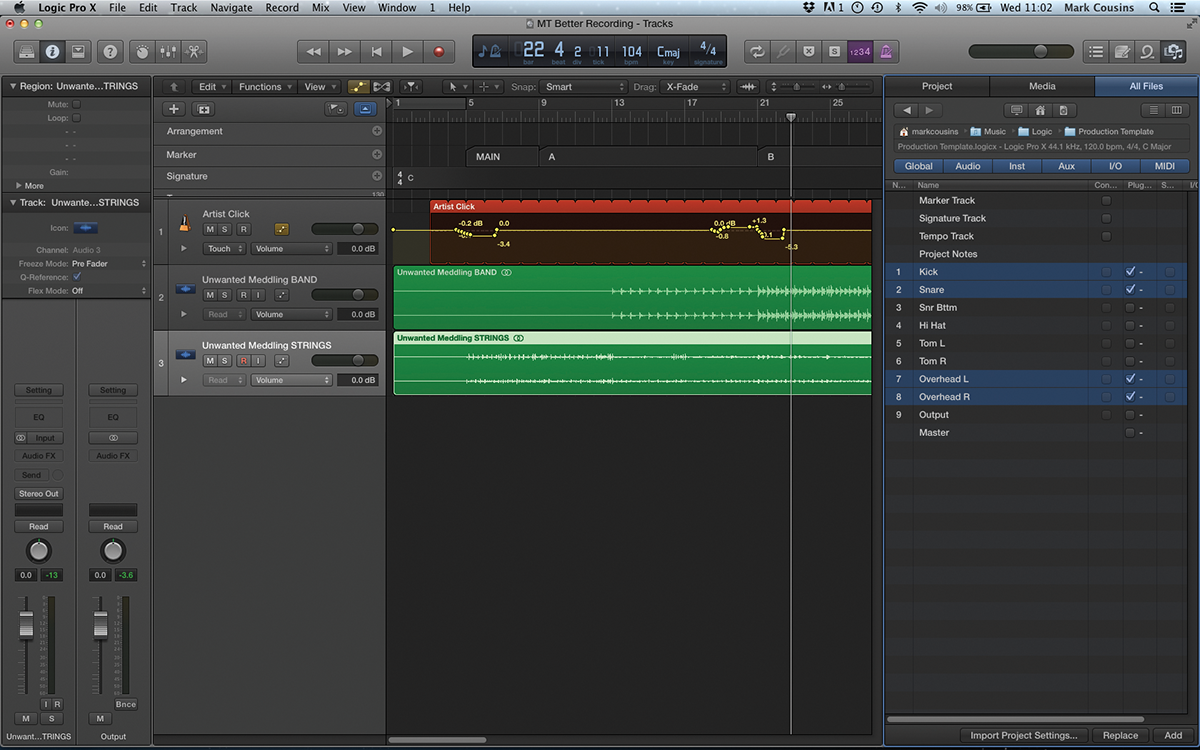
5: Now create your empty tracks (in this case for Kick, Snare and Overheads). To save time, we’re importing the tracks from a pre-assigned template file, which saves use naming, colour-coding and assigning an icon to each track.
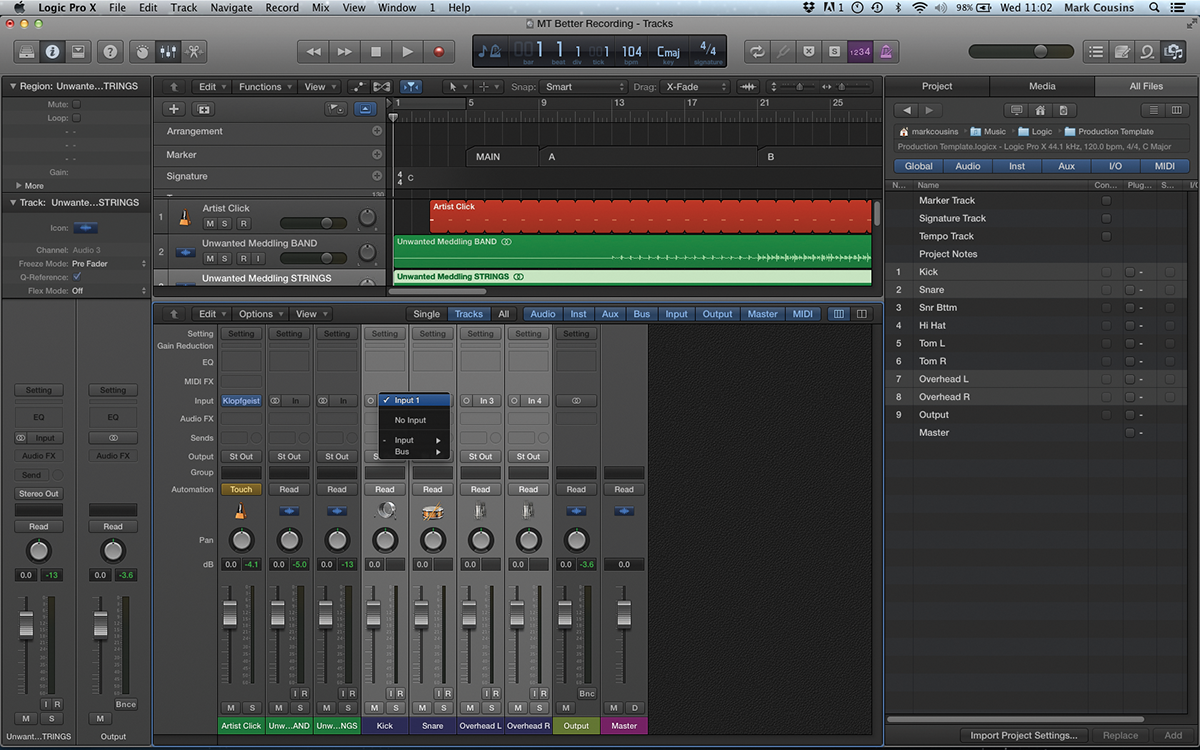
6: You’ll need to assign inputs to each of the tracks you’ve created. A handy technique is to select the tracks and then hold the alt key as you assign the first input. Logic will then create an incremental input assignment.
Click Here to Continue
This tutorial is endorsed by Point Blank. With courses in London, online and now in LA, Point Blank is the Global Music School. You can study sound to picture on their Music Production Diploma courses, with pro industry tutors.
