10 Tips for Better Mastering
Got a perfect mix? Now is the time to add some professional sparkle to it. You need to give it a lift to the giddy heights of a mastered master. Follow these tips to go up a level… 1. Is it really perfect? Your mix has really got to be perfect before you enter the […]
Got a perfect mix? Now is the time to add some professional sparkle to it. You need to give it a lift to the giddy heights of a mastered master. Follow these tips to go up a level…
1. Is it really perfect?
Your mix has really got to be perfect before you enter the mastering stage. If you find yourself having to make major changes when mastering, then your mix isn’t perfect, so don’t be frightened to go back into the mix to sort the issues out there and then restart the mastering. Conversely, don’t process the stereo bus too much before mastering – it’s a common mistake and many mix engineers over-compress too early. You need to leave room for the mastering stage to breathe – a good 6dB of headroom should do it.
2. Take aim and compare
In order to achieve a great master, you need to have something to aim at. We always recommend that you load in a song with an arrangement or mix you are aiming at into your DAW and with mastering, it’s no different. Choose a track that sounds incredible, load the audio into your DAW and line it up next to your own to make comparisons. It might be depressing at first, but with each tweak, you’ll get closer and closer and learn a lot along the way for future mastering sessions.
3. Get excited

Mastering is more about using compression to give a more even sound and EQ for subtle lifting, but you can also use an exciter to add some sparkle to your highs. Exciters use subtle distortion and phase manipulation to add life to harmonics, which EQ doesn’t. And, as ever with the mastering process, it’s about being careful and restrained; it’s that word ‘subtle’ again…
4. It’s not about ‘loud’ any more
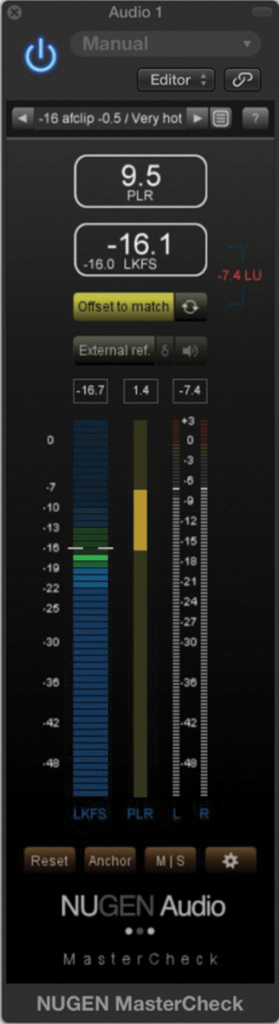
There was a time when mastering seemed to be about being as loud as possible. Thanks to movements like Dynamic Range Day and the fact that services like Spotify and iTunes level tracks for an even loudness – so one track doesn’t burst through louder than another – more dynamic masters win out. Don’t over compress, and use plug-ins like Nugen Audio’s MasterCheck to prepare your masters for different platforms.
5. Apply pressure
That’s not to say you shouldn’t compress at all. Compression can add consistency. Try compressor ratio settings of 1.5:1 to 2.5:1, attack times of 50-250ms and release times up to 500ms. Consider multiband compression, too, so you could, for example, tame your bass while allowing other bands a bit more freedom.
6. Don’t do it, Part 1

You don’t actually have to master your music, you know – there are plenty of very qualified people out there who are willing to do it for you for money, people who certainly sound like they’ll do a great job.
Abbey Road and Metropolis are just two famous studios who have an online mastering facility. You send the audio in and they master it for you, simple as that, and it’s not as pricey as might think, either. Prices can start from as little as £40 a track, and Abbey Road starts at just £90. You even get to choose your own engineer!
7. Don’t do it, Part 2
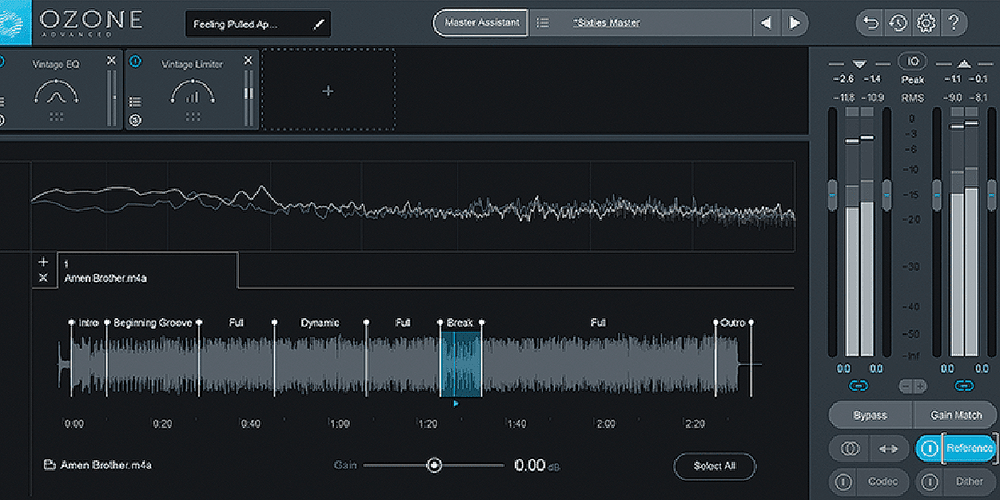
And there are also other ways to avoid getting your mastering hands dirty. Software such as iZotope’s Ozone allows you to master with presets or genre profiles and contains just about any effect you need for mastering and a whole lot more besides.
You get 11 modules, including EQ, Imager, Exciter, Vintage EQ, Vintage Compressor and Limiter. The latest version even has what’s called an AI Mastering Assistant that allows you to aim for CD masters or masters for specific streaming sites. Okay, it takes the fun out of the process, but watching it in action will save you time and can help you learn the ‘dark art’ along the way.
8. Be consistent

Working on a ‘body of work’? We used to call this an ‘album’ back in the day, but if you’re working on songs that will appear in the same place, or are part of a soundtrack or other collection, then make sure you apply a similar process to each track. That comes down to using the same tools and effects, the same order of application and even the same settings. Obviously, if your mixes are very different, this may upset your mastering process. Again, don’t be scared to go back to your mixes to even them out.
9. Add width with care
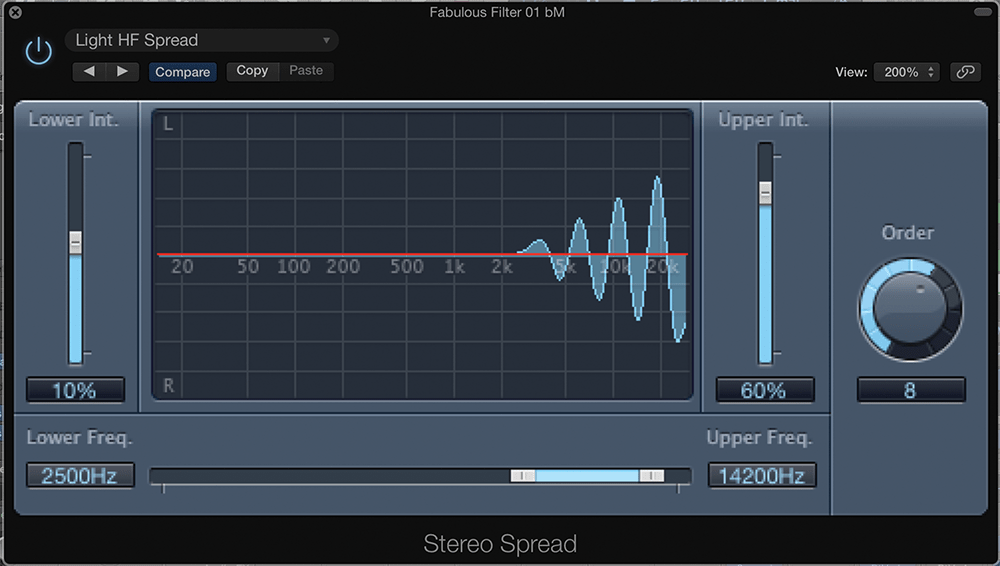
Imaging is another process that’s often included at the mastering stage and, like reverb, it’s very easy to whack it up to the maximum, thinking the wider or more reverberated, the better. Too much widening can alter the complete mix and you’ll want fundamental bass parts to stay central. So, once again, as with all mastering processes, go easy on your width (and very easy on reverb).
10. And… test
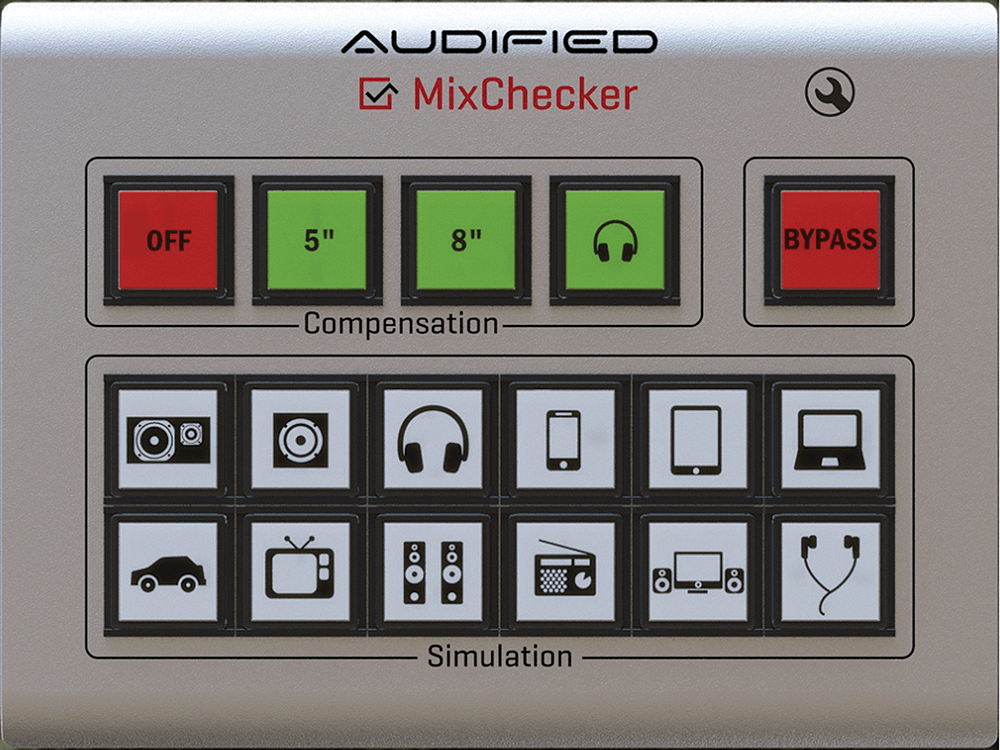
We do say this a lot, but it’s a great idea to check and compare your master on several different playback systems where possible. But if you don’t have a hi-fi, CD deck, headphones, car speakers and other audio gear just lying around, some of the new utility software titles out there, like Audified’s MixChecker, can take a lot of the strain out of this by emulating various playback systems. They allow you to immediately hear how your master will sound to different listeners with zero, or at least very little, effort on your part. Now who said that mastering was hard?