20 EQ Tips
The EQ stage of mixing is vital in finding space for each instrument, making important moments punch through and eliminating clutter. Here’s our guide to getting it right… 1: Watch the Very Top Watch the very top common procedure when editing or mixing audio is to try to get rid of hiss on recorded audio […]
The EQ stage of mixing is vital in finding space for each instrument, making important moments punch through and eliminating clutter. Here’s our guide to getting it right…

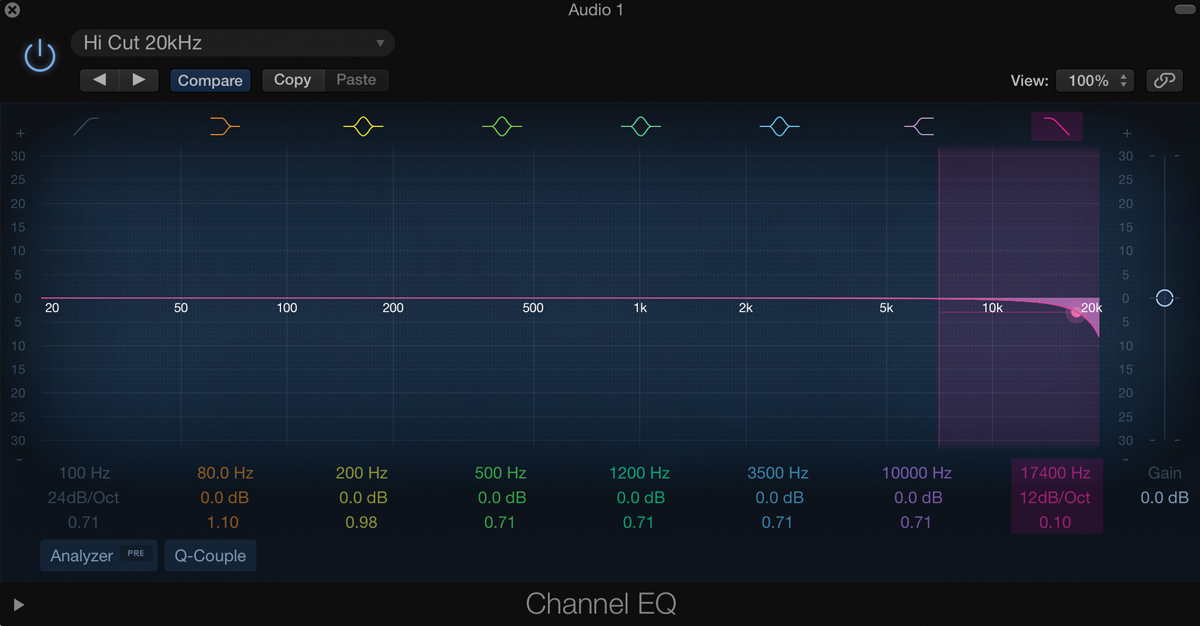
1: Watch the Very Top
Watch the very top common procedure when editing or mixing audio is to try to get rid of hiss on recorded audio tracks. These very high frequencies can often be found between 5kHz and 20kHz in the frequency range, depending on the material, so applying a high-cut filter with a narrow Q value should enable you to knock out the hiss while leaving other high frequencies that you want to keep intact.
As ever, this is a matter of careful experimentation. Systems such as Dolby Noise Reduction used to get rid of hiss, but also usually made the whole track sound dull as a side effect. Since digital files don’t suffer from the same physical problems as tape, you can be fairly sure that if you get your top end sounding clean, it should be reproduced as such whatever it’s played back on.
2: Control your Body
More than any other tool, EQ is able to control the ‘body’ of a sound. Compression can play around with levels and presence, but to control the weight of a sound it’s usually to EQ that you will turn. For some parts, this means reducing bottom end and lower mids to reduce clutter in the mix, and for others it’s about adding weight by increasing those same frequencies.
3: Add Bass Weight
To add weight to a track, try looking around the bottom end of the spectrum, gently boosting with an amount of around 10dB as you move around, until you find a point that seems to add the most body. Then find a frequency either double or half that value �– so if it was 110Hz, go to 55Hz – and add a dB or two of boost there as well.
4: It’s the Ensemble That Matters
In a dense or complex arrangement, you may well find that two or more elements of a track are fighting to occupy the same frequency space. It might be impossible to EQ them to sound the same as they originally did and still make enough space for both of them. One trick is to EQ them in slightly different directions while keeping them sounding good in the context of a track.
This doesn’t necessarily have to be extreme; for example, you could make one guitar part more bass-heavy and one more top-heavy. Solo’d up, they might sound odd, but the main thing is that they sit well in the context of the track. If there are parts of a track where a sound plays solo or with less accompaniment, you can always automate the EQ to behave differently at those points, or duplicate the track and treat it separately.
5: Understand Vocal Requirements
Vocals almost always need to cut through a mix, or at the very least be prominent and audible, and EQ is key to this – along with compression, of course. There are some good rules of thumb to observe.
A lot of male vocals will, prior to treatment, have too much bass end on it to sit well in a mix, so rolling off some of this is usually a good tactic. A vocal that is too nasal or top-heavy, on the other hand, might benefit from the addition of some lower mids, and perhaps even bass.
As vocals can sometimes vary over a large part of the frequency spectrum through the course of a song, you need to pay particular attention to their EQ. Multiband compression can also help to control unexpected peaks if a single band compressor isn’t quite doing it.
6: Pre-treat certain sounds
When you are recording certain sounds, particularly vocals, it can be advisable to do a little EQ’ing on the channel into which the vocal is going to be recorded. Close-up vocals, in particular, can sound boomy in the singer’s headphones and lead to them not performing to their full potential. Knocking some bottom end off will help their vocal sit better in the headphone mix.
Remember, however, the difference between doing this using a software channel strip where the EQ is not part of the take, and thus can be changed afterwards, and on your mic pre or interface, where the changes are a permanent part of the recording. It’s usually wise to record relatively clean and then EQ afterwards, but if a sound is particularly problematic at the low or high end, for example, it doesn’t hurt to mitigate this prior to recording.
7: Order matters
As with any effect used as an insert, the point at which you apply EQ can have an effect on the end results. Imagine you applied an EQ that cut out a lot of bottom end, and then in the next insert slot applied a compressor. That would cause the compressor to behave in a specific way because it would be compressing a signal without much bass end. If the EQ was applied after the compressor, the EQ would be working on the compressed sound – the full frequency spectrum – rather than the compressor working on the EQ’d sound. The differences can be subtle or more noticeable, depending on the plug-ins you are using. If you are using EQ in your DAW’s mixer, rather than as a plug-in, be aware of what path the signal is taking on its journey from timeline to speakers.
8: Compare and Contrast
When it comes to getting a production right, you’ll do a lot of tweaking. Many EQ modules give you the ability to A/B between two presets, and sometimes as many as four. With almost any effect used during music production, this can be a really helpful thing to do, as it lets you non-destructively audition different treatments and flip between them. After extensive periods of listening, your ears get used to the way something sounds, and so sometimes a fresh perspective can be helpful. Consider, also, muting the EQ from time to time to remember exactly what you are adding or taking away from a part. EQ presets, whether in the form of plug-in or track presets in your DAW’s mixer, are also a good way to try different treatments while being able to roll back easily.
9: Get Up Close
Between about 4 and 6kHz, you will find frequencies that control the clarity and ‘up-front’ quality of a track, so boosting in this range can make the music seem closer to the listener. At the very top end, from 6 to 16kHz, you get the ‘air’ that can be used to add sparkle to tracks. Pushing the very top end too hard can result in sibilance on vocals, or too much hiss, so be careful. Some EQ plug-ins even have an “add air” preset.
10: Investigate Channel Strips
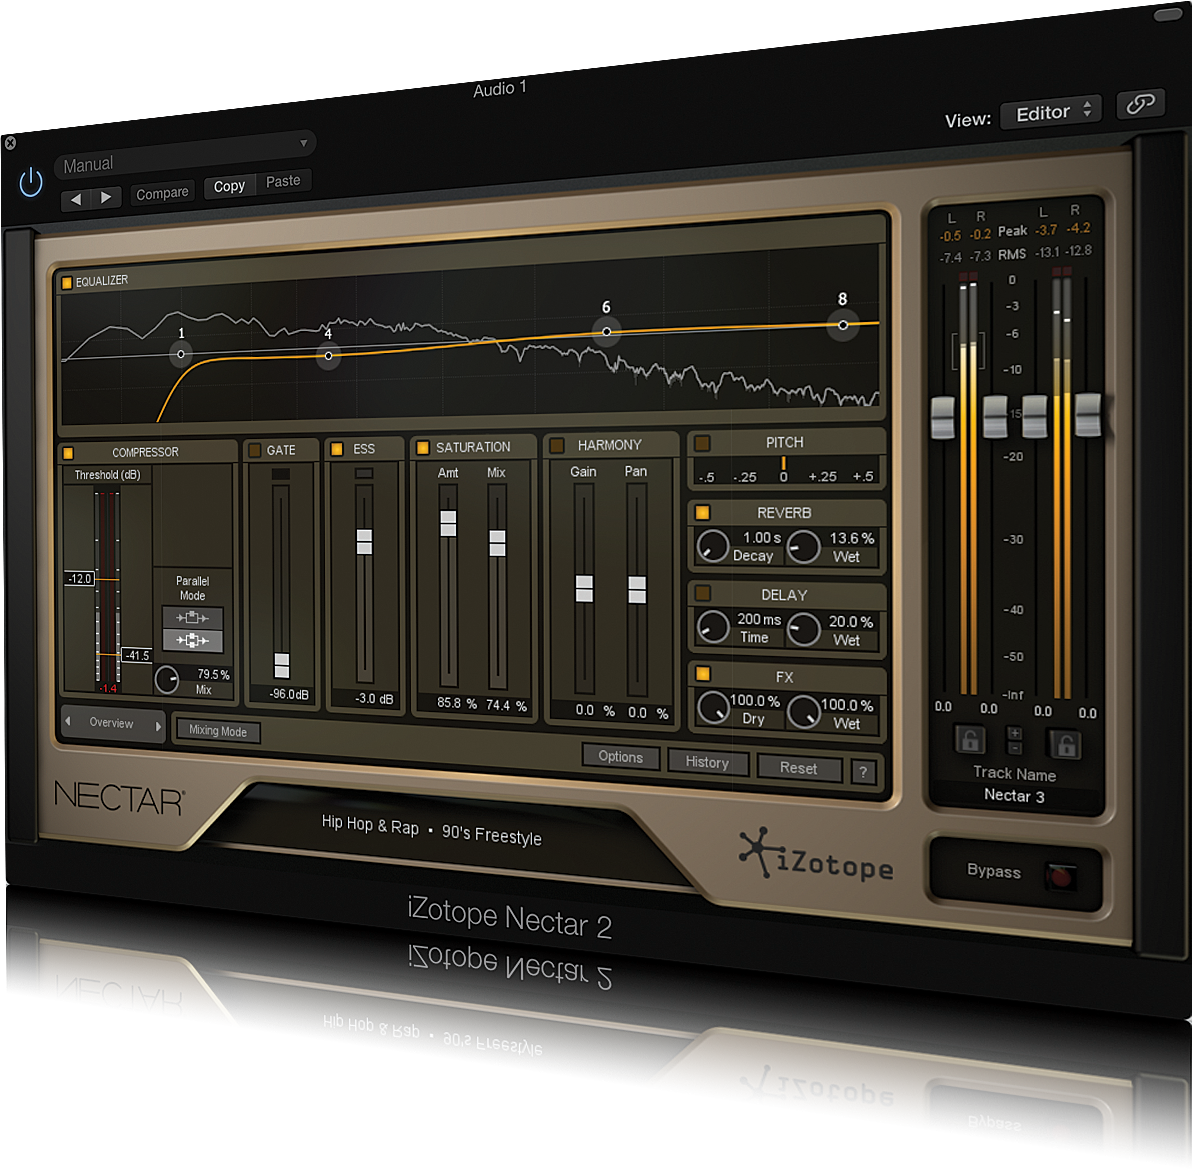
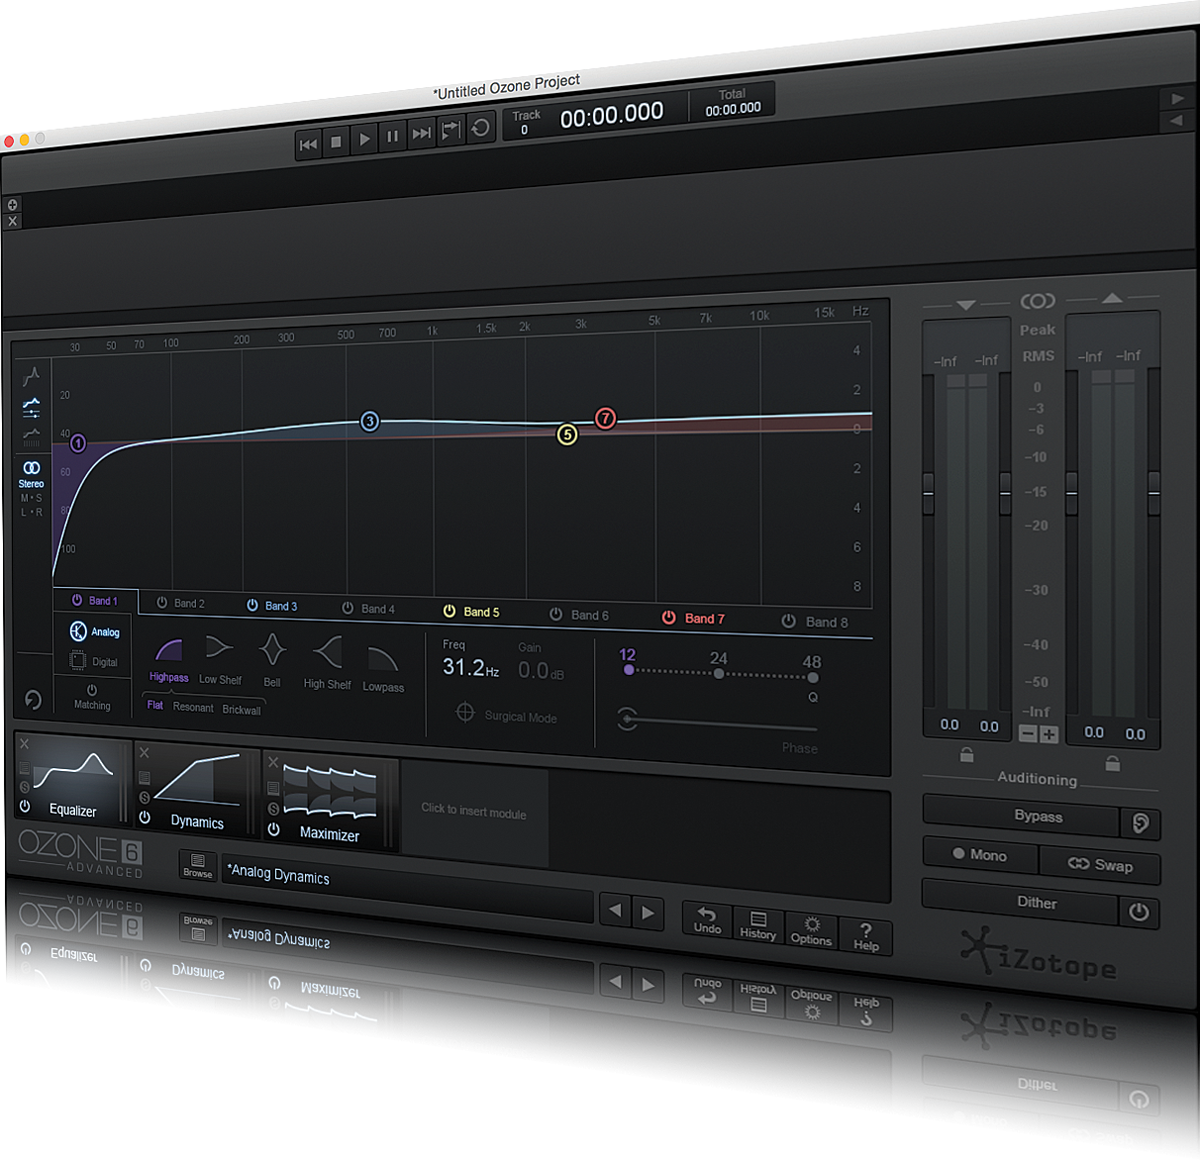
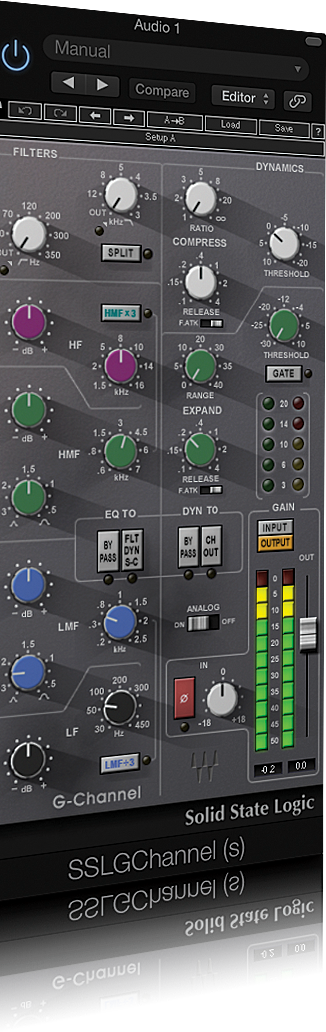
All major DAWs feature EQ of some description on channels, often in the form of a channel strip. These usually contain some handy presets that you can dial in quickly to see how something will sound. One good use for this is to pull up a ‘telephone line’ or ‘old radio’-style EQ setup to quickly alter the sound, rather than having to spend time working out for yourself how such a curve might be set up.
You can flip through presets to quickly audition different treatments; of course, every vocal is different so it’s unlikely a preset will be perfect from the get-go, but it’s usually a great starting point. Some third-party plug-ins take the form of channel strips, notably Izotope’s Alloy and various models from Waves.