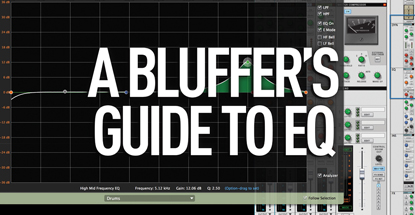
The Bluffer’s Guide To EQ
We’ve covered the basics in part one, now we move on to a little more advanced areas of music producution. The first step in becoming a mix master is getting to grips with the simplest of tools at your disposal: EQ. Rob Boffard shows you how to bring balance to your musical force… The Equaliser, […]
We’ve covered the basics in part one, now we move on to a little more advanced areas of music producution. The first step in becoming a mix master is getting to grips with the simplest of tools at your disposal: EQ. Rob Boffard shows you how to bring balance to your musical force…
The Equaliser, or EQ, is the Tetris of audio effects. You’ll figure out how it works in seconds, but it takes an age to master. No other effect, if used subtly, can make such a dramatic difference to your sound. If you know what you’re doing with an EQ it’ll make your mixes sound as if they’ve popped out of a top-of-the-range studio. Conversely, there is no other effect that, when mishandled, can screw up your mixes so badly. A heavy or badly managed hand with EQ can wreck a good song.
Don’t stress, though. EQ may sound intimidating but in practice it’s not difficult to get the hang of. Give us a few minutes with this guide and we’ll show you exactly what you need to know about this powerful effect.
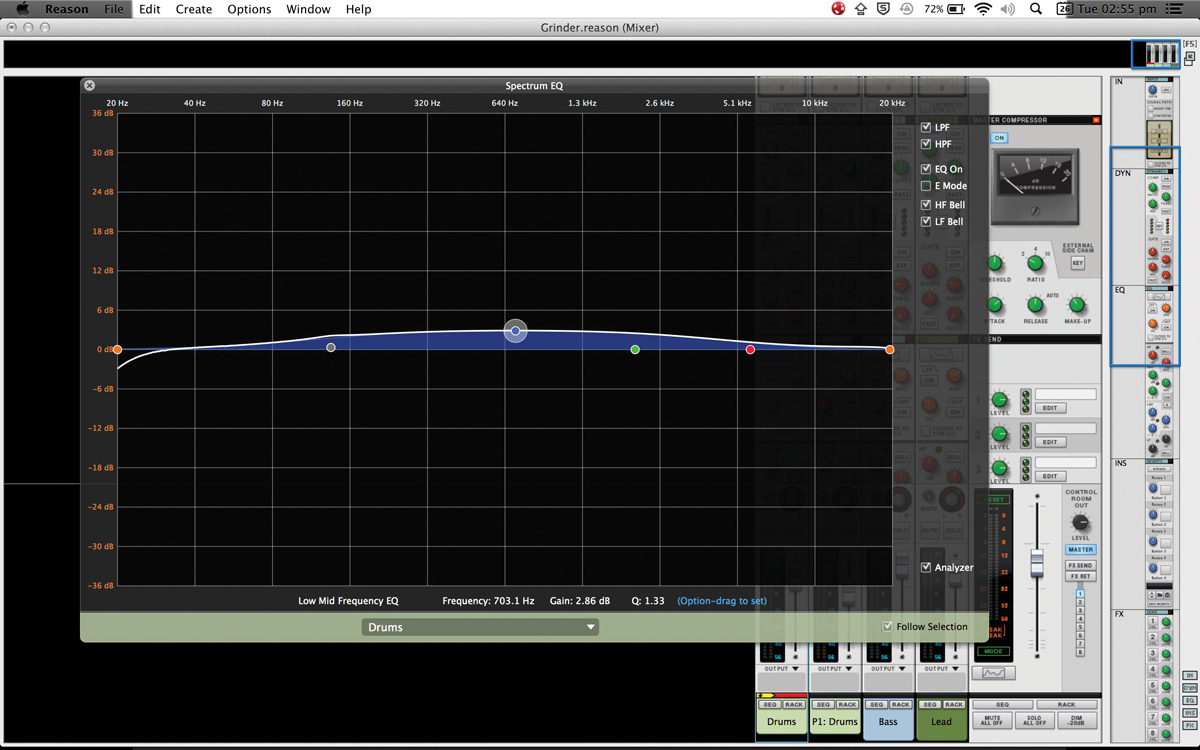
Your basic paragraphic EQ. Note the individual nodes (each of theme draggable) the frequencies along the top and the decibels on the left.
What’s The Frequency?
Let’s start with the basics. Sounds have frequency, right? It’s the part of sound that is measured in pitch. A high pitch, or high frequency, means that the sound waves are packed closely together and hit your eardrum more frequently than sounds with a lower pitch. A low frequency is the opposite, where sound waves are spaced further apart. That means your eardrum hears those sounds as low-pitched. If that sounds hard to handle, think of it this way: a violin has a high-frequency sound; a bass drum has a low frequency.
An EQ enables you to boost or reduce those frequencies. You can make the bass louder, the highs higher. You can also cut that bass, or remove some of the high frequencies so things don’t get too sharp. In a full song where you have any number of different sounds, all with their own frequencies, this is an exceedingly important technique. You’d be hard-pressed to find a music session that didn’t have some EQ in it somewhere.
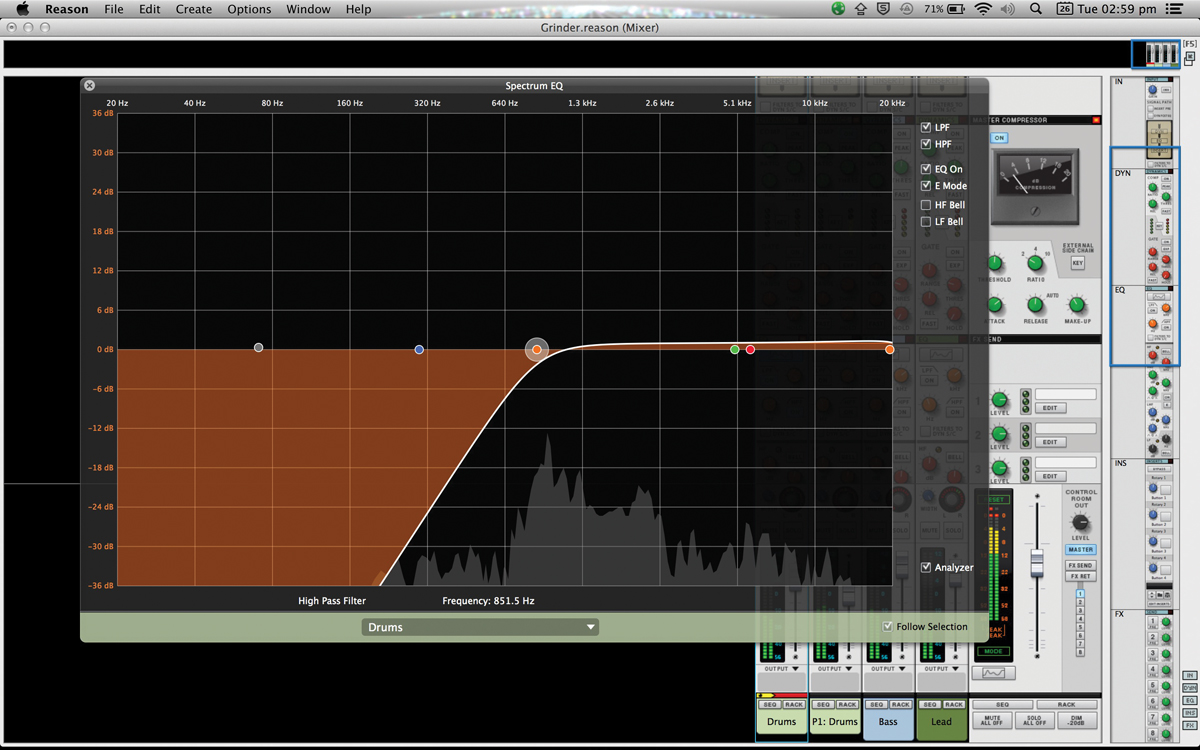
A high-pass filter. Any and all frequencies under about 700Hz will be cut. This is very useful for elements such as vocals or strings
Frequencies are measured in Hertz (Hz), named for Heinrich Rudolf Hertz, who was the first to identify electromagnetic waves. Humans can hear only a certain range
of frequencies, from as low as 20Hz to as high as about 20,000. Dogs, obviously, can hear much higher, but since they aren’t great music fans the 20-20,000 range is what you’ll see on most EQ displays. This range is known as the frequency spectrum. Again, instruments such as bass drums are down low, violins up high, the human voice somewhere in the middle.

Instruments can possess more than one frequency. Indeed they have ranges of their own. Think of a kick drum. Sure, you’ve got the big, bassy boom which will show up at around 500-1000Hz, but you’ve also got the ‘snap’ as the beater hits the surface, which registers much higher in the spectrum at around 15,000Hz. What you’re trying to do is lower or raise the volume of these frequencies to bring out, or reduce, a sound’s desired characteristics.
Here’s a pro tip for you: when talking frequencies and EQ, don’t talk about bass or treble. Talk about highs, mids and lows.
Revert to Type
So what exactly are you going to see when you bring in your EQ? Well, that depends. There are a few types of equalisation, some of which are more useful than others, and it’s worth going through them all.
First, you’ve got your fixed EQ, the most basic of all the types. Essentially it gives you a bunch of controls – knobs, usually – each set to a specific frequency. You can’t change that frequency, but you can raise and lower the gain (read: volume) for each one.
See that greyed-out mountain range? It’s a frequency analyzer. It gives you a visual representation of your sound, showing you the dominant frequencies – useful for EQ
Then you’ve got your graphic EQs. Instead of the few controls you’d get in the fixed EQ you’ve now got dozens, usually appearing as faders instead of knobs. Each one of them is still locked to a specific frequency and you can still raise and lower the gain as before, but what this EQ does is enable you to create ‘curves’ by setting the faders in increments. You usually see this sort of EQ on an old HiFi, and frankly, they’re a pain to work with.
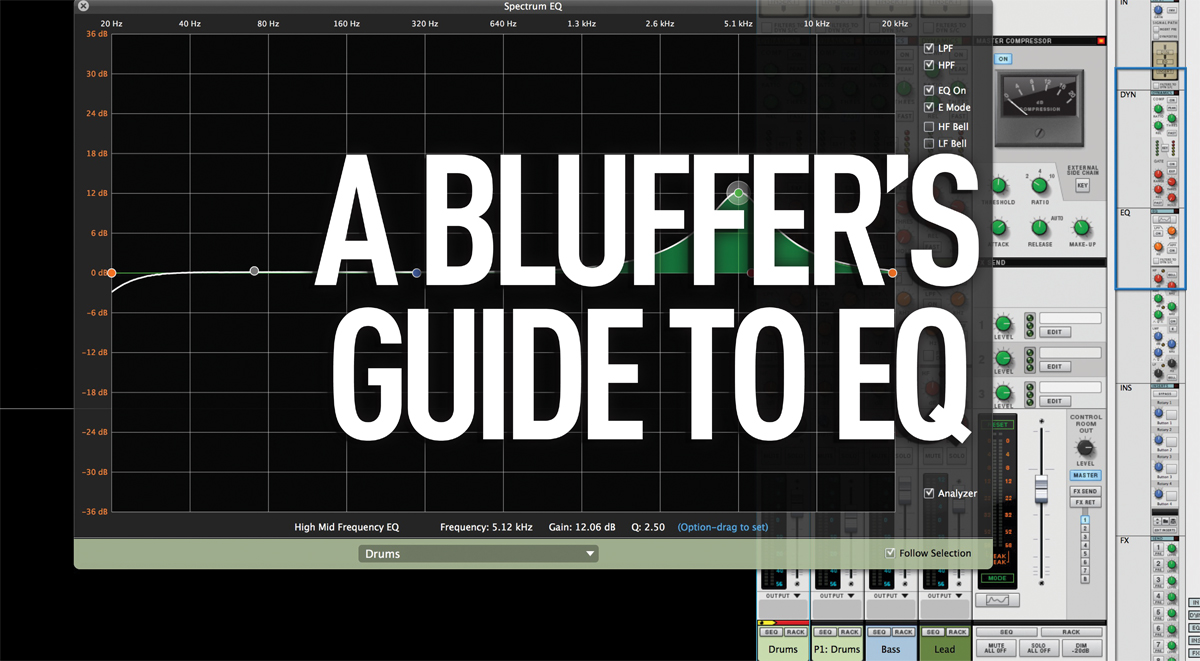
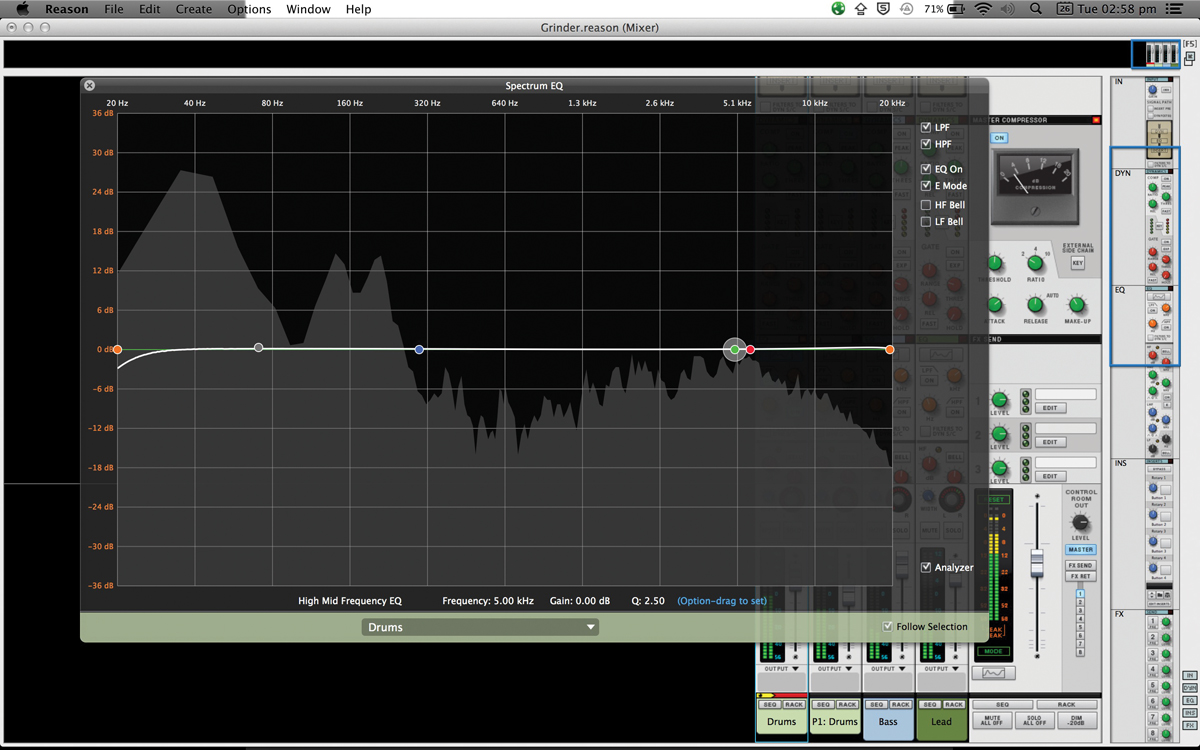
Paragraphic EQs are what you want. Now you don’t have fixed frequencies; instead, your EQ display will have nodes, each of which can be dragged to any frequency you want. You can raise or lower each node to change the gain, and (this is the clever bit) adjust its ‘Q’ to change the shape of the curve. The lower the Q, the more space there will be under your EQ curve, which means more frequencies will be boosted or cut. It’ll look like a hump. Raise the Q, and you’ll get a spike, with far fewer frequencies affected by the boost or cut.
When it comes down to it that’s all the controls you ever need worry about with EQ: frequency, gain, Q. Go try it out now. Load a track into your DAW and start playing. Like Tetris, you’ll figure it out straightaway. We promise.
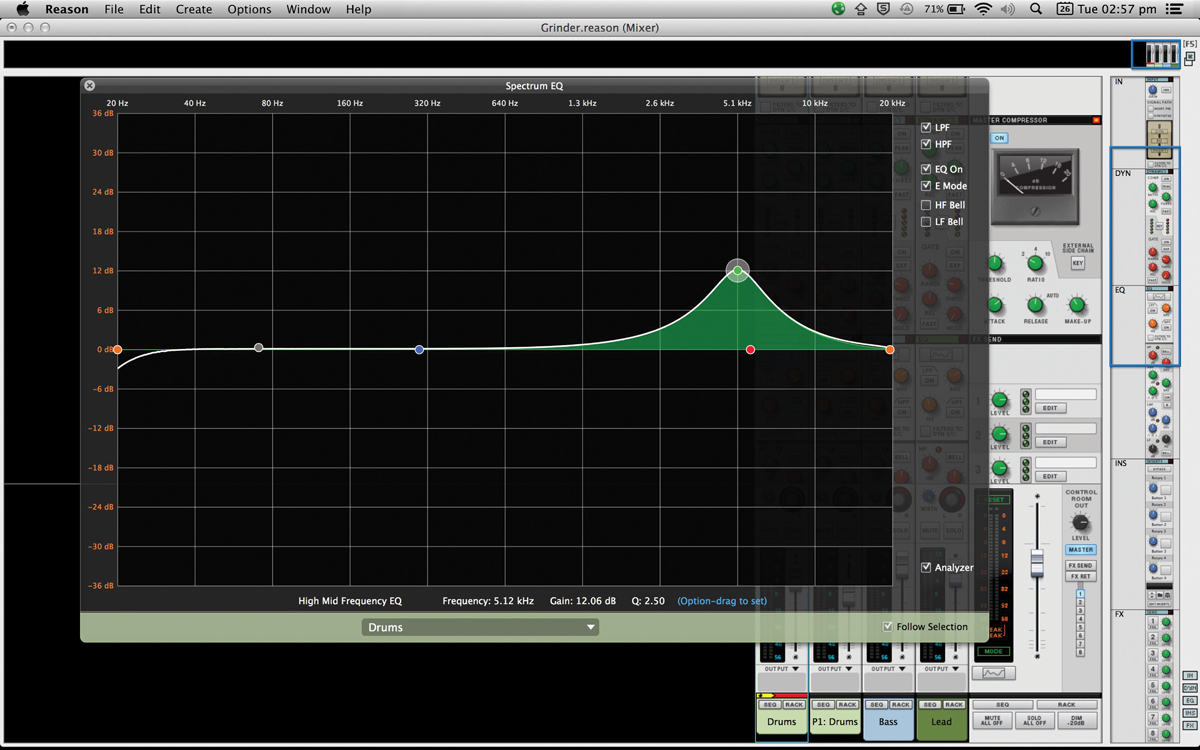
This is what a boost in the highs looks like. Our node is at about 5kHz, and we’ve got a very high Q. Expect seriously snappy snares here
OK, there are one or two more things to bear in mind. Most of the time EQs will include what are known as high- and low-pass filters. A high-pass filter is a specific type of gain cut that removes all frequencies below a certain point. In other words it lets you eliminate the lows. The opposite is true for a low-pass filter, which gets rid of the highs. This is useful when you’re doing things such as EQing vocals – with so few bass frequencies in them there’s often no need to have any lows at all, and so a high-pass filter will get rid of them for you. Handily, this can also help eliminate background hum.
You also get shelving filters. Essentially they’re a stripped-down version of the high- and low-pass filters, which cut or boost the frequencies in far less dramatic fashion.
Some EQs provide a subtle colour or warmth to the sound when used. It’s pretty cool. If you don’t want that then consider investing in a linear or transparent EQ, which will do nothing but boost and cut your frequencies without colouring your sound.
Make Room
So you’ve got your EQ. You’ve loaded it up, you understand how Q and gain work, and you’re ready to go. What exactly do you do with it?
On an individual level, when applied to a specific, solo’d sound, you’re going to use it to make things sharper. You’re going to use that EQ to take the sound from where it is to where you want it to be. You will boost the frequencies that bring out the sound’s best qualities and cut the ones that muddle it. A big, booming bass drum will not suffer – indeed, will be improved – if you use a shelving filter to remove some frequencies above, say, 15,000Hz.
But that’s not difficult. The tricky part is what happens when you un-solo a sound because then you have all sorts of other noises to play with. Sounds share frequencies, they don’t exist in a vacuum. Your kick drum and your bassline both have low frequencies, and when they combine one will mask the other. When your sounds start masking each other you’ve got problems. You’ll end up with a muddy, disappointing mix.
How do you fix this? You use the EQ to carve out a space for each sound. When your vocals start there shouldn’t be anything else dominating those frequencies, so you can use your nifty paragraphic EQ on instruments that conflict with the vocal and lower the gain in their middle ranges.

Now, we can’t teach you how to do this. We can teach you how it works but the only way you get good at Tetris is by playing, and the only way you get good at EQ is by doing lots of mixing. You need to learn how different sounds work together and which cuts and boosts you need to bring out their best qualities. You need to listen to a sound – really listen – and discover where its most important frequencies are, as well as the ones which you can cut.
That being said, there are a few principals to abide by. Cut first, boost later – often, things can be improved just by dropping the gain in a few places. And be gentle. You don’t need big Q spikes; and if you’re boosting or cutting over -3dB, then you’re going too far.
Most of all, remember that EQ doesn’t exist in isolation. You’re going to be using a whole whack of other tools to help you along, such as compression, which we’ll deal with next time…