The Essential Guide to Recording
If you capture the perfect sound at source you will have a much better ingredient with which to produce perfect music. Here’s MusicTech’s Essential Guide to recording so you can get great results every time… So far in these MusicTech Essential Guides we’ve focussed very much on products – synths, microphones, interfaces and so on […]
If you capture the perfect sound at source you will have a much better ingredient with which to produce perfect music. Here’s MusicTech’s Essential Guide to recording so you can get great results every time…
So far in these MusicTech Essential Guides we’ve focussed very much on products – synths, microphones, interfaces and so on – and where (and how) they fit into your studio. We’ve started at the beginning detailing DAWs and finished with a couple of chapters on plug-in effects.
Now it’s time to tie everything together by looking at one of the main processes behind music production – recording. This part of music making is key and often one that you need to get right, as it’s potentially difficult ot undo mistakes you make during the process at a later stage.
Start at the beginning
The recording signal chain – that is getting an audio signal into your computer in the first place, producing a song with it and other files and instruments and listening to the results on your monitors – very much starts with a microphone, so we’ll cover microphones and mic’ing techniques in this guide and include a variety of microphones over different price points.
However, the recording practice ends when that signal picked up by the mic – guitar, vocal, drums or whatever – is safely and perfectly sitting inside your DAW so you can start mixing with it.
To get to this perfect scenario you will also need an interface to physically get the signal in, which possibly includes a preamp or two to bolster your signal or colour it in a satisfying way (to improve or ‘warm up’ its tone, for example). With that in mind we’ll also give a brief explanation of interfaces and include a selection of those with and without preamps included in our buyers guide. So that’s two product types for the price of one and arguably the most important part of music production explained in just a few pages.
Mic types
Let’s jump straight into the essential facts you need to know about microphones and mic’ing up a variety of different acoustic instruments. There is a huge array of microphone types and styles to choose from and you have to match the type of recording you are attempting to make – instrument, vocal, drum, etc – with the right microphone in order to get the perfect recording at the start of your signal chain. We’ll try and sum up these types in as concise a way as possible and then do some instrument matching for you.
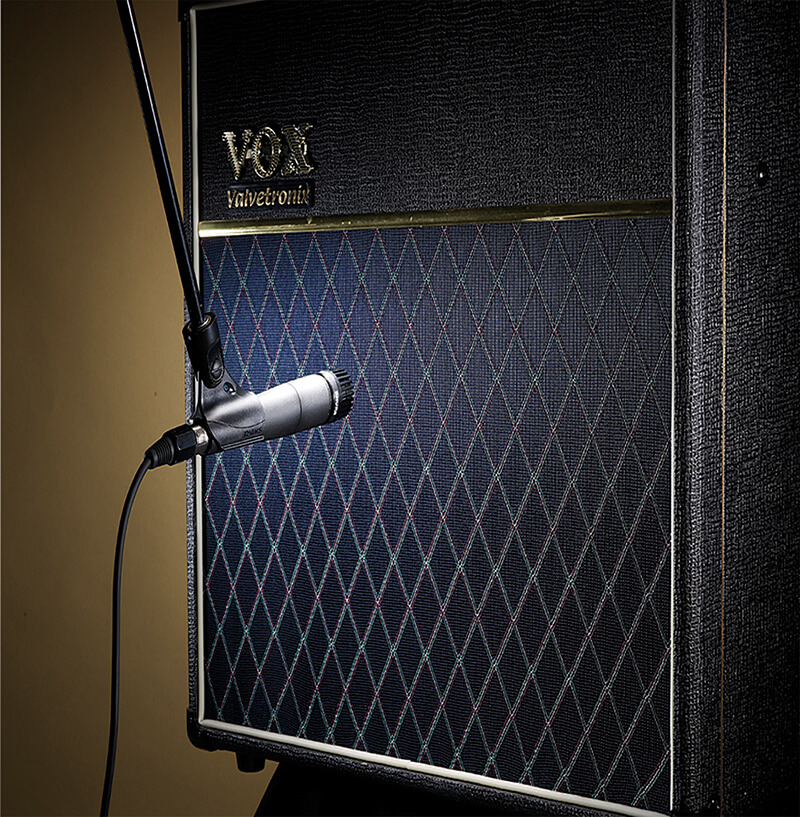
Firstly, microphone types. We start with the dynamic microphone. Think of it as a reverse speaker in operation. You sing into it, a diaphragm moves according to the vibration of your voice and converts your singing into an electrical audio signal. Dynamics are the big, simple and often the cheap option in the microphone world and used to record big sounds – electric guitar cabinets, live vocals, and some drums.
Condenser microphones are a more sensitive option, often require external power and can be expensive but they are capable of picking up all the nuances of a performance, so tend to be used on more sensitive recordings – acoustic guitar for example.
Ribbon mics can be thought of as offering the detail of a condenser with less noise. They operate rather like dynamics but are less robust. They can consequently be expensive but almost offer the best of both worlds of the previous two options alongside some very characterful recordings.
Other types of mics include tube which offers character and warmth, while USB and iOS mics plug straight into your computer or iPad. For music recording, though, the three types that we started with are by far the most common.
Basic vocal and instrument recording techniques
A) Acoustic guitar
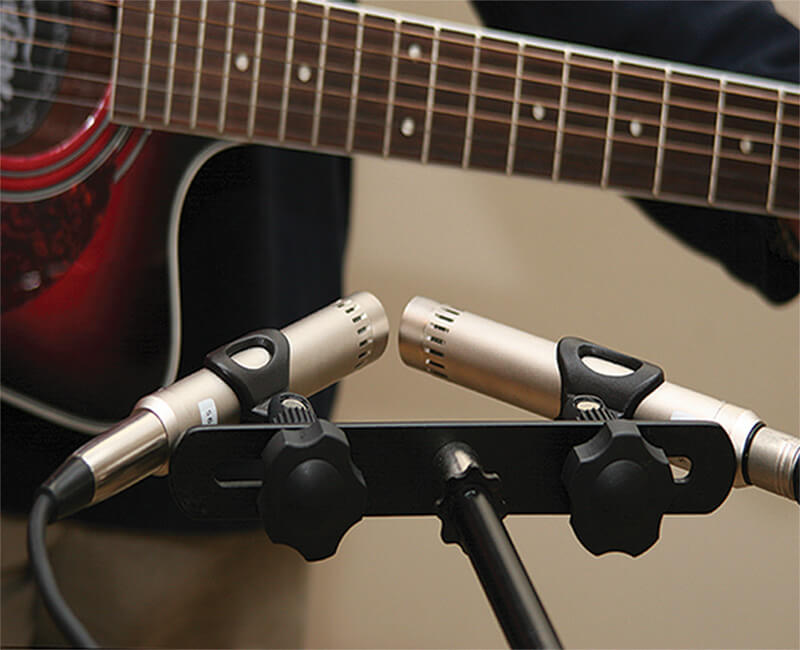
A good stereo method is the X-Y setup with two mics placed at 90 degrees aimed between the sound hole and 12th fret.
B) Electric
Choose a dynamic and close mic it to the centre of the amp for a brighter sound or further to the edge for a more mellow sound.
C) Piano
This is a piano from the side with a single mic placed in the middle over the top or in front (which results in more of a hammer sound).
D) Vocals
Always use a pop shield to reduce plosives and place the mic slightly above the mouth and below the nose.
Mic positioning
In order to put your microphone in the right place to capture the best recording, you’ll need to understand a little about polar patterns. This pattern is the invisible field around a microphone that picks up the best signal – the part, then, that you’ll want to aim at your subject. Mics with an omni-directional polar pattern record equally well all around the microphone, with a polar pattern like an invisible ball.
Cardioid microphones focus on one side, usually the top of the mic so are often used for vocals. In a live situation, for example, they will pick up the vocalist at the peak part of the cardioid pattern, but because they are focussed on the vocal, they won’t pick up the crowd noise behind that part which represents the weakest part of the pattern.
Other patterns include supercardioid – where the main focus of the patterns is enlarged and becomes even more intense – and figure of 8, with two focusses in front and behind the mic which is used for stereo recording or maybe two backing vocalists singing into the opposite patterns. Most of the microphones we talk about here are omni or cardioid although some include multiple patterns so you can tailor your microphone for different situations.
So, to setting up microphones for recording: there are as many differentways of doing this as there are microphones (and recording engineers!). The only rule is that ‘if it sounds good,it’s right’. OK that’s not the only one, but the main thing you need to consider is to make the time for a little experimentation and trial and error to find your favoured sweet spots, and a great sound to record.
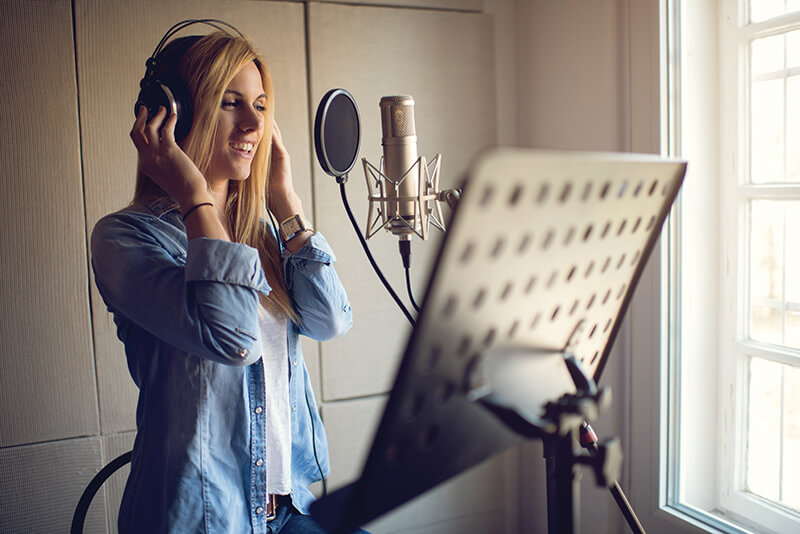
When it comes to vocalists, a key factor is to make them feel at ease to capture what should be a very personal performance. On a more practical level, have a few microphones ready to try some options out. Have at least one as a large condenser mic. The best position is placing the mic a few inches away and slightly above the mouth. At mouth level you might get more plosives but always consider a pop shield to reduce these.
All in the balance
Different instruments all require different mic’ing up techniques but a single mic rule that can be used for a variety of instruments is to place the mic between the bass and treble part of the instrument to get a balanced sound. If you have two then place one each at each end.
When recording acoustic guitar, try a small or large diaphragm condenser with cardioid pattern aimed at the 12th fret eight to 12 inches away. If you have a matched pair of mics try two small condensers at least 90 degrees to one another pointing at anywhere along the guitar between the soundhole and 12th fret. For electric guitar a classic method is the a dynamic close to the amp and a condenser further out to capture the room.
For piano we’ll try and keep it really simple. With one condenser mic, place it central and in front of the piano. If this results in too much hammer noise raise it, still centrally, over the top of the piano. With two mics, use the same distance and technique, but place each a third of the way alongthe high and low notes to capture bass and treble.
With drums you can get away with one condenser or dynamic placed over the drummer’s shoulder angled towards the kit but you should really aim for a two mic set up at least. Producer Bob Clearmountain has a famous set-up – a Shure dynamic, in front of the kick or inside to avoid air rumble and a condenser pointing down and placed overhead to the kit and fairly centrally over the snare and toms.
Legendary producer Ken Scott has a very specific set-up that has worked as an engineer and producer for everyone from The Beatles and David Bowie downwards: “An Electro-Voice RE20 on the bass drum, a Neumann U67s or U87s on toms, two Coles 4038s overhead and a Sony C38A on the snare.” Well, we did say that it was specific…
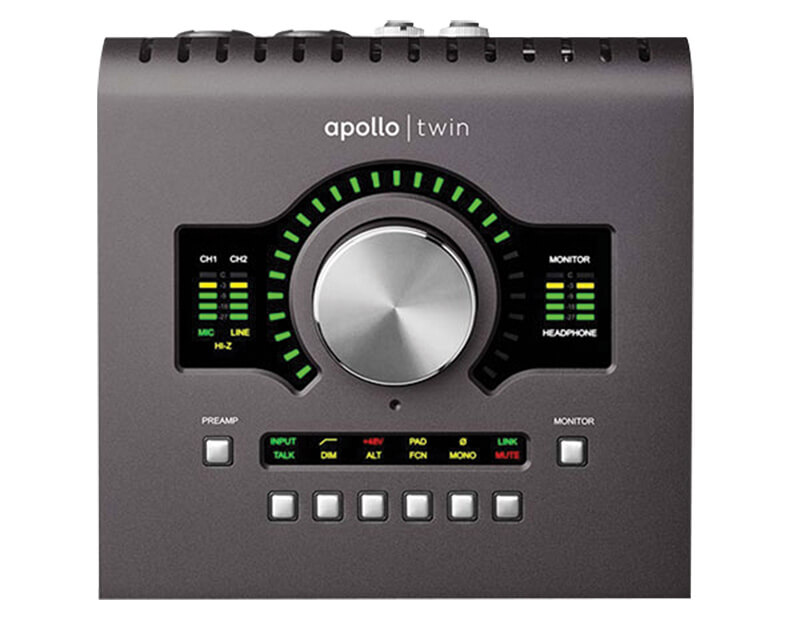
Anatomy of a simple interface: front and back
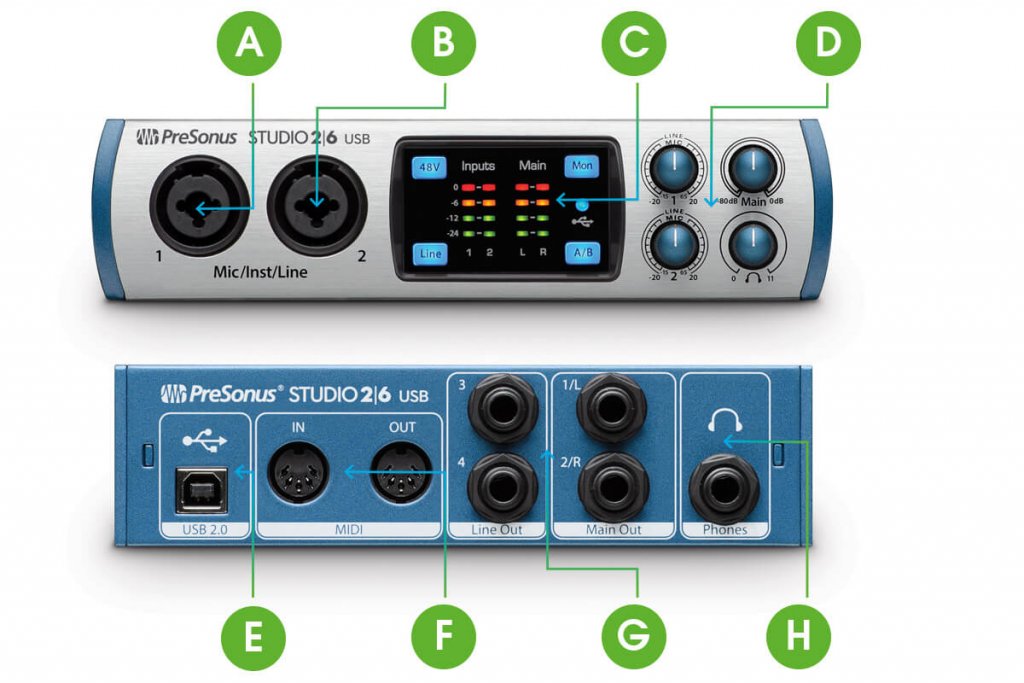
A) Inputs
Many interfaces have inputs at the front and back for ease of use. These ones can take all three inputs: microphone, instrument and line.
B) Built-in mic pres
Microphone inputs need mic preamps to amplify the signal and in some cases colour it in a pleasing, often warming way.
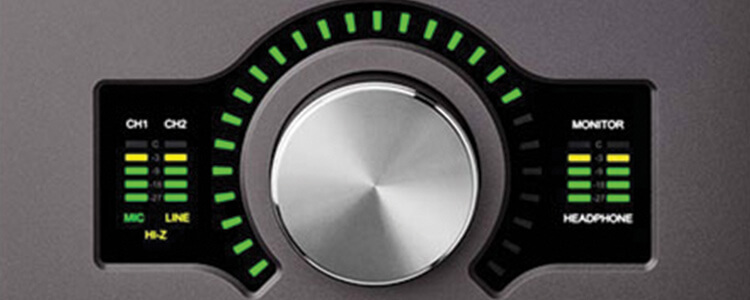
C) In and out LEDs
It’s useful to have visual indicators to see if your signals are clipping into the red so you don’t get a distorted DAW recording.
D) Controlling levels
Control levels with dials for inputs one and two, main speaker outs and the headphone out which we usually like to see at the front.
E) Interface type
The connector is a clue – this is a USB interface of which there are USB 1.0, 2.0 and 3.0 – the higher the better although 2.0 is good enough for a lot of audio.
F) MIDI connectors
Many audio interfaces also deal with MIDI data too which is the digital info routed through that records note presses (and a lot more) from MIDI keyboards.
G) Outputs
This particular interface might be basic, but it still allows your DAW to send to a main set of monitors or another set, useful for speakers perhaps placed in a different room.
H) Headphone out
Monitoring on phones is always good if you have angry neighbours and many interfaces have two so you can monitor different mixes or with your singer.
Interfaces
The second piece of the recording puzzle is an interface, designed to take your microphone signal – or a ‘line’ level signal from a keyboard or amplifier, or ‘instrument’ signal from a guitar – and route it to your computer.
Microphone inputs have preamps on them to boost the signal from the mic to the necessary line level. Some preamps add a certain sound to an input signal, like a vintage warmth beloved by certain engineers. You can get separate preamps just to do this, but we’ll concentrate on those that specialise in interfacing as well.
Back to the mic input and you’ll usually find at least two of these. You could argue that this is enough for any situation, as you can record any instrument in stereo with this and build your recorded song up track by track. However, some interfaces have multiple inputs so that complete bands can be recorded live with the same interface for more convenience.
A quick word on interface types: they come in several flavours that really denote speed more than anything else. The faster your interface, the less latency; that is the delay between you hitting a note and hearing it, as the signal has to travel in and out of your DAW.
USB is the most common, but slower than FireWire which also handles multiple ins and outs better, while Thunderbolt is faster still. Ethernet and others take you to the pro level; it’s really the three above that we’ll list alongside our favourite interfaces later, after our top microphones starting opposite.
Choosing a decent mic and interface can take time but once you’ve settled on some, then you’ve got the core elements you need to begin building up your perfect recording signal chain.