The Final Mixdown – Part Two
Mike Hillier continues his guide to perfecting the final mixdown… Getting in Early The key to getting the mix-buss right is to apply the processors to your mix before you start mixing. This way, as you work on the mix you’ll already be hearing the effect of the mix-buss processing, and you’ll be able to […]
Mike Hillier continues his guide to perfecting the final mixdown…
Getting in Early
The key to getting the mix-buss right is to apply the processors to your mix before you start mixing. This way, as you work on the mix you’ll already be hearing the effect of the mix-buss processing, and you’ll be able to focus your attention more keenly on matching your mix to the mix-buss processing.
Dynamics processors are important to add on to your mix early on, as they’ll change the balance not only of the dynamics, but will also change the frequency balance in response to the dynamics of the song. This should in turn change the way you mix.
With a compressor already in place, as you adjust the balance of the mix you’ll be adjusting the response of the compressor. So pushing the bass higher in the mix will in turn push the compressor to work harder in response to the bass, bringing the rest of the track down as you push the bass higher.
Similarly any fader rides will be pushing into the compressor, so lifting the vocal by 4dB with a 4:1 compressor in place will result in only a 3dB lift in the vocal, but also a reduction in the level of the instrumental around the vocal. While this can be tricky to get your head around initially, once mastered this is an incredibly powerful tool.
Waves plug-ins were used extensively in the making of this track
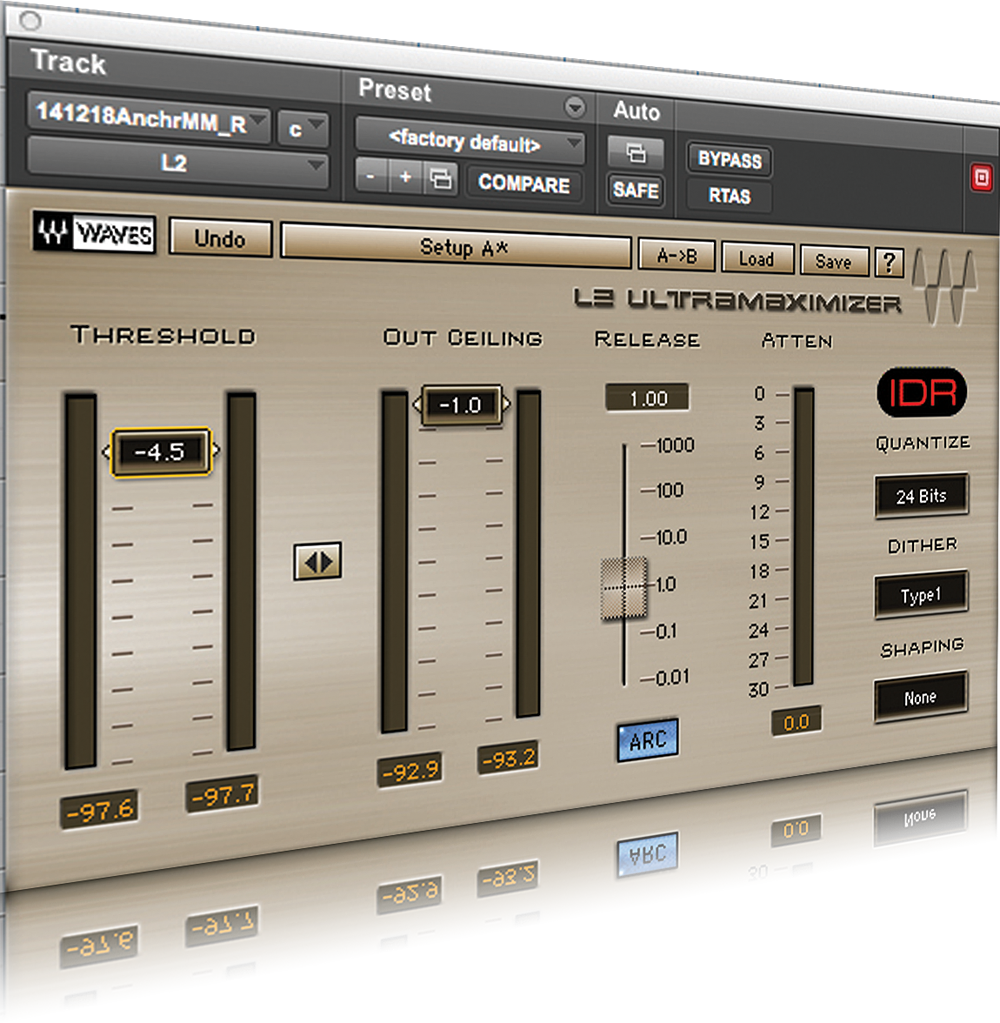
Compressor Settings
Choosing a compressor or two and getting them set up before you mix is not an easy task. Over time you will most likely develop a few favourites. VCA compressors, such as the classic SSL G-Series buss compressor, are a great place to start as they’re usually quite clean and can be configured to respond relatively slowly, but they are by no means the only option with many engineers making use of vari-mu style compressors, such as the Fairchild 670, or optical compressors, such as the Maselec MLA-2, across the mix buss.
Slower compressors are more common in this position than faster ones, with any fast transient compression being left to the individual channel compressors rather than the whole mix. So start with a slow attack and release time to let the transients through. If your compressor has an auto release this can also be a good starting point. Then, as your mix starts to take shape, experiment with different release settings to try and get the compressor moving in time with the music.
Usually we will opt for a low compression ratio of around 4:1 or lower. We’re not looking to smash the mix at this stage, just to help tie it together. With that in mind, it’s also worth setting the threshold fairly high, so the mix isn’t pushing too heavily into the compressor straight away.
We often find that as we build our basic static mix, we have to go back and adjust the compressor a little to keep the mix balanced, but that it is much faster this way than building the static mix, and then adding the compressor. Then once the static mix is done we can work on the automation stage knowing our compressor is going to be working with us to complete the mix. Furthermore, with a compressor across the master buss, any individual track compression and group buss compression need not work as hard.

Brainworx Digital V2 helped widen our mix
Drawing the Curves
EQ is harder to put in place before you start your mix. However, if your compressor is pulling the top-end down, adding a high-frequency shelf across the mix-buss can help to compensate for this. Other than this, any frequency build-ups ought to be taken care of on a channel-by-channel basis.
If, as your mix progresses, you feel that further manipulation of the mix-buss EQ would improve the mix it can be added, but always consider what it is you’re trying to achieve and if going back and changing a specific channel in your mix would not be a better approach.
In the example track, the mix has no traditional mix-buss EQ, but instead a mid-side EQ is being used. Mid-side EQ is a complex beast to understand, changes tend to move frequencies around in the stereo space rather than actually boosting or cutting. The low-end boost in the mono section of Anchor has the effect of rooting the kick and bass together in the centre image, while the top-end boost adds width in the top-end, giving the overall impact of a narrow bass range and wide treble.
This has been further gelled with the use of the Mono-Maker knob, which filters frequencies below the cut-off point into the mono signal. These two shelves and the Mono-Maker can be a great starting point for your mixes.
We’d probably start with the Mono-Maker set much lower, especially on a busier rock mix with wide-panned guitars. We also recommend caution when working with mid-side EQ as you can introduce some strange phasing issues if the EQ is pushed too far.
As well as mid-side EQ, the example mix uses the Brainworx Digital V2 to widen the whole stereo image with the Stereo Width knob. This is a very simple process, and can be done with a variety of plug-ins all producing the same result. This can be safely left until mastering, but can be useful if you have a strong idea of how much width you’re looking for.