The Final Mixdown – Part Three
Mike Hillier reaches the final stages of mixing and prepares the track for mastering…. The main session for Anchor – our track in question Distortion In a similar way to compression, the choices you make for distortion on your mix buss, if any, will have a huge impact on the sound of your mix, and […]
Mike Hillier reaches the final stages of mixing and prepares the track for mastering….
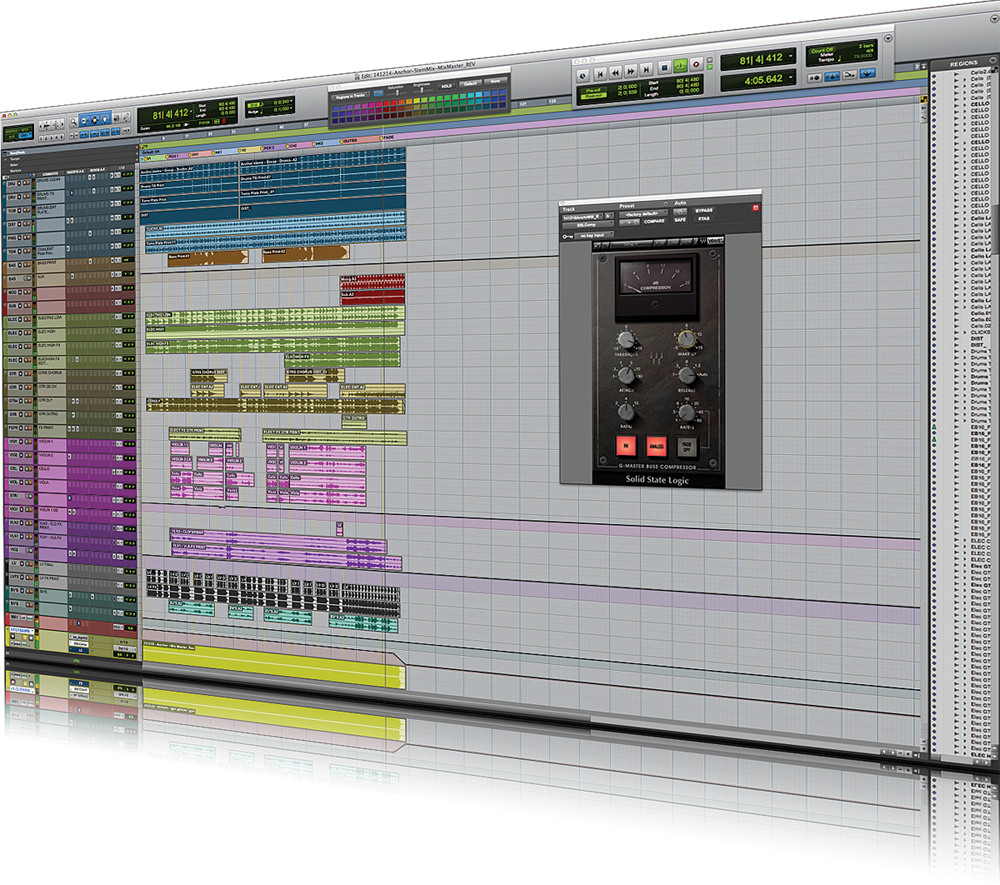
The main session for Anchor – our track in question
Distortion
In a similar way to compression, the choices you make for distortion on your mix buss, if any, will have a huge impact on the sound of your mix, and should be there from as early in the mix as possible.
Distortion on the mix-buss is unlikely to be a face-melting over-the-top effect – we’ll leave that for special effects on the guitar, synths, or vocals. Of course, if you find you just can’t get your signature sound without a Big Muff Pi strapped across the mix, who are we to stop you? But more than likely, mix-buss distortion will take the form of a very subtle saturation plug-in. Perhaps an analogue console emulation, tape simulator or some choice outboard gear with tasty transformers.
Distortion works by adding musically relevant harmonic content to the mix. This can act as both an EQ and a compressor in one, with additional harmonic content emphasising certain frequency ranges, while simultaneously bringing up the sustain of sounds like a compressor.
In-the-box mixes often suffer from being too clean compared to their analogue cousins, which will pick up small amounts of distortion at every stage.
Compare the signal path of an instrument in the box, which may go through a mic capsule and transformer on the way in, then through one or two analogue modelled plug-ins, before being spat out the speakers with that of an analogue mix, which will be recorded onto tape through various amp stages and transformers, before being read off tape, passed through a console, which will add more colour at each stage (particularly if it’s a transformer-based console), then through an outboard – usually another two transformers per unit – before being summed in analogue and then back through another amp stage to a tape machine.
With so many stages of distortion in analogue mixing it’s no surprise old-school mixers spent so much time and money on low-noise gear. We can afford to be less picky, and in fact, simply running your mix out through an analogue EQ or compressor can be invaluable at this stage.

The SSL Stereo Buss Compressor
Reverb
The final mix-buss processor we want to look at here is probably the least commonly applied. Reverb is usually added on an auxiliary channel as a send effect, with multiple instruments each being sent to the reverb.
This method has a big advantage in that you can send differing amounts of each channel to the reverb, placing each channel in a different space. This also enables you to place different instruments in different spaces, or have multiple versions of a similar reverb with different instruments sent to different versions to enhance the concept of space in your mix.
Most of the time we’d recommend using this method above placing a reverb on the mix-buss. But from time to time placing a reverb across the mix-buss can help to really bring a mix together, placing it all in one space.
Usually when we’re using reverb on a whole mix we tend to look at a very wide reverb setting, with the wet/dry control set fairly low. A dark room sound with quite short reverb tails can sometimes work wonders in this situation, and as well as this, we’d usually avoid static convolution reverb types in favour of more lively algorithmic reverbs.
Referencing
With all of these processors in place it can be very easy to ruin your mix: often what seems like a great idea at the time can sound awful the next day. This is why we always check our mixes against reference tracks.
While it can be tempting to simply reach for your iTunes library or Spotify to play reference tracks, we prefer to play them from inside our DAW. This lets us use all the tools at our disposal to listen to the reference tracks in different ways. For example, if you want to compare how much is going on in the bottom end of each of your reference tracks compared to your track you can apply frequency spectrum meters across both, but you could also use low-pass filters to remove everything but the low-end and listen closely to the two tracks side by side.
This way you should be able to hear not only the frequency content, but also how quickly the low-end of the kick attacks, how long it sustains and then decays. You can then use this to help you tune the dynamics on your own kick drums. You can use similar techniques across the whole spectrum, focussing in on each frequency range using high- and low-pass filters and matching the qualities of each frequency range in your mix. Be sure to double-check the results with the filters off though, as the last thing you want to do is spoil your mix trying too hard to make it sound like someone else’s.
We also check the mid and side bands of our mix with those of the reference track, using a free tool like Brainworx bx_solo. The mid-band is essentially the mono-mix, and it’s important that you always check this, but checking the sides is useful too as it lets you compare how wide your mix is with others, and often how much reverb and delay there is on the lead vocals.
It can also be useful to take the same reference tracks with you when checking your mix on other playback systems, such as on a hi-fi, MP3 player, or in the car. This is so you can listen not only to how your mix translates on other systems, but also how that translation compares with other mixes.
Room at the Top
One area you don’t want to try and match reference tracks in is loudness, as the reference mix will already have been mastered. Rather than bring our mix up to the mastered level, it’s more useful to bring the reference track down to match your track, or even a reference “mix level” that you want your mixes to achieve.
This is doubly important now that the (to p24)(from p20) loudness wars are largely over, especially when referencing tracks that were casualties of that war. As a rule of thumb it’s best to leave the mastering engineer a good 4-8dB of dynamics headroom in the mix, erring on more if you aren’t all that confident with your mix-buss compressor. With this in mind, bring the reference track down 4-8dB to match your mix.
Your peaks should now be louder than the reference track, but the overall loudness (or RMS value) should be around the same level. If your RMS is already equal with, or above the level of the reference track before you turn the reference track down, you’re probably squashing your mix too much. Similarly, if after turning the reference track down to match yours, your peak levels are not above those of the reference track you’re again most likely over-compressing your mix.
While it’s possible in most DAWs to use the channel metering to view both RMS and peak levels, it’s usually quicker to use additional plug-in metering. Meters that combine RMS and peak in one are especially useful.
The free TT Meter is one such example, providing not only RMS and peak metering, but also showing the difference between the two in what is referred to as dynamic-range metering. Different meters may give different values for the RMS and dynamic-range of a signal, so it is important that you compare values using the same meter.
When checking your levels be sure that your peak level never reaches 0dB on your master buss, even when bouncing at 32-bit floating point resolution. It is good practice, in fact, to make sure no channel or buss in your entire session ever reaches 0dB, especially if working with older DAWs at below 32-bit. This is because any signal that reaches 0dB will result in digital clipping distortion. We usually leave around 6dB of peak headroom on each channel or buss, not only because this works better when interacting with outboard hardware, but because many plug-ins – particularly analogue modelling ones – work best with some headroom too.
The exact figure you achieve with your peak headroom is far less important. With early digital recordings, the signal-to-noise ratio was important, and leaving too much headroom would mean your noise floor would be closer to your signal level.
At 16-bit for example the noise floor is -96dB. Leave 6dB of peak headroom and you still have 90dB between the peaks and the noise floor, but this will be less for quieter sections. However, any gain applied to this signal will raise the noise floor, while any compression will push the signal closer towards the noise.
Pass this mix on to mastering and every dB of gain reduction applied by a mastering compressor or limiter takes your signal another dB closer to the noise floor. At 24-bit however, you have 144dB of dynamic range to work with before you hit the noise floor, while 32-bit floating point essentially puts the noise floor out of the question, with an enormous 1680dB of dynamic range.
Bouncing Down
The final mixes should be bounced at 32-bit floating-point if your DAW supports it, or 24-bit if not. This ensures the greatest possible signal-to-noise ratio. Even if all the tracks in the session were only recorded at 16-bit, assuming your DAW sums at 24- or 32-bit it is worth bouncing the final mix at the highest available bit-depth.
The sample-rate however, should be kept the same as your project sample-rate. There is nothing to be gained from up-sampling unless you’re bouncing through an analogue summing chain and into a separate DAW and interface, running off a separate clock, to capture whatever additional details may have been added by the analogue stage. For most of us that kind of commitment to audio fidelity isn’t an option, so if you want to submit a high sample-rate master you should be recording and mixing at that high sample-rate too.
In addition to your final mix, you should include bounces of the instrumental track, an a cappella, and a TV mix. We usually also bounce down a limited version as well, which we use as a reference for the artist. Often we will also bounce a radio edit of the track too, for which we would again bounce not only the radio edit itself, but also an instrumental, an a cappella, a TV Mix and a limited reference. This means that for every mix of the song, we are creating four separate files.
We usually send all four to mastering, although whether you get all four mastered will depend on your budget and the terms of the particular mastering facility. Most mastering houses will charge a small additional fee for each version of the track mastered, while a few will actually include this in the charge.
The instrumental track should contain everything from your mix, except the lead and backing vocals – and the vocal effects, while the a cappella should contain both the lead and backing vocals and all the vocal effects. Play these two files together and you should have your mix.
The TV mix should include everything from the mix but the lead vocal. While called a TV Mix, or sometimes a karaoke mix, this version of the track can be useful for any performance of the track where the vocalist may want to sing along to the backing alone.
Some engineers will also bounce a Vox Up and Vox Down mix, leaving the final decision to the mastering engineer. However, if you have sent the a cappella this is unnecessary as the mastering engineer can, in an emergency, add more vocal to the mix from this. And you really shouldn’t be leaving these important mix decisions to anyone else.