How To Record: Acoustic Guitar Part 2
Continuing from Part 1, capturing the true essence of the humble acoustic guitar can be a tricky task, but with some basic know-how and just one (yes, one!) microphone you can record a truly electrifying tone. John Pickford tunes up, turns on, and rocks out… Last time, we looked at the basic principles of recording […]
Continuing from Part 1, capturing the true essence of the humble acoustic guitar can be a tricky task, but with some basic know-how and just one (yes, one!) microphone you can record a truly electrifying tone. John Pickford tunes up, turns on, and rocks out…

Last time, we looked at the basic principles of recording acoustic guitar, focusing on single mic techniques. Now, it’s time to delve deeper and discover how multi-mic’ng can offer a wider variety of tonal options.
Don’t be fooled though, it’s no good throwing up several randomly-placed mics and hoping for the best, you still need to think about and – crucially – listen to the sound of the instrument before deciding where the best sounds will be captured.
Points mentioned in Part 1, such as the quality of the recording environment, condition of the instrument and an understanding of whereabouts on the guitar various tones can be captured are still relevant and should be used as a good starting point before extra mics are brought into play. As we shall see, using more than one mic – or a combination of microphone and DI can present its own problems as well as offering more flexibility.
There are two main reasons why we might want to use two or more mics to record acoustic guitar. Firstly, microphones can be placed at wildly different sounding parts of the guitar to achieve a coherent blend. With just one mic, the chosen position must capture a fairly broad range of the tones that the instrument is capable of

However, using two mics, for example, one could be positioned near the bridge where the sound is full-bodied but might lack top-end detail, and a second mic could be placed facing the neck, capturing a bright, detailed sound that would probably be too thin to be used alone. Secondly, two or more mics offer the possibility of stereo recording.
When using multi-mic techniques to create a mono signal (which can later be panned anywhere in the stereo picture), there are several ways of going about it to achieve the desired effect. As previously mentioned, mics can be used to pick up contrasting tones that would be practically useless used on their own but sound great when mixed together.
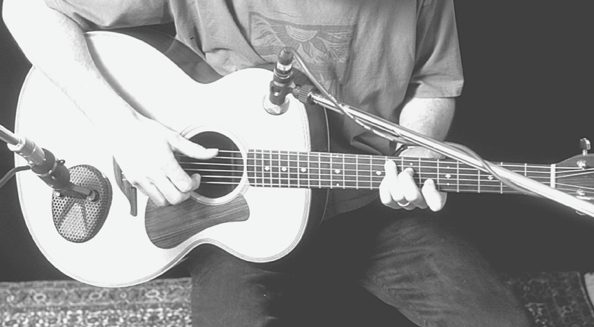
However, another method is to try to get the best overall sound from the first mic – as you would when using single mic techniques – then embellish the sound with a second mic that emphasises certain aspects of the guitar’s tone that the first mic is lacking. For example, if your first mic is in the sweet spot (the classic 12th fret position is often a good starting point) but lacks body, a second mic could be placed where more bottom-heavy tones are heard – near the bridge of the guitar, behind the instrument or even close to the sound-hole.
Similarly, if the first mic is missing some high-frequency information, a second mic positioned somewhere further up the fretboard towards the headstock might produce a more natural tone than adding top-end EQ to the main microphone.
Another reason for using more than one mic is to capture some of the recording room’s natural reverb. Again, the main mic should capture a good overall guitar sound while another mic, placed at a distance, will add ambiance and life.
Of course, the techniques already mentioned can be used simultaneously, so that you have a couple of close mics capturing the broad tone of the instrument while a third mic picks up the room-sound; two spaced room mics can produce a very good stereo effect. As always when using multi-mic set-ups, check the phase relationship between microphones by inverting the polarity of one channel; if the sound becomes fuller and more focused, use that configuration.
Recording acoustic guitar in stereo can give excellent results, particularly when it’s a featured instrument in a predominantly acoustic track. There are several techniques that can be employed for this but a detailed study of stereo recording is beyond the scope of this article.
That said, the mid/side method – explained in the Step By Step guide – is worth trying as it can produce a very natural and convincing stereo image. Often, when musicians request ‘stereo’ acoustic guitar, they actually mean two separate mono guitars playing the same part, panned left and right.
This double-tracking method can sound really good in many rock/pop recordings, helping to create a sense of width and space. Some engineers like to create two almost identical recordings, using the same mic in the same position on the same guitar.
However, it’s worth experimenting with different mics and positions – even different guitars – to determine what works best for the song.
Some acoustic guitars have pick-ups fitted, enabling the instrument to be DI’d or plugged into an amplifier (effectively turning it into a semi-acoustic guitar).
Most engineers prefer to use microphones rather that a DI when recording acoustic instruments, but sometimes a blend of microphone and DI signals can produce good results. Just remember that the DI signal will hit your recorder slightly before the mic signal, which can cause issues with phase.
So far, we have assumed that the acoustic guitar is being recorded in isolation – it can be tricky getting a really good sound if it’s being played in a small space along with loud drums and amplified sounds. That said, many singer/songwriters like to lay down their guitar and vocal tracks simultaneously.
A good trick here is to use a bi-directional (figure 8) polar pattern with both the vocal and guitar mic. Bi-directional mics are extremely effective at rejecting sound that arrives from the sides, so if each mic is positioned so that the null side points towards the unwanted sound, good separation can be achieved.
Well-recorded acoustic guitars generally don’t require too much in the way of processing, if a natural sound is desired. However, when it forms part of a busy mix, a certain amount of low-end attenuation can help the guitar sit in the mix, creating space for bass instruments.
At the recording stage, a high-pass-filter on either the microphone or preamp can be engaged, helping to eliminate boom; when mixing, a low-end shelving EQ is the best option. Many acoustic guitar tracks benefit from a touch of top-end boost to generate a bit of sparkle. Anything from 10kHz upwards will add some zing to the sound but a healthy boost around 16kHz can add a lovely sense of air and space.
Talking of space, a touch of reverb often sounds nice on acoustic guitar, particularly if it’s been recorded with very little room ambience; the length of the reverb will be determined by the nature and tempo of the song.
A little bit of compression can help franticly-strummed rhythm guitars sit in the mix if the compressor is well set-up to respond to the tempo of the track. Excessive pick sounds can be tamed by using a very fast attack time to dull the presence of the plectrum.
Acoustic guitars feature in all sorts of recordings in any number of styles ranging from solo singer/songwriter performances where it is the main accompaniment, to complex mixes where it provides a rhythmic bedrock. Experimenting with the techniques explained here should allow you to make professional sounding acoustic guitar recordings with confidence.
Multi-Mic Recordings
1: Listen to the sound of your main microphone. If it lacks body, try adding a mic pointing at the guitar’s body just beyond the bridge. When more top-end clarity is needed, a mic positioned near the headstock, pointing at the strings will add some treble detail. When recorded onto two or more tracks, these mics can be subtly panned to create interesting stereo effects. Extreme panning will produce an unnaturally wide sound that may sound unconvincing.
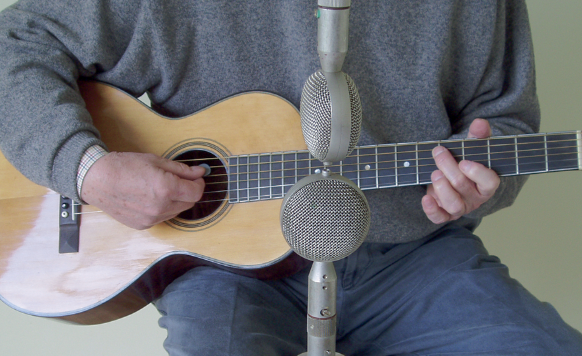
2: Rather than using just one microphone in the sweet spot, try using a vertical-spaced pair. The two mics should be placed around 20cm apart on the vertical plane, with the top mic angled downwards to pick up the low-end while the bottom mic is pointed up to capture more high frequency information. Again, judicious use of stereo panning can produce some useful spacial effects. This technique can sound good when making solo voice and guitar recordings.
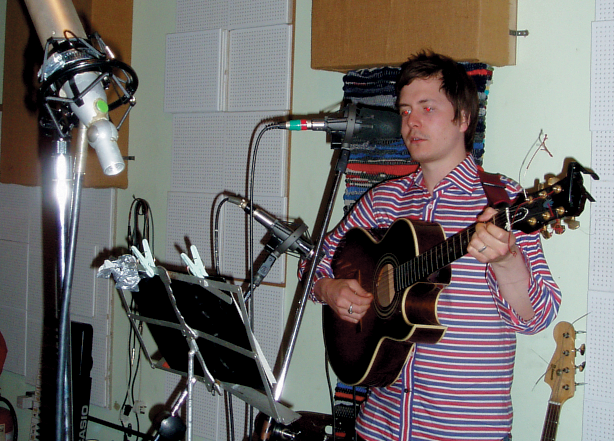
3: When recording acoustic guitar and vocal simultaneously, try using two bi-directional (figure 8) mics – one each for voice and guitar – to get good separation.
The mics should be positioned so that the null side of each mic is aimed at the unwanted sound source. Figure 8 mics are remarkably deaf to sounds appearing at the sides and a surprising degree of separation can be achieved. This is useful if you need to add effects or treat one channel without affecting the other.
Mid/Side Stereo Acoustic Guitar
1: There are several ways of capturing acoustic guitar in stereo. A spaced pair or employing the X-Y method can give excellent results, while a mono acoustic guitar recording can be treated to a touch of stereo ambience at the mixing stage.
However, the Mid/Side (M/S) technique is a superb method that avoids many phasing issues and is completely mono compatible. For this you will need to use two mics, one of which must be bi-directional, and three channels on your mixer.
2: The first (Mid) microphone should be set to either cardioid or omni-directional – omni often works better with acoustic guitar. Place this mic in your chosen sweet spot.
Take your bi-directional (figure 8) mic and place it so that it sits either beneath or above the Mid mic, with the capsules as close as possible. A piece of double-sided tape to join the mics is useful here. This mic should be positioned so that the null side is pointing towards the guitar.
3: The signal from the bi-directional mic must be split and sent to another channel. Invert the polarity of this channel and pan each of the bi-directional channels left and right. Adjusting the levels between the Side channels and the Mid channel will determine the width of the image. If the recording is mono the Side channels will cancel each other, leaving a mono image with no phasing issues.
There is a thorough Guitar Recording Workshop on our sister site Guitar-Bass.net