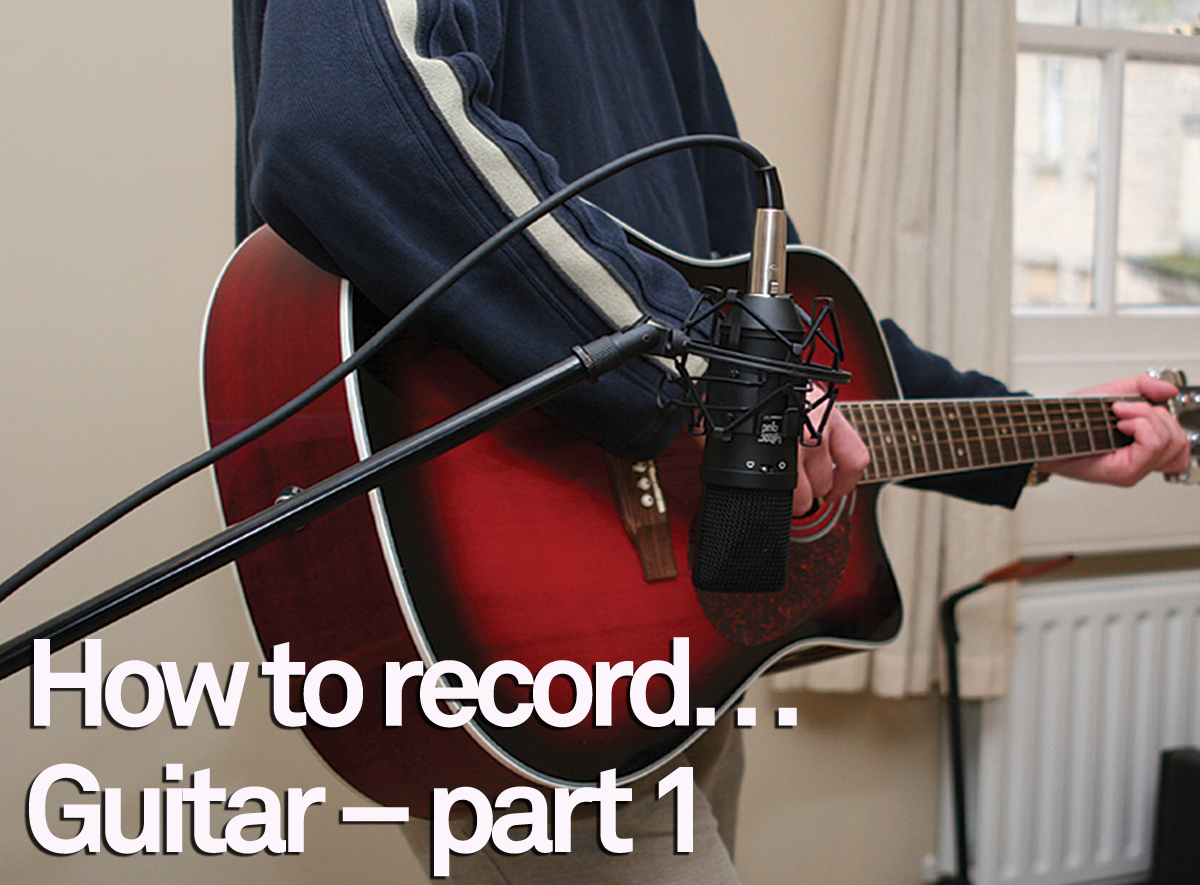
How To Record: Acoustic Guitar Part 1
Capturing the true essence of the humble acoustic guitar can be a tricky task, but with some basic know-how and just one (yes, one!) microphone you can record a truly electrifying tone. John Pickford tunes up, turns on, and rocks out… Life would be a lot simpler if there was one perfect method of recording […]
Capturing the true essence of the humble acoustic guitar can be a tricky task, but with some basic know-how and just one (yes, one!) microphone you can record a truly electrifying tone. John Pickford tunes up, turns on, and rocks out…
Life would be a lot simpler if there was one perfect method of recording acoustic guitar that everybody agreed with. However, if you ask ten engineers to name their favourite technique you’ll likely get ten completely different answers. Some engineers only ever use a single microphone to capture the sound while others prefer to blend the sound of two or more mics.
The best engineers understand the benefits and pitfalls of a number of techniques and adapt their mic’ing approach to suit the job in hand. This month we’ll look at how to get set up along with tips on how to produce great results from using one microphone to capture the whole sound.

Tools For The Job
Acoustic guitars come in a wide range of flavours, ranging from the warm, mellow tones of nylon-strung classical and Spanish guitars to the bright, metallic sound of resonator types such as Dobros; the full-bodied folk-sy vibe of a dreadnought to the distinctive sprightly tone of a gypsy jazz guitar. And then of course there are 12-strings…
Thankfully, no matter what style of acoustic guitar is used the methods employed to record it remain the same. Of course, you won’t be able to make a classical guitar sound like a resonator with recording techniques, so it’s very important to make sure that you choose the right instrument for the job in the first place.
Prior to the session it’s worth checking that the guitar is in the best possible condition. The age of the strings will affect the tone, and be aware that the gauge used will make quite a big contribution the sound: light-gauge strings will produce a thinner tone than heavy ones. Also, the type of plectrum (if used) will influence the final result: a thinner one providing more percussive energy from the strumming, and a thicker one generating more volume thanks to its heavier attack.
Once the guitar is in optimum condition, listen to how it sounds in the room, as it’s the way the instrument interacts with the recording environment that has one of the most profound effects on the sound.
Unlike vocals, that are best captured with as little room ambience as possible, acoustic guitars positively benefit from the natural reverb of a good recording room. Generally, a reasonably lively room with wooden floors will give the best results. Also try different rooms, as you may find that the guitar actually sounds best in the kitchen!
Technique: Setting Up and Selecting Mics
1: Different shapes and makes of acoustic guitars can sound dramatically different, so make sure you have one that suits the track. Sort out any rattles and buzzes, and ensure that the player’s jewellery or clothing – shirt buttons, for example – are not causing unwanted noise by knocking against the instrument. Discard tired, dull-sounding strings but be aware that brand-new strings may emphasise ‘finger screech’. Coated strings and lubricants can help tame this.
2: Start by making sure the guitar sound good in the room. If your recording room is small, boxy and dry-sounding, try another room. Alternatively, increase ambience by removing soft furnishings and adding some reflective surfaces. A handy trick in heavily carpeted rooms is to place a sheet of hardboard or something similar beneath the player in order to pick up some reflections from the floor. When all else fails, add some artificial room ambience during processing.

3: Use a condenser mic, if possible, to capture the high-frequency detail and harmonics. Mics with switchable polar patterns are ideal, as omnidirectional or figure of eight (bi-directional) settings offer more natural ambience and avoid the low-end boom often caused by the proximity effect when using a cardioid setting. If you only have cardioid mics, choose the brightest-sounding one and position it at a distance that avoids excessive bass and captures some room ambience.
Tone on the Range
With the guitar sounding great in the recording environment, it’s time to think about the best way of capturing the sound. Most engineers choose condenser microphones to record acoustic guitars, as they are often more flattering than dynamic types.
Opinions differ as to whether a large or small diaphragm condenser is preferred; however, the sound of the instrument and the role it will play in the final mix should influence the choice to a greater degree. Even with the best EQ and compression a midrange-y parlour guitar will just not cut it if your track requires a bass-y jumbo-style sound.
Large diaphragms tend to have a fatter, full-bodied sound, which is often desirable if the guitar is a featured instrument, as you would hear in, say, a solo singer/songwriter performance. Small diaphragm mics are usually favoured for their exceptionally detailed top-end response, which is useful to help the guitar cut through a busy mix.
That’s not to say that dynamic mics are completely unsuitable, though, as a well-positioned dynamic mic will sound better than an expensive but poorly placed condenser. Ribbon mics (which are a type of dynamic microphone) can sound gorgeous on acoustic guitar, as they often sound big and warm but still capture the delicacy and detail of the sound. Also the bi-directional response of ribbons picks up a decent amount of natural room ambience. Now, not all of us have the luxury of choosing any mic that takes our fancy but as indicated above, an inexpensive and carefully positioned mic should produce satisfying results.
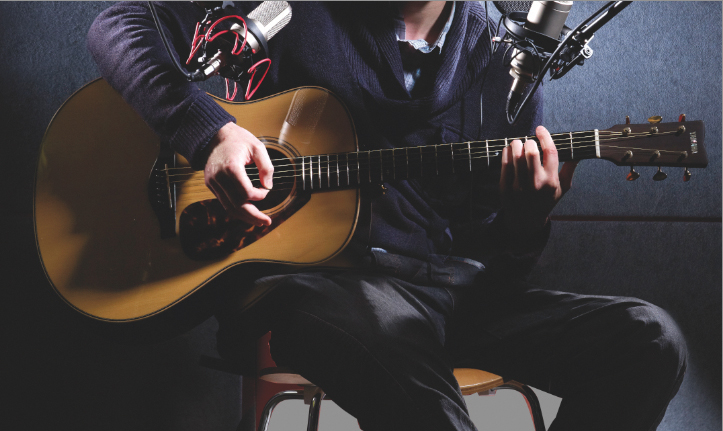
Technique: Positioning Your Microphone
1: Listen to the sound the guitar produces by moving your head around in front of the instrument (whilst someone else is playing it, obviously!). You will hear the sound change quite significantly from one position to another. The sound should become lighter as you move away from the body and towards the neck of the guitar. Try to find a spot that captures a full, resonant tone without excessive boom, while also picking up the detail of the strings being plucked and strummed.

2: Once you have set up a microphone, put on some headphones with a feed of the signal and sweep the mic around, moving along the guitar at various distances and heights to find the best sound. Make sure the headphone level is sufficient to block-out the ambient sound of the instrument without being deafeningly loud. Better still, if you have someone to assist you, get them to sweep the mic around while you audition the sound on your monitors.
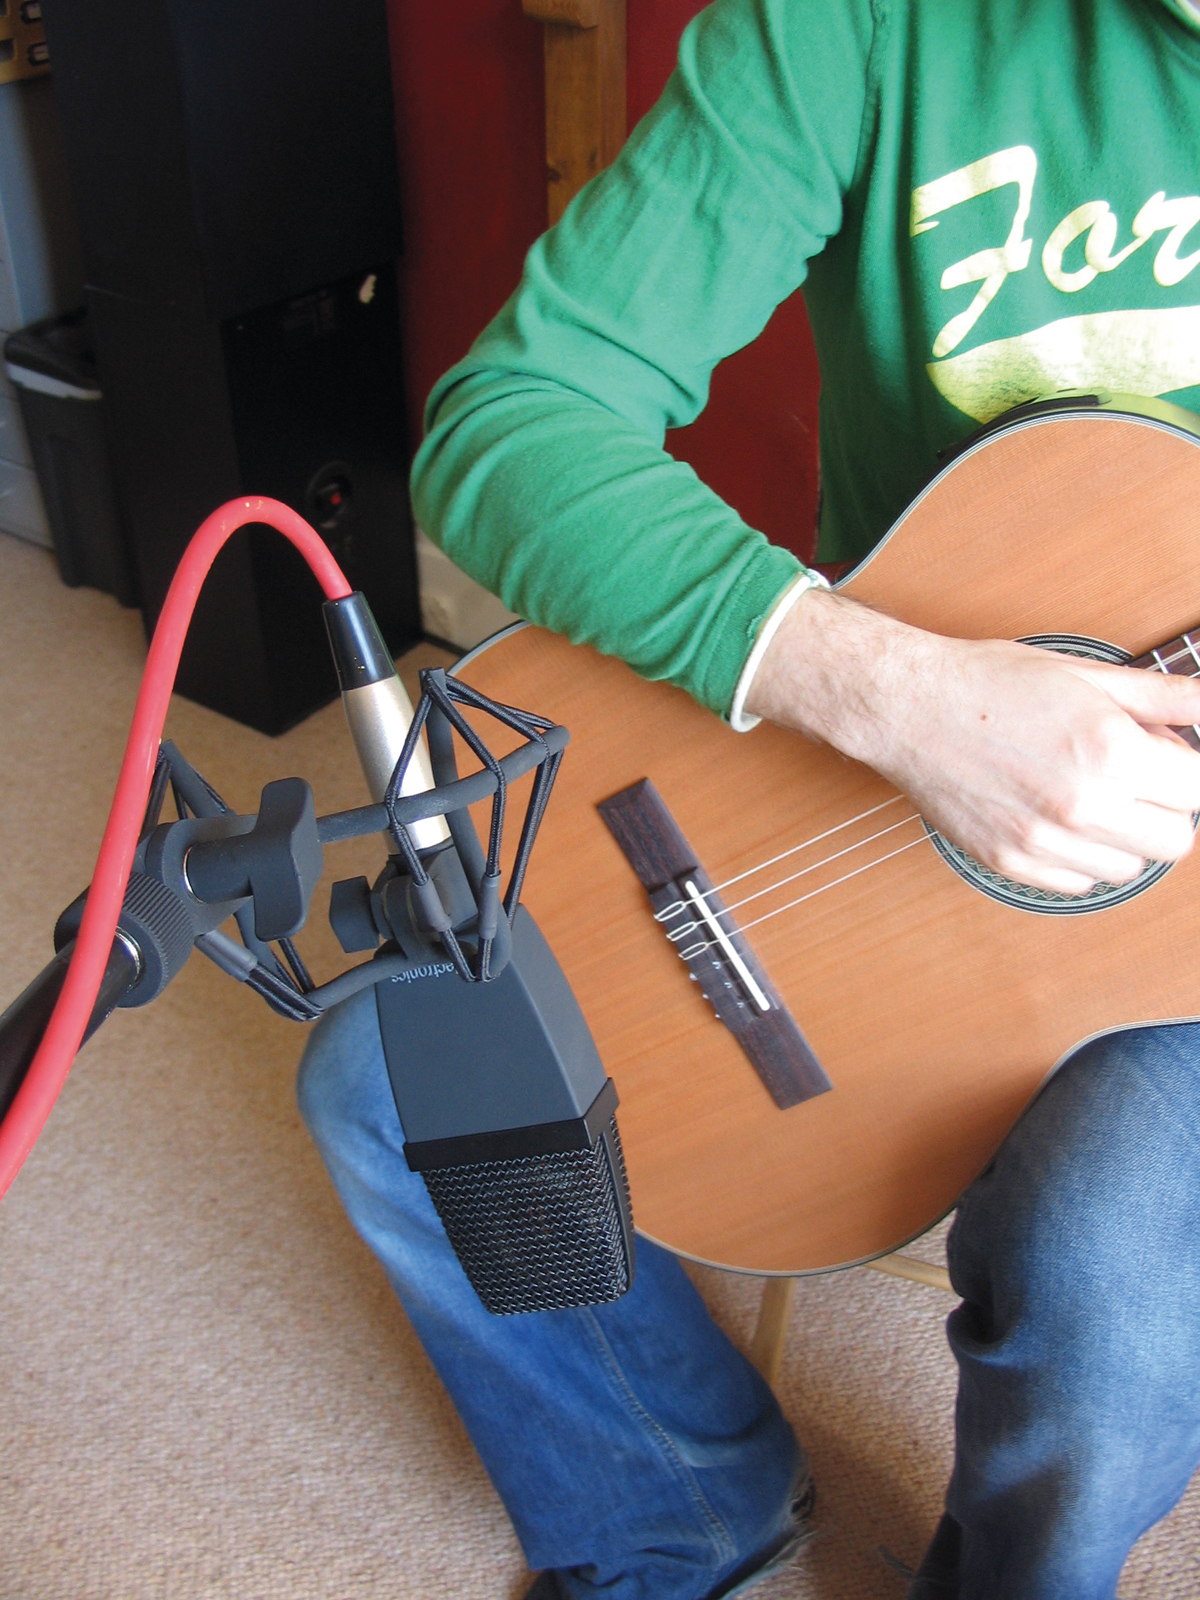
3: As a starting point that is favoured by many engineers, position the microphone at the point where the guitar’s neck joins the body. Experiment with distance to achieve a good balance of direct sound and room ambience, and also try some less obvious positions such as placing the mic at the player’s
shoulder level.
Sound Decisions
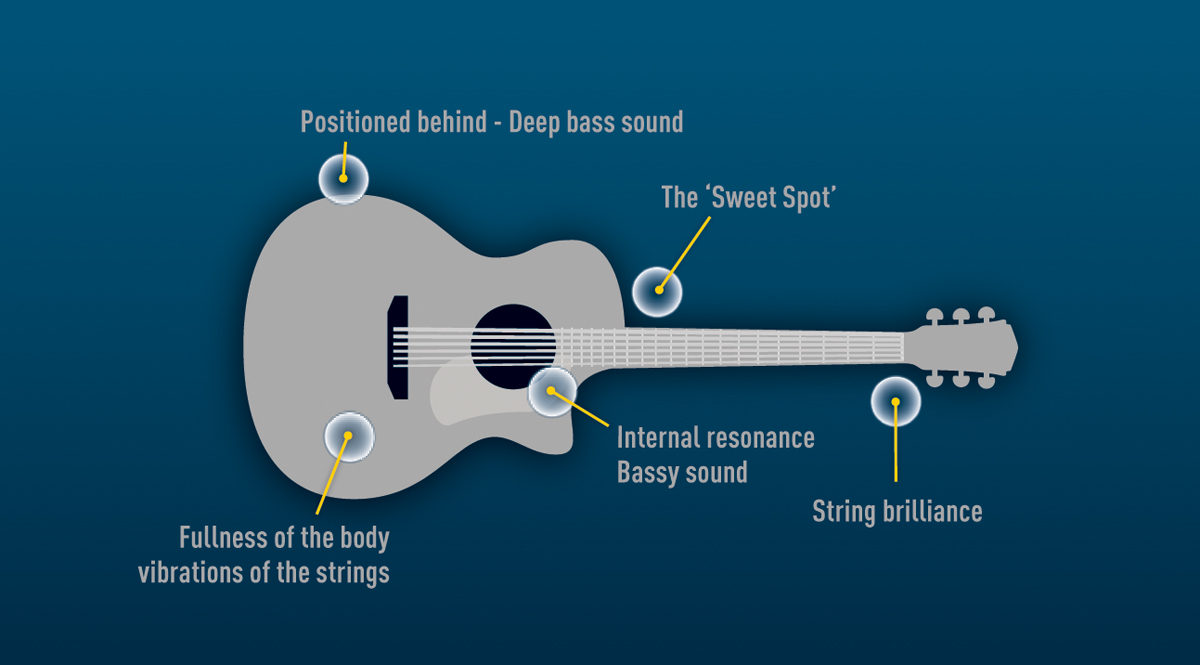
The most common mistake made by novice engineers is to point the mic straight at the sound-hole. Sure, it looks like the right thing to do, but this position often exaggerates any low-end boom that could potentially clutter up your mix.
It’s far better to find a position that picks up a more even balance of the instrument’s sound. Remember, an acoustic guitar’s sound is made up of several elements: resonances from the sound-hole, wooden panels and internal bracing, as well as the sound of the strings, so finding a spot that captures a larger slice of the complete sound is best.
Aim to find a position that offers a decent overview of the guitar’s sound without too much unwanted low-end information, especially when using a directional mic with a fixed cardioid polar pattern. If you have a mic with an omnidirectional pick-up pattern you can afford to move in a little closer if desired, as the low-end boost caused by the proximity effect of directional mics isn’t an issue. Also, an omni mic will capture a nice, even amount of room sound.

One problem with this mic position is that with some instruments the sound can lack body, which can be an issue if the guitar is a main part of the recording.
If, however, the guitar forms part of a busy mix, the thinner sound can be positively advantageous, particularly if you want the rhythmic strumming of the strings to cut through without too much midrange frequency information cluttering-up the production.
Another problem can arise from unwanted noises, either from the player’s fingers sliding along the strings, or annoying fret buzzes. A good solution to this problem is to position the mic away from the neck and further along the body towards the bridge.
For a more full-bodied tone, experiment with positions that have the microphone placed above the sound-hole, angled downwards – this position is excellent for capturing a well-rounded sound while avoiding the blast of air emanating from the sound-hole.
If the guitar you’re recording is an electro-acoustic then you can DI it onto a separate channel (preferably through a preamp first to add warmth) and then blend it in later (if required) to thicken the sound. (Granted, we’re meant to be talking about recording with just one mic but as this is a pickup we can get away with it!)
Guitar Hero
With these tips and techniques you should be able to produce a recorded tone that gets the best out of the natural sound of the instrument.
In the next feature we’ll look at some multi-mic’ing set-ups as well as recording acoustic guitar in stereo, double-tracking and how best to record someone singing and playing acoustic guitar simultaneously.
Finally, we’ll see how subtle EQ, dynamics control and reverb can help bring out the very best in your acoustic guitar recording.
There is a thorough Guitar Recording Workshop on our sister site Guitar-Bass.net