The Final Mixdown – The Tutorials
In addition to our whopping feature examining The Final Mixdown we’ve a handy series of tutorials covering the technical aspects. In this first part we look at using playlists in Pro Tools to store our reference tracks, walkthrough using Brainworx bx_meter and make a Pro Tools template… Pro Tools Playlist Reference Walkthrough 1: We can use […]
In addition to our whopping feature examining The Final Mixdown we’ve a handy series of tutorials covering the technical aspects. In this first part we look at using playlists in Pro Tools to store our reference tracks, walkthrough using Brainworx bx_meter and make a Pro Tools template…
Pro Tools Playlist Reference Walkthrough
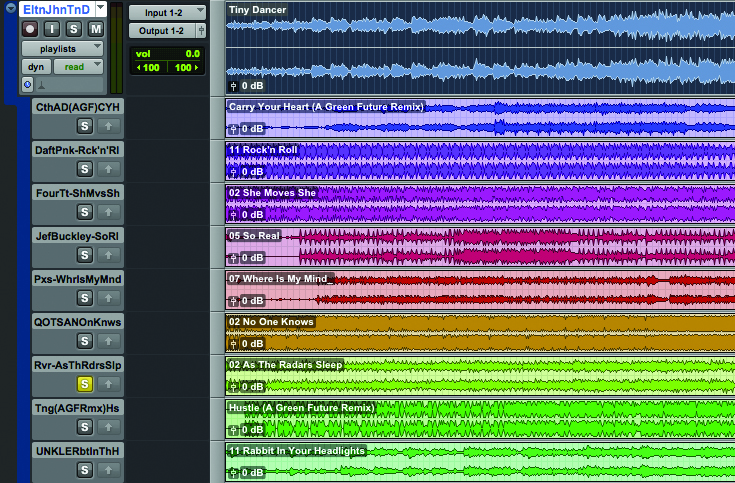
1: We can use playlists in Pro Tools to quickly store all our reference tracks without using any additional plug-ins at all. Create a new stereo channel in a session – we have a template session just for this purpose. Place each reference track on a different playlist and name each one.
2: Using Clip Gain, lower the gain of each track so that each reference track plays back at a constant loudness level. It can be useful to set this level around the same as your average mixing level, as this is what you’ll be referencing against.
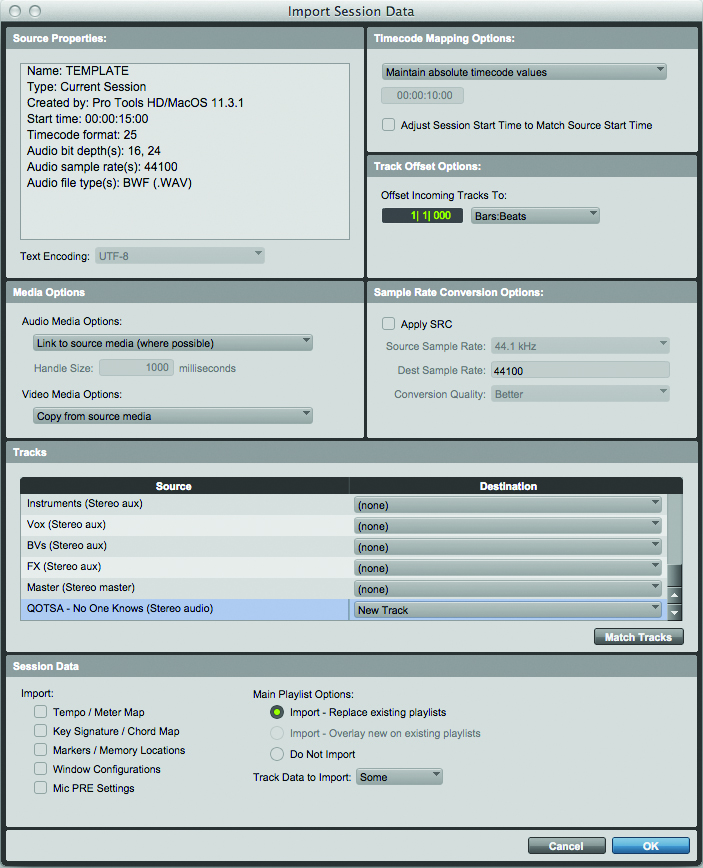
3: Now each time you open a new session you can import the Reference track and all the playlists into your new session using Import Session Data (Shift+Alt
+I (PC) or Shift+Option+I (Mac)). Be sure to import all the alternate playlists, and select “Link to source media (where possible)” in the Audio Media options to reduce hard disk clutter and save space.
Brainworx bx_meter Walkthrough
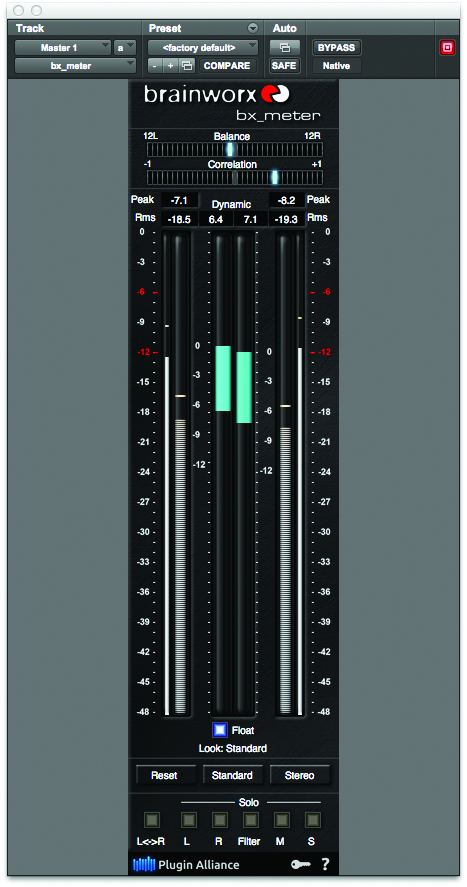
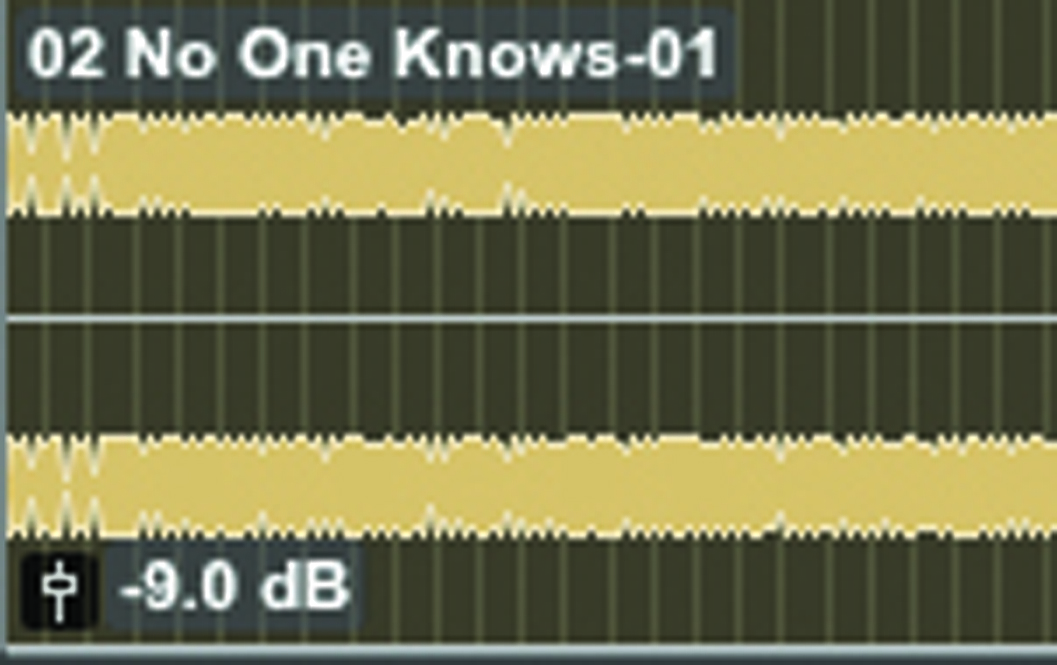
1: The Brainworx bx_meter helps you to visualise not only the RMS loudness of your track, but also the peaks and the dynamic value, which is the difference between the two. Keep your peaks well below 0dBFS and look to have a dynamic value of at least around 8-10 on mixes.
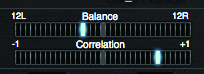
2: The two stereo meters at the top of bx_meter give an indication of the stereo balance, which in this example is off to the left, and the mono correlation. Ideally the stereo balance should be close to the centre, and the correlation should always be a positive figure. If it becomes negative you have phase problems that need sorting.
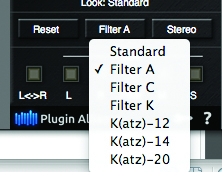
3: You can use different filters to get an idea of the relative loudness using either IEC A or C weightings, or the ITU/EBU K-weighting system, additionally the meters can be changed to Bob Katz’ K-System.
Pro Tools Template Walkthrough
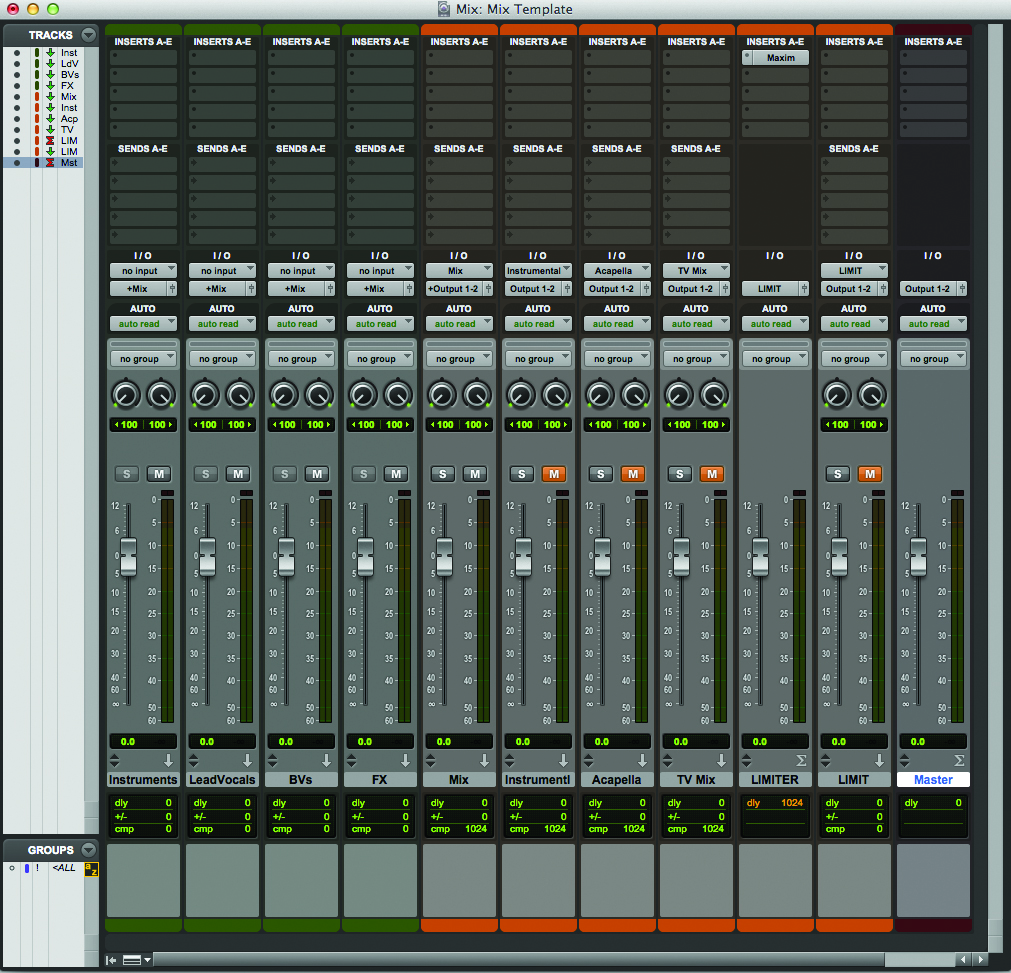
1: In this download we’ve included a Pro Tools template folder, which has a series of channels set up ready to use, which will enable you to print your mix and all the alternative options, such as the instrumental, a capella, TV mix and a limited version simultaneously.
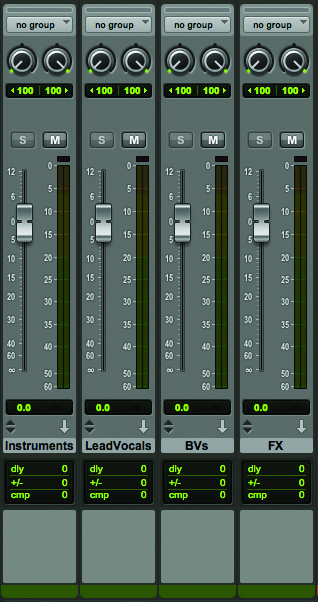
2: To use this template as a starting point you have to ensure that any channels you add to your mix are routed to one of the four buss channels in green. Most of the mix should be routed to the ‘Instruments’ buss, the lead vocals and any effects specific to the lead vocal should be routed to the ‘Lead Vocals’ buss, all backing vocals to the ‘BVs’ buss, and any remaining effects, such as general reverb, to the ‘FX’ buss.
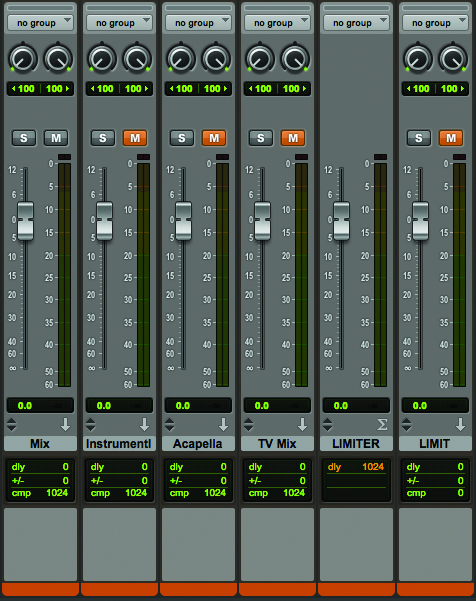
3: The template will then route each of these channels to the multiple output busses in orange. Note that many of these aux channels are muted: this is so that you only hear your full mix, and not a sum of the mix, the instrumental, a capella, TV mix and limited version. But you can monitor those at any time should you wish.
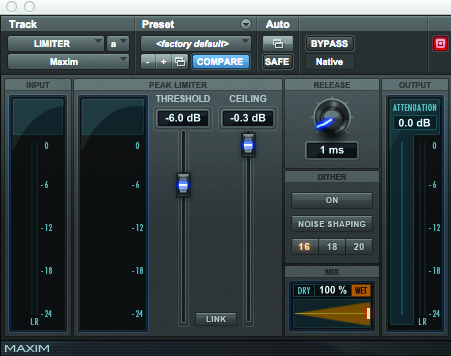
4: The LIMIT buss has a master channel with Maxim placed on it before the Aux buss. We’ve preset Maxim at -6dB, which may be too much or too little depending on your mix, but is a good starting point for getting the mix up. Note we’ve also set the ceiling at -0.3dB – this is as loud as we’d ever let anything get, and would often set this as low as -1dB.

5: If you want to add any processing to the mix buss, you’ll have to add master channels for each of the orange output busses (Shift+double click in space the Mix window). If you add the processing directly to the aux it will still appear at the Master output, but won’t allow you to bounce the various mixes simultaneously.
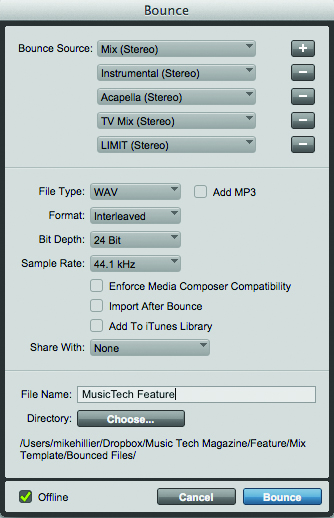
6: To print all of your mixes simultaneously, use the bounce window (Ctrl+Alt+B (PC) or Cmd+Option+B (Mac)), and use the [+] button in the top right to add a new bounce source for each of the five mixes.
Click Here To Continue
Click Here for our Final Mixdown Feature
