The Bluffer’s Guide To Acoustics
Your room can make or break your sound and it’s all about its acoustics.
The most important piece of equipment in your studio is not your computer. It isn’t your DAW or your monitors or your MIDI controller. The most important piece of equipment in your room has zero moving parts, probably looks a little bit ugly, and is something you will almost certainly never actually notice.
We’re talking about your acoustic treatment. The acoustics of a room where music is made, mixed or mastered is the single most important thing in the entire production chain. It doesn’t matter how good your ears are or how expensive your equipment is: if your space isn’t treated correctly, then what you’ll be hearing won’t be accurate, and you won’t get a good sound.
In this guide, we’ll go into exactly what acoustics are. We’ll talk about what sound is, how it behaves, and how you can tame it. We’ll also detail a short construction project that you can undertake to make your own acoustic panels. Trust us: it will improve your sound like you wouldn’t believe.
Even a little bit of acoustic treatment will immediately benefit the sound of your room
Ride the Wave
Think about sound for a minute. Very obviously, it has a source, like your speakers, and a destination – that would be your ears. But in-between the source and destination, that sound is doing some very interesting things.
Sound consists of pressure waves in the air. When those pressure waves hit something, such as a wall or chair or desk or coffee mug or bookshelf, they are either reflected or absorbed. We’ll admit, that’s putting it a little simply, but the point is that the sound you hear is dramatically affected by the environment it’s in.
You’ve almost certainly experienced this: think of the last time you were in a church, or a massive concert hall. There is a heavy reverb to the sound, which comes not only from the walls, floor and ceiling, but also from the distances between them. Likewise, step into a cupboard very quickly (go on, we’ll wait) and say a few words. Chances are, your voice will sound muffled and stripped of character.
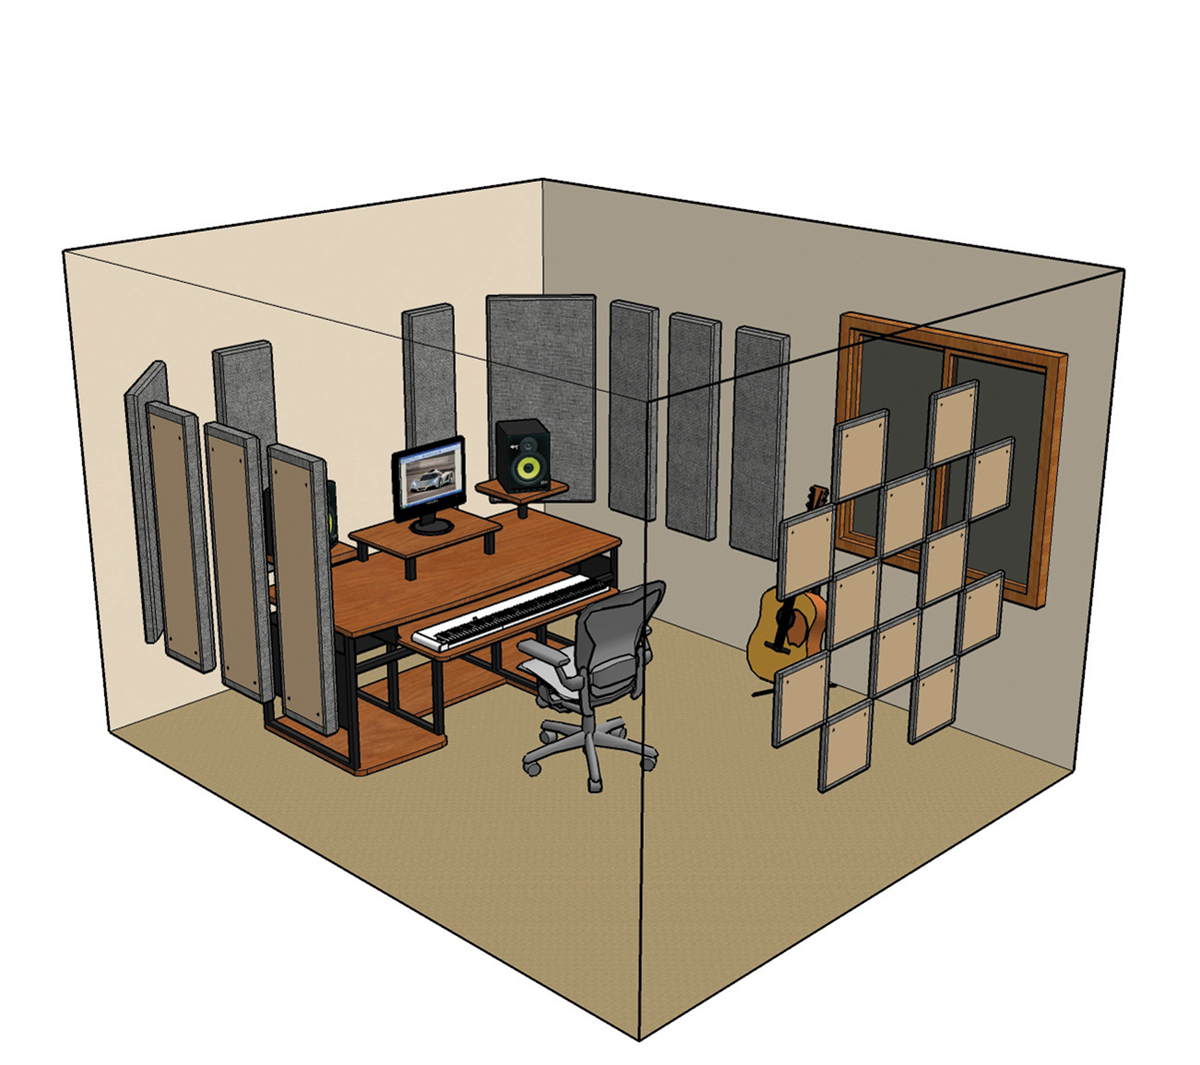
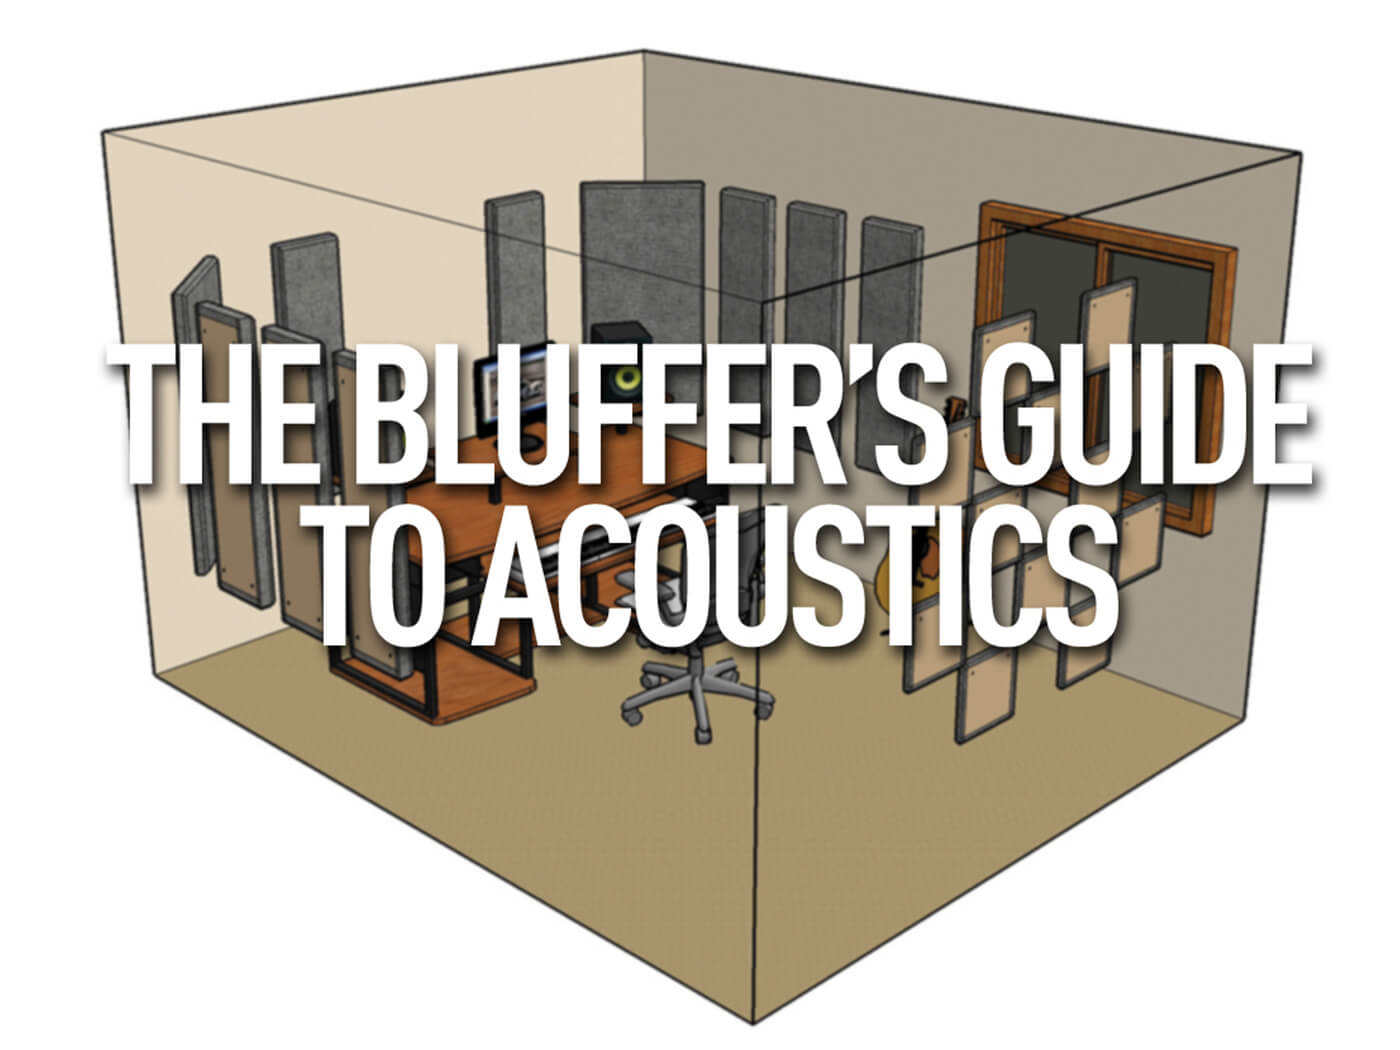
Although a purchased full package is the minimal fuss solution (such as the London 12 Room Kit pictured here from Primacoustic), your room may benefit from the more custom treatment when building your own solution. And, yes, we know there’s no door.
These are not ideal conditions for music-making. It’s less important at the actual production stage, when sound quality and balance take a backseat to musical creativity. But when you’re starting to mix, you want as little environmental interference as possible. You need an accurate picture of what’s coming out of your speakers in order to make informed mix decisions. Plenty of songs have been recorded in a cathedral, but very few have been mixed there.
Ensuring that the environment you are in is as acoustically neutral as possible is absolutely key. Let’s have a look at how to make that happen.
 Foam Pit
We’ll operate on the principle that you have a room at home for your music-making. Furthermore, we’ll operate on the principle that you can do things to that room. If you are a renter, or otherwise unable to change the room too much, this may not apply. That being said, it’s still worth reading, as it will help you understand the principles of how acoustic treatment works.
Chances are you’ve got a room with regular furniture. A table, chair, maybe a couch, perhaps a couple of bookshelves, too. Stand at the centre of the room, and clap. Listen to what happens to the sound. Try to analyse where the echoes (or reflections) come back at you from, and what they sound like. Don’t worry if you find this difficult – it’s just a crude test meant to illustrate that most rooms don’t treat sound that well.
There are a couple of things we can do to this room to make that sound better. The first has nothing to do with acoustic treatment at all. It’s all about positioning. Every room will have a ‘sweet spot’, where the sound is at its most honest. This can be quite difficult to find, but fortunately, there is a very good general principle you can use. Assuming you operate at a desk, set that desk up so that when you sit at it, you’re facing one of the short sides of the rectangle. Make sure you are at least three feet from the wall.
Now: your monitor speakers. Imagine that you and the speakers form a triangle. It should be an equilateral triangle – that is, one where all three angles are equal. Don’t worry about getting it too exact for now; just make sure that you are roughly the same distance from the speakers as they are from each other. In addition, try to arrange things so that your speakers are each the same distance from the wall on either side. Even if you can’t get it exactly right, or if your room is a weird shape, don’t worry. What we’re going to do next is to treat your room.
Look at your walls and ceiling. Right now, they are almost certainly flat. That’s not good for sound waves, which will be reflected back into the room, messing with your mix. You might think the way to solve this problem would be to blanket all flat surfaces in acoustic treatment, but if you did, you’d end up with a room that sounded completely ‘dead’. We don’t want that either.
What we want is something between the two, where some surfaces are covered. This will ensure that you don’t have too many reflections, while allowing your room to retain its acoustic character (and remain pleasant to work in).
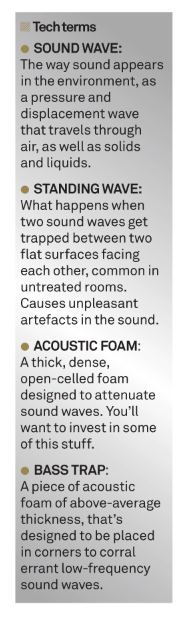
What we’re going to use to cover them is acoustic foam. This is very different to regular foam, in that it’s a lot denser, with a ridged or textured surface. It is specifically designed to absorb sound waves, trapping them before they get to your ears. Plenty of companies sell acoustic foam, and in its most common form, it comes in slabs that are a couple of feet square. Eggcups, by the way, don’t work, no matter what you’ve seen.
The goal is to put these slabs at key points on the walls and ceiling. Again, this will depend on the dimensions of the room, but a good rule is to position them adjacent to your speakers, covering the walls with a roughly nine-foot square section of foam. In addition, you’ll need to put it on the wall directly in front of you when you are sitting at the desk, and the wall directly behind you.
You would be very wise to attach it to the ceiling as well. Don’t worry if you can’t hit all the spots. Even a little bit of acoustic treatment will immediately benefit the sound of your room.
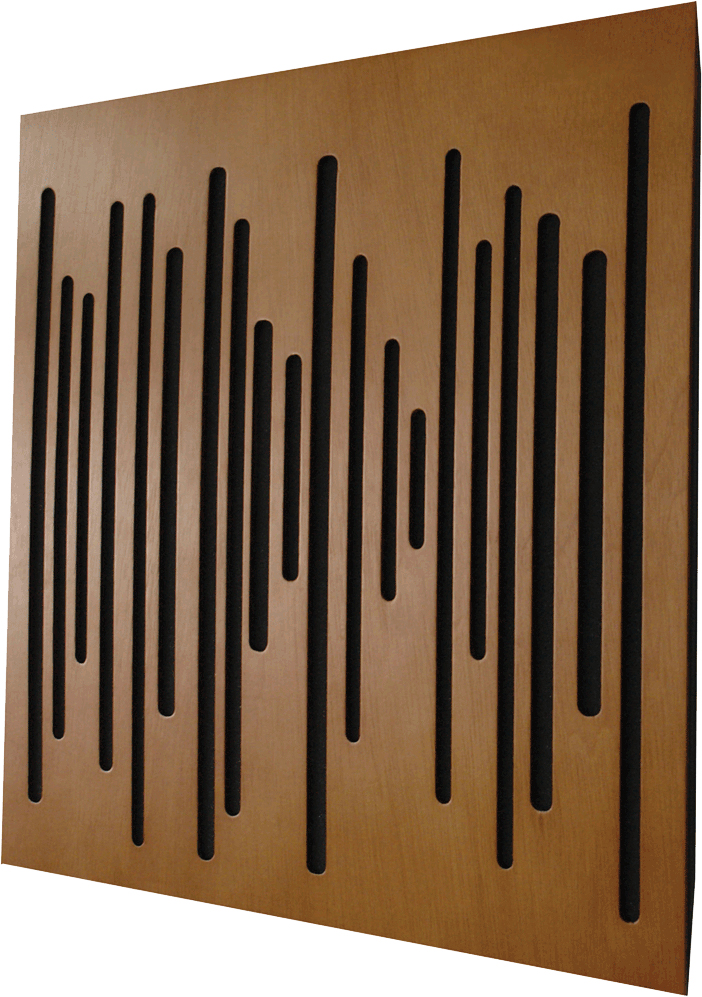
There are some products that are difficult to DIY. Vicoustic’s products are both elegant and highly effective, such as this WaveWood Bass Trap.
While you’re at it, isolate your speakers, either with specially-designed stands or by placing them on acoustic foam. Several companies sell angled chunks of foam for this purpose. This will ensure that the surface your speakers rest on does not resonate in sympathy with the monitors, further confusing matters. You’re not done yet. You need to deal with the bass frequencies.
Traditional acoustic foam slabs don’t deal with low-frequency sound waves particularly well. In addition, bass has a nasty habit of accumulating in the corners, and letting it do so can give you a false impression of what’s going on in your mix. To fix this, you’ll need to invest in bass traps, which are thick, chunky pieces of foam designed to fit right into the corners of a room.
Again, please note that these are general principles. You don’t treat a live room as you would a vocal booth, and acoustics are a detailed science that experts will charge a lot of money to get right. But as a general guide, this should get you going.
Studio Ergonomics
The ergonomics of your studio is something to consider both for your comfort as well as its impact on your room acoustically. Naturally, it is important to ensure that all the equipment you use is well within your reach and doesn’t require stretching for, something that perhaps later results in injury. Ensure that your chair is up to the job and that you’re comfortable when you’re working.
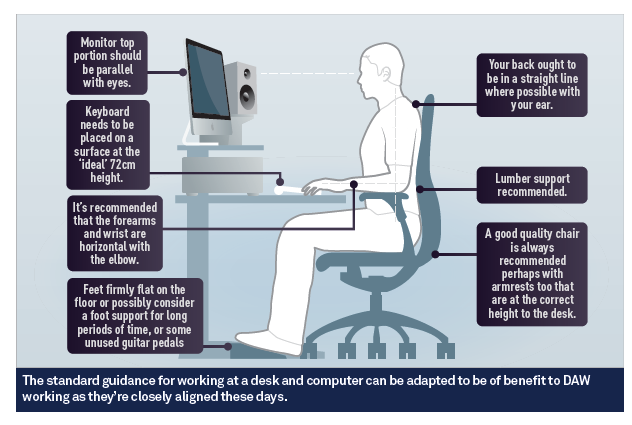
Your desk needs to be at the right height and should be suitable for the kind of work you’re doing. Placing your most often used equipment within your ‘arc of reach’ will, therefore, prevent you moving your arms in repetitive movements that can cause injury.
Also it’s worth considering installing your equipment in racks built within your desk or having them in a desktop rack. However, spare a thought for reflections that may be caused by such devices and how you might tackle them if they cause unwanted reflections. For more details, see this handy feature
DIY Style
Acoustic foam panels differ from other audio equipment in one crucial way. You can actually make your own without any specialist knowledge.
We’re not going to go into the exact step-by-step procedure here, as it’s relatively simple, especially if you’re a dab hand with DIY. What you need to do is construct a solid wood frame. Cover one side of the frame with fabric, making sure it fits tight around it (you can staple-gun it into place). What you’ll need to do then is fill the interior with a substance known as Rockwool. This material, readily available from hardware stores, is very sound absorbent and is easy to work with.
Once you’ve filled the frame, all you have to do is close the back – we suggest using another piece of fabric, perhaps with a wooden bar placed across the middle of the frame to keep the Rockwool in place. Congratulations: you’ve made an acoustic panel. If you want more detailed instructions, you’ll find hundreds of them online.
But how do you go about hanging these on the wall and ceiling? Many companies sell an adhesive spray that you can use to attach the foam directly to the wall. We’re going to speak from personal experience here: avoid this stuff. Not only is one can not sufficient to put up a room’s worth of treatment, but it doesn’t last very long, so your panels are in danger of falling away. Despite that, the substance itself is absolute murder to get off the wall.
What you can do, however, is attach each section of acoustic treatment to a pre-cut wooden panel – chipboard will do. You can try using the spray, but a better option might be to use metal brackets to hold the foam in place. The panels can then be hung on the wall like a picture. The real advantage of this is that if you move studio, you can simply take down the panels and take them with you.