Bitwig Studio Review – Part 2: Feature Set
So, a few layout niggles aside, Bitwig Studio is easy to pick up and navigate. Now to the tools and devices. First up are audio FX which will be especially welcome to Linux users who have limited options to expand their toolset. The usual EQs, distortions, dynamics, modulation effects, delays, reverbs and filters are available, […]
So, a few layout niggles aside, Bitwig Studio is easy to pick up and navigate. Now to the tools and devices. First up are audio FX which will be especially welcome to Linux users who have limited options to expand their toolset.
The usual EQs, distortions, dynamics, modulation effects, delays, reverbs and filters are available, plus unique processors like Blur, a diffused comb filter effect that allows you to quickly create a sense of smearing and stereo width. Transient Control is for transient shaping to increase the definition of a sound. All the effects sound pretty good with the Bit-8 bit-crusher and Ladder filter being some of our personal favourites.
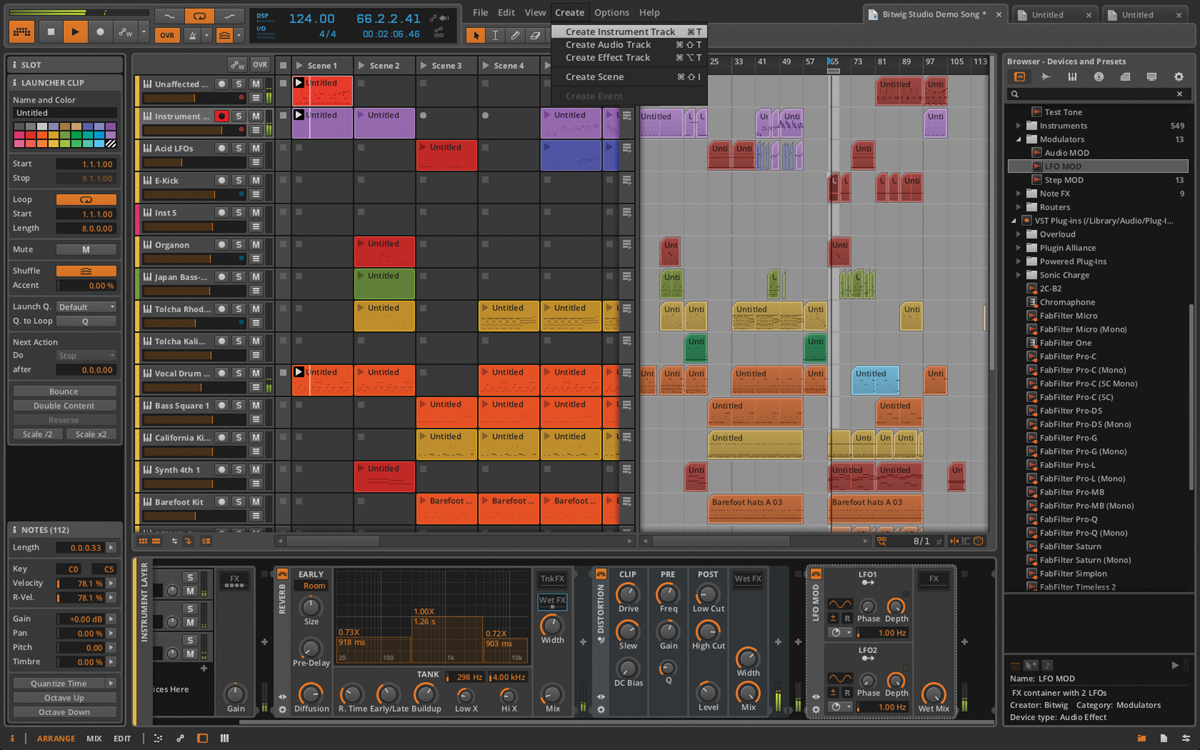
The ‘Containers’ folder has various functional devices to drop other processors into. The names are fairly self explanatory including Mid-Side Split, Multiband Split, XY Effects and XY Instruments. The last two let you run up to four instruments or effects chains and cross fade between their outputs which is very useful for sound-design tasks and a very valuable feature.
Note effects allow you to add MIDI processing to MIDI instruments. The bundled Bitwig instrument range includes a variety of drum synthesizers specialising in each main electronic drum sound, along with a drum sampler much like Live’s Drum Racks. A regular sampler is included, as well as a drawbar organ emulating device. Synthesizers come in the form of a four operator FM-4 and a polyphonic subtractive synth called Polysynth. All have a deep, textured yet never abrasive tone and, although the included presets are a stark contrast from one load to the next in terms of style (which isn’t a bad thing), they all have a lot of potential to tweak and make your own.
The layout of the instruments suffers a little from being overly crammed in places though their saving grace is how simple the internal modulation system is to use. You just click the modulation source, then everything assignable is highlighted and you simply drag and set each parameters assigned range.
Sadly the MIDI control assignment functionality is more limited. You right click and select Learn Controller Assignment then move the relevant controller which as a process is very easy. But you’re not given the ability to control the range of assignment so every control is mapped with its full range set to the MIDI control.
Bitwig point out that assignable macro controls per device do have a range function so you can use up to eight macro controls per device which can each have a defined range for one or more parameters. Then you simply MIDI map the macro which acts as a middle man to the parameter you actually want to control.
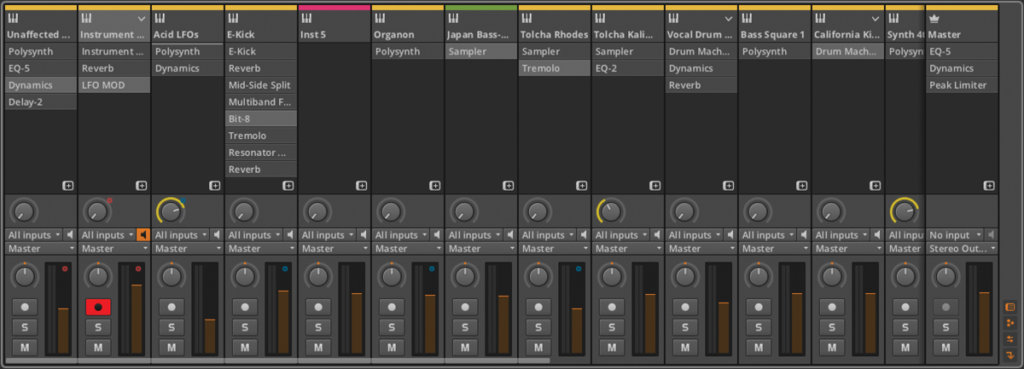
The mixer view is a welcome separate feature which is easily enabled via F4 or the M key. Devices can be dragged and dropped to re-order them and see what’s on each channel at any given moment.
Arrangement and Editing
Audio clips can be sequenced as you’d normally expect in the arrangement view, but they can also be sequenced within container clips like Cubase’s Audio Parts functions. So there are two methods of workflow and the container option is very handy for grouping and managing small sections of audio like sequenced drum hits.
At first it seems that audio events are quite limited for in-depth editing, i.e. you can’t add user defined fades to the start or end of a clip. But it turns out that this is just for the arrangement view as an automation line that represents gain expression can be modified in the editing window. This offers a great level of detail, but does miss the simple and quick option of having a basic curve handle to drag for start and end fades on the clip itself. Cross-fading between clips is also missing, but we imagine Bitwig will be adding this soon as it makes audio compiling very difficult.
Bitwig Studio’s Slice to Drum or Multisample function is quite advanced. As well as the usual options to slice up audio into slices of an equal division or by transients within the material, there’s a whole heap of places in the audio chain where you can pre-bounce the audio before it’s sliced up. Normal bounce functions can be used to replace an instrument with rendered audio, or a new track can be created for the audio to keep the original instrument in place.
Automation editing is clear to read and edit but again, misses out on the finer details, i.e. anything more than anchor point editing, drawing shapes or creating curves from between two anchor points. Some shape drawing tools would be great here like Cubase’s line styles much like how LFO modulation works. You can of course use a modulation device like Bitwig’s LFO, but this can only be used as a real-time assignment as the modulated movements of a parameter cannot be recorded as automation. Automation lanes however can be viewed in both the arrangement view and clip launcher which is very useful for knowing what’s happening at a glance.
A more detailed review of Bitwig Studio is in the next issue of MusicTech on sale 17th April where we look at many more of the software’s features (including Hybrid Tracks and micro-pitch options).