Recording Drums Tutorial
Achieving a well-balanced drum recording is something that every engineer aspires to – but how exactly is it done? John Pickford shares the knowledge.

The Right Kit
No matter what you’re recording, you need the right tools for the job. Take into account the style of music that will be played and the desired drum sound. If, for example, you want a big, punchy rock drum sound you’ll need a suitably sized and prepared kit. You won’t achieve that sound with a small under-damped jazz kit irrespective of how you go about mic’ing and processing it. Make sure that the basic sound of the kit is right for the project in the first place, and if it isn’t, try to get hold of a more suitable one.
Preparation
Once you’ve got the right style of drum kit, make sure that it’s sounding good in the room before you start mic’ing it up. Establish if any parts of the kit are not going to be played on the tracks to be recorded and, if possible, remove them. There’s no point spending time mic’ing-up a rack tom if it’s not going to be used. However, the drummer may feel uncomfortable if elements of the kit are missing, so try to strike a happy balance. Listen out for any unwanted rattles or squeaky pedals before you surround the kit with microphones. Hopefully, the drummer will have taken care of these considerations before entering the studio and wasting valuable recording time.
Tuning
Tuning drums is something of an artform in itself and unlike, say, the tuning of a piano, there is no universal pitch used by all drummers. Without going into detail, here are some basic techniques to get you started. Tap around the circumference of the drum head near to the tuning lugs to ensure that the tone is consistent at all points and adjust as necessary. It’s worth remembering that if both the top ‘batter’ head and bottom ‘resonant’ head are tuned to the same pitch, the sound will be louder and more resonant than if one is tensioned higher than the other. If the whole drum needs adjustment, there are established tuning paths that are preferential to simply proceeding clockwise around the head, as shown below.


Microphone Types
Mic’ing approach
Phasing Issues
Take care when using a large number of microphones as phasing issues can arise as a result of the sound reaching the various mics at different times. This can be particularly noticeable when using two mics to capture the sound of one particular drum �– mic’ing both the top and bottom of a snare drum, for example. Invert the polarity on one of the channels when this method is employed. The distance between the overhead mics and bass drum mic can also cause phasing problems, so it’s worth checking the phase on these channels as out-of-phase signals lack weight and punch.
Overhead Mics
One of the most common mistakes made by novice engineers when recording a drum kit is to consider overhead mics purely as cymbal mics; it’s a schoolboy error. Ideally, the overhead microphones (or single microphone if a monophonic kit sound is desired) should capture the fundamental sound of the entire kit. A spaced stereo pair is arguably the most common overhead mic’ing technique, although coincident mic’ing – sometimes referred to as a crossed pair – is also an effective way of achieving a good stereo kit sound. If you want to capture more of the room sound, position the overhead mics higher above the kit.
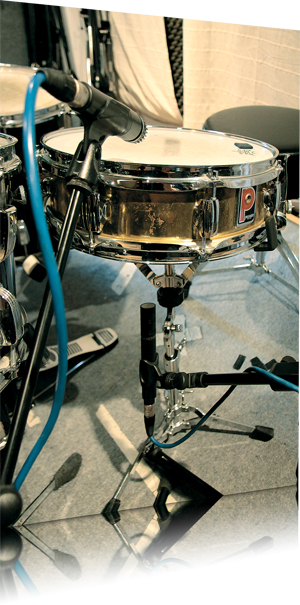
Single-Mic’ing Snare Drums
Along with the bass drum, the snare drum is the most important element of the kit’s sound, and opinions differ sharply as how best to record it. When a single, close microphone is used to capture the sound, a dynamic type is usually the preferred choice, with many engineers opting to use the ubiquitous Shure SM57 positioned over the top of the drum. It’s common to position this mic so that it’s pointing somewhere between the rim and the centre of the drum head, angled slightly downwards. Depending on the desired sound, the distance between the mic and drum can vary from just an inch or so to around seven or eight inches. Very close-mic’ing can produce a rather boxy sound due to the bass lift caused by the proximity effect.
Mic’ing Bass Drums
Some microphone manufacturers make dedicated dynamic bass drum mics, such as the industry-standard AKG D112 (pictured). Position the microphone off-centre for best results and experiment with differing distances from the drum. A popular technique is to use a dynamic mic inside the drum close to the batter head, with a large-diaphragm condenser mic placed outside the drum. Some engineers like to use an additional mic on the batter head to further emphasise the click of the beater. Remember to check the phase if you’re using more than one mic.

Multi-Mic’ing Snare Drums
While some engineers will only ever use one microphone over the snare, others like to place a second microphone – often a small-diaphragm condenser – underneath the drum to emphasise the rattle of the snares. It’s better not to position the bottom mic too close to the snares as this can produce an artificial sound. To minimise spillage from the bass drum, point the mic away from it and roll-off some low-end frequencies. Another useful snare mic’ing technique is to point a mic towards the shell of the drum at a distance of between around five to eight inches. This is a good way to capture the natural sound of the drum, especially if you use a good condenser mic with a flat frequency response.
Bass Drums
Also commonly referred to as the kick drum, engineers will often go to considerable lengths to create the ‘ultimate’ bass drum sound. Sometimes the front (resonant) head is removed completely in order that a microphone can be placed inside the drum, although these days many resonant bass drum heads feature a hole for the same purpose. Making a hole in the resonant head avoids the rattles from unused lugs that often occurs if the head is removed completely. You also retain some of the sonic properties of a double-headed drum this way.
Tom Toms
In the case of a well-tuned and nicely balanced kit, a lot of the tom sound will be picked up by the overhead mics. However, if a more upfront sound is required, individual close mics can be employed in a similar way to the overhead snare approach. Clip-on mics, such as the Sennheiser e904 (pictured), specifically designed for toms are a popular choice, and have the additional benefit of not requiring microphone stands. If the tom tom does not have a bottom head, a mic placed inside can produce a nice, rounded tone with good separation.

Damping
Although it’s usually better to tune out any unwanted ringing before resorting to damping, a touch of damping can produce a good recorded drum sound. It’s common to find bass drums with blankets or pillows stuffed inside them, and Ringo Starr often covered his tom toms with tea towels to achieve a very dry sound. Various damping accessories – such as O-Rings, for example – are available these days, although good old gaffer tape is still a common way of combating nasty rings. Remember, though, that over-damping will reduce the loudness of the drum, and what might sound like an overly resonant drum in isolation may well sound fine when mixed with other instruments.
Cymbals
It’s rare to find dedicated spot mics on crash and ride cymbals – the main overhead mics should pick up plenty of cymbal sound. Similarly, the hi-hats often don’t need a dedicated microphone; however, on occasions when a close-mic’ed hi-hat sound is desired, the best choice of microphone is a small-diaphragm condenser. Very close-mic’ing hi-hats isn’t a good idea; leave a gap of at least seven or eight inches and angle the mic away from the kit to achieve good separation. A hyper-cardioid microphone is a good choice for this application.
Screens and Booths
If you are recording drums live along with other instruments, such as bass and electric guitar, it’s a good idea to place screens around the kit as well as the amplifiers in order to minimise spillage. Many top studios have dedicated drum isolation booths, and although screens and booths can be bought, they are usually quite expensive. If you have the ability to construct your own screens from wood and other materials, keep one side hard and reflective while making the other absorbent with foam and/or fabric. This will give you the option of creating either a bright or dry sound.
Room Mic’ing
When recording drums in isolation, it can be useful to set up a mic some distance away from the kit to capture the sound of the room. The ideal distance for the room mic will depend on the size and liveliness of the room. This technique can add a sense of depth, as well as ambience to the kit sound. A stereo pair of mics can also be used for this effect. Try spacing the mics so that they are one or two feet wider than the kit. Panning the two room-mic channels can produce a very good stereo image.
Bass Drum Tunnels
A technique that can produce great results is to construct a ‘blanket tunnel’ extending from the bass drum. This helps to isolate the drum from the rest of the kit, as excessive spillage – particularly from the cymbals – can cause problems later if heavy processing (using EQ or compression) is applied during the mixing stage. This technique usually produces a nice, tight and dry bass drum sound, as well as providing good separation. Nirvana producer Butch Vig constructed a different kind of drum tunnel from several bass drum shells to create the kick sound on the group’s classic Nevermind album.

Glyn Johns Technique
Glyn Johns is a world-class engineer/producer who has recorded many legendary drummers – John Bonham and Keith Moon to name just two. His stereo technique relies on just three or four mics; however, it’s the positioning of the two main kit mics that is crucial. The first mic is positioned directly over the snare drum, pointing down towards the centre at a height of about three to four feet. The second mic is positioned just above the rim of the floor tom, pointing towards the snare and hi-hats. This mic must be placed exactly the same distance from the centre of the snare drum as the first mic. These mics can then be panned, leaving the snare drum centrally placed. A bass drum mic is usually employed and sometimes a spot-mic on the snare drum.

Natural and Artificial Reverb
When you are record drums in a reverberant room – a concrete room, for example – the natural reverb can be enhanced by heavily compressing the room mics. Plate and spring reverbs were traditionally used for drum ambience, and these settings, along with many other ‘room sounds’, can be found in the digital domain. For that big 1980s snare sound, try a gated reverb setting, giving you a blast of ambience with a sharp reverb-tail cut-off and no natural decay.
Compressing Drums
Most drum sounds in popular recording feature some degree of compression. When you’re recording the kit, it’s best to go easy and maybe just compress the bass and snare drums a little to even things out. More obvious compression effects can be created at the mixing stage. A good, punchy sound can be achieved by using a medium attack time and fast release time. Very fast attack times will blunt the transient response and lose crispness. The amount of compression used is very much a matter of taste. Parallel compression techniques offer a good way of comparing and blending heavily compressed sounds with the natural sound of the kit.
Drum EQ
As with compression, EQ is often best left to the mixing stage, when all of the elements of the track are in place. As a basic guide, bass drums often benefit from a slight boost around 80–100Hz, and a low-mid cut somewhere around 400Hz; a boost somewhere between 2–4kHz can bring out the click of the beater. A good, fat snare sound can be achieved with a boost around 240Hz, and another lift around 5kHz will help it to cut through a mix. High-pass filters (except for the bass drum) can be useful for creating space within the track, but, as always, experiment.
Drum Gating
Noise gates can be used in all sorts of ways on drums, from cleaning and tightening-up individual tracks to triggering other sounds. An in-depth look at gating techniques is beyond the scope of this article; however, a basic rule is to leave gating to the mixing stage. Gates are notoriously fiddly to set up accurately, and it takes only one failed trigger to completely ruin a take.
Analogue Tape
Most recordings these days are made in the digital domain, but when it comes to recording drums, the sound of analogue tape cannot be beaten. If you are lucky enough to possess an analogue multitrack, drum sounds can be enhanced by recording ‘hot’, with lots of level to slightly saturate the tape. This provides a degree of compression on the transients that has a very pleasing effect on the overall sound. Various bits of outboard kit and software is available that goes some way towards re-creating the effect.
Percussion
Apart from the drum kit itself, many recordings feature the sound of other percussive instruments. Hand percussion, such as tambourines and shakers (maracas, eggs and so on) can add a bit of sparkle to a production and are best recorded with a condenser mic with an extended top-end response, and using a high-pass filter. A distance of about 12 inches is a good starting point. Pairs of congas and bongos can be recorded with a single, centrally paced mic a few inches above the rim, much like a close-mic’ed snare drum.
Mixing
It’s tempting to go about a drum mix starting with bass drum, then snare, hi-hats, toms and so on. However, you’re better off starting with the overhead mic channels to get an impression of the overall sound of the kit. Once you’ve got a good basic kit sound, the close spot mics can be introduced one by one. You’ll almost certainly need some bass drum reinforcement and probably some snare drum, too. However, you might find that you don’t need those close tom mics after all. Listen to the drum sound within the context of the whole track before heavy processing, and do remember to check the phase.
This vid takes you through recording with 4 mics: