8 CPU Tweaks To Enhance FL Studio 20
Despite FL being one of the world’s most beloved DAWs, and now smoother than ever with the release of FL 20, there’s still a variety of tweaks and settings to make your FL experience even smoother. Leo Koenig explains… We all know the drill. You spend five to six hours on a new song, working […]
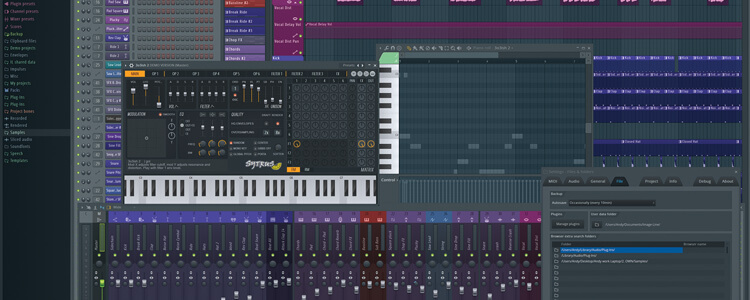
Despite FL being one of the world’s most beloved DAWs, and now smoother than ever with the release of FL 20, there’s still a variety of tweaks and settings to make your FL experience even smoother. Leo Koenig explains…
We all know the drill. You spend five to six hours on a new song, working away, everything’s fine and dandy, but then, all of a sudden, your beautiful work in progress is utterly disfigured by crackles, stutters, pops and dropouts. You hadn’t been looking at it, but the CPU meter is now peaking well in the red. Don’t fret. Happens to everybody. That’s why we’ve compiled a list of options you have short of upgrading your hardware when you’re in a CPU pinch in FL Studio 20.
First, let’s examine two common misconceptions around CPU usage in digital audio. The first one is often accompanied by the question ‘Why is FL’s CPU meter in the red, but my task manager only shows FL using 40% of my CPU?’. The answer is easy: Fl Studio does not actually measure regular CPU load. It measures how much time the computer needs to fill an audio buffer divided by the time span of a buffer.
That’s why, when the CPU meter hits 100%, there is just enough time to fill the buffer in the time of the buffer that is already playing. So if the CPU needs more time to fill the buffer than the actual buffer length, playback stops for a split second until the buffer is done rendering. This is what is commonly referred to as an under-run.
The second misconception disguises as a perfectly economic way to produce, but it really isn’t. I’m talking about bus and send processing. Mathematically, one single reverb on a send for five tracks should be more efficient than five individual reverbs, one for each track, right? Wrong. In sending audio from one place to the next digitally, you will always have to add everything in the chain up to that point. As soon as two audio signals end up in the same place, they need to be processed first before they can be summed, meaning that the shorter chain will have to wait for the longer chain to finish processing and eventually waste CPU power doing that.
How to Enhance FL Studio: step-by-step
1. Increase your ASIO buffer size
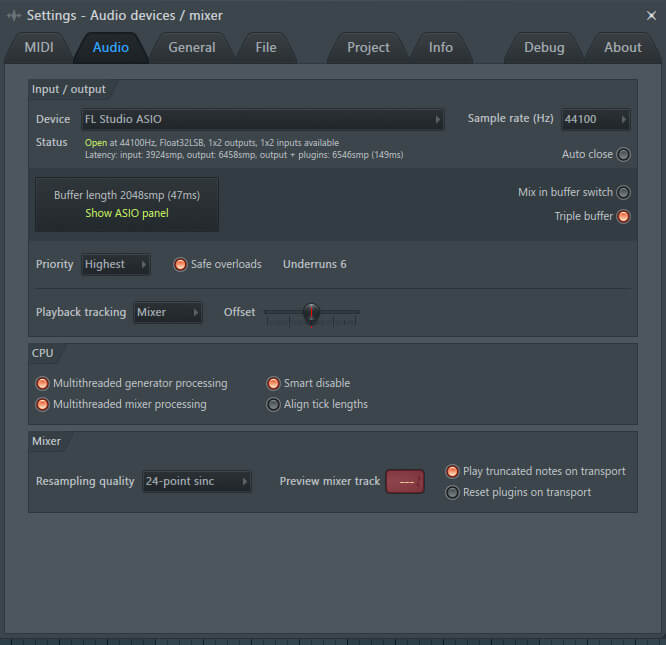
This may seem like a no-brainer for some people reading this, but I have to include it in the list for one main reason: FL Studio recently added a function to triple the buffer size, regardless of what the driver is set to, and there are some people who haven’t touched this option yet.
While you’re in there, make sure ‘Multi-threaded mixer processing’ and ‘Multi-threaded generator processing’ are turned on. Since it’s 2018, your CPU is probably a multi-core processor.
2. Live resampling quality

If you’re using a lot of Audio Clips and other sample-based native FL functions, turning this to the lowest available setting (2-point-linear) can free up some CPU headroom, at the expense of a crunchier, more old-timey sampler style playback in the preview (you can set a different resampling quality for renders).
3. Sample rate and oversampling
Try to keep the project sample rate at 44.1 or 48 kHz unless you absolutely need to make your dog go wild or record a flock of bats. Higher sample rates will mean larger CPU hit. Some audio interfaces will give you larger maximum buffer sizes at higher sample rates to compensate, but the resulting headroom is in no way proportional to the extra CPU use.
Usually, a lot of plugins will also have quality options that determine how much CPU they will consume. Listening back at the lowest setting is usually not the worst experience. Many stock FL Studio plugins have oversampling options built in, Sytrus f.e. has two: one for render and one for the live preview.
Try to keep oversampling to a minimum as it often more than doubles the CPU a plugin will use. If the plugin has a draft or economy quality mode, use it.
4. Smart disable
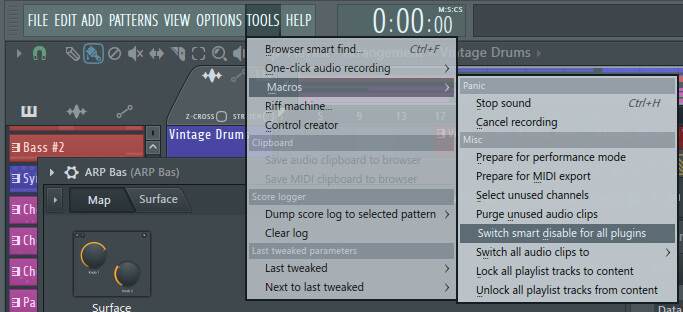
This is a feature that is so far unrivalled by any other DAW. Smart disable turns off the processing for the plugins that are not receiving or making audio for a certain amount of time, freeing up CPU based on whats in use at the playhead position.
So if you have run into the 100% CPU brick wall you can go to Tools->Macros->Smart disable for all plugins and watch the CPU meter drop, often to more than half of where it was before. Some plugins don’t play nicely with this feature, but it is a good go-to strategy nonetheless.
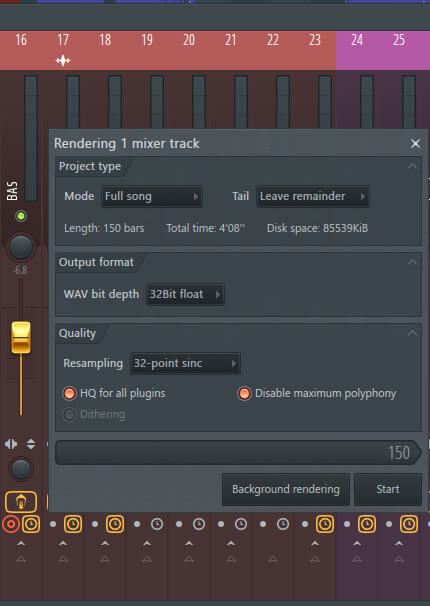
5. Freezing
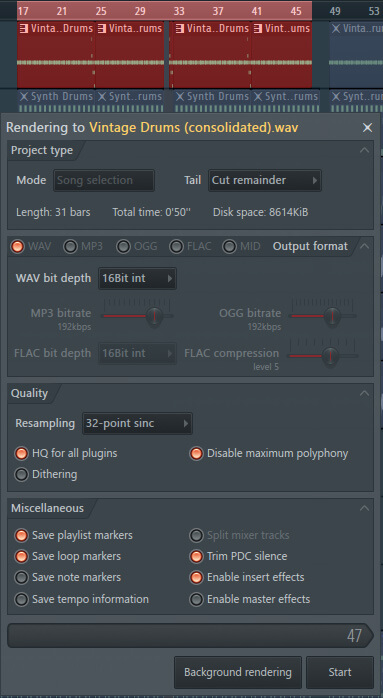
Playing a wave file uses almost no CPU, and with the advent of FL Studio 20 we got a new rendering function: Consolidate. This is a function that enables you to select any number of clips that produce audio in the project or a whole playlist lane and render them to a wave file.
It will essentially solo all the clips you selected or all the clips on the playlist lane and render that. Automation is kept on during the render, but dependencies in the mixer (like sidechains) are not rendered into the result. You can choose to consolidate pre-FX, pre-Master or through the Master chain.
To consolidate something, select a bunch of clips and press ctrl+alt+c for consolidate. When the render is done, the source clips will be muted.
You can also freeze using the mixer disk recording feature: When you have the mixer focused, the key combo alt+r will render any armed tracks to new audio files in your session, including sidechains, but not including routing destinations, so no bus or send effects will be in the render. This does not mute the source clips or instruments, so you will have to do that by hand.
6. Turning CPU Hogs into sampled instruments with DirectWave
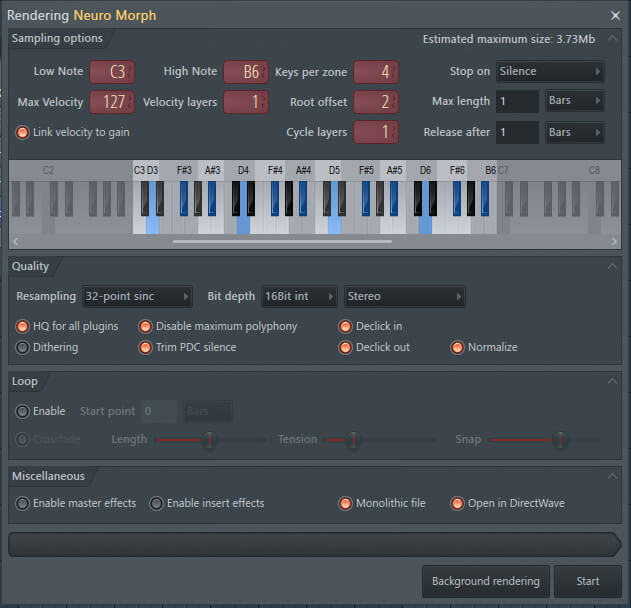
In the Channel context menu (right click a channel button), you have the option of making a DirectWave instrument out of the selected channel. This is helpful for when you know the CPU abuse is happening before the mixer, i.e. on the generator side of things.
You will first be prompted to save your .dwp file, which is the patch format for DirectWave, and then you will see a batch render window which allows you to set how deeply you want to sample your generator.
7. PPQ value
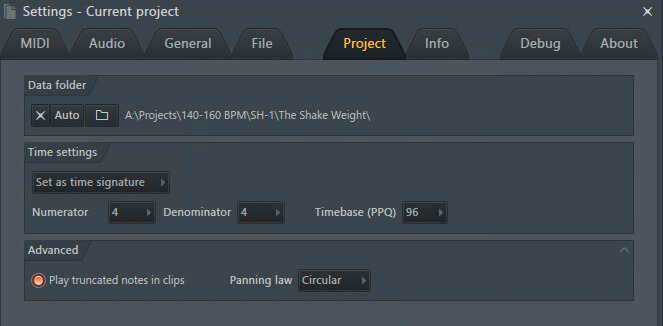
PPQ or points per quarter refers to the resolution of MIDI events and automation. Many things depend on this value, but the simplest way to think of it is like the „sample rate“ of automation. FL Studio, unlike other DAWs, lets you actually set the PPQ value yourself.
The default PPQ in FL Studio is 96, meaning that notes and automation point can be at 96 evenly spaced positions inside a quarter note. So it is BPM related, too. Turning this value down to 48 means you can’t zoom in as far, but it will free up a lot of CPU headroom. As soon as you get to 24 though, you might experience automations becoming ‘stepped’ – an unfortunate side effect of the reduced resolution.
8. Minimal use of mix buses and sends
Do you really need 15 different mix buses, all with 10 FX intertwined and sending to each other? If that’s you, that’s probably why your project is locked up. Don’t believe me? Save a new version of your project (ctrl+n) and in that copy, select all mixer tracks (ctrl+shift+click and drag) and then route to the Master only.
This forces all the inter-dependent tracks to be properly multi-threaded and therefore will most likely free up a bunch of CPU. This is why in my recent sessions I only ever have a drum bus and maybe a percussion bus, because my excessive bussing used to take up a lot of CPU headroom.
If you apply a combination of these techniques to your overloading project, you will considerably ease the strain your project puts on your CPU and hopefully be able to produce in peace. The good bit is: two of these processes, freezing and smart disable, are repeatable – so if you hit the brick wall again you can still render to wave and smart disable all the new plugins that you’ve added since last time.