Ableton Live Tutorial: Processing Your Beats – Part 2
In this continuation from Part One, Martin Delaney further explores the art of beat processing in Live… 7: Now you’ve created a melodic percussion part by tweaking your original beat. Live is great for recycling your audio and MIDI parts! It is definitely possible to make an entire tune from one source sample. 8: Uh, […]
In this continuation from Part One, Martin Delaney further explores the art of beat processing in Live…
7: Now you’ve created a melodic percussion part by tweaking your original beat. Live is great for recycling your audio and MIDI parts! It is definitely possible to make an entire tune from one source sample.
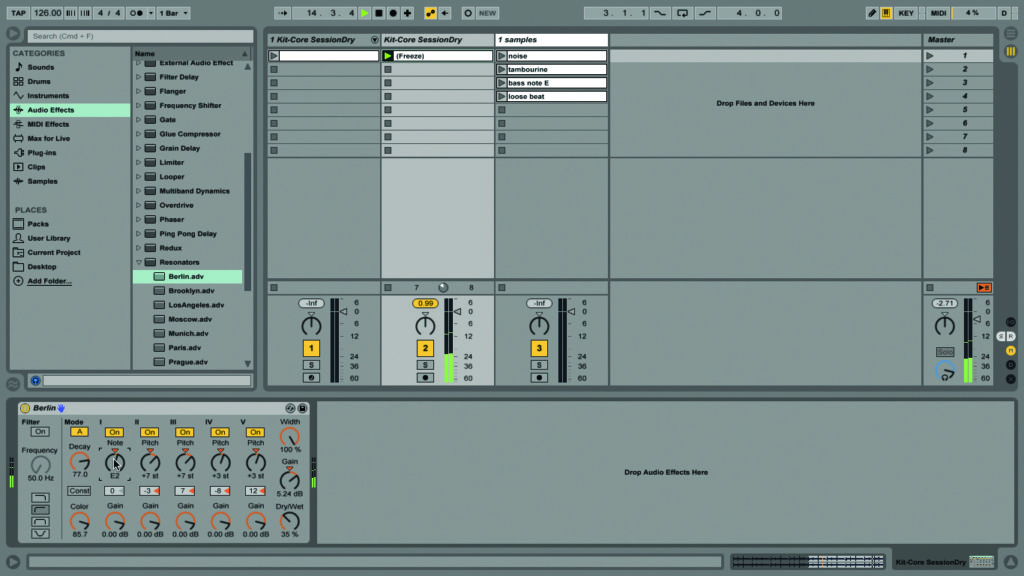
8: Uh, maybe we’re getting bored with the original beat now – it sounds quite flat against the Resonator percussion track. Let’s put it through the wringer taking it on a gratuitous journey of sonic dismemberment.
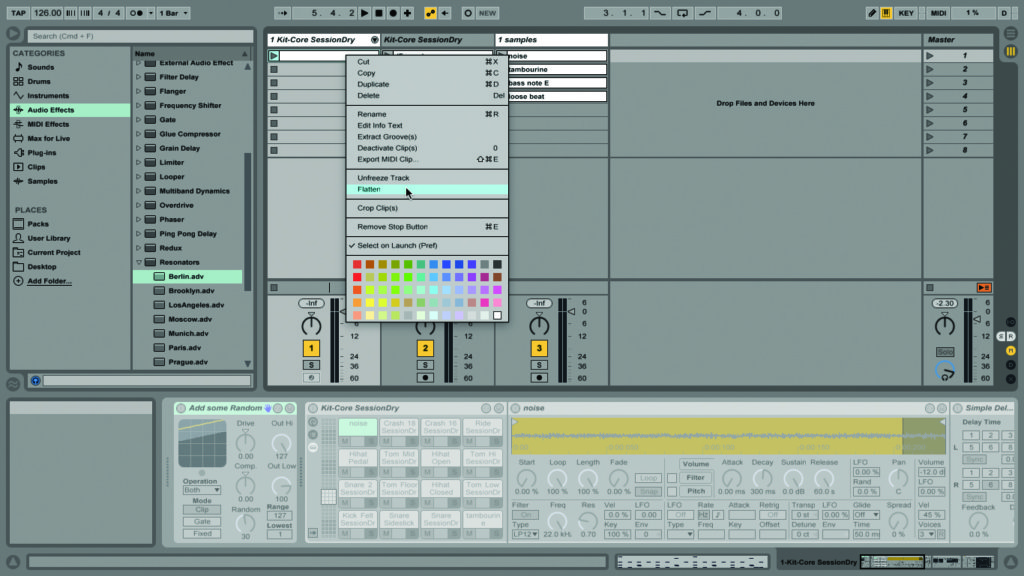
9: Right-click the track containing that original beat and choose Freeze Track. Right-click again and choose Flatten. The MIDI track’s disappeared! Freeze/Flatten is destructive – that’s why we copied the track when we did it before.
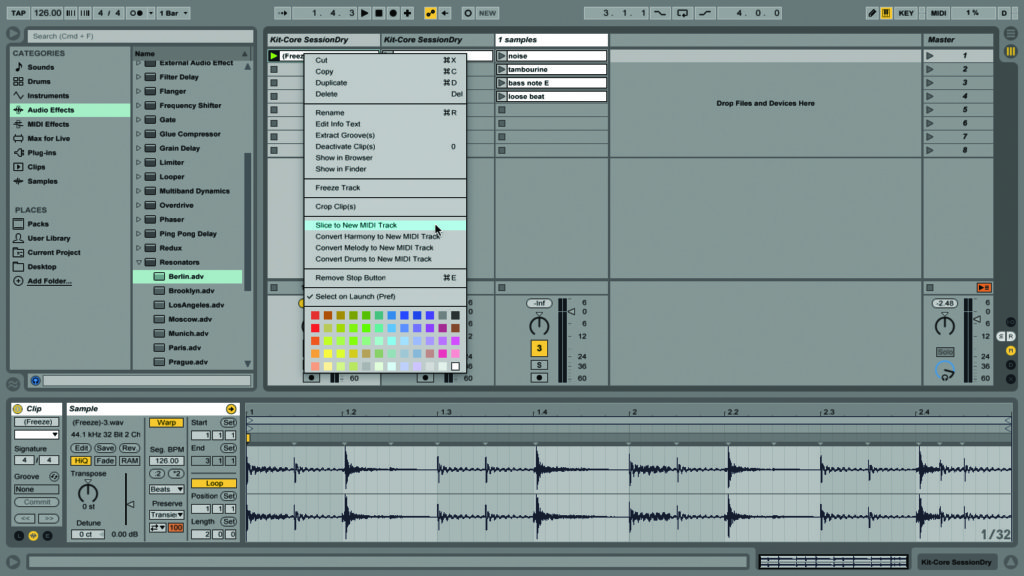
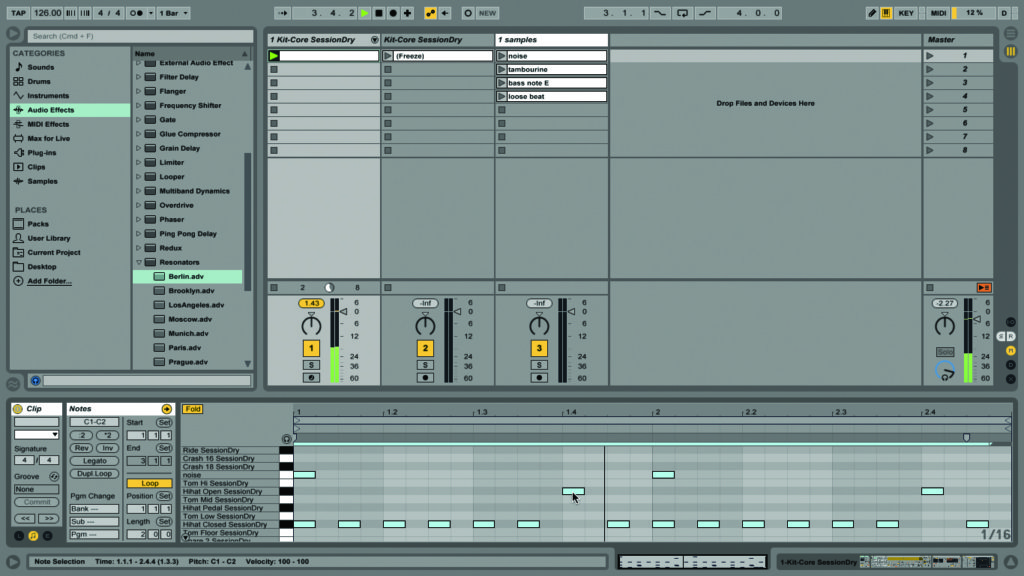
10: This is just a fun way to mess with your parts as we want a different vibe. Crop the new clip down to only two bars. Right-click on it and choose Slice To New MIDI Track.
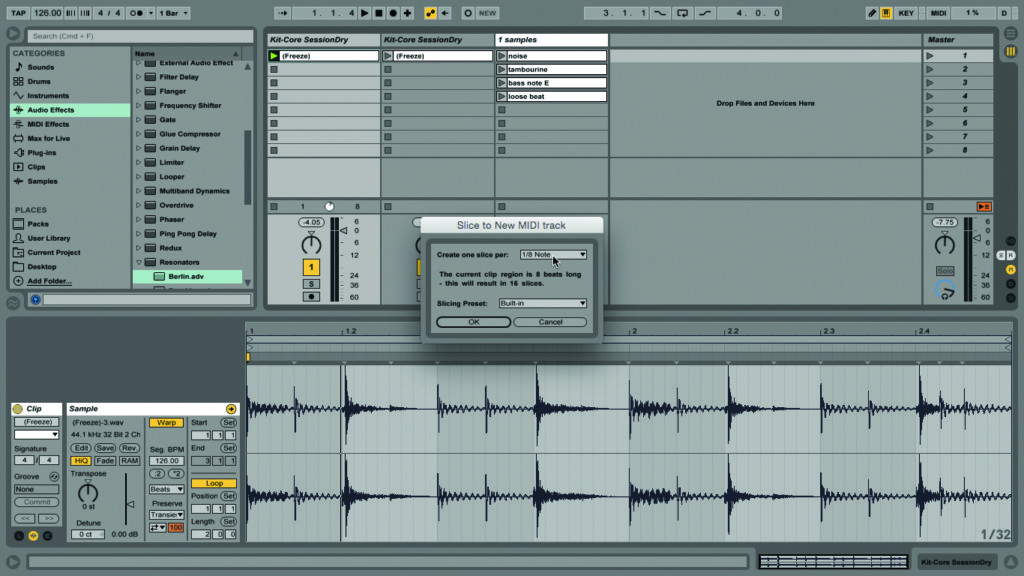
11: Choose the 1/8 Slicing option from the new window. Now you have a new MIDI track and clip. Perverse, isn’t it? Launch the clip – it should sound pretty much the same as the original.
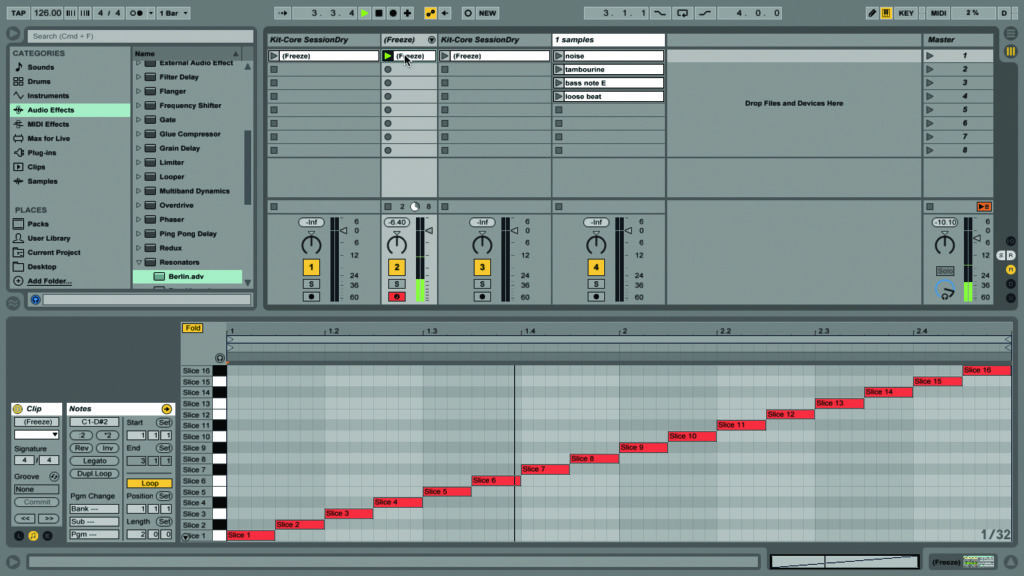
12: This operation has sliced the audio clip, and made a new drum rack, with a different instance of Simpler for each slice. It’s also automatically created a MIDI clip, with a note for each slice.

13: Audition the slices from your MIDI controller, or from your computer keyboard (Shift-Cmd-K to activate that), or enable Preview for the clip (the headphone icon) and click on each note to hear it.
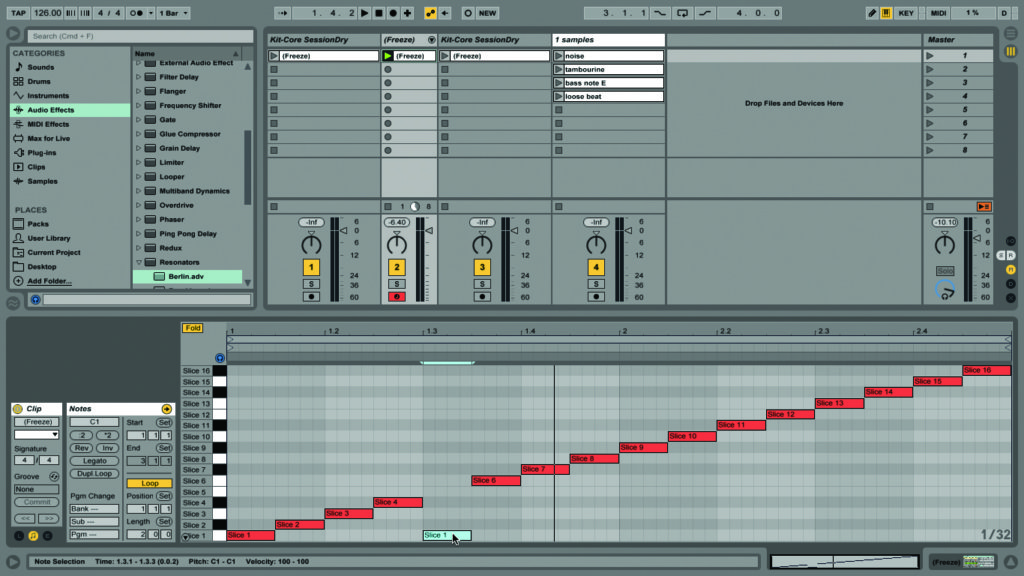
14: Effectively we’ve sampled ourselves. Experiment with dragging the notes around the editor grid, to see what happens; you can take any beat and reorganise it to fit your song, this is one of Live’s top features!
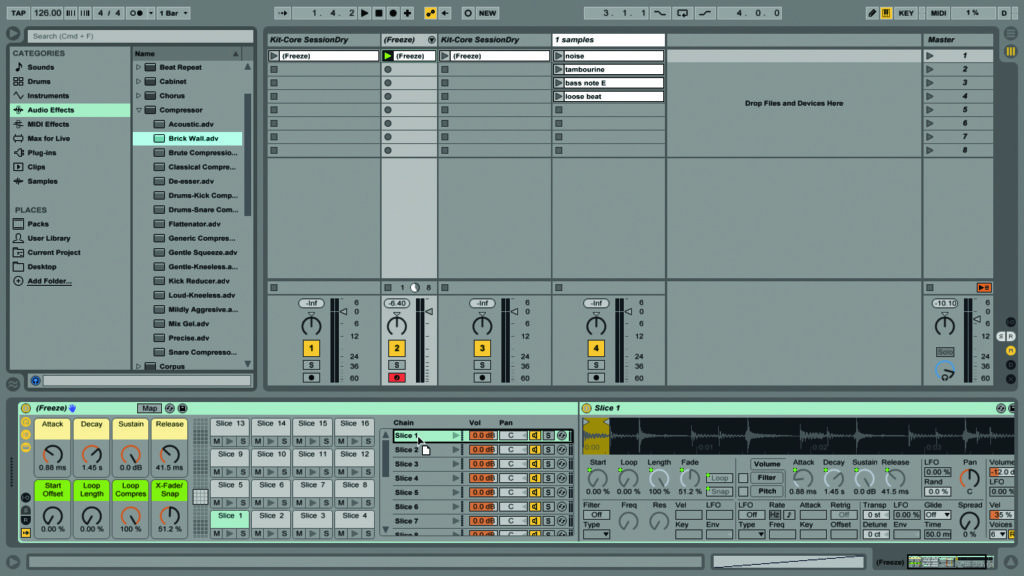
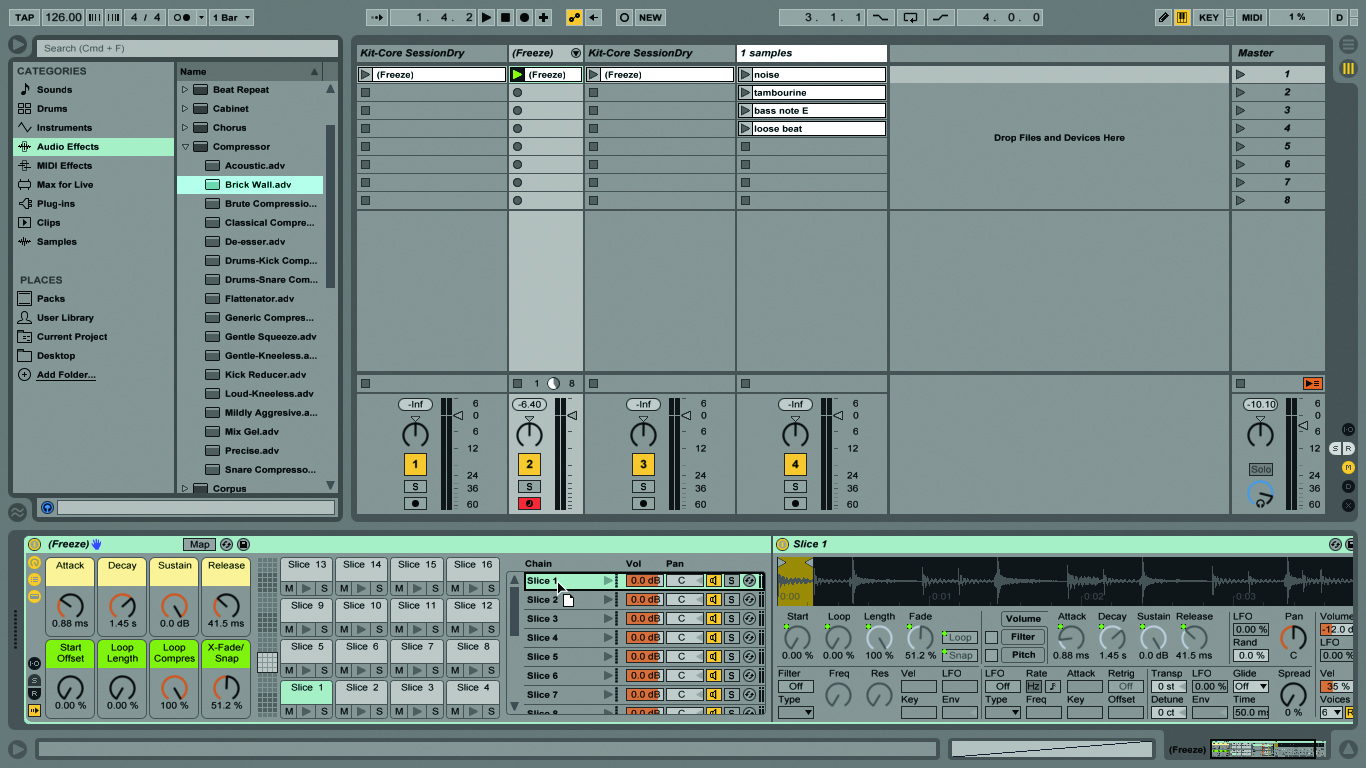
15: Not only can we reorganise the notes, we can tweak each slice. Give the kick a little bump by dragging the Compressor preset Brick Wall onto slices 1, 5, 9 and 13 in the clip.
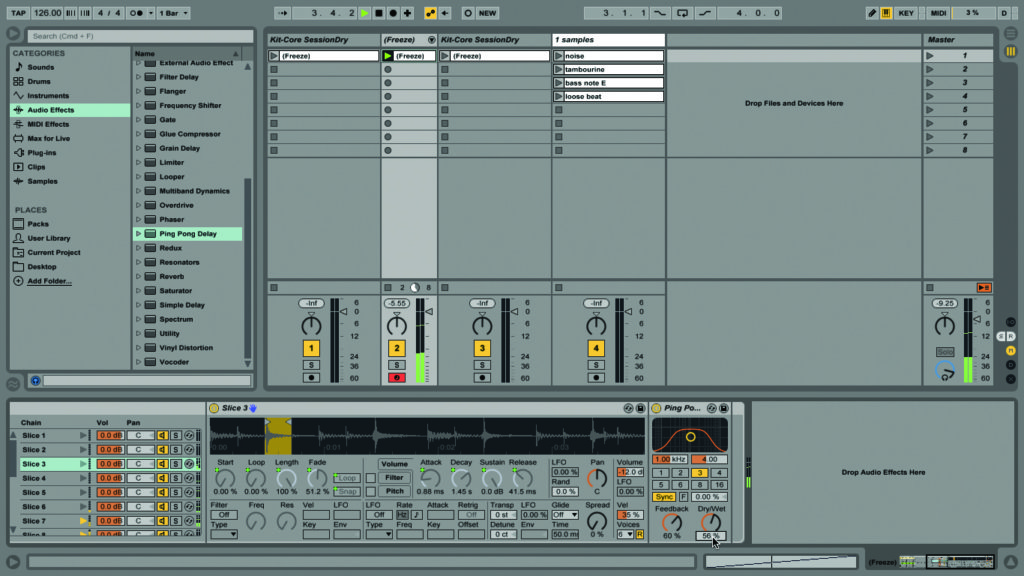
16: Now we turn our attention to the snare. Drag the Ping Pong Delay onto slice 3, the first snare in the clip. Wow! That’s too much. Dial the Dry/Wet control down to 30%.
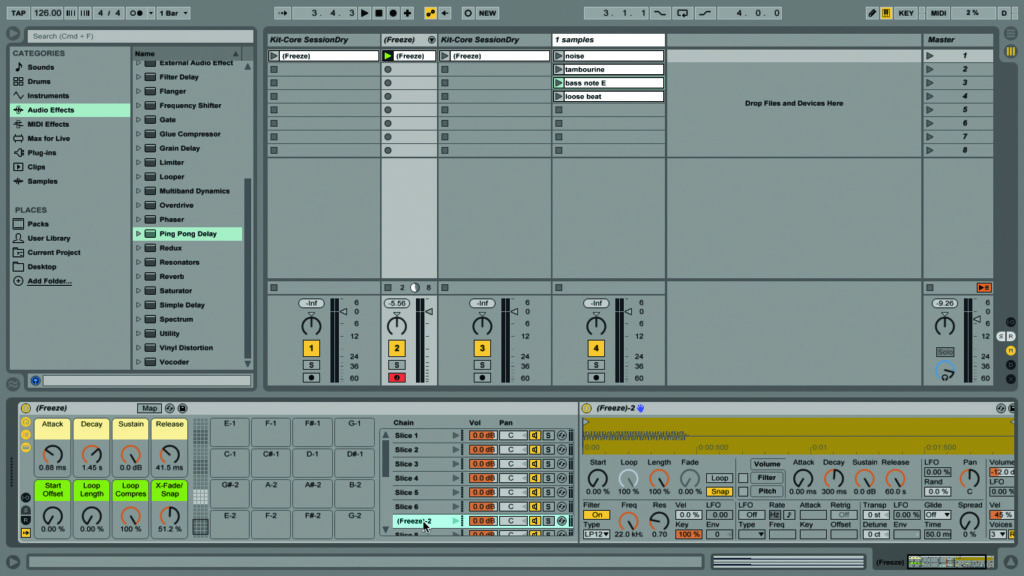
17: Delays are a great way to change the rhythm of your beats. Onwards. We have another sample, called ‘bass note E’. Drag it onto slice 7. It automatically creates a Simpler instrument to contain it!
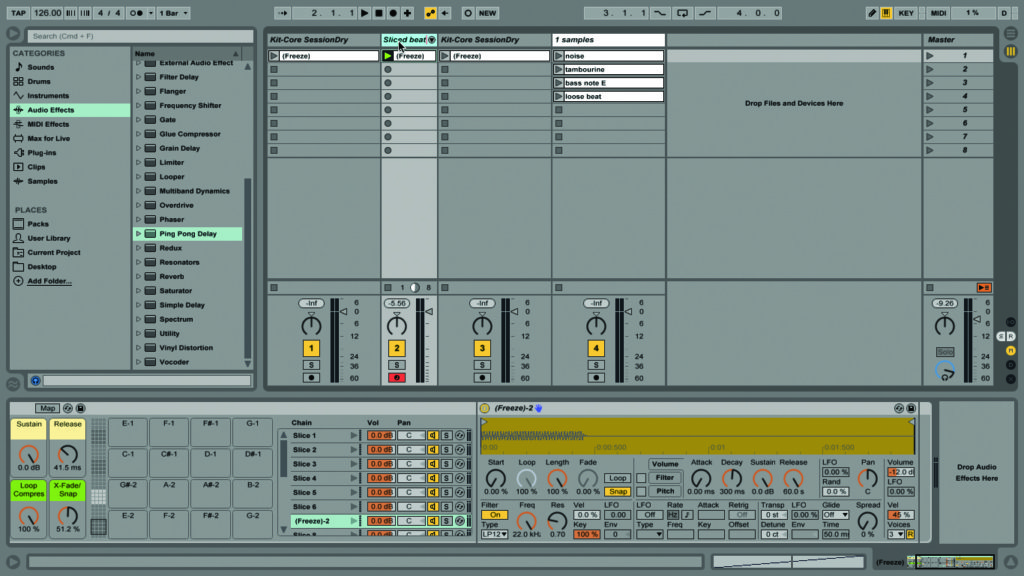
18: Doing that automatically replaces the original slice – now you have a bass note hitting alongside the beat. Click on the track name, type Cmd-R, and rename the track ‘Sliced beat’. That’s it for now.

