Ableton Live Tutorial: Audio Ins and Outs
Do you need more audio inputs and outputs for your Live rig? Before rushing out to buy another interface, make sure you’re fully exploiting what you already have… (Click images for larger versions) Sooner or later, we all have a moment when something changes unexpectedly in our studio or live setup; maybe we borrow a […]
Do you need more audio inputs and outputs for your Live rig? Before rushing out to buy another interface, make sure you’re fully exploiting what you already have…
(Click images for larger versions)

Sooner or later, we all have a moment when something changes unexpectedly in our studio or live setup; maybe we borrow a drum machine or synth from a friend, or somebody comes over for a jam, and suddenly the well-organised rig doesn’t quite have enough audio inputs or outputs to go round.
In the longer term, you can plan to buy another soundcard, or you can use external audio inputs on your hardware instruments, if they have any, and bodge something together that way. Either way, right there on the spot, you need something to make it work, and this is where aggregate audio devices come in, if you have an unused sound card lying around.
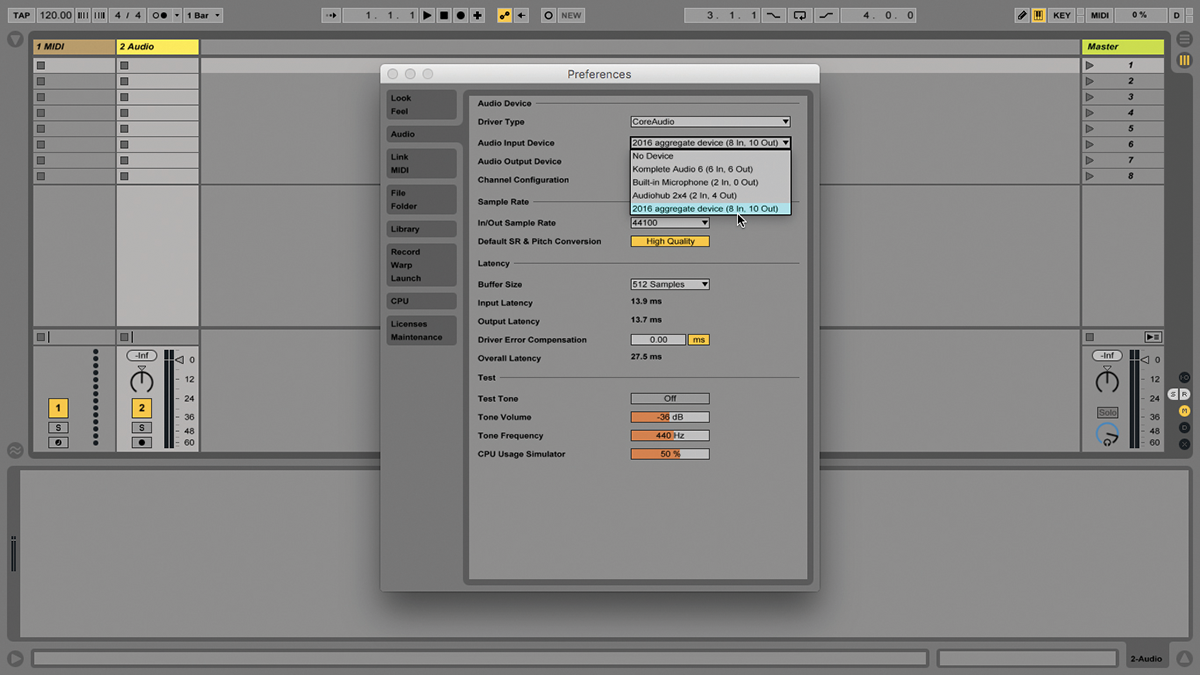
Under Mac OS X, we can combine two or more audio interfaces, including the one built into the computer, so that our favourite music software sees all of the connected physical inputs and outputs as one virtual device.
This device will be available system-wide for any software, including Ableton live and other DAWs. In some ways, you might think we’re not talking about an Ableton Live-specific topic here, but it’s incredibly relevant, because Live is at the centre of so many stage and jam rigs. The understanding of aggregate audio devices fits very neatly into that world, just as you ought to know how to ReWire different DAWs, how to use MIDI Sync, and so on.
Typically these days, we’d be using USB audio interfaces for this. It’s the most common form of connection for audio and MIDI peripherals, although FireWire is still around, and there are a few Thunderbolt interfaces available, like the Apogee Ensemble, and FireWire interfaces are still around – and FireWire is compatible with Thunderbolt if you have an adaptor. Just to be clear, when I talk about an audio interface, or a sound card, I’m referring to the same thing.
You can combine multiple devices to create the monster aggregate device of your dreams, although after a certain point, I’m not sure what’d happen regarding computer performance and latency – I don’t think I’ve ever gone further than two interfaces plus built-in audio.
I always make a point of using the mains power adaptors for any interfaces in these setups as well. The ability to create aggregate audio devices is built into Mac OS X, which is why this entire tutorial is Mac-only. OS X is very convenient for handling these audio tasks, as well as having deep MIDI routing capabilities also built in – like the ability to configure wireless MIDI networks.
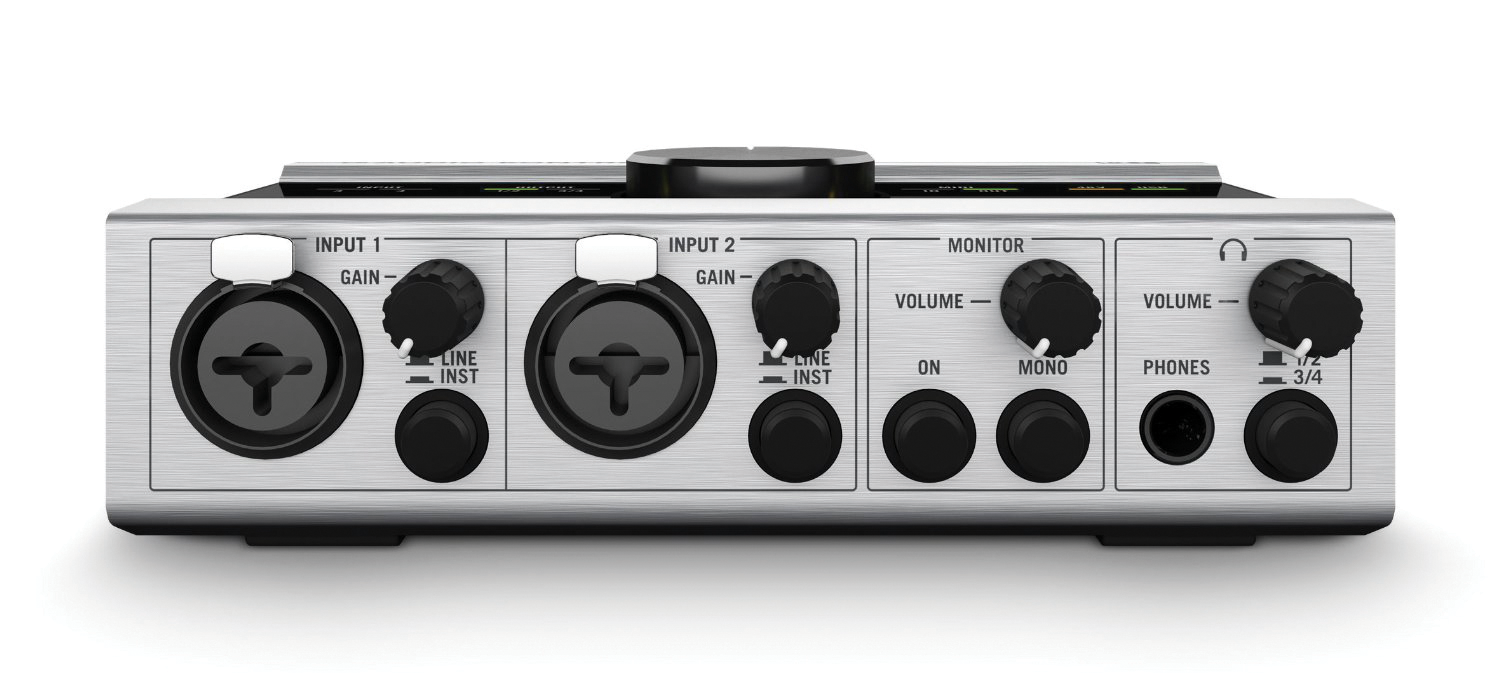
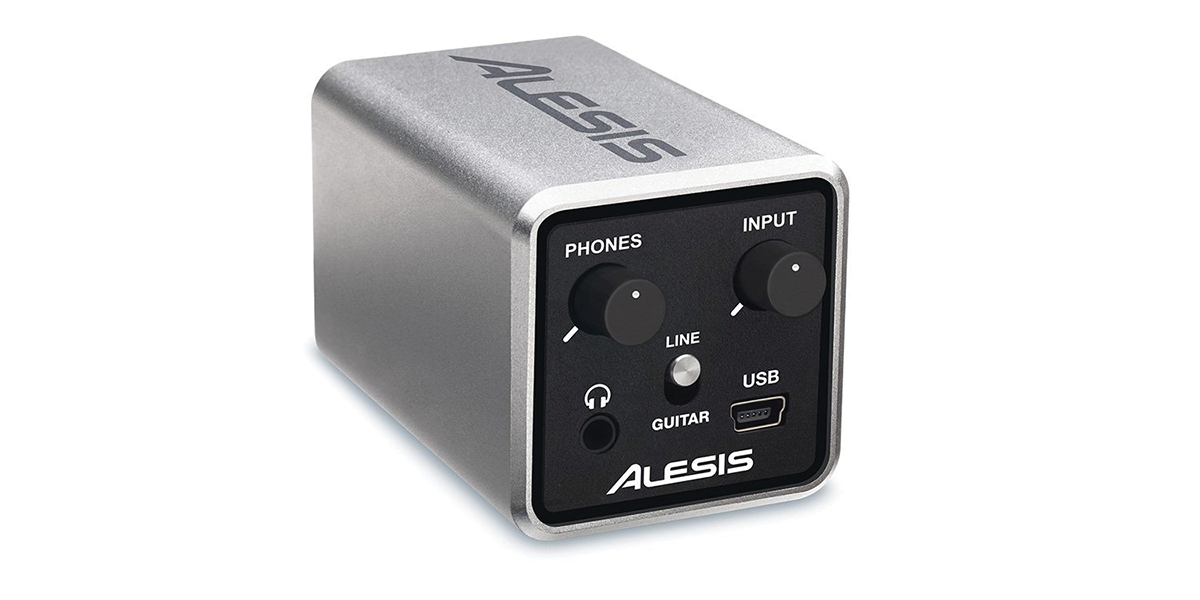
You can use little audio interfaces like the Alesis Core 1, right up to, for example, the RME Fireface UFX. Live won’t recognise a new aggregate audio device until it’s relaunched, so bear that in mind if you don’t see it listed in Audio Preferences. Talking of which, you’ll also have to visit Audio/Input Devices/Configure and Audio/Output Devices/Configure and enable every input and output that you want to use – which is probably all of them! After that, of course, they’ll all be available in in Live’s In/Out View.
How you use all those spare connections is up to you; one thing that comes to mind is routing out and back to external hardware synths and drum machines, especially if you’ve got something like a Machinedrum, which has six separate physical outputs…that’ll plunder your cable stash in double-quick time.
Same with audio effects – you can wire up a hardware reverb, or compressor, and create a convenient recall by using Live’s External Audio Instrument and Effect devices, effectively letting you include your hardware in chains of presets. By the way, the OS X Audio MIDI Setup utility is the most important place to view and troubleshoot your audio and MIDI routings, especially as Live users are so fond of using the IAC Driver to create weird audio setups, like sending MIDI out of Live and back in again.
A better long-term solution for this is to buy a soundcard with more inputs, and if that’s still not enough, combine it with a mic pre that connects via optical cables. Naturally, you’ll also have to make sure your main interface has optical connections, too.
If you take a Focusrite 18i20 for example, and you want to add eight more inputs to it, get a Focusrite OctoPre and connect them via optical. The 18i20 will appear to Live as usual, without any special configuration; it’ll just have more inputs. You can buy long optical cables as well, so the two units don’t have to be physically together. In my studio, I have a five-metre optical cable connecting a Ferrofish A16, positioned near the hardware synths, to the UFX which is positioned near the computer.
Aggregate devices aren’t always the most elegant long-term solutions. But if you have a spare interface lying around and suddenly you need… more, it gets the job done. Under Mac OS X, creating and managing aggregate devices is about as easy as it gets, and Live has no problem identifying and using them. Whether you’re going to use this on a day-to-day basis or not, it’s something to get familiar with in advance of the day when you might need it to get you out of a hole!
Focus On a Workaround or a Long-Term Plan

Is it worth buying another soundcard just so you can do this? Truthfully, I’d say no! I view aggregate audio devices strictly as a workaround for those situations where you’re caught short on the input front, like when there’s a gear failure in the studio, or you’re having a jam with a group of players and there simply aren’t enough physical inputs to do it properly. If you’re looking to expand on your available inputs long-term, a better option would be to add something that connects to your existing interface via an optical cable, like Focusrite’s OctoPre or RME’s OctaMic.
Step by Step – Aggregate Audio Devices
1: An aggregate audio device is a name for the connecting and configuring multiple hardware audio interfaces, so that they appear as one continuous set of inputs and outputs in software.
2: You’ll need a Mac running Live, and one or more audio interfaces, to follow our steps. Any relatively recent version of Mac OS X should do, and I’m afraid that, yes, this is Mac-only.
3: This can scale up from small to very big rigs. For starters, let’s say you want a simple DJ cueing setup, which requires two separate stereo outputs, but you only have a basic stereo soundcard.

4: You can combine your Mac’s headphone output with soundcard output to make a ‘virtual’ interface with two stereo outputs, and set them up so one outputs to PA/mixer, the other to your headphones.
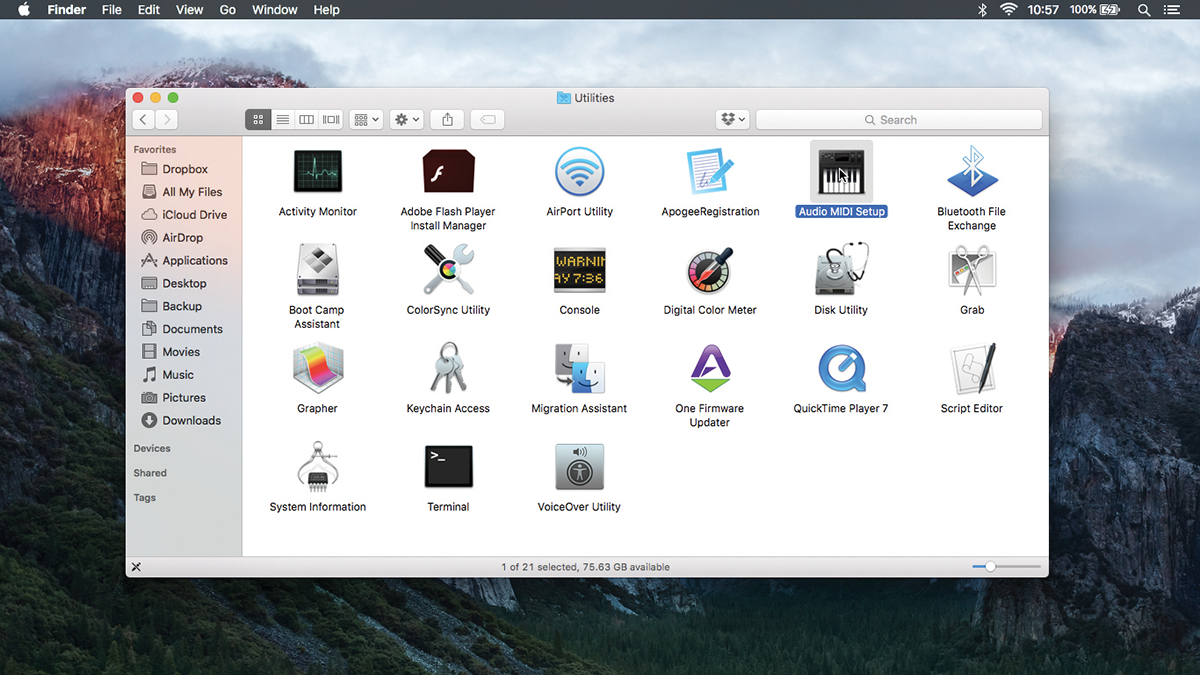
5: Make sure your soundcard is connected as usual – probably via USB. You don’t want Live open yet. Go the OS X Utilities folder, which is inside the Applications folder, and open Audio MIDI Setup.
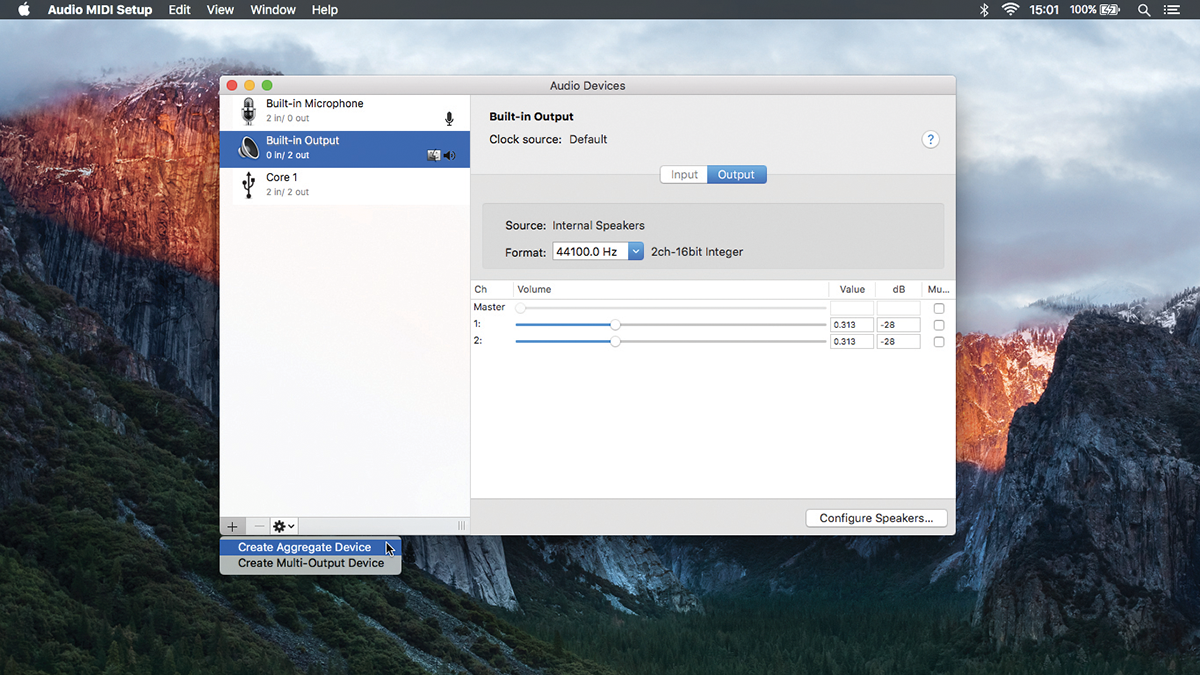
6: From the Audio Devices window, you’ll see a panel that lists all recognised interfaces and any existing aggregate audio devices. Click ‘+’ to add a new one, and rename it something sensible.
Click Here To Continue
