Using Ableton Live With Drum Machines
It’s so easy to get Live working with your favourite drum machine; Martin Delaney says you’re missing out if you don’t try it… It’s not so difficult to get Live talking to your music hardware. We’ve talked about this before, but here we’re focusing on drum machines, with two examples. First, the Elektron MachineDrum, originally […]
It’s so easy to get Live working with your favourite drum machine; Martin Delaney says you’re missing out if you don’t try it…

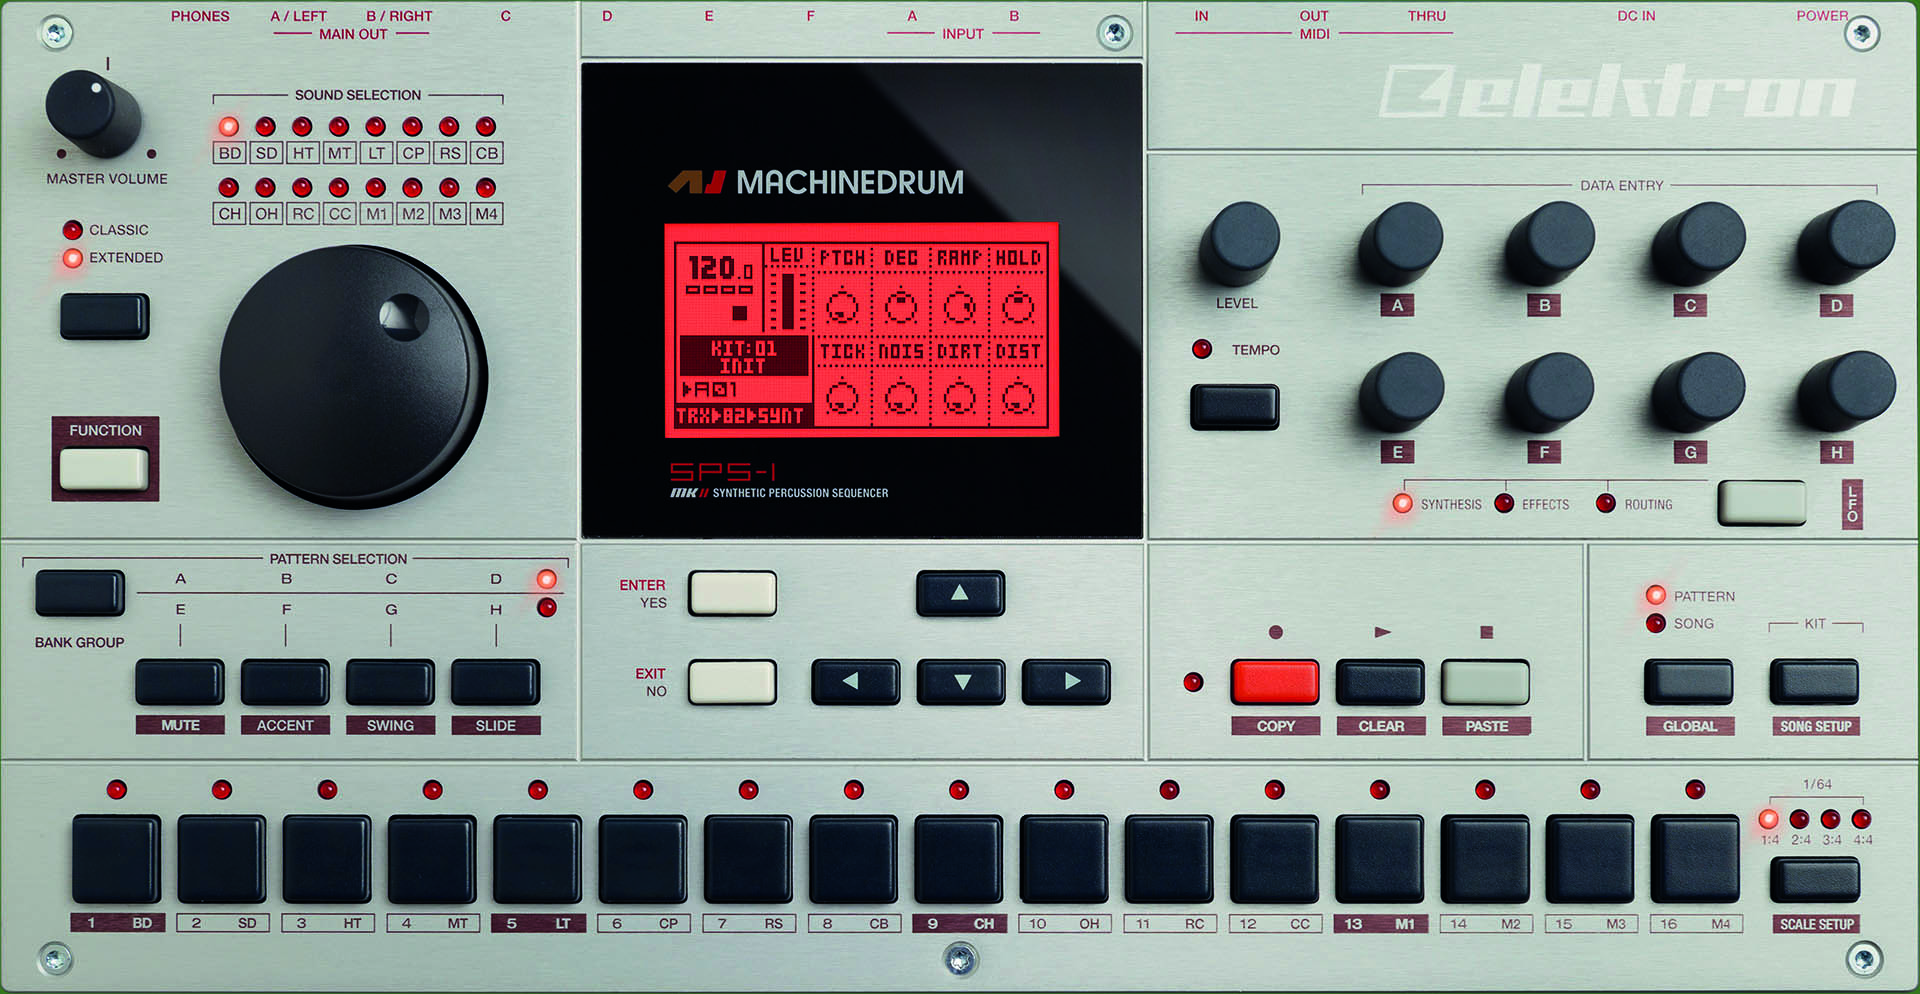
It’s not so difficult to get Live talking to your music hardware. We’ve talked about this before, but here we’re focusing on drum machines, with two examples. First, the Elektron MachineDrum, originally released in 2001 (updated in 2005) – its vintage shows in that it connects through audio and MIDI cables, and uses SysEx messages for backups and even sampling loading; not a USB cable or software editor in sight. Still, it remains one of the best drum machines ever built.
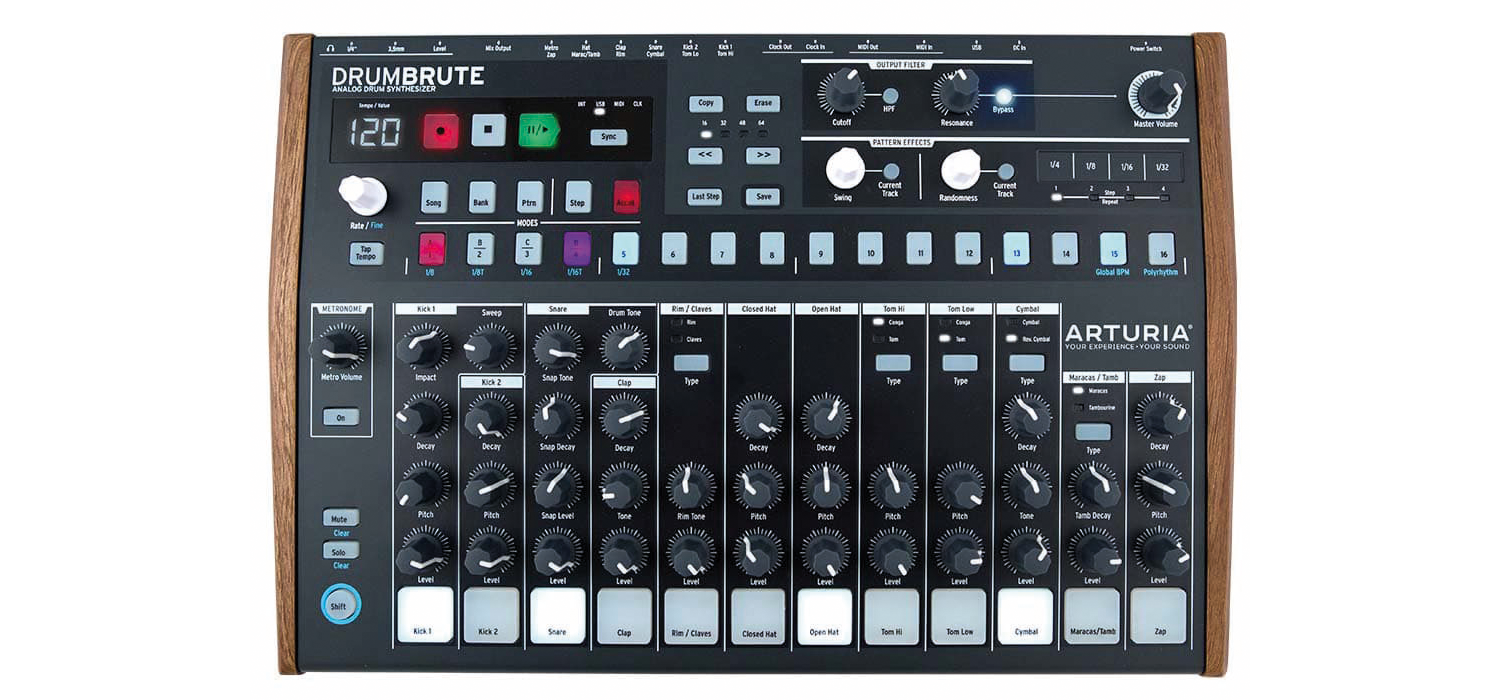
Second, we have Arturia’s DrumBrute, from 2016. Ironically, this machine is more ‘retro’ in some ways, being entirely analogue, with recallable patterns, but without automation or presets. However, it does have a USB connection (as well as MIDI ports), which can be used for MIDI sync, and to send notes out from the pads (it doesn’t do USB audio). It also connects to Arturia’s MIDI Control Centre software, which makes configuration and updates easy (more recent Elektron boxes like the Analog Rytm and Digitakt can send multi-channel audio over USB, via the Overbridge plug-in).
Not all audio interfaces include MIDI ports, so you might have to deal with that separately, with a dedicated MIDI interface, or USB, if relevant. Recently, I’ve been using the KMI K-Mix audio interface, which doesn’t have MIDI, so I use a USB cable to connect the DrumBrute, or the Elektron TM-1 USB MIDI interface for the MachineDrum.
Go hardware or go home
You might ask why anybody bothers with this kind of complicated arrangement, especially when Live includes perfectly good drum kits, and a hardware controller like Push can take care of the programming and control. This is perfectly sensible, and some prefer to keep everything in the DAW.

But a self-contained drum machine has more of an instrument vibe than a software/computer combo. Working with a dedicated control surface streamlines the user experience and standalone hardware provides security in case of computer failure… and just maybe, it sounds different, too.
After the physical hookups, you’ll need to configure MIDI in Live’s Preferences. Identify the MIDI port your drum machine is coming in on, and activate Sync, ensuring the outgoing Sync switch is off. With the MachineDrum and DrumBrute, and probably every drum machine out there, sync results are better if Live slaves to the hardware (having said that, if you want totally solid timing, the best solution is something like ERM’s Multiclock, which generates its own sync and shares it across several outputs).
Once you enable Live’s EXT button, the drum machine’s transport controls Live; but Live can still send MIDI messages the other way at the same time – if you enable Track and Remote Out in MIDI preferences, you can send MIDI notes, CCs, or program and bank changes. You’d use notes and velocity to play the sounds on your drum machine, CCs for parameter changes – effects depth, for example – and bank and program changes to load different preset kits or patterns. The MachineDrum, for example, can use either program changes or MIDI notes to load patterns.
What we get from this is the ability to process and mix individual drum-machine outputs, maybe even going as far as recording a few bars from one input and cutting it into loops while the others keep playing. The MachineDrum has six audio outputs, and the DrumBrute has 13. On the MachineDrum, you use a menu to select outputs, while the DrumBrute automatically detects when cables are connected (the DrumBrute, by the way, is defiantly mono – even the main output is a 1/4-inch mono jack!).
Then we use Live’s In/Out View to select the relevant tracks. If we want to just listen to and process the tracks we can set Monitor to In; to enable recording, click the track arm button instead. If you notice a timing disparity between your hardware audio and that from your Live clips, that’s latency. You can fix it by going into Audio Preferences and juggling Buffer Size and Sample Rate (Live has a built-in lesson that’ll help you deal with latency in more detail).
As you adjust these – do it while Live’s running – you should hear your computer and machine audio line up. I found that the MachineDrum, despite being older, needed less fiddling than the DrumBrute, but both were solid once configured. A great thing about this relationship is that we can launch clips or scenes in any order, and the drum machine always has the right kits and beats lined up.
You could use the drum machine as, basically, a sound module and program your beats inside Live, but to me, that makes the exercise less worthwhile – we want to keep the vibe of working with that dedicated hardware. I also like to know all of the beats are located on the drum machine in case something happens to the computer!
As far as effects go, I begin with EQ Eight, Limiter, and PSP VintageWarmer on every input – to compensate for the room sound, to contain volume levels, and to add some analogue warmth to the MachineDrum, which can sound quite clinical. On tracks 2 and 3, I’ll add delays, filters, and rhythmic effects such as Beat Repeat, often a few stacked in different configurations.
You can use Live’s External Instrument and Audio Effect Devices and racks to save any combinations for use in future Live sets. You could also create a template project that includes all of your drum routings. I never group these drum input tracks: I guess I just like to see them all separately, all the time – purely my own preference.
If you’ve got a drum machine, and you’re using Live, making a setup like this is a no-brainer – it’s totally worth the small effort it takes to get it going. Instead of having software, or a controller that’s trying to please everybody, you’ve got a dedicated control surface and focused range of sounds that are all about just one thing – drums.
Step by step: Welcome to the machines
1. We’re going to connect drum machines to Live. I’ll use the Elektron MachineDrum as an example of an older machine (2001), and the Arturia DrumBrute (2016) as a newer example.
2. To join in, you’ll need a drum machine, an audio/MIDI interface (and maybe a USB cable), and a computer running Ableton Live 9. You should probably have the drum machine’s manual handy as well.
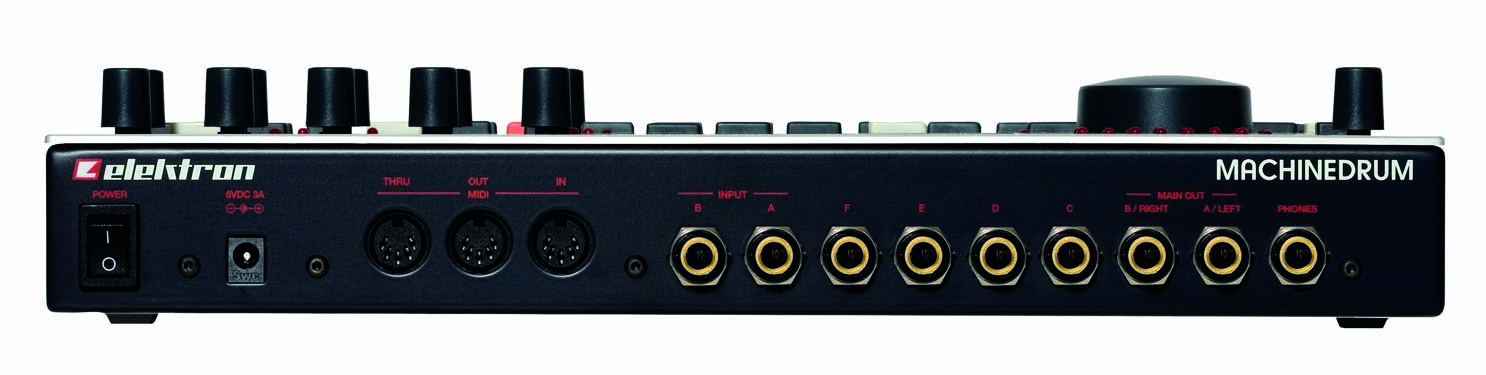
3. Using the MachineDrum, connect MIDI cables between it and your interface’s MIDI inputs/outputs. Connect audio cables from outputs A/B/C/D to your interface inputs. This’ll vary between setups.
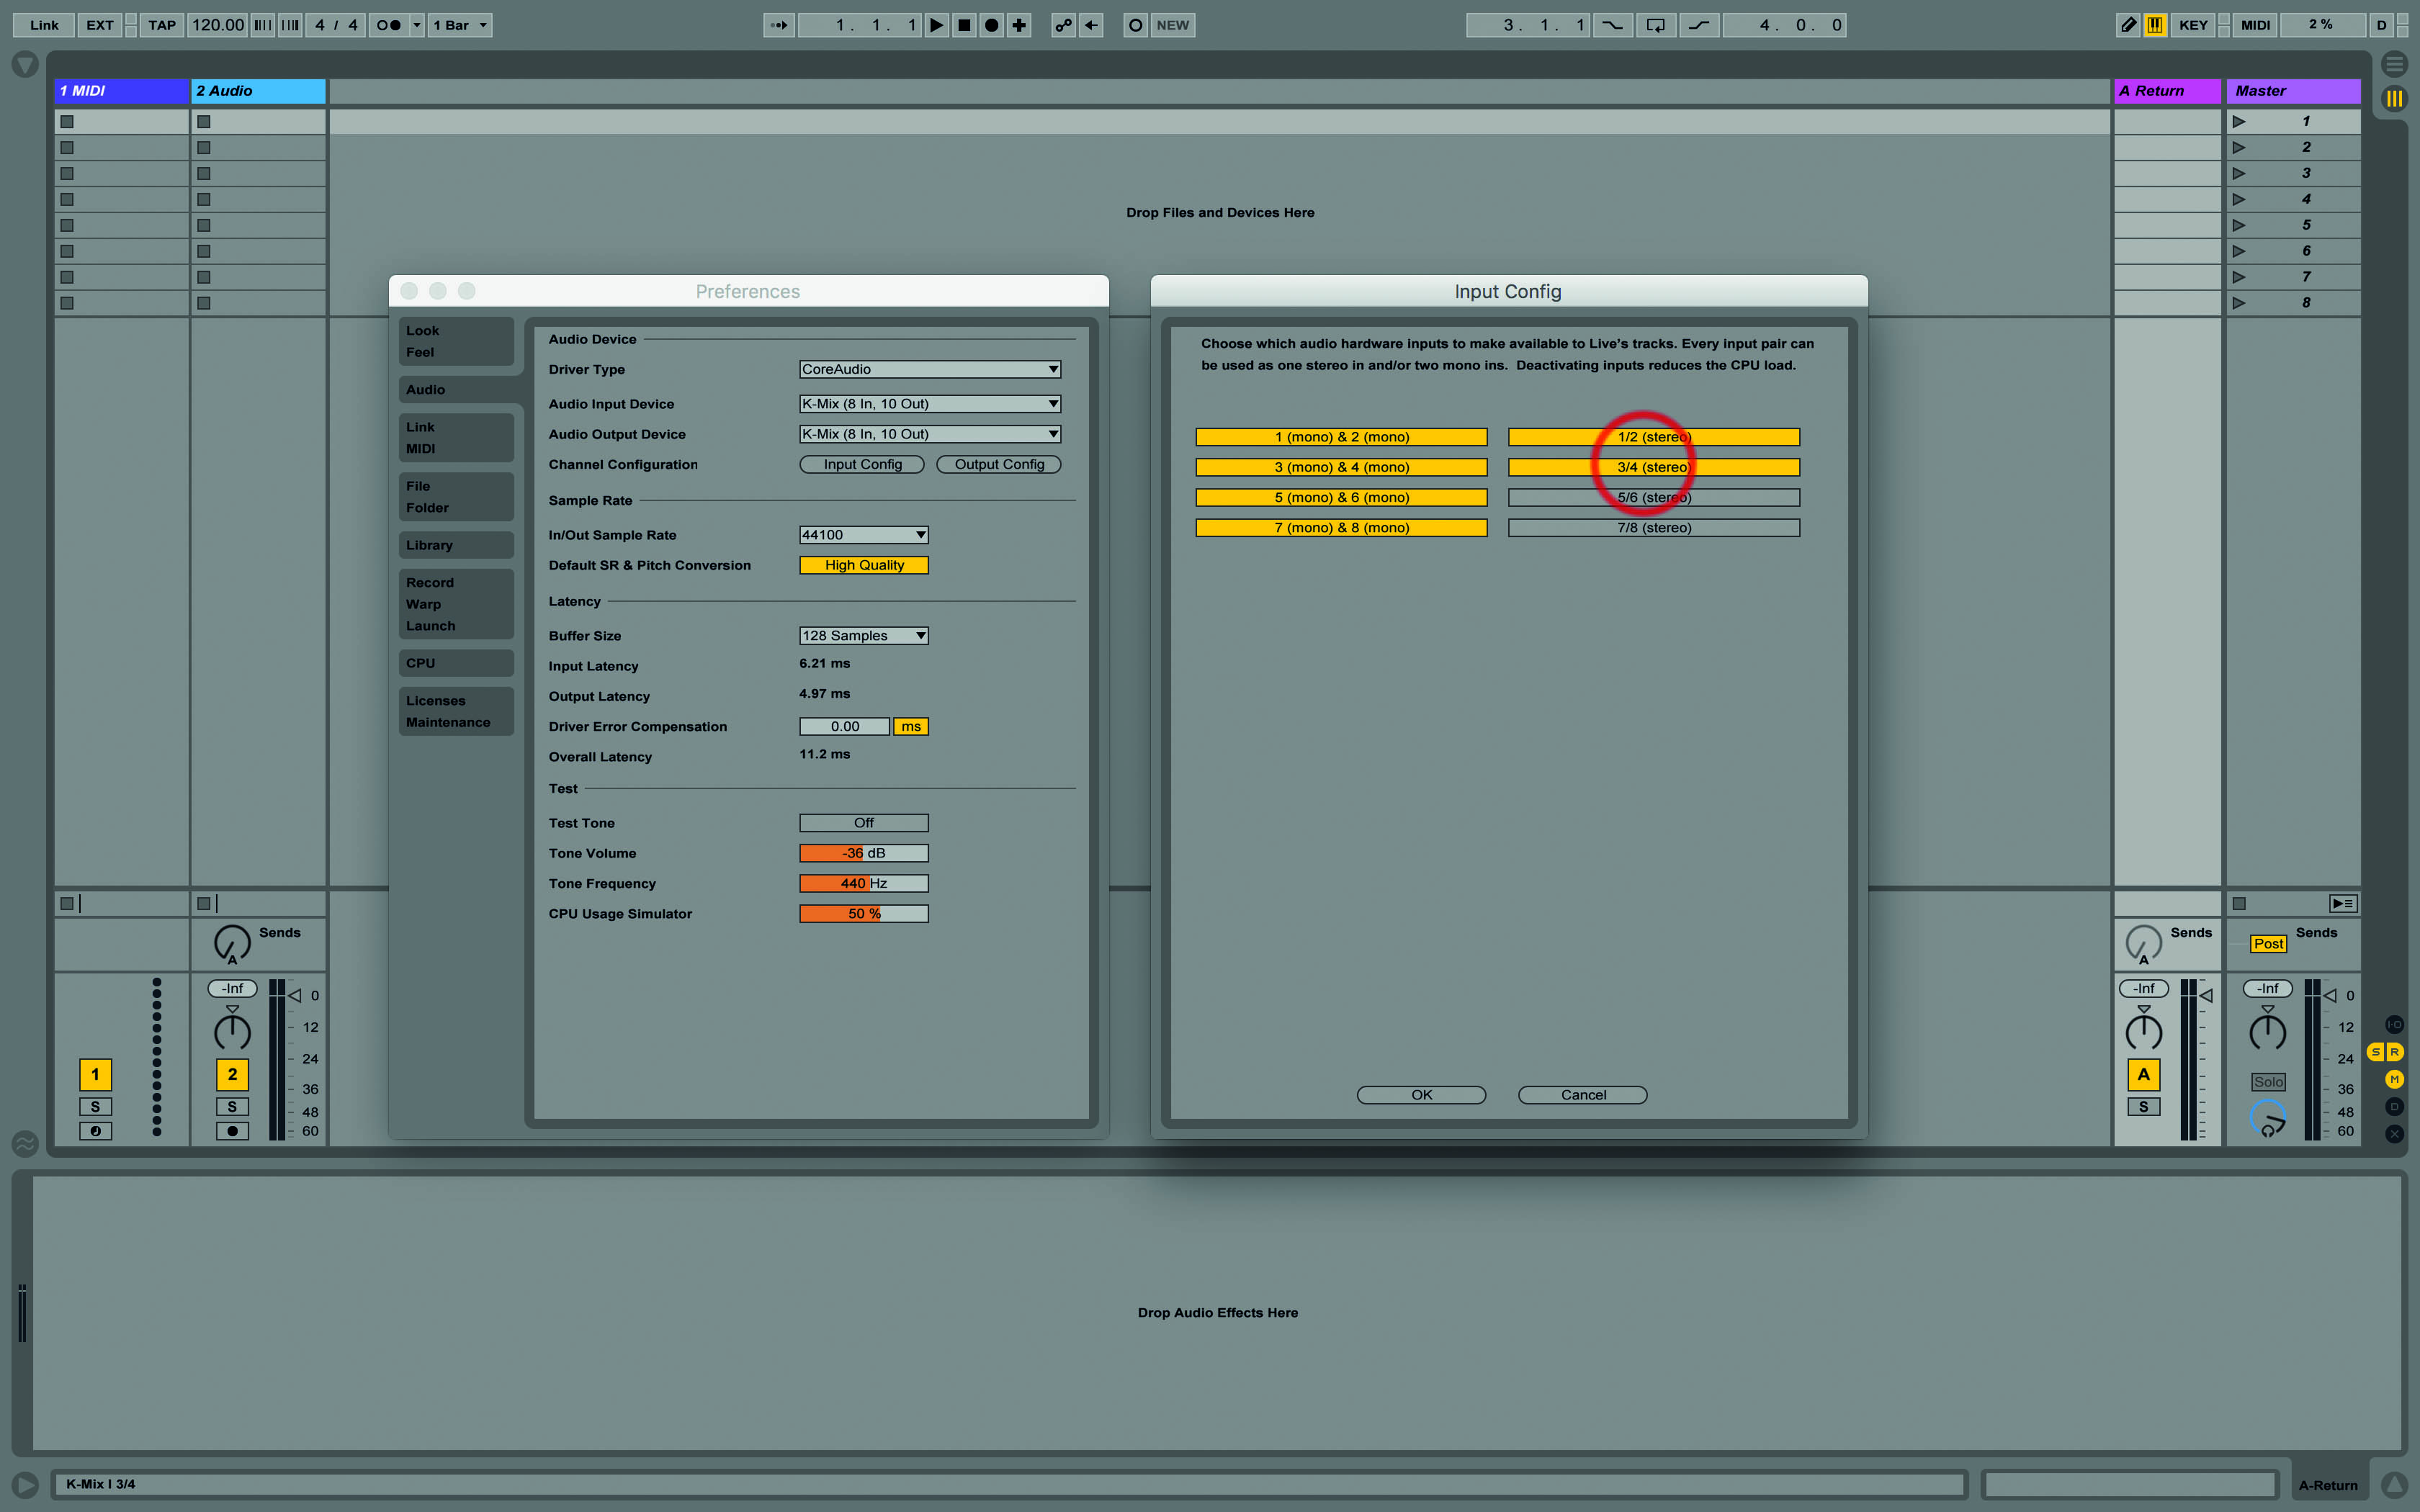
4. Power everything up. Launch Live and go to Preferences/Audio. Configure your audio interface, making sure extra inputs are enabled as appropriate – we’ll split off C and D into separate tracks.
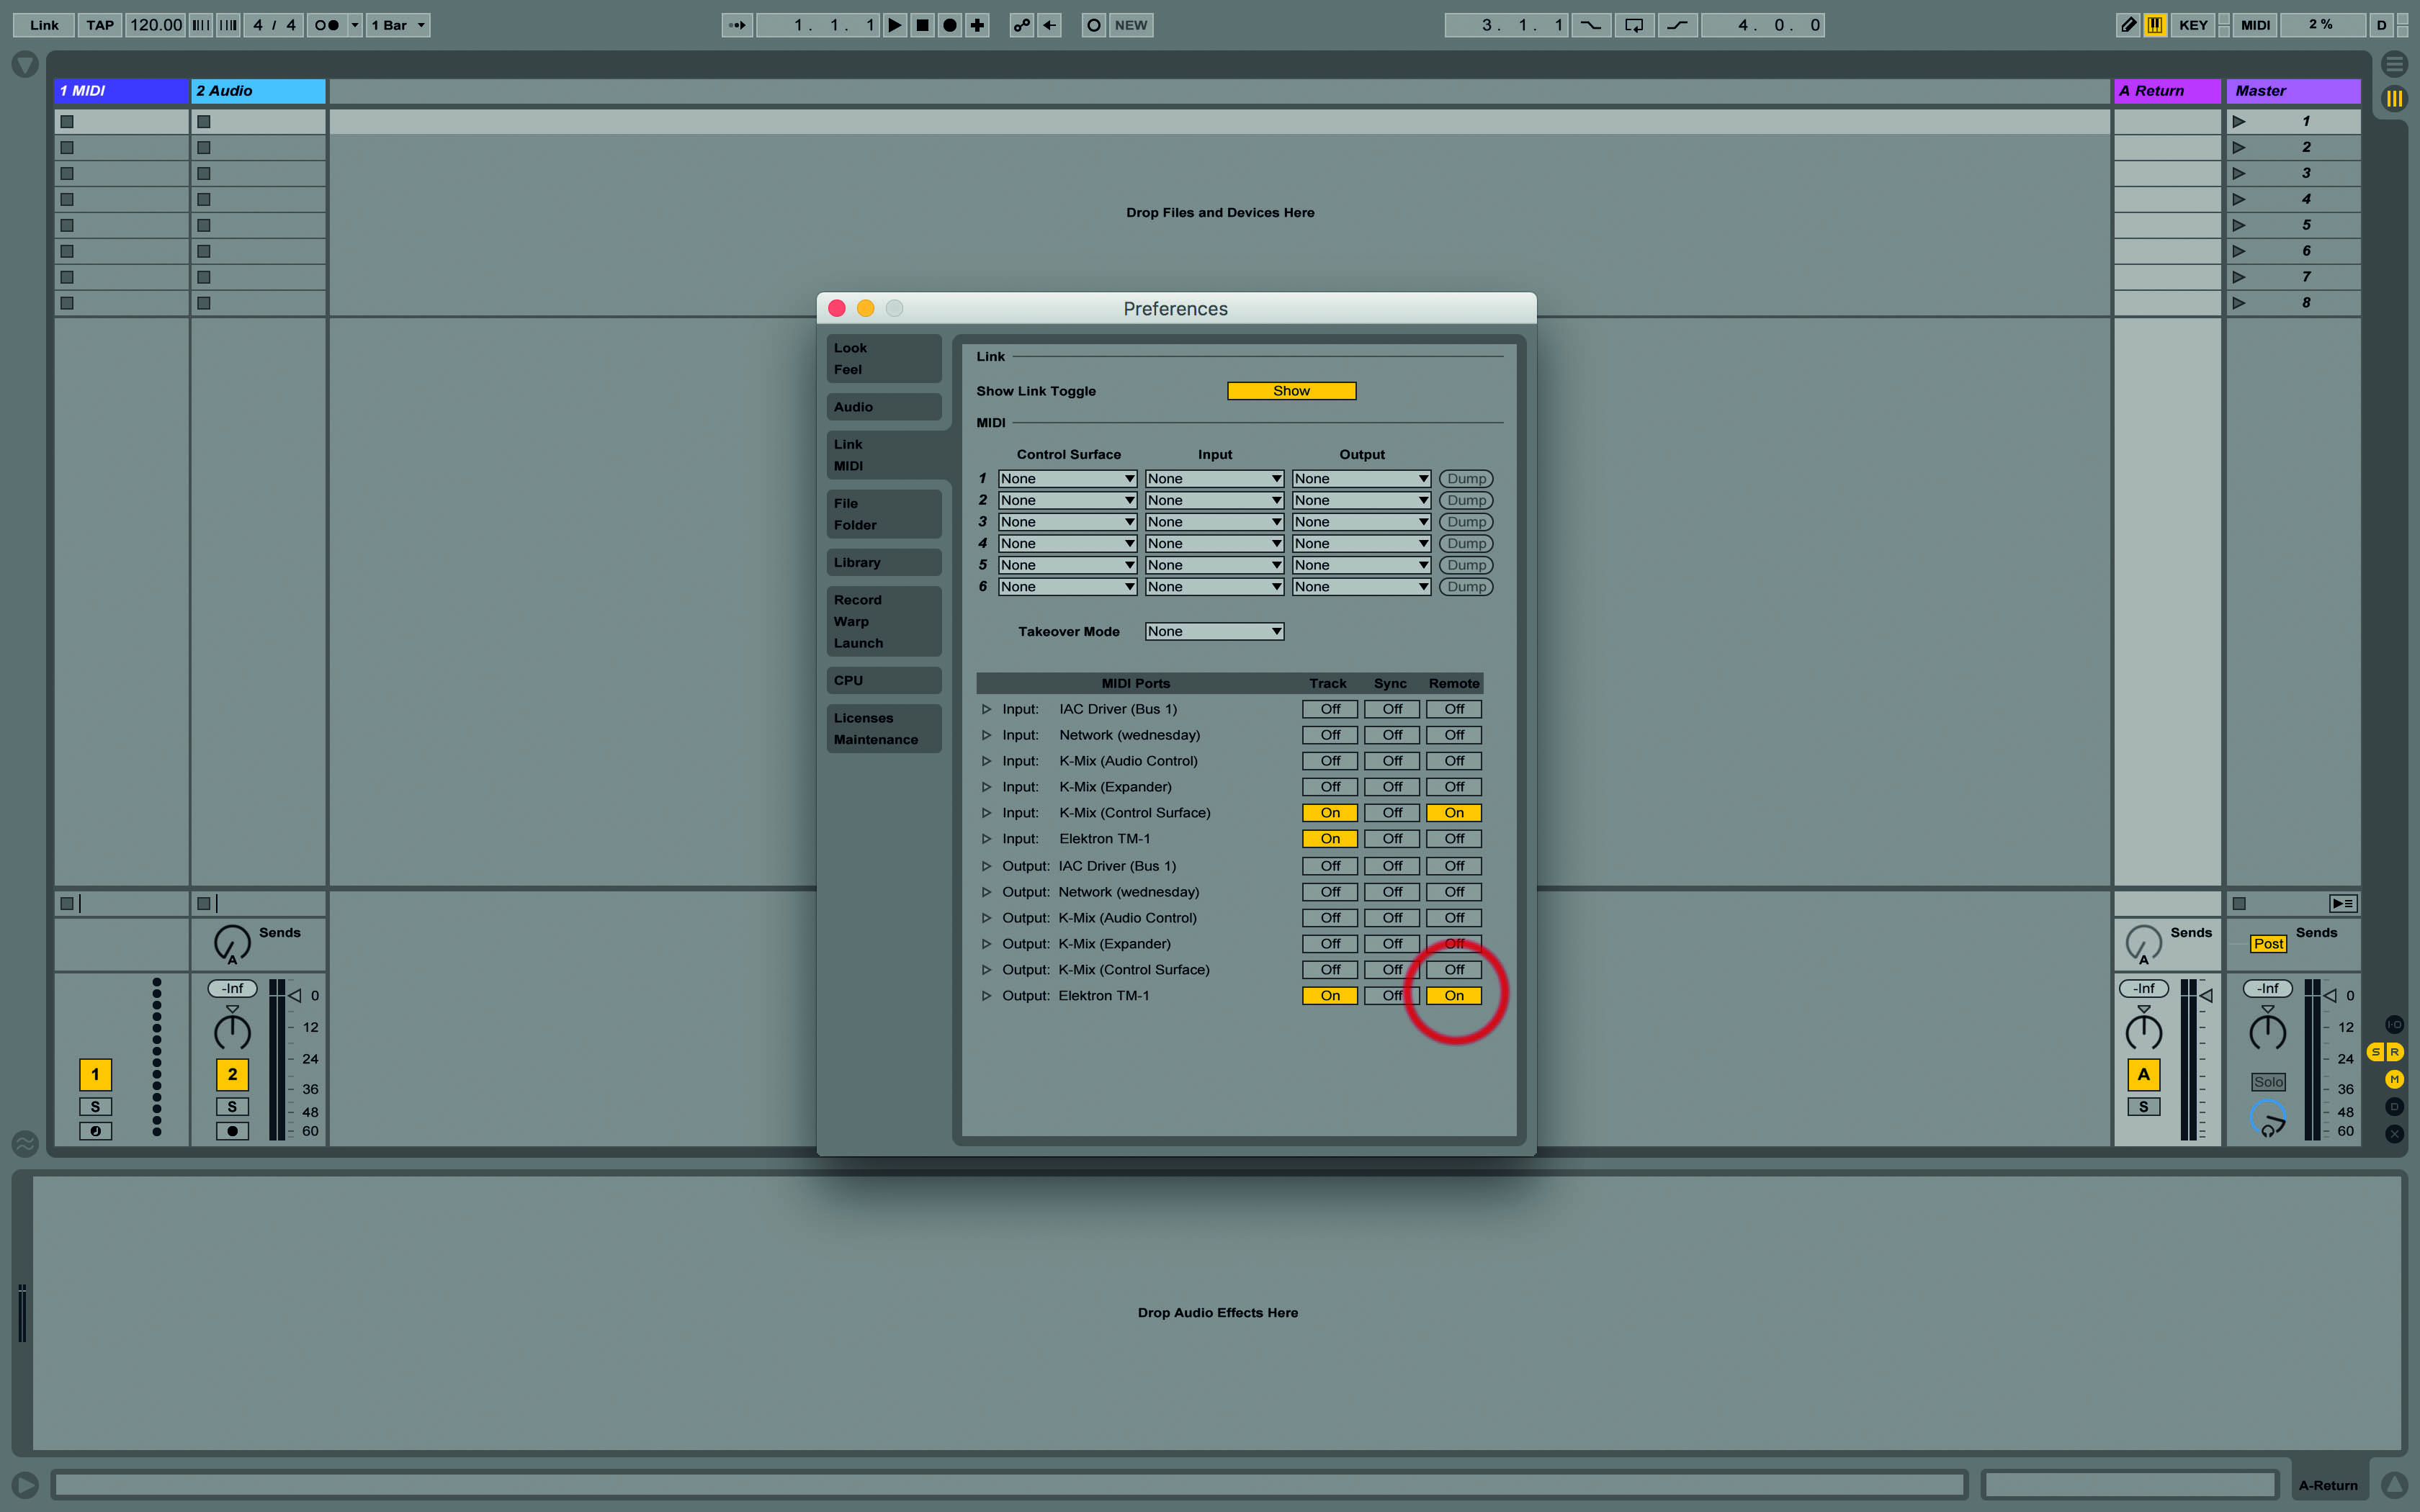
5. Then, in Preferences, under the MIDI Link tab, select your interface’s MIDI in port as an Output/Remote destination. We need to send messages to the drum machine so it’ll load patterns.
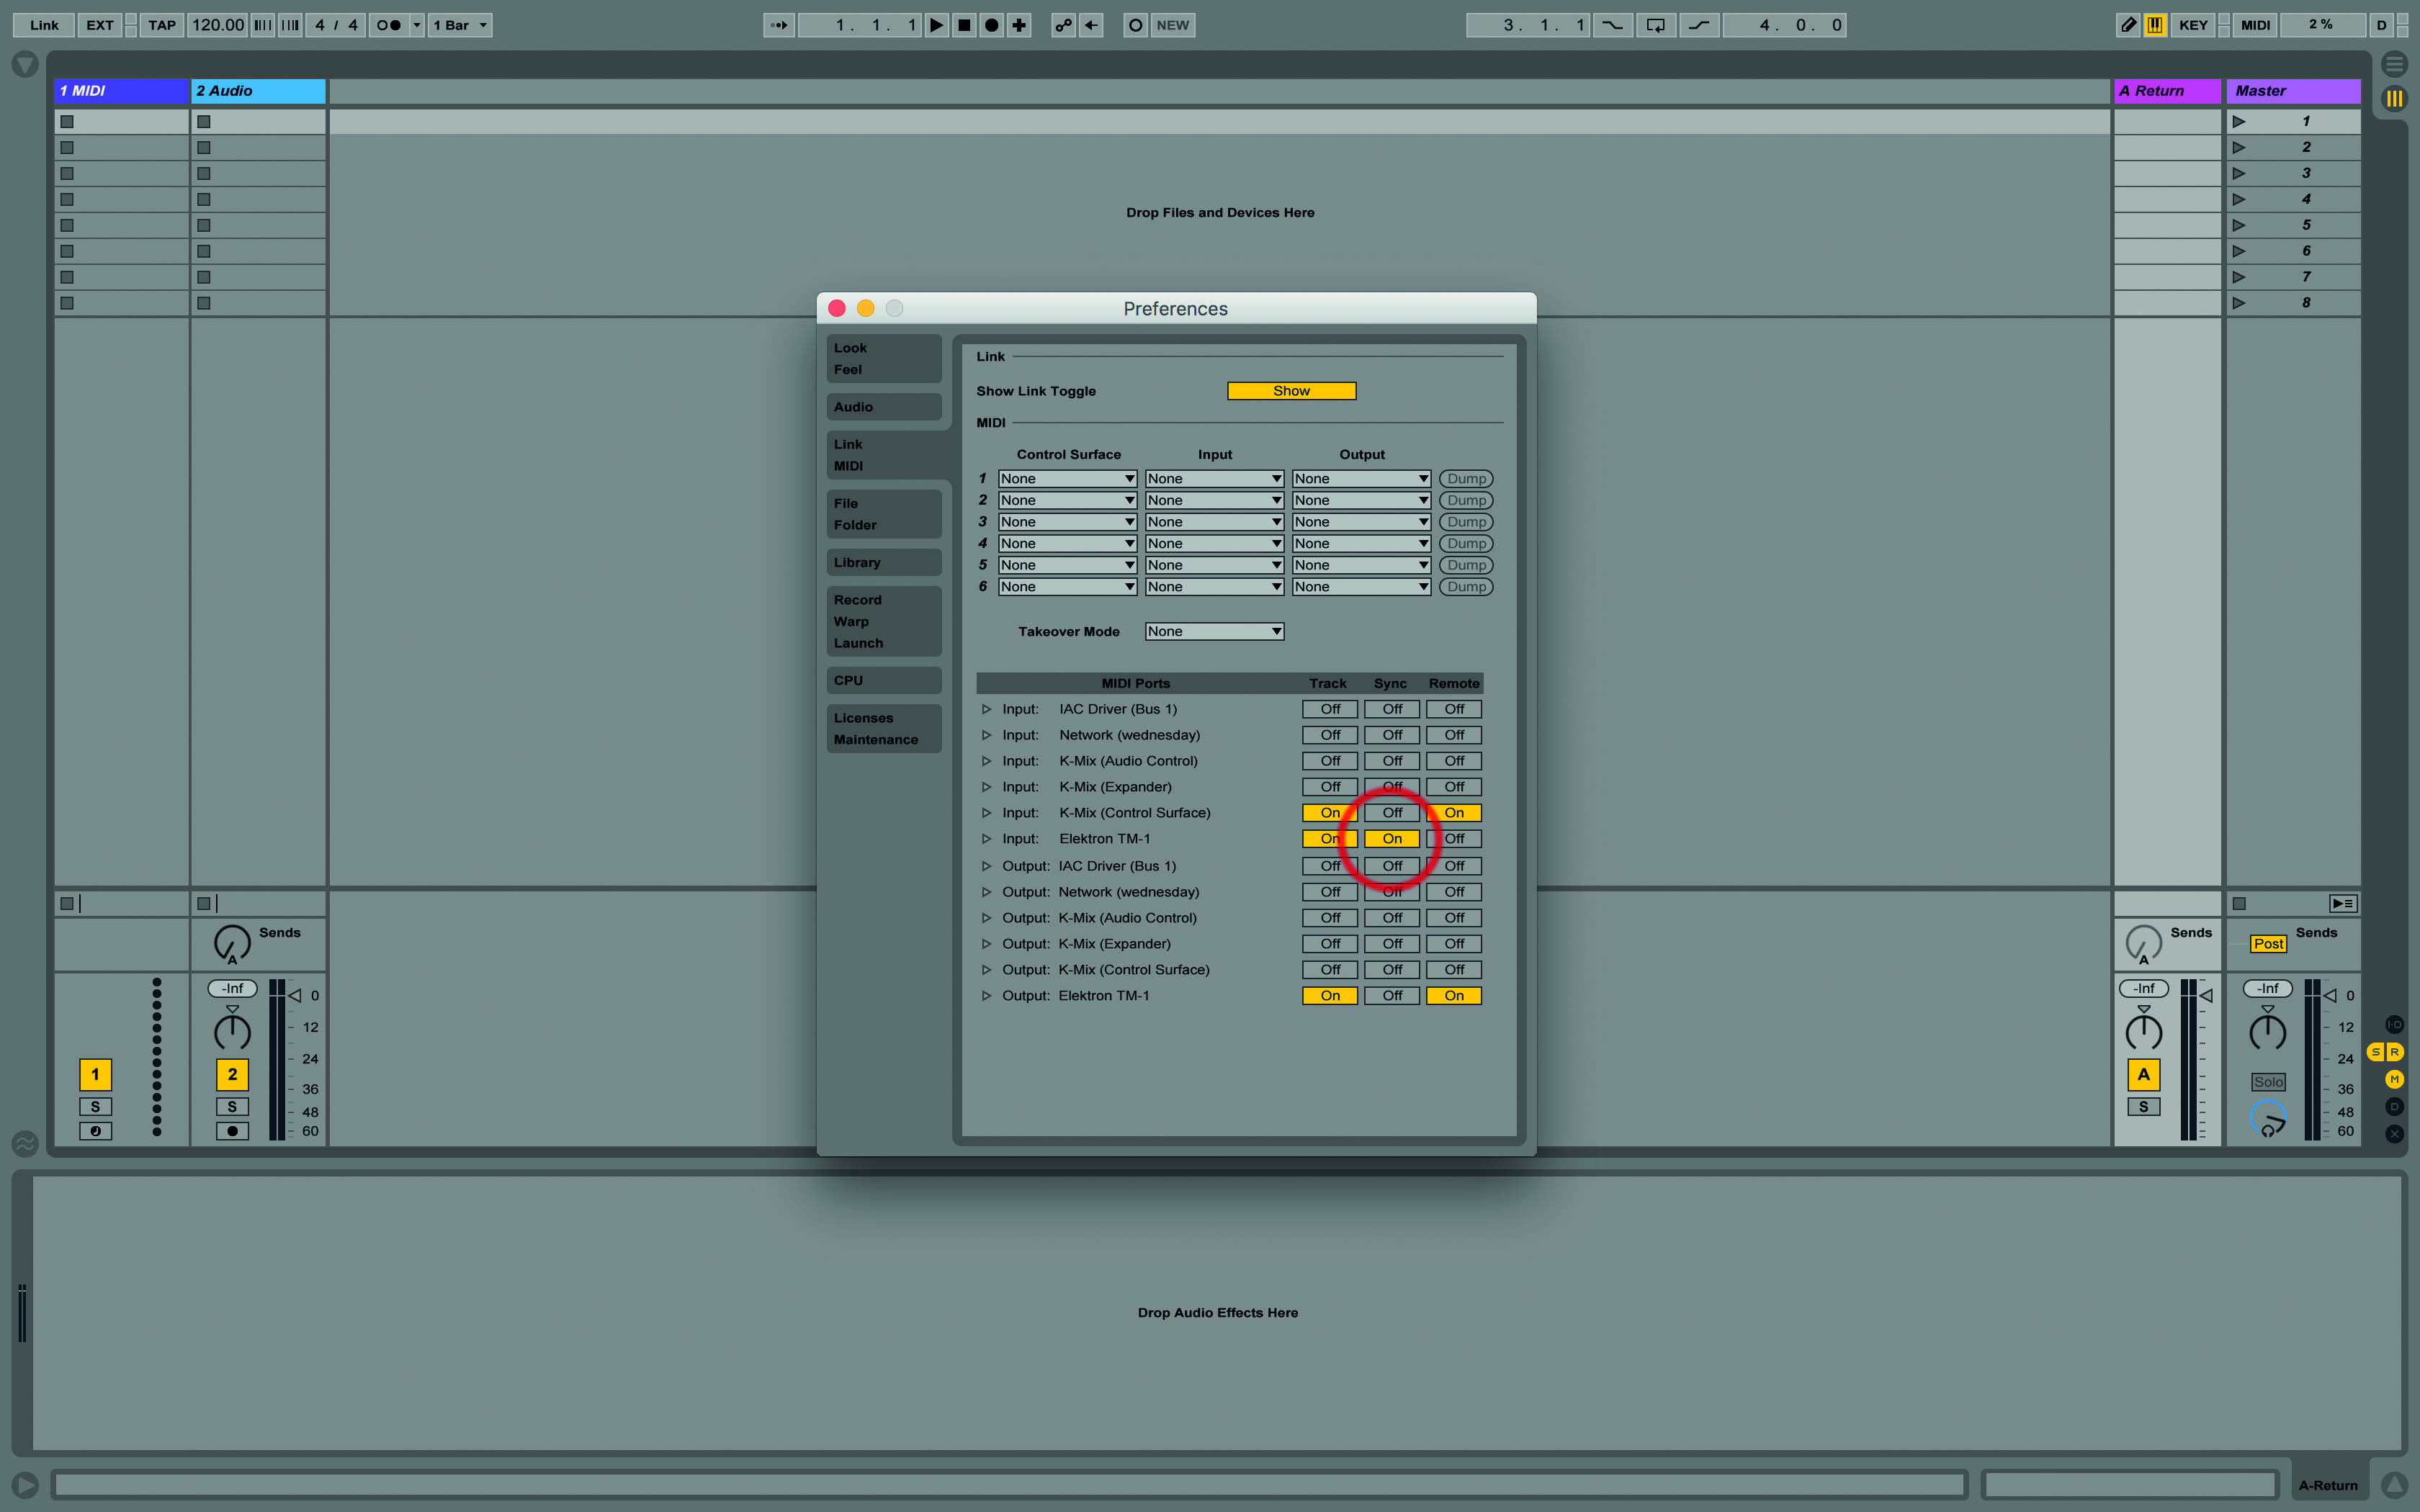
6. Still in Preferences, select your interface’s MIDI Out port (I’m using the Elektron TM-1) as an Input/Sync source. We’re going to get Live to play in time with the drum machine. Close Preferences.
Click here to continue