Ableton Live Tutorial: Final Tweaks Before Mastering
Hold on! Before sharing your finished tune with your friends and fans, Martin Delaney wants you to check and tweak your mix one last time. Last time, we added movies to the Arrangement View timeline. Now we have to prepare our mix for rendering and delivery as a stereo file. One thing to remember about […]

Hold on! Before sharing your finished tune with your friends and fans, Martin Delaney wants you to check and tweak your mix one last time.
Last time, we added movies to the Arrangement View timeline. Now we have to prepare our mix for rendering and delivery as a stereo file. One thing to remember about much of the mixing information you read online is that it’s not oriented to the home producer; there’s a lot of talk about room setup – acoustic treatments and so on – which is less relevant if you’re mixing your own music exclusively.
Sure, if you have aspirations of becoming a professional mix engineer, you have to have those things, but if you’re always doing your own music, the rules are different. There’s a small amount of gear needed to mix at home (apart from the obvious computer); the bottom line is you’ll need a soundcard, monitors, and headphones.
More people are mixing on headphones these days, out of necessity, but it should be the last resort, and listening on at least one pair of speakers as part of the process is really important. I have my monitors, a good set of headphones, and an old mono speaker that I use for checking in more lo-fi conditions. I also sync mixes to my iPhone and listen to them on the tiny little iPhone speaker – that is the world we’re in.
As it says in the walkthrough, I have a sequence that I follow when I’m finishing a song: volume; stereo imaging; EQ, compression, and overall loudness. Everything fails if you don’t have your track volumes under control – digital recording isn’t like recording to tape, or overloading a tube guitar amp, when you can get some enjoyable distortion; it sounds ugly and it’ll cause problems down the line at the mastering stage.
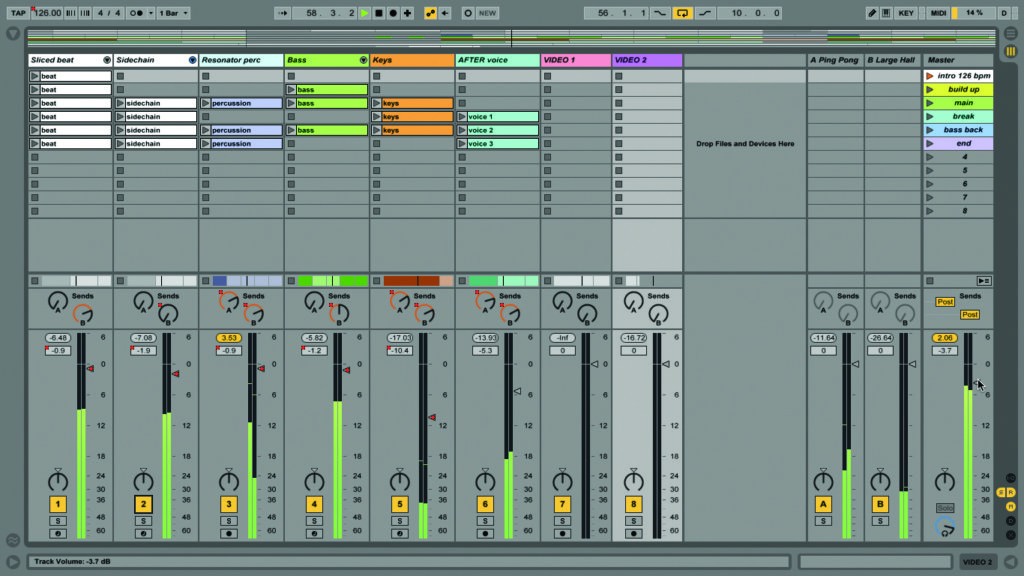
Stereo imaging is also very important. If you’re trying to sonically differentiate your tracks, organising them across the stereo field from left to right will help each one find a space. This relates to your volume judgements as well, because positioning a part differently might make it appear louder or quieter. You should also be keeping ‘mono imaging’ in mind, because people are going to hear your music on all kinds of setups, including systems that are effectively mono. A rule of thumb is to keep your lower frequencies, like kick drums and bass parts, in the centre of the mix.
Listen for any areas where your mix sounds too busy, like maybe there are too many parts fighting for the low end, or too much in the middle or top. If you want your composition to come across, cutting chosen frequencies with EQ can help. When you record traditional instruments or bands, the bulk of the equalisation is done in the instruments themselves. Indeed when you think of a classic rock band, each instrument is designed to cover a certain frequency range.
You have drum kits, basses, guitars, and vocals – they’re kind of pre-mixed within the instrument roles and the types of part associated with them. With electronic music, there isn’t always a defined role for each synth or sampler; you have to reinvent the wheel each time and work it out for yourself, although I suppose if you’re sticking to a strict genre, there are rules in place…
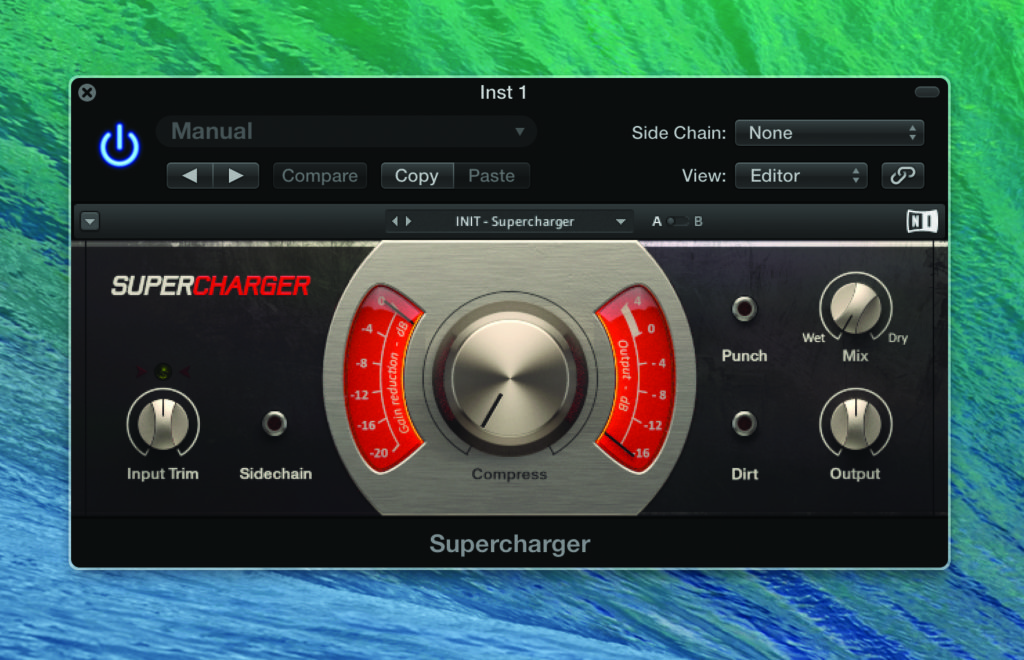
Following on from that, compression and limiting help to contain and manage the overall loudness for specific tracks, and later, the entire mix. Compression levels out track volumes – it reduces the chances of an instrument suddenly blurting out loudly from nowhere.
There’s nothing to stop you using more than one compressor per track, in fact it can make sense to combine two different compressors, when each has a different sound and does a different job. Then you can also add compressors at group level, and of course in the master track.
I use Live’s native equalisers and compressors as much as possible; they are clean, efficient, and they share the classic simple Ableton interface design. Each of Live’s compressors has a Dry/Wet mix control, which makes parallel compression very simple to achieve; it’s useful to set a more extreme-than-usual compressor, but then dial it back and blend it with the clean signal.
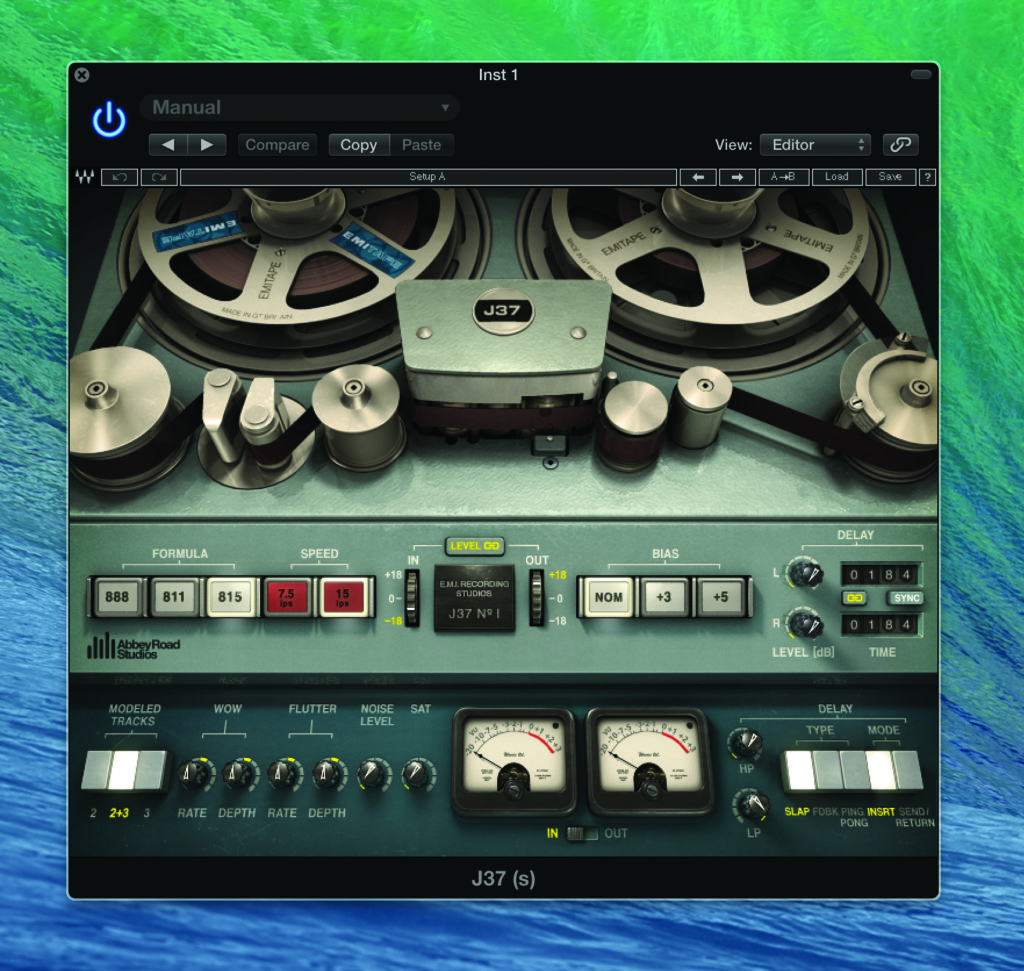
As well as compressors, I like to use at least one non-standard reverb. At the moment this would be something like Exponential Audio’s Phoenixverb, although I also like the Max for Live Convolution Reverb. I also use Waves Vocal Rider and Bass Rider when applicable, to level out the track volumes before applying compression. This reduces the need for heavy compression settings and gives you more freedom to use ‘colourful’ compressors for their tonal qualities.
This is also where I’ll turn to hardware compressors once in a while, because they each have a unique character, or because I’m recording hardware synths and I like to pre-process them before they go to disk. For mono channels I’ll use a Universal Audio LA-610, and for stereo sometimes an Alesis 3632 or, for a more upmarket sound, an Empirical Labs Fatso Jr which also does nice tape simulation.
We have Live’s Multiband Dynamics on our master track, and for now we’ll call that ‘done’. We’ll review it next time, when we deal with mastering and rendering.
Why Don’t My Mixes Sound ‘Professional’?
Even for the more experienced producer, there are times when you wonder why your finished songs don’t sound ‘finished’ or ‘loud enough’. There are several likely explanations but maybe you should start by asking more questions.
Where was the song recorded – house or studio? What hardware and software was used? Who mixed it? Who mastered it? Getting a truly finished-sounding song is the result of a long process, so don’t be too hard on yourself if it doesn’t come together straight off. Compression and EQ are key parts of the process, as is mastering, which we’ll cover next time.