Ableton Live Tutorial: Audio to MIDI Conversion and Back
Live’s audio-to-MIDI conversion provides mind-blowing ways to create new musical parts. Martin Delaney shows you how separate the notes from the samples… For this tutorial you will need the Ableton Live Project File – Download Here We’re looking at audio-to-MIDI conversion, which is one of the most fun activities in the Ableton World. Introduced in […]
Live’s audio-to-MIDI conversion provides mind-blowing ways to create new musical parts. Martin Delaney shows you how separate the notes from the samples…
For this tutorial you will need the Ableton Live Project File – Download Here
We’re looking at audio-to-MIDI conversion, which is one of the most fun activities in the Ableton World. Introduced in Live 9, ‘Convert…to MIDI’ gives us new ways of disrespecting samples and creating new sounds. Used with the ‘Slice to New MIDI Track’ and Freeze/Flatten commands, you can get amazing results.
These handy commands let us transform an audio sample or recording into an editable form, without having to do any programming; we can create a MIDI track from an original recording or we can create parts to play in parallel with the original part. We can even venture far deeper into substituting different instrument sounds and applying MIDI effects.
The source material can be, well, anything. For more conservative uses, it’s typically drums or bass sounds, but it doesn’t take long to get into more left-field territory by converting field recordings, miscellaneous noise, and speech samples into rhythmic or melodic MIDI parts. Some complain that Live’s MIDI conversion tools aren’t as accurate or sophisticated as those in Melodyne, for example, but that’s missing the point.
With Live it’s all about immediacy and creativity; with these tools you’ll get results you wouldn’t have dreamed of – never a bad thing.
In this tutorial’s example Live set, we’ve provided a few audio clips that’ll give straightforward illustrations of how audio-to-MIDI conversion works.
You should really start using your own audio samples as soon as possible though – that’ll be much more rewarding. One usage example that comes to mind is with drums.
You’ve recorded a beat that you liked at the time, but now you want to use different kit sounds while keeping the notes and timing of the original beat. Or maybe you’ve taken a beat from a record, and instead of using it as a straight sample loop, you just want the parts from the beat. You might also use it to create a second part that plays along with the original.

The conversion process can work very well, but it’s dependent on the quality and character of the source recording. If there’s a lot of sounds playing at once, audio effects in use or other influences like audience noise – anything else in the background – of course it’s going to be harder to get a clean clip. You might have to tidy the notes afterwards but the idea is this can still be faster than programming the part from scratch.
It’s not dissimilar to Slice to New MIDI Track except that command keeps the original sample sliced across different chains in a rack, while this
discards the original sound altogether. Bass is typically easy to convert with the ‘Convert Melody to MIDI’ command, because for the most part, bass tracks are monophonic, and reasonably clean. Bass guitar can be harder to process because there’s variation in dynamics and clarity, as well as finger/fret noise.
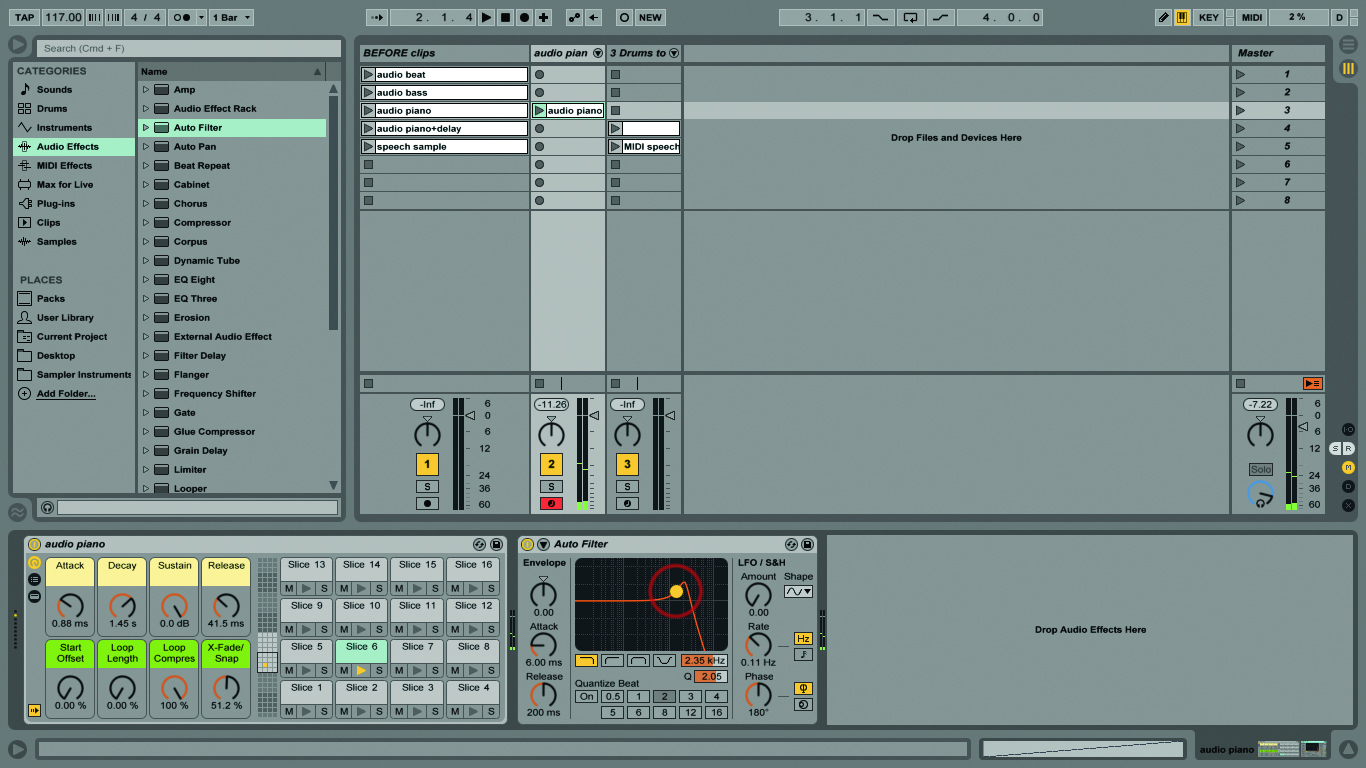
In this context, ‘Harmony’ refers to any audio sample with more than one instrument note playing at the same time: piano, guitar, synthesiser and so on. This is harder for software to decipher, but Live does a good job as long as it’s presented with a clean-ish recording. So as not to make things too easy, the piano clips in the example set include distortion, delay, and reverb so you can see and hear how they affect conversion. I’ve also provided a voice sample, but you can also use any sound.
If you’re the sort of person who likes to use their own sources for everything, but also favours MIDI programming over plain sample manipulation, then why not snag a few recordings using your iPhone or other recorder, and create an album’s worth of songs using MIDI conversion to create all of the parts?
Furthermore, it’s really unpredictable and exciting to take one original audio recording and apply all of the conversion options to it in turn, creating a beat, melody, and chords, from that single sample. If necessary you can use Live’s MIDI effect devices to squeeze the notes back into some kind of semi-organised timing and pitch. I dare you, go on, it’ll be good!
I included the Freeze and Flatten commands in the walkthrough because they complete the circle – you can use them to bounce your MIDI clips back into a purely audio format, for yet more processing, or for re-use in other live sets. Much as I like to work with MIDI parts for the original programming, I still put everything into audio tracks for live use – it’s just more robust and portable.
If you’re seriously interested in audio-to-MIDI conversion there’s no reason why you couldn’t use it as the basis for all of your sound design. Live has the commands I’m talking about here. There are hardware options as well, like the Sonuus products mentioned in our little sidebox and I also mentioned Melodyne at the top of this story, which is the king of audio manipulation – converting audio to MIDI is only part of what it does.
Give it a try (see www.celemony.com). But even without such extras Live, of course, has more than enough options to keep us happy and productive, and converting audio to MIDI is one of the most exciting of those options.
Focus On: Real Time Conversion
One thing you can’t do with Live’s wonderful audio-to-MIDI tools is convert in real-time i.e. create MIDI notes directly from incoming audio. I use a piece of hardware to achieve this: the Sonuus B2M bass converter (there’s also a G2M model for guitar).
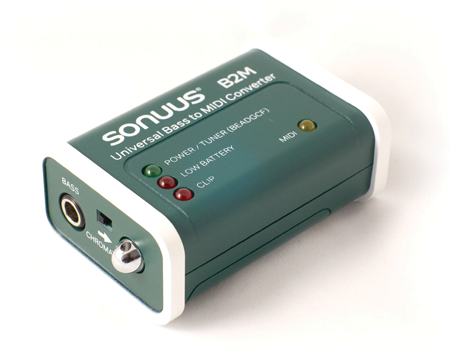
Connect your guitar at one end and a MIDI cable at the other, and you’re in business. It works pretty well and it’s a good incentive to clean up your playing technique. I also connect a microphone to it sometimes, to see what kind of chaos that generates, converting speech to synth parts.
Step-by-Step: Audio To MIDI
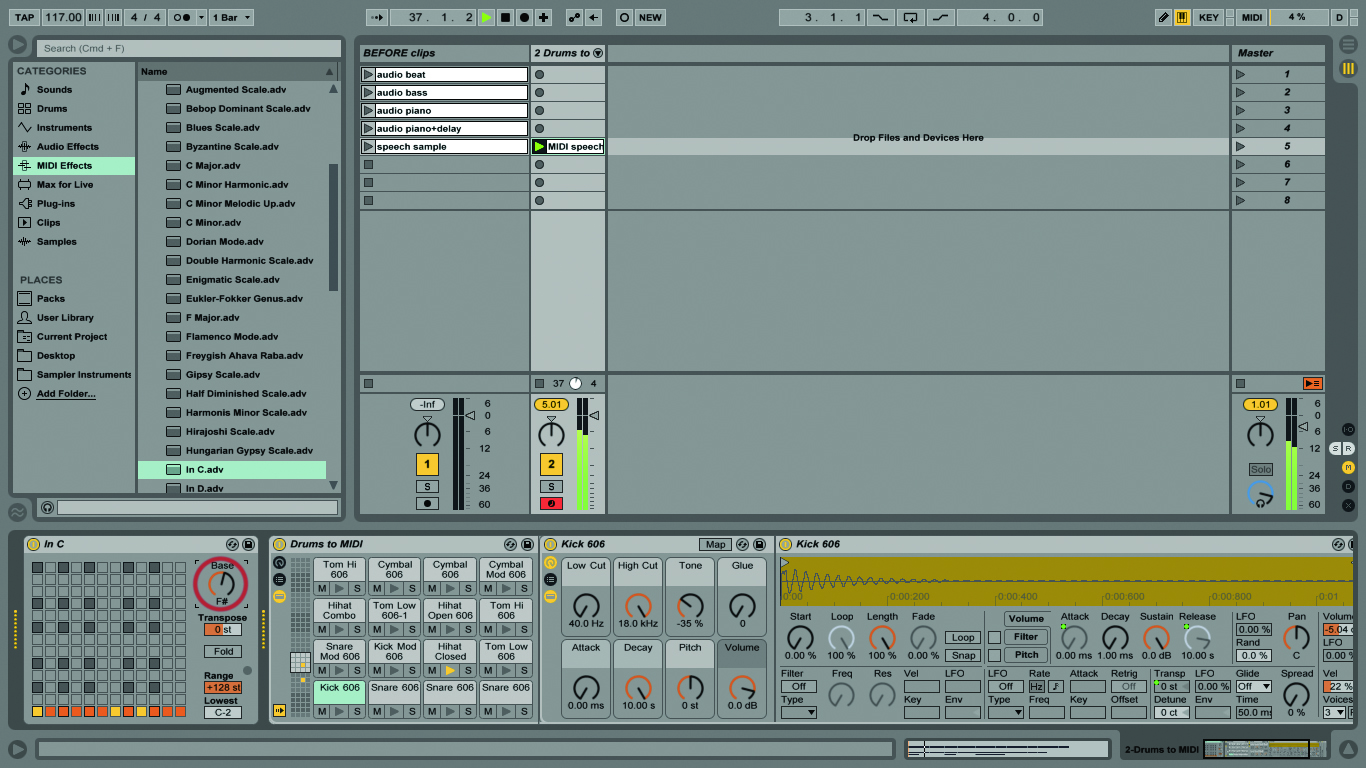
1: We’ve provided an example Live set so you can practice your audio-to-MIDI conversion techniques (called LID02) and it contains audio clips for drums, bass, piano (two clips) and speech.
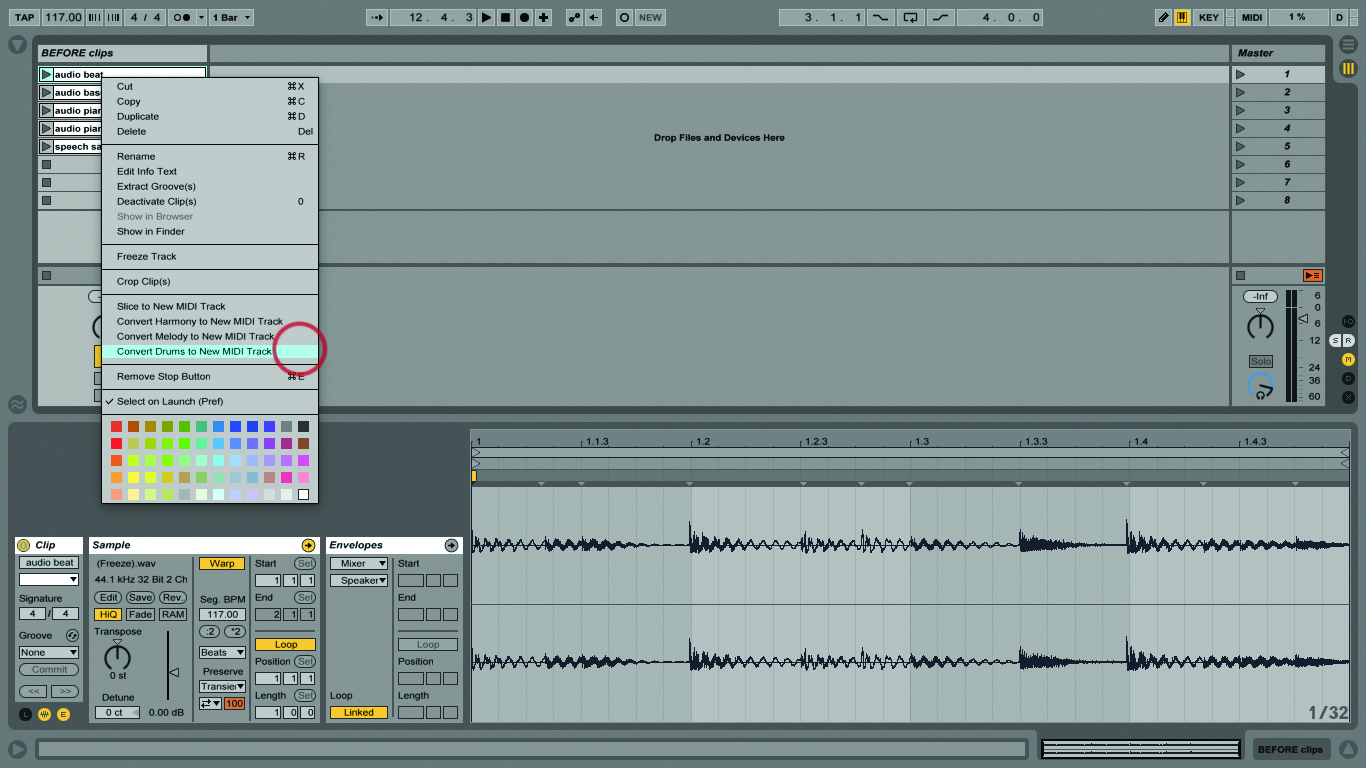
2: The clip called ‘audio beat’ is a drum loop with acoustic sounds, compression, distortion and some reverb. Right-click on it and choose ‘Convert Drums to New MIDI Track’ from the Context Menu.
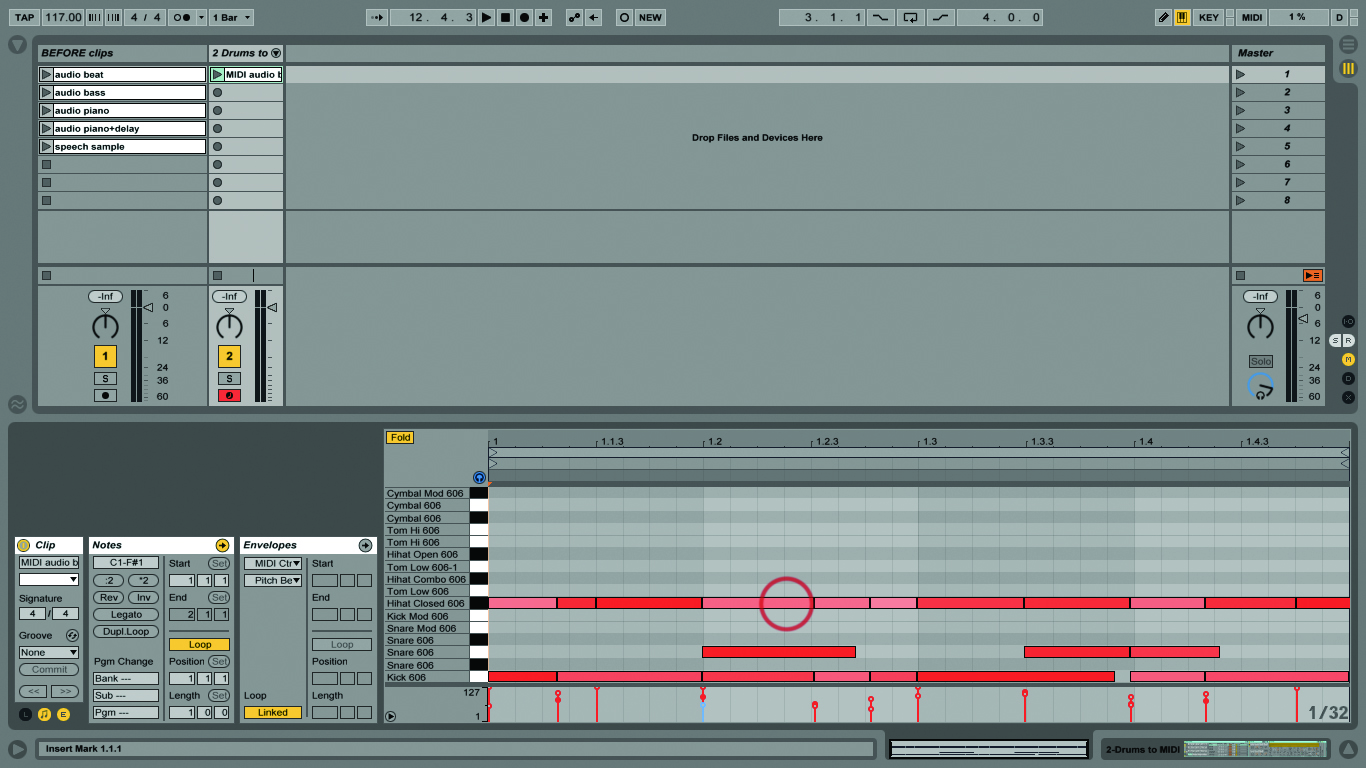
3: That’s all you have to do! Live creates a new MIDI track, containing a clip based on how it’s interpreted the audio. A default drum kit’s loaded, ready to play and ready to edit.
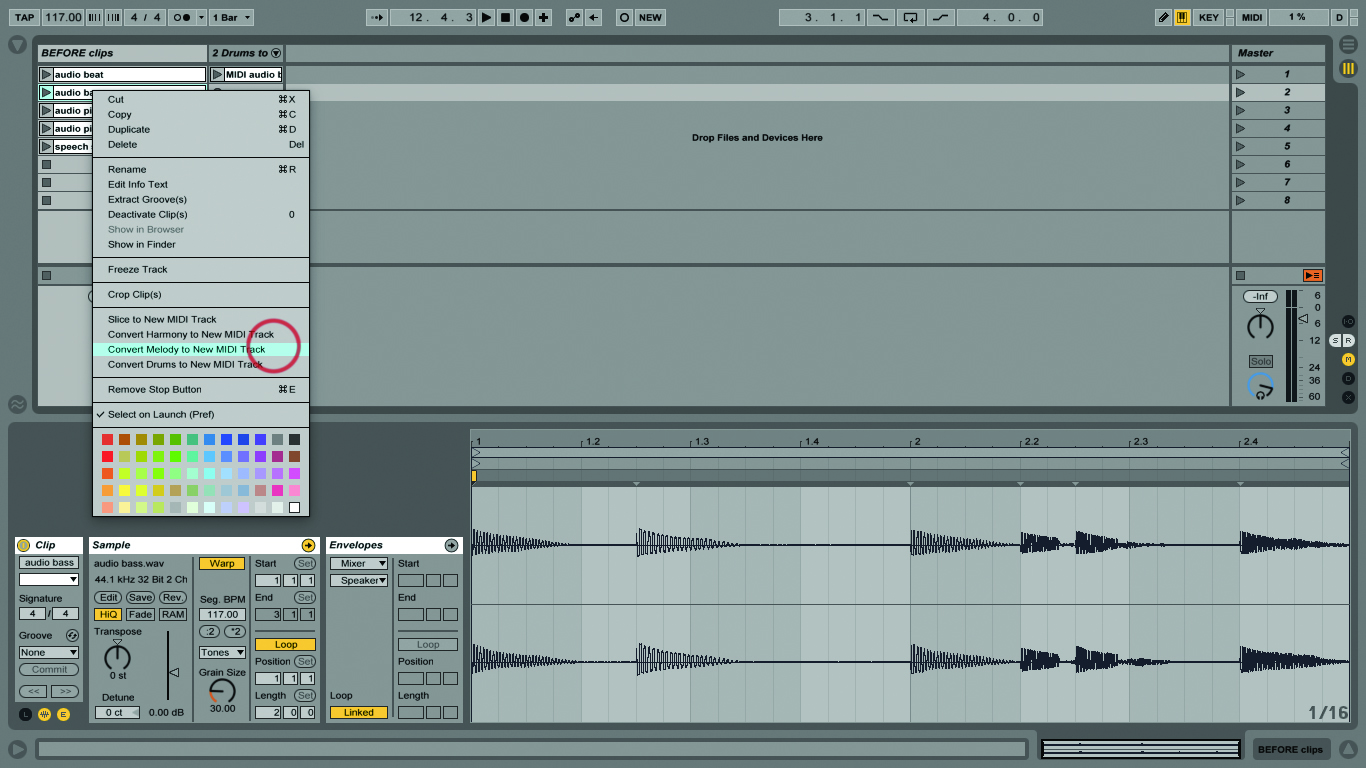
4: Now let’s do the ‘audio bass’ clip. This is a very simple part and a clean sound – just a little bit of reverb, that’s all. Convert it again but this time choose ‘Convert Melody to…’.
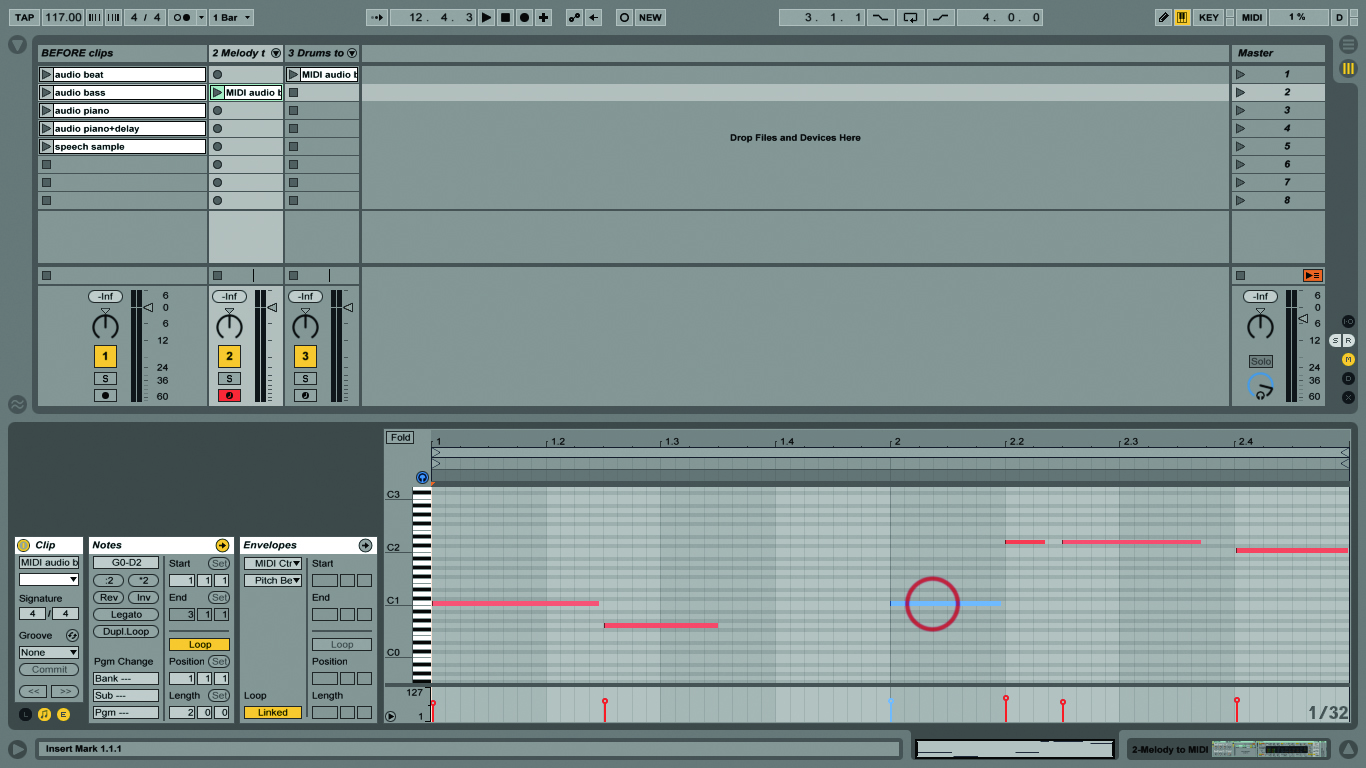
5: This is designed for monophonic sources such as (typical) bass parts or synth and guitar leads. You should hear that the bass converts to MIDI well, unaffected by the presence of that subtle reverb.
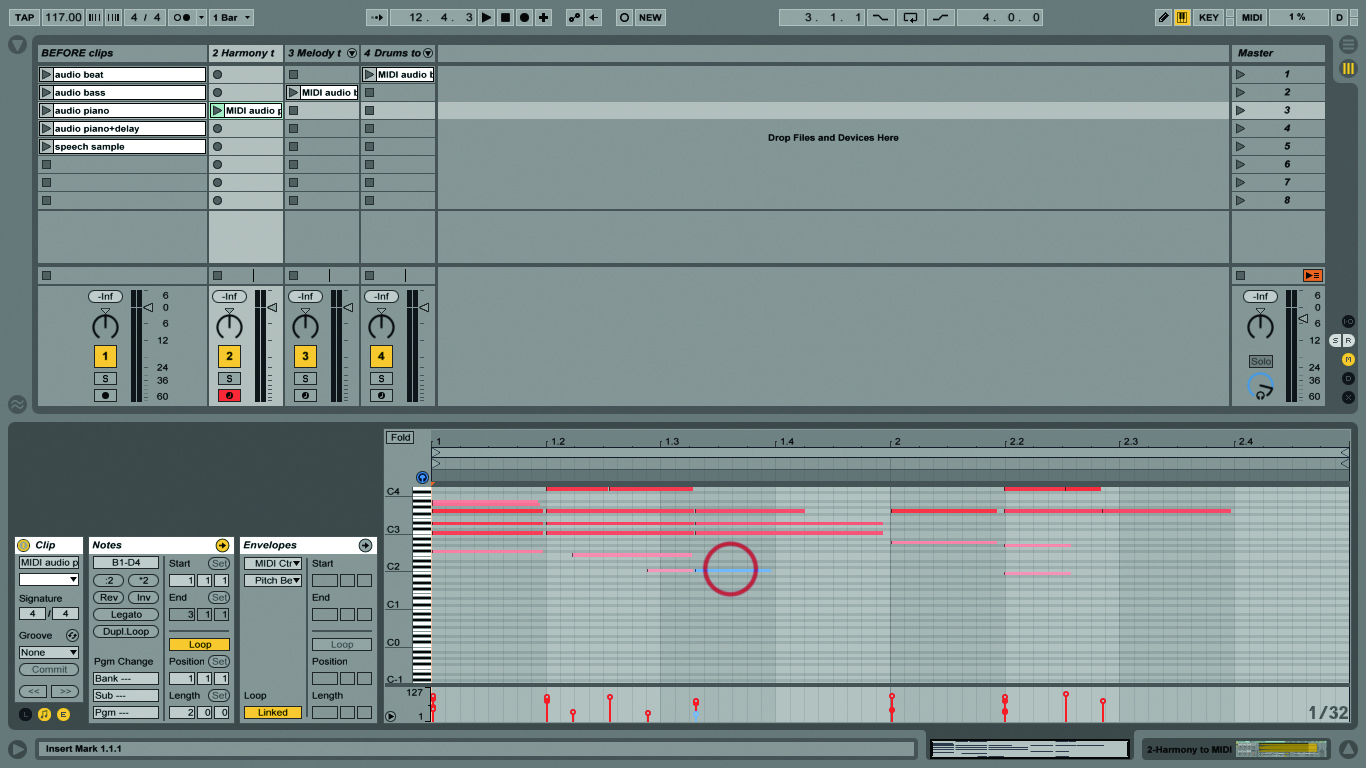
6: Use ‘Convert Harmony…’ for the piano clip – it contains chords. There’s also distortion and reverb present. This doesn’t provide a clean conversion so you will have to remove a few ‘spare’ notes.
Click Here To Continue
