Ableton Live Tutorial: Beginning a Live Project With Drums
Ableton Live is fantastic for drum programming; it has all the tools you need, and it’s easy to get started. Martin Delaney counts you in… For this tutorial you will need our project files – Download Here Last time round we gave ourselves an introduction to the basics of Ableton Live – the interface, key […]
Ableton Live is fantastic for drum programming; it has all the tools you need, and it’s easy to get started. Martin Delaney counts you in…
For this tutorial you will need our project files – Download Here

Last time round we gave ourselves an introduction to the basics of Ableton Live – the interface, key commands, clip launching – before programming our first little MIDI drum beat, using Live’s Core 808 kit. Now we’re moving on to a new project, one that we can work on over a few simple instalments, building it into a self-contained set that will include all the tips and material referred to in the tutorials.
We’ll begin by going back to drum programming, to create a beat that’ll be the foundation of our new project. Most music projects begin with a beat, even if it’s simply acting as a glorified click track for the recording of live instruments. We’re going to use an acoustic drum kit, in the shape of Live’s Kit Core Session Dry.
No matter how focused you are on electronic beats, you’ll still be working with acoustic sounds, and their playing and programming techniques. A clean acoustic kit is also a better way to illustrate MIDI programming tweaks and audio effect usage, instead of one that loads with a lot of effects in place before you start.
Our tutorial will skim through the fundamentals of Live beat production – including creating clips, programming beats, customising drum racks and adding audio effects. For this, we’re working in Session View because the loop-based workflow is ideal for programming beats – at times like this you just want the part in focus to keep looping round while you edit it, which makes things a lot more simple by freeing you from thinking about structure at this early stage, so you can concentrate on the job in hand: making the best beat possible.
A benefit of working with MIDI is that you don’t really have to commit to a fixed tempo until a long way into the production process – and with Live, even when you’re working with audio, you’ve got a lot of freedom with tempo changes thanks to the wonders of warping. It’s also important to remember that you can automate BPM changes in the Arrangement View if you want your music to breathe a bit.
Get Kitted Out
In the interests of compatibility, I’m using one of the standard Live library drum kits for the tutorial, but there’s no need to limit yourself to this as there are many more Live Packs available which feature great sounding kits, whether you’re looking for acoustic or electronic sounds – you’ll find some on the Ableton website (the Session Drums pack is a good example), as well as through third-party providers.
When you’re browsing the Library drum kits, you can audition each kit without loading it; either click the Preview button that sits just below the Browser, or simply right-arrow on your computer keyboard to hear a brief sample of the kit sound (this only works with the Live factory sounds). Along the way we’ll be adding two little samples – just to let you know that this is possible!
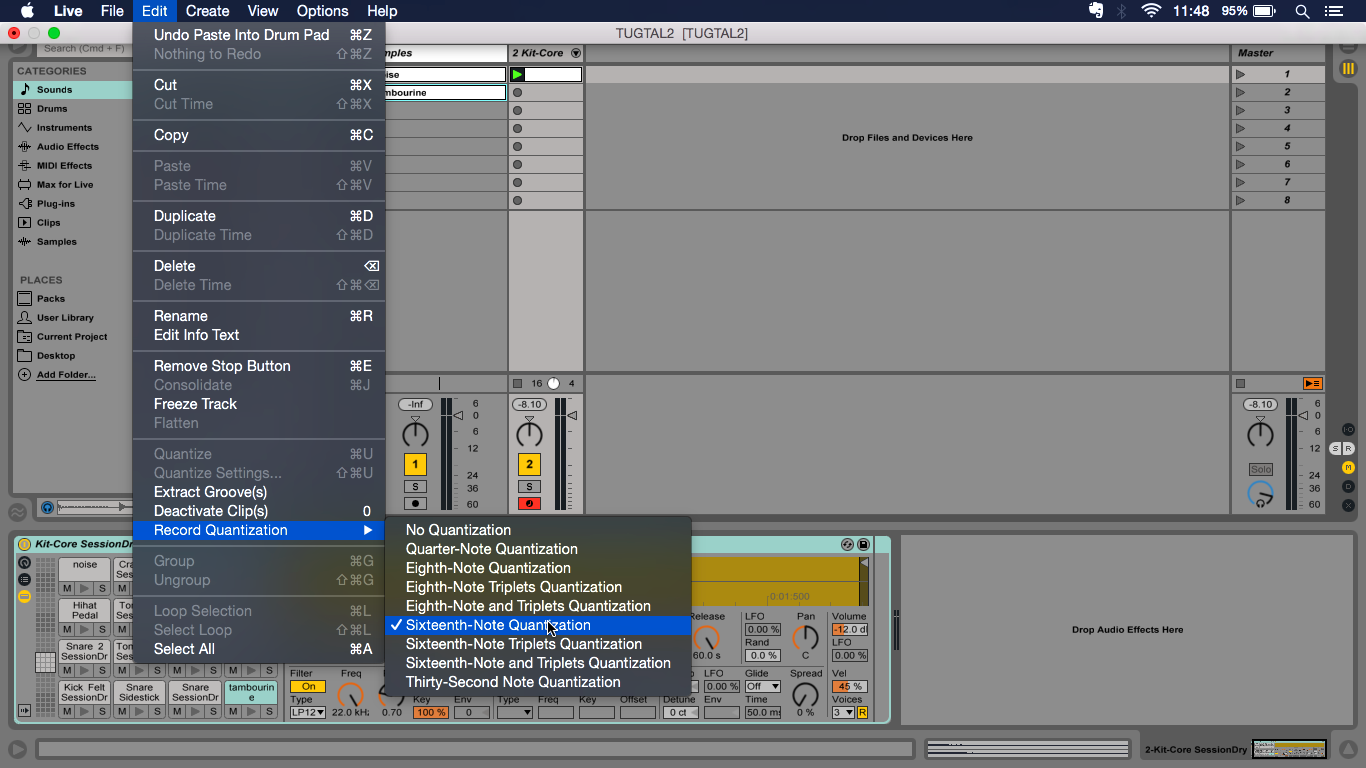
We set Record Quantization to Sixteenth-Note, though you’ll change this on a project-specific basis depending on the part you’re recording. If you forget to enable quantization, you can use Cmd-U to quantize the recorded notes, so you don’t have to record them again, with an Amount control that lets you blend in the amount of correction.
When you’re working in the MIDI Note Editor, you can navigate note pitches by simply clicking and dragging up/down on the piano roll at the left, and you can zoom in and out by clicking and dragging left/right at the same spot. You can also expand the editor upwards by mousing over the border at the top, where you’ll see the pointer icon changes into a dragging tool – and you can scale the editor upwards so it fills the screen, which makes it easier to work with.
The way I like to work when I’m creating a drum track is to add variations and breaks in the programming of the notes, but to use the Velocity MIDI Effect Device for dynamic variations – this keeps them randomising across the length of the track. We’ll offset the snare hits a bit, which is what real (good) drummers do to vary the feel of what they’re playing. This is part of what Live’s Grooves do as well – you can find them if you look under Packs/Core Library/Swing and Groove.
If you use these carefully you can impart a ‘human’ feel in your beats. Most of us will probably be working in 4/4 time, but don’t forget that Live can easily handle more complex time signatures, and even time signature changes can be automated, so don’t limit yourself to the ones that feel safe.
Live’s drum kits are usually based on drum racks, but it’s worth remembering that the good ol’ Impulse drum sample player is still there. This is a basic beat-making tool, but it’s great if you’re building your own electronically-oriented kits and you want to limit your options.
Making Tracks
Next time we’ll be treating beats more aggressively – taking audio samples of drum loops and slicing and processing them, and laying that on top of the beat we’ve created. Looking ahead, we’ll then be adding bass and keyboard parts to the project to create an entire track.
Focus On – Do You Really Need Drum Pads To Program Beats?
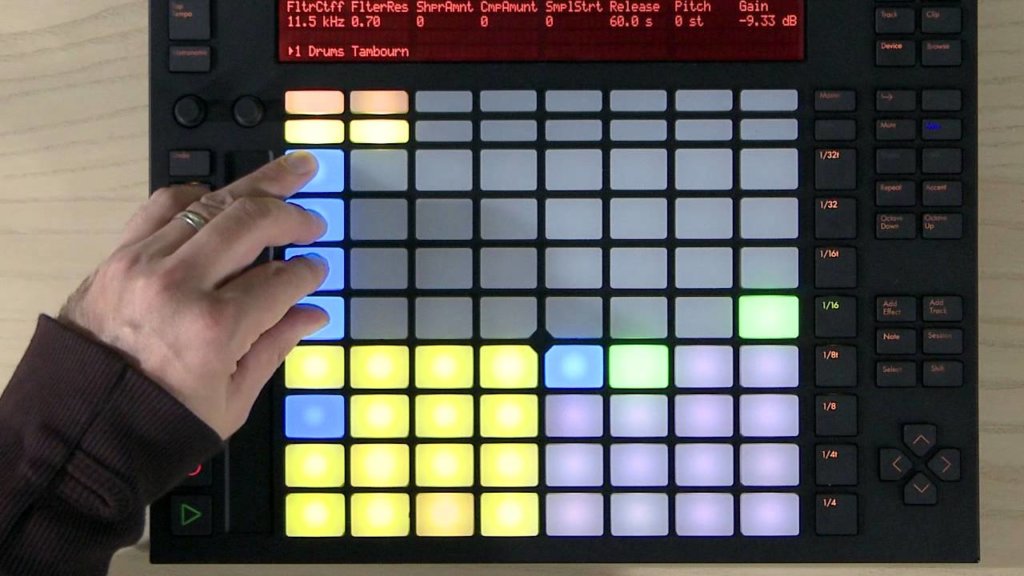
In a word, no! But a sensible answer takes longer – you can program MIDI beats perfectly well using a computer mouse or trackpad, but that doesn’t always get you in the mood. We can play in drum hits using Live’s computer MIDI keyboard for starters, then the options ramp up after that: from MIDI keyboard to MIDI drum pads, culminating in a more dedicated device such as Ableton’s Push.
Never mind the funny keyboard-in-a-grid gimmick, if there’s one thing Push is good for, it’s creating drum parts! Velocity-sensitive pads, step sequencing, device control… it’s all there.
Making a Beat with Ableton Live

1: Open our example set – TUGTAL2. Look at the Session View: a timeline gets in the way when you’re building beats (we want them to loop indefinitely) and there are some clips there!

2: Enter a bpm value in the tempo box near the top left of the screen. We could use any value from 20-999 bpm, but let’s agree on 126 for now – a little bit upbeat.

3: Type Cmd-F to search, and start typing ‘Kit-Core SessionDry’. When you see the kit in the ever-updating list, navigate to it with the computer keyboard’s down arrow and hit Enter to load it.

4: This is an acoustic drum kit, as you’ll hear when you audition the sounds from your MIDI controller (arm the track first), or from the triangular preview buttons in each cell in the drum rack

5: We want to add one electronic sound now, so drag the audio sample we’ve called ‘Noise’ on to the Conga cell in the drum rack – that’ll replace the original sample. Drum racks contain 128 cells

6: Double-click in the top clip slot in your drum track. This automatically creates a 1-bar MIDI clip. Turn on the metronome as well. Launch the empty clip. All you’ll hear is the metronome.
Click Here To Continue

