Ableton Live Tutorial: Editing in Arrangement View – Step-by-Step
In this step-by-step guide we take a look at the process of editing in arrangement view in Ableton Live 1: I’m using my recording; naturally this will differ from yours. You can either apply similar steps to your own project, or load the completed part 8 set – download here 2: Tap the Space bar […]
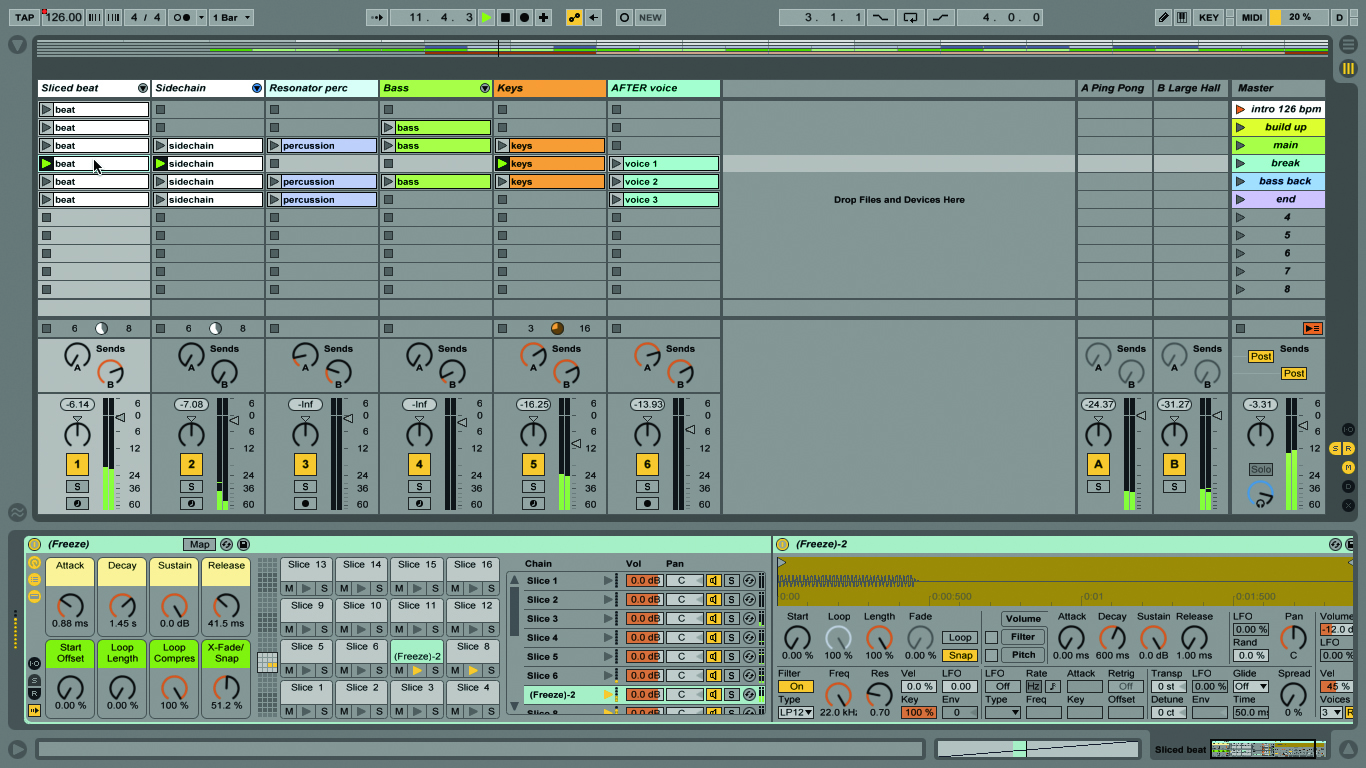
In this step-by-step guide we take a look at the process of editing in arrangement view in Ableton Live
1: I’m using my recording; naturally this will differ from yours. You can either apply similar steps to your own project, or load the completed part 8 set – download here
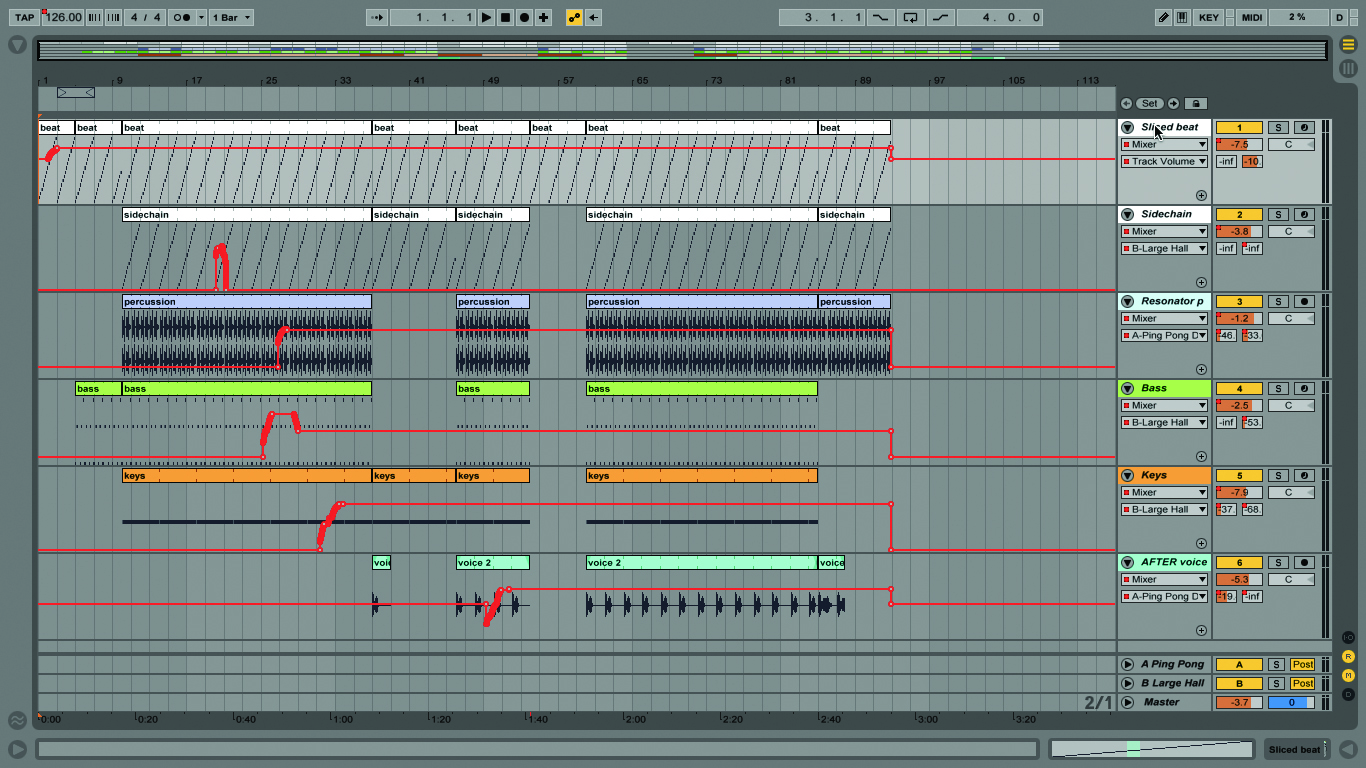
2: Tap the Space bar or the Play button, to hear the recorded arrangement. If any of the tracks are greyed out, use the Back To Arrangement button to restore them – read more in the main text.
3: Also be aware that if you now pop back to the Session View and launch any clips, they will affect the arrangement playback, so avoid that unless it’s really what you really want to do!
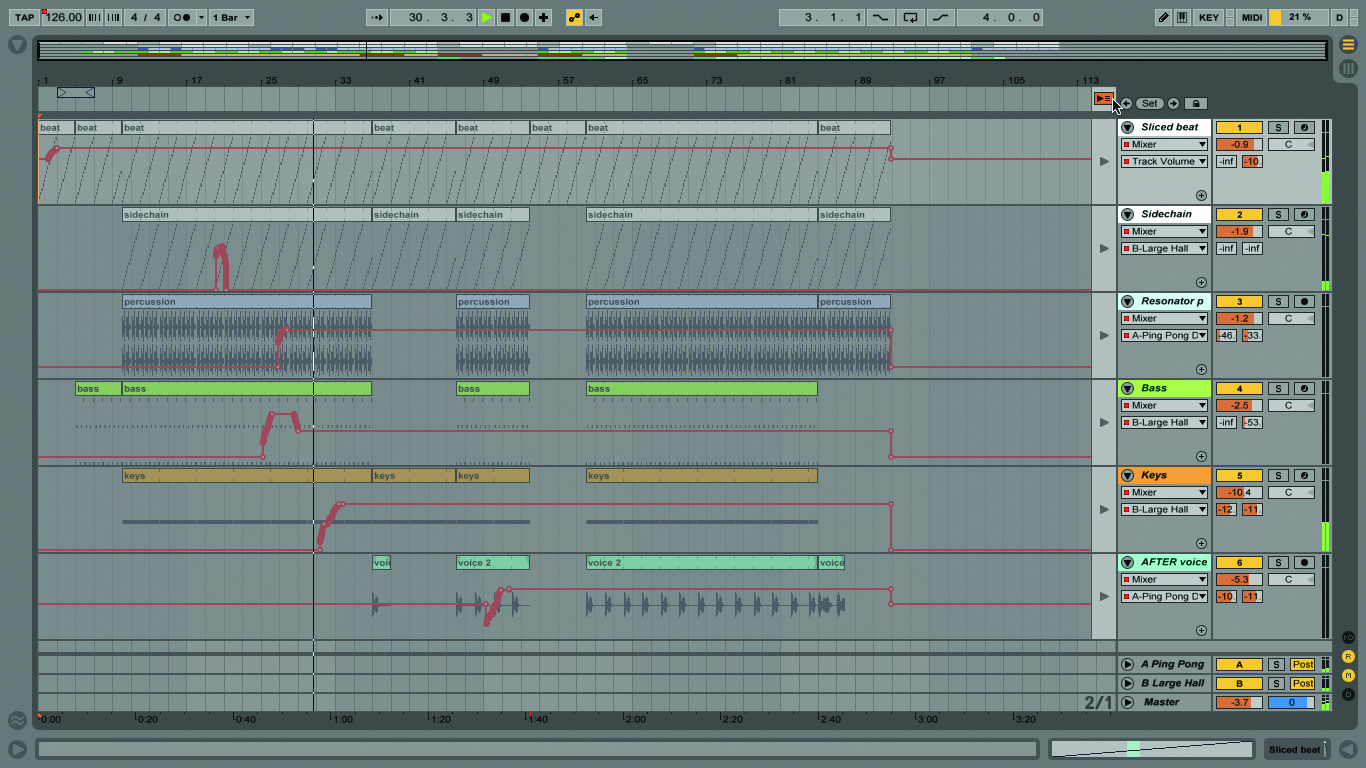
4: Zoom in and around the timeline by clicking and dragging above it, where you’ll see a magnifying glass icon, or in the black rectangle in the overview. Double-click there to view the arrangement.
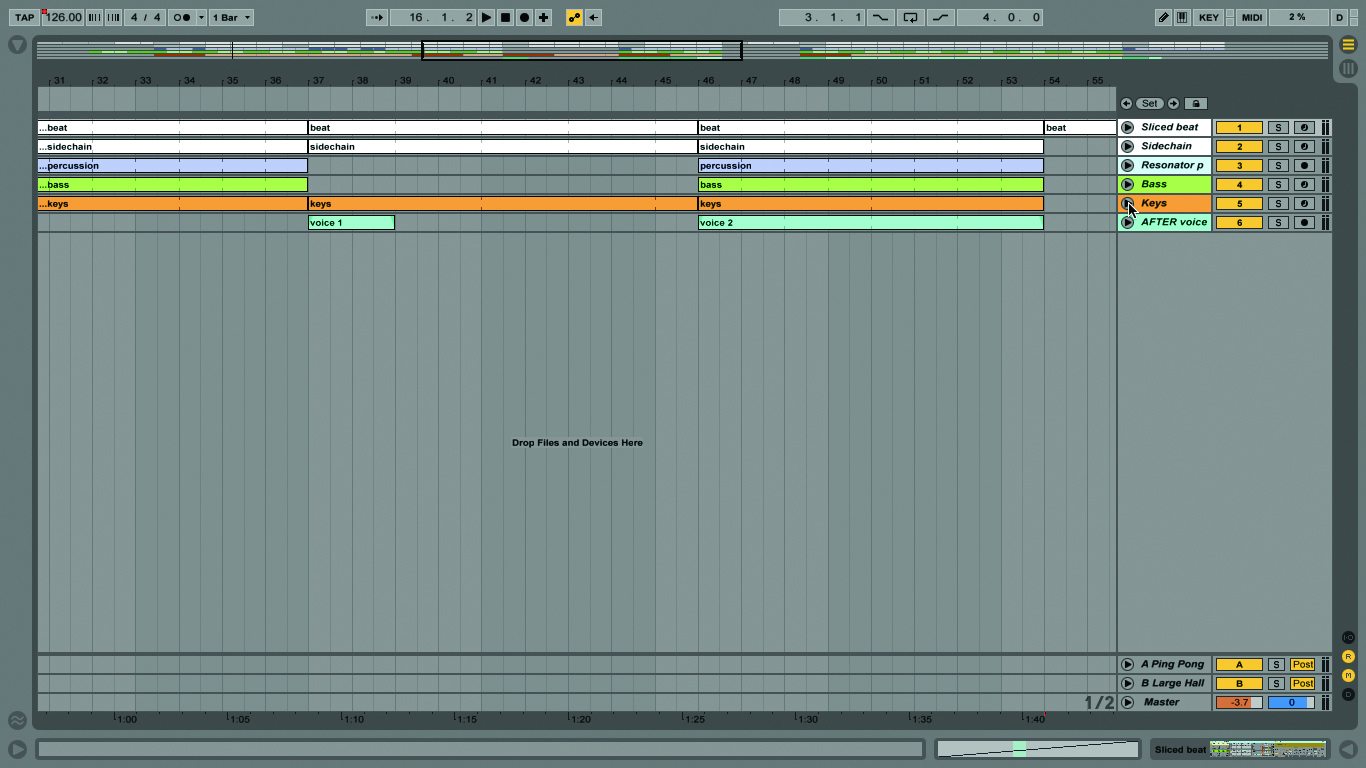
5: You can also zoom using the + or – keys. Manage vertical space by folding tracks – click the small triangle at the end of the track. Hold Option/Alt and every track unfold/folds simultaneously.

6: If you move any on-screen controls during recording, these are captured as automation, depicted by red lines that go from left to right in the Arrangement View tracks – these are called envelopes.
7: If you can see a red dot on a control, that means there’s automation present. Use the pop-up boxes in the Mixer at the right of the screen to view the envelope.
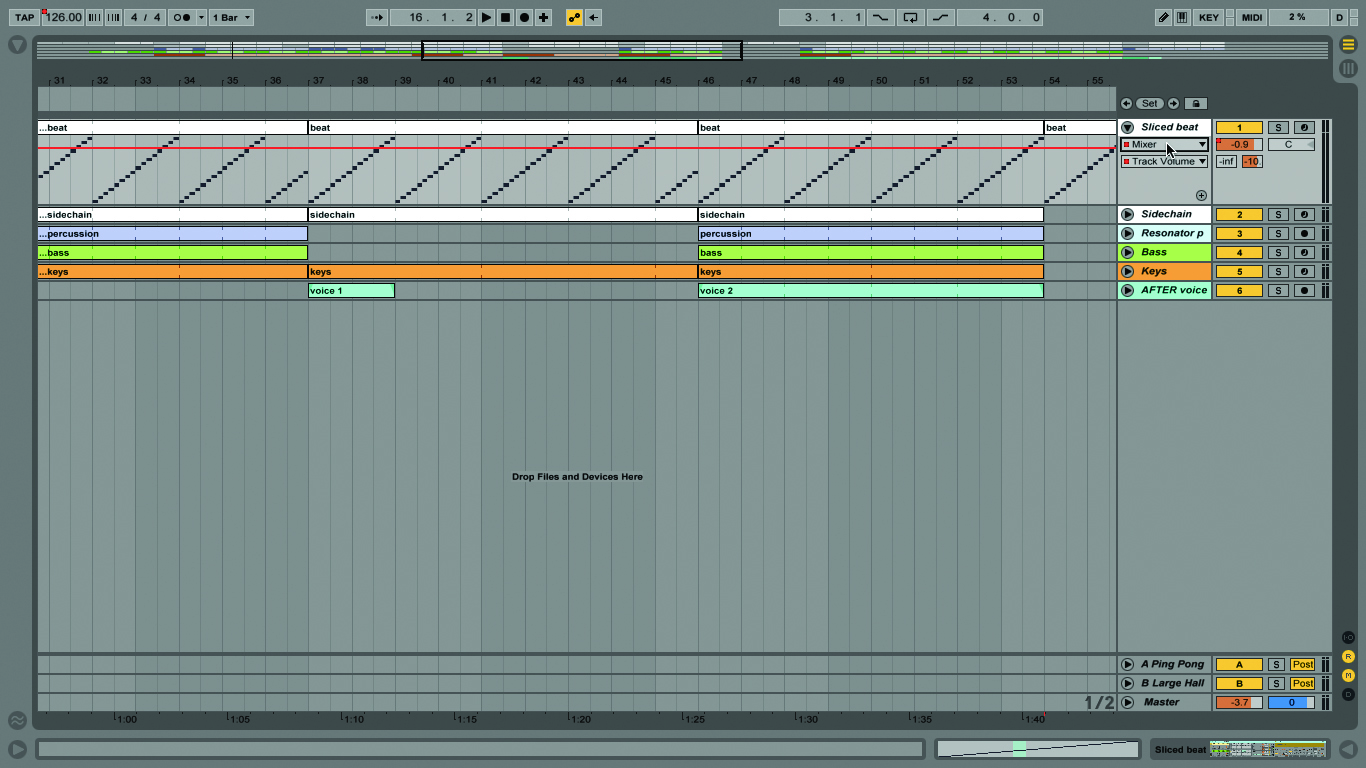
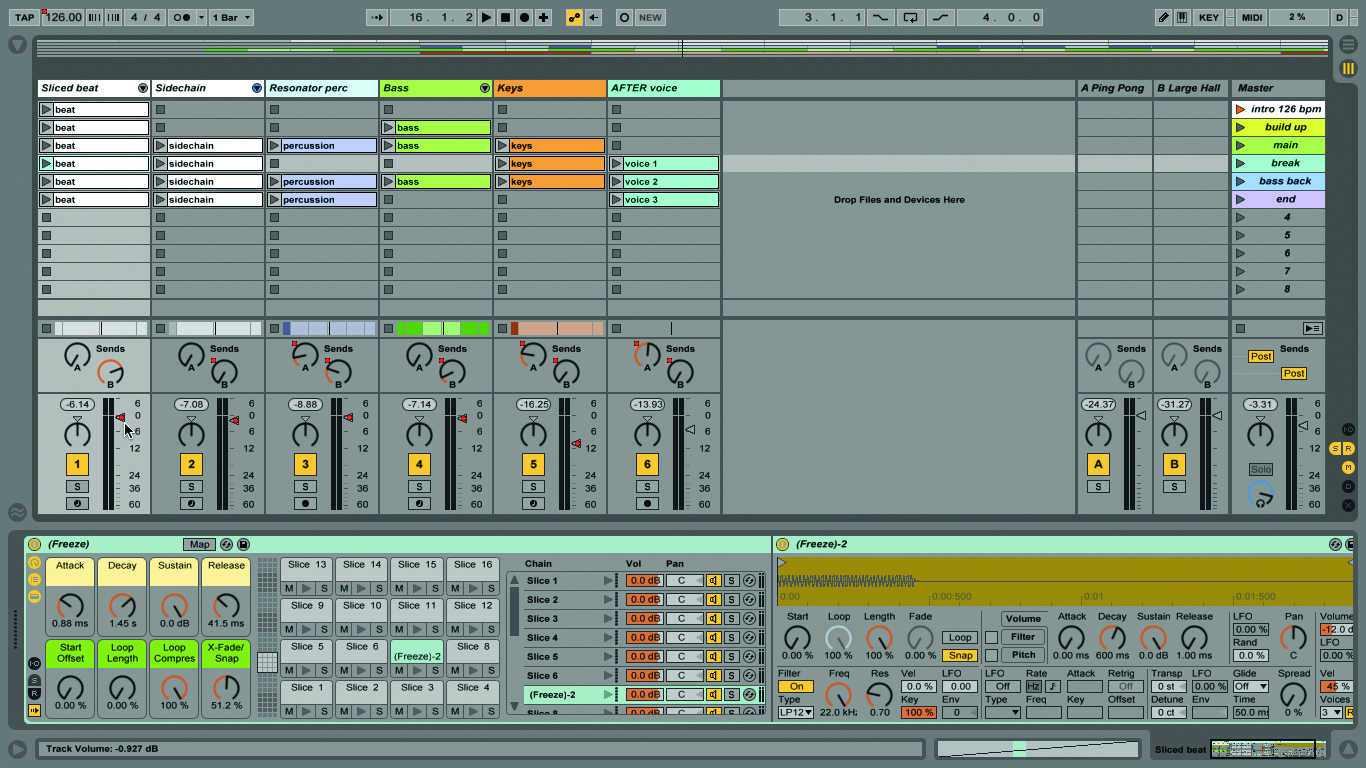
8: Let’s tweak the example set as discussed. Unfold track 1 by clicking the triangle left of the name. Choose ‘mixer’ from the top chooser. It has a red dot by it, indicating there’s automation present.
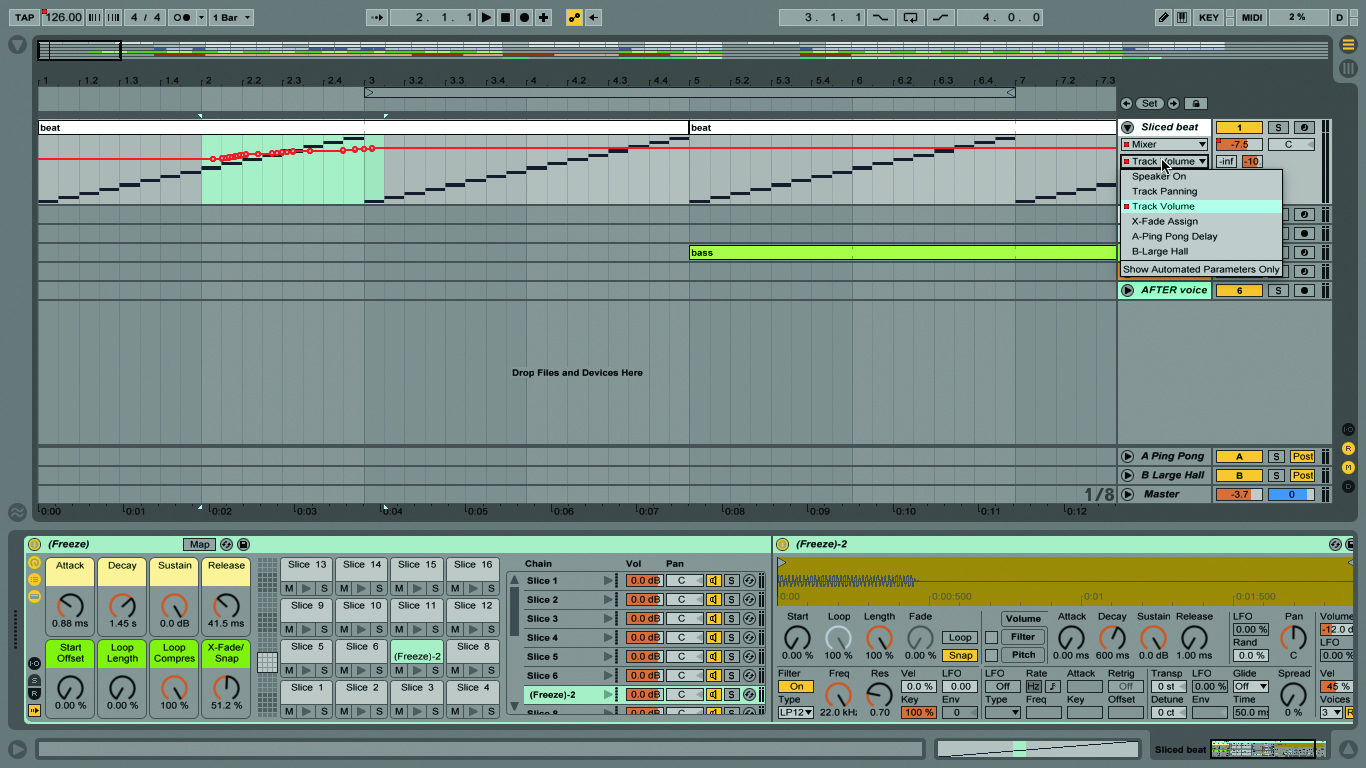
9: Sometimes you need to dig to find the envelope. Click the lower chooser, and you’ll see Track Volume listed, with a red dot. Select that, and you’re looking at the track volume automation, in red
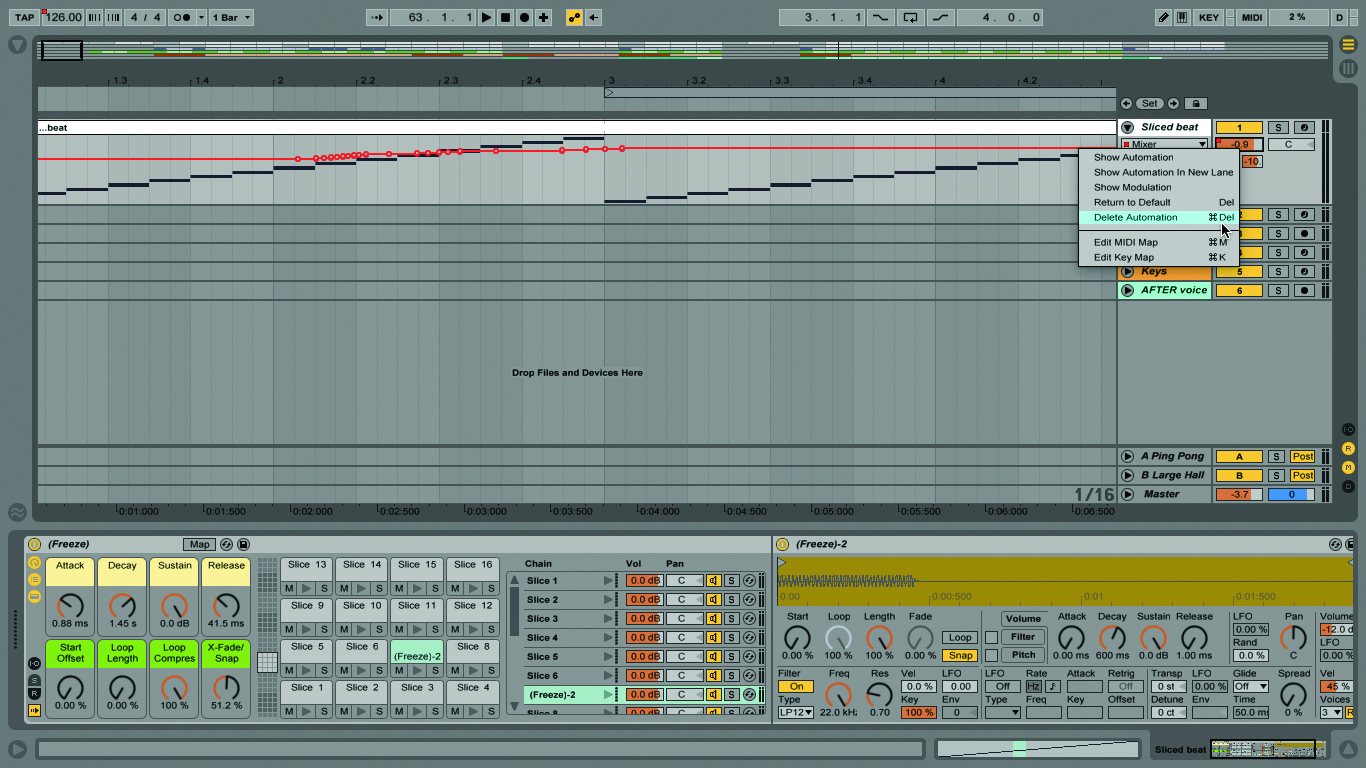
10: At the beginning, I increased the beat volume. Right-click on the Track Volume box at the end of the track, and choose Delete Automation, to straighten out the entire volume envelope.
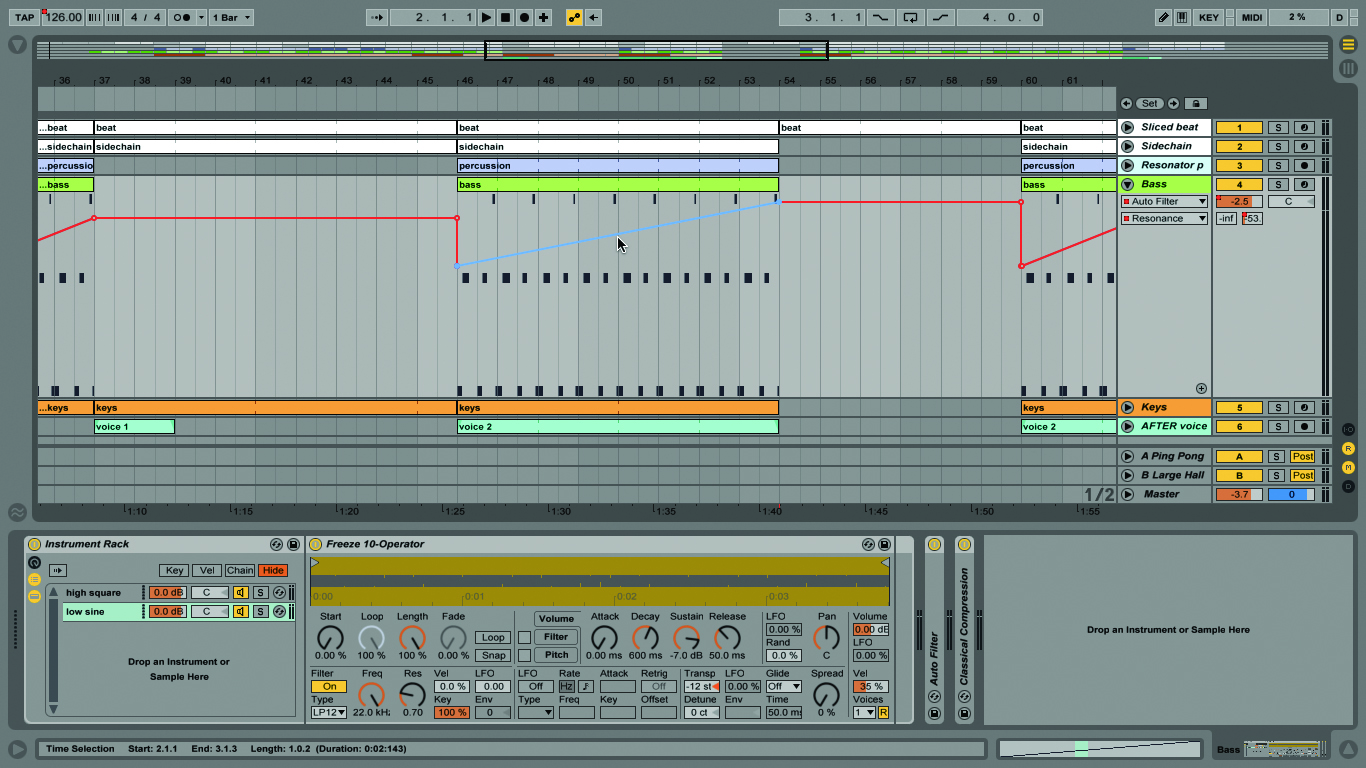
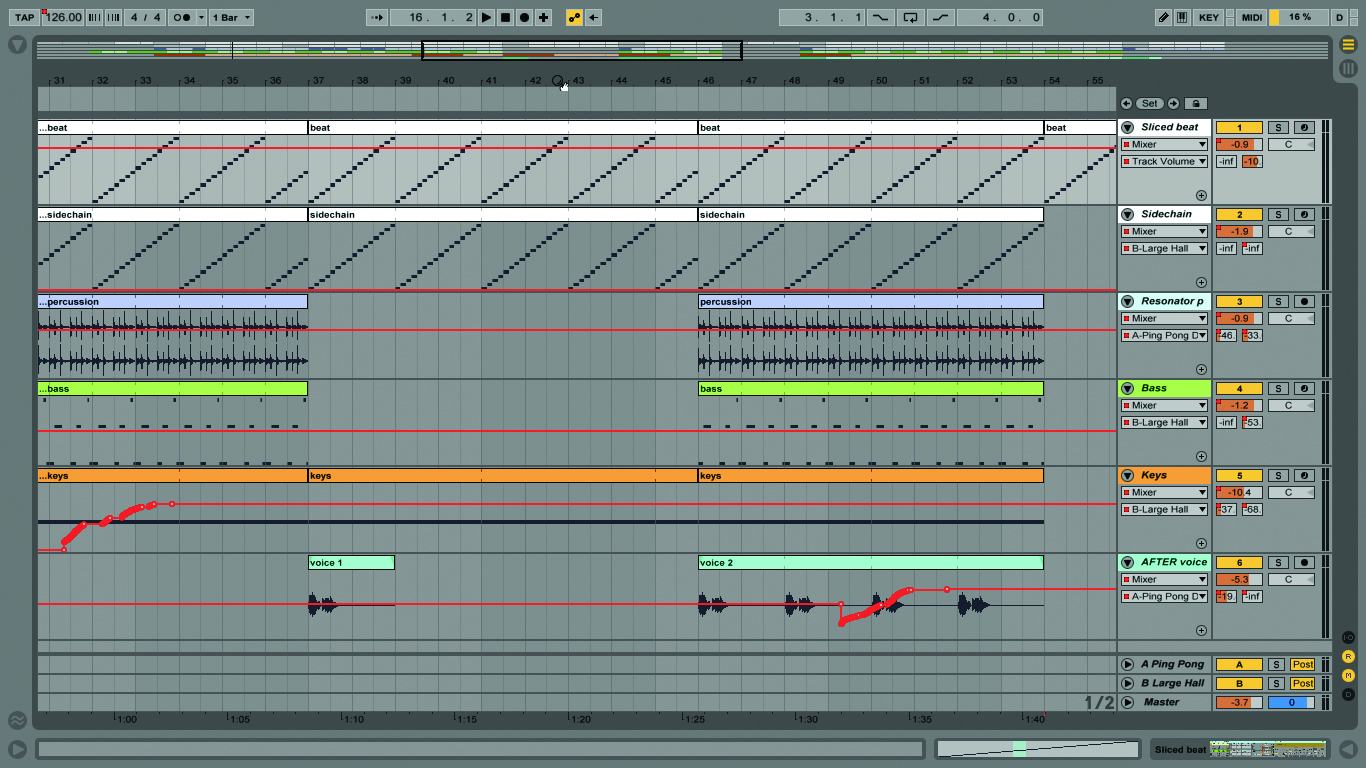
11: Let’s automate the bass track’s filter. Unfold the track so you see the automation for Auto Filter/Resonance. Use single-clicks to delete each breakpoint between bars 46 and 54.

12: Unfold the Frequency lane and do the same there. What this does is create a unique longer filter sweep for that part of the song. Fold the track afterwards if you want to be tidy.
Click Here To Continue
