Ableton Live Tutorial: Editing in Arrangement View
Previously we captured our Live jam into the Arrangement View timeline. Now Martin Delaney shows you to how polish that and create a finished structure… Last time, we concluded with a recorded jam – a spontaneously-created structure, laid out along the timeline in Live’s Arrangement View. The purpose of this was to show how Live’s Session […]
Previously we captured our Live jam into the Arrangement View timeline. Now Martin Delaney shows you to how polish that and create a finished structure…
Last time, we concluded with a recorded jam – a spontaneously-created structure, laid out along the timeline in Live’s Arrangement View. The purpose of this was to show how Live’s Session View relieves you of the pressure of making commitments and working out your songs intellectually. Instead you can start record, start playing and improvising, and just see where it takes you.
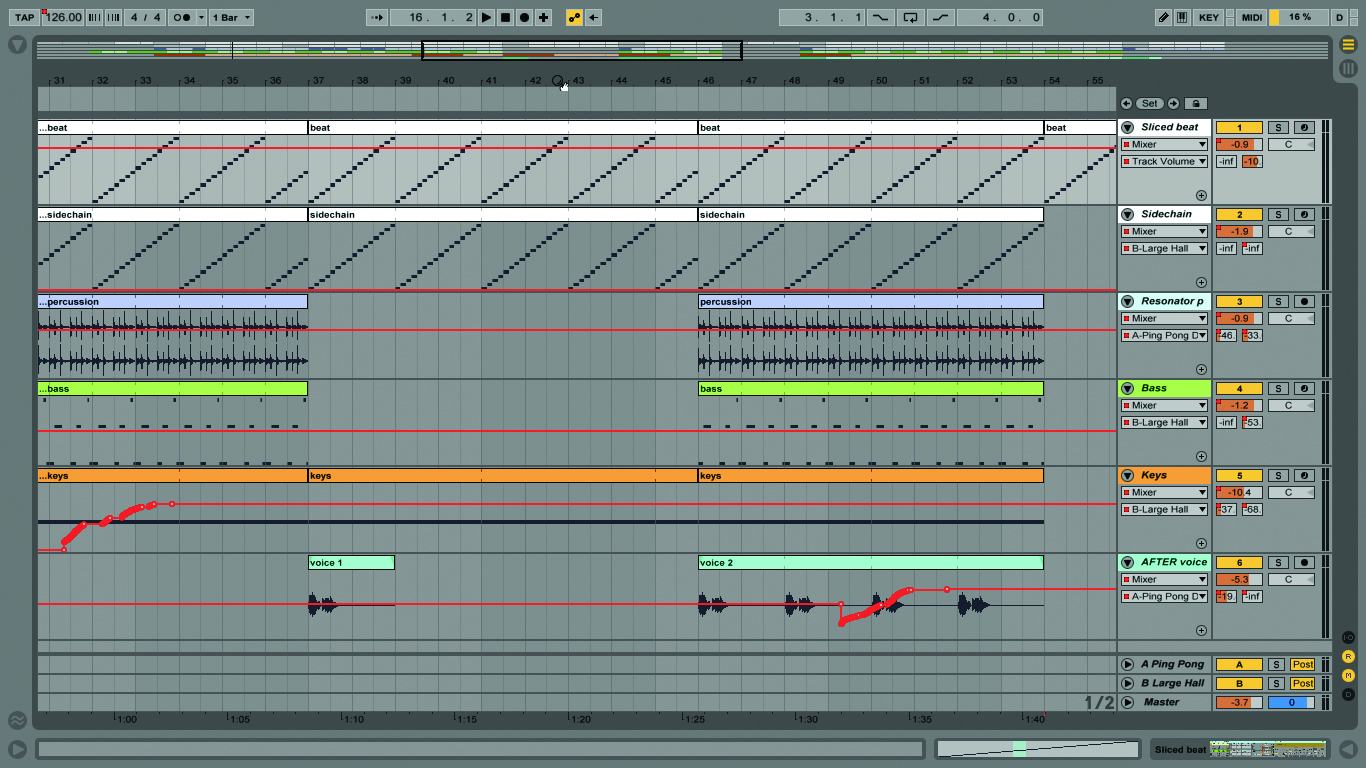
After you tap the Tab key to view your recorded tracks, you’ll see they’re greyed out. This is because Live prioritises the Session View clips. To restore Arrangement playback, click the orange Back To Arrangement button above the top right of track 1, to enable all tracks (this button disappears when not needed, which is confusing/annoying until you get used to it).
You’ll also notice separate Back To Arrangement buttons for every track, so you can specify individual tracks you want to drop back in to from Session View. This provides a very powerful and dynamic way to work with the Views; useful if you’re running a complex live show that might need both planned and spontaneous elements.
Understanding the relationship between the Views is an essential step to mastering Live. You’re seeing the same tracks in both Views, laid out vertically or horizontally; if you delete a track from either View, it’s gone from the entire set! But if you delete a clip from, say, track 1 in Session View, it doesn’t affect any clips in the same track in the Arrangement view.
Our aim now is to edit the structure that we created through jamming; everything is up for grabs, everything can be tweaked. You can keep working with your set from last time, or you can use the up-to-date version on the disc, which includes all of the steps from the last tutorial. (There’s a good chance we’ve started to diverge as we’ve made different recordings, so these walkthrough steps might not make sense unless you use our example set.)
When you’re working with a lot of tracks, you will need to manage your screen space. Folding and unfolding them helps, and you can zoom in and out, but you can also expand individual tracks by mousing over the bottom of the track and dragging downwards. If you hold Alt at the same time you can expand all your tracks simultaneously.
Editing automation is easy in Live – just click to add or remove breakpoints. Mouse near an envelope so it turns blue, then you can drag it around, or copy and paste it, delete it, whatever you want to do.
Hold down Alt while you do this, and you can draw curves as well as straight lines. Caution! When you’re deleting an envelope, make sure you have it selected properly, otherwise you’ll delete the entire region that it applies to, clips and all. If you want to view multiple lanes of automation in the same track, use the little + and – buttons that appear when you unfold the track.
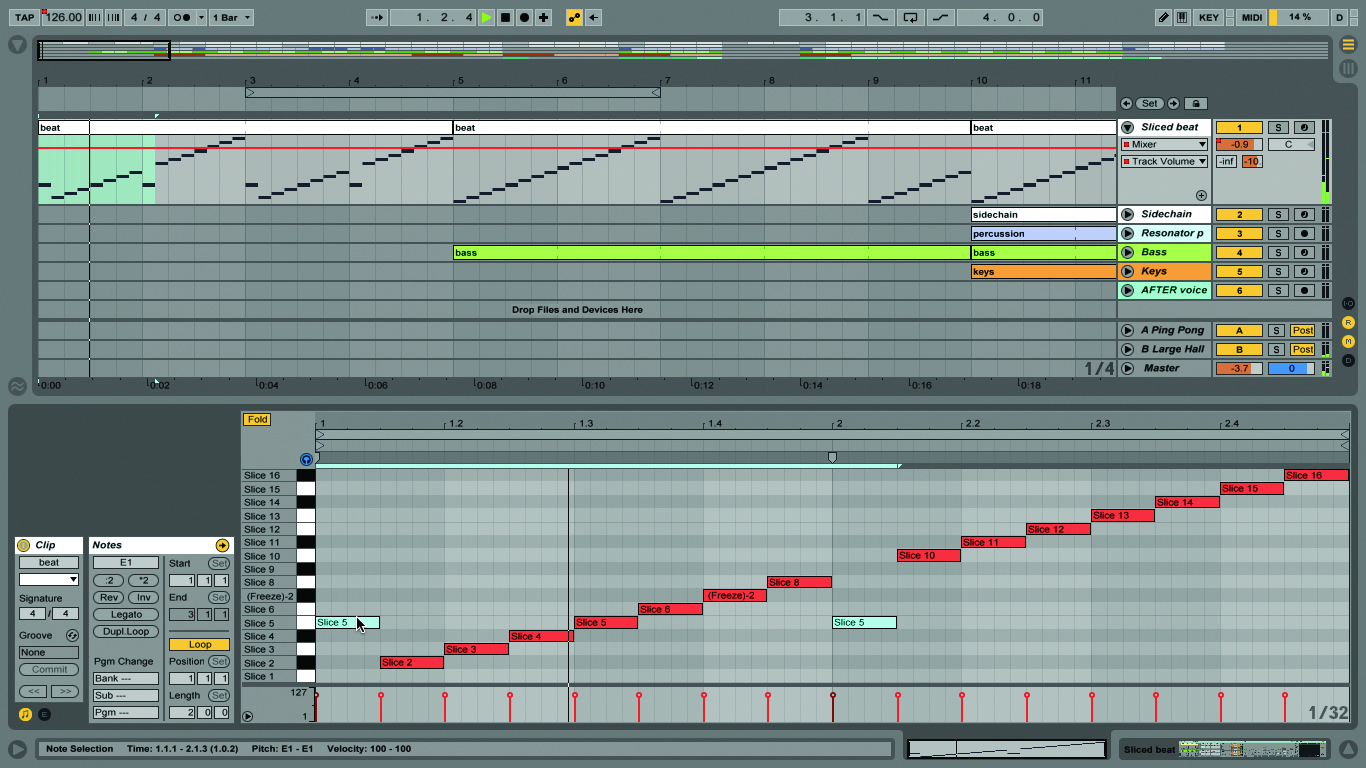
In the walkthrough, we edit the beat in the first MIDI clip, to remove the noisy sample hits from the beginning of the song. If you remember, we created this beat by using Live’s Slice To New MIDI Track command.
Each note represents a slice of the original sampled beat, so when we drag the notes in the clip around, we’re choosing to play different slices at that point in time. By choose Slice 5 each time, we’re substituting the slice that doesn’t contain the noisy sample.
We shorten some of the sections to the typical bar counts that you see in music – everything happens in fours! I’m just getting you to do that to practice editing, I’m not suggesting you always have to use such regular bar counts. Of course, you’re free to do it how you like.
Live is quite intelligent with its handling of automation, when it comes to copy and paste, or to moving clips around. When we copy and paste the bass clips in the tutorial, you’ll see the filter envelopes for those clips are copied as well. Also, if you copy and paste a clip between Session and Arrangement Views, the envelopes are preserved, converted to clip envelopes – or vice versa – to track automation.
We briefly touch on the topics of locators – these are very useful for identifying and labelling sections in longer songs. The arrows at the top right of the screen let you skip through your locators, while the Set button can be used to insert them dynamically and all three of these controls are MIDI-assignable. If you’re studying song structure, sometimes it’s good to load a song you like, and use locators to map out all the parts.
Then delete the song and build your own tune using the structure! It’s not stealing – you’re not taking any samples, melody, or anything, it’s just a good learning and experimentation tool.
Be warned, creating a piece of music in Live doesn’t truly end until you render and master it. Even after recording into the Arrangement View, you can drag in, or record, more audio and MIDI parts, add new tracks, or add new effect devices. As with a lot of music production you have to be clear about reaching a cut-off point otherwise you’re working on the same tune forever!
Focus On… Monitors
You can get quite a long way into the composition and production process without high quality monitoring – I’m sure many of us begin sketching out tunes on mobile devices or laptops, where we’re either listening on tiny built-in speakers, or on cheap headphones.
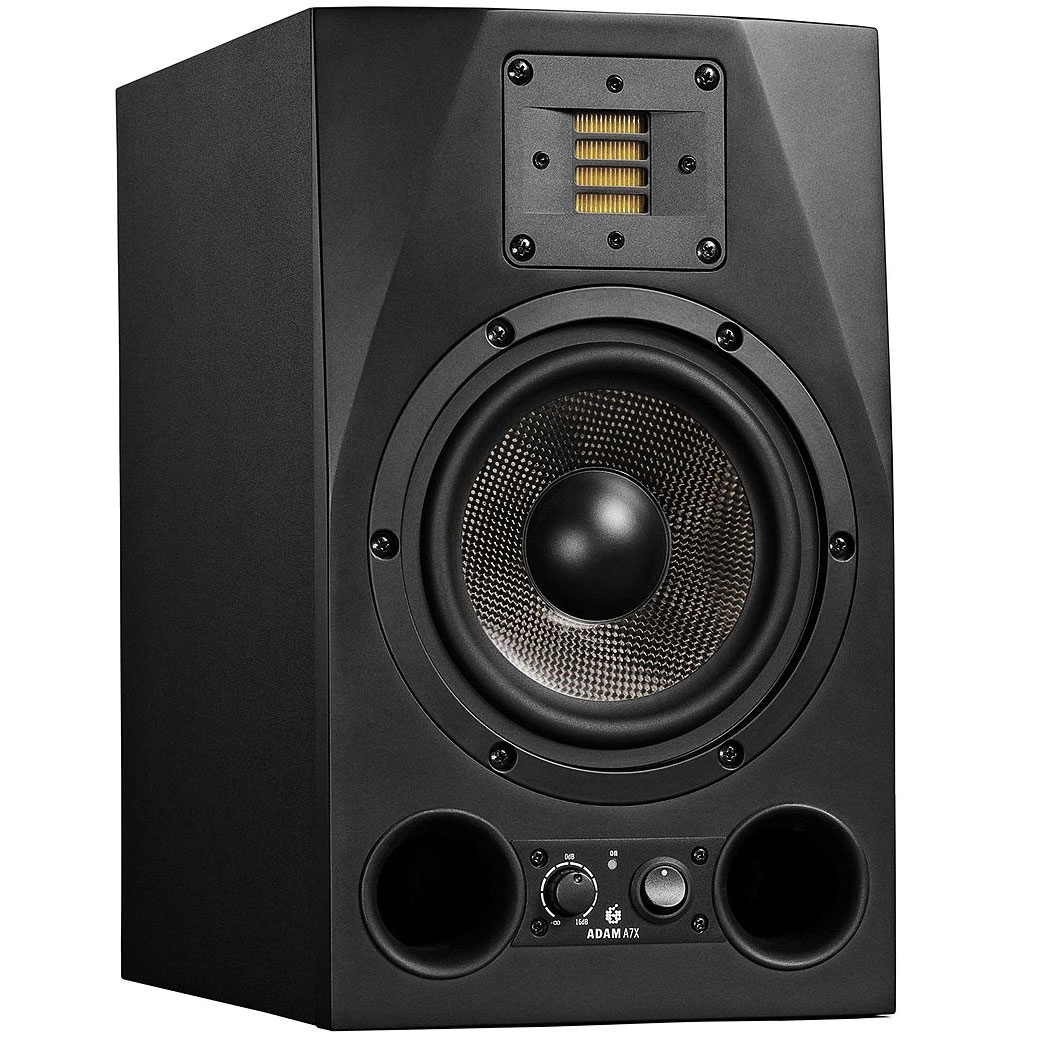
As you progress towards finishing your track, though, you need to hear what’s going on more clearly, and across a wide frequency range. You will need some high-quality monitoring headphones, and some monitor speakers as well.
You can’t be applying critical processes like equalisation and compression when you can’t really hear what effect they’re having.
Click Here To Continue
