Ableton Live Tutorial: Envelopes and Automation
It’s time to augment your Ableton Live shows and productions with a more organic, evolving vibe by using envelopes and automation to the max! Martin Delaney maps his MIDI… For this tutorial you’ll need the project file – download here Automation is the process of recording mixer or device moves for playback later. The recorded movements […]
It’s time to augment your Ableton Live shows and productions with a more organic, evolving vibe by using envelopes and automation to the max! Martin Delaney maps his MIDI…
For this tutorial you’ll need the project file – download here
Automation is the process of recording mixer or device moves for playback later. The recorded movements appear inside Ableton Live as red objects called envelopes and breakpoints.
We can use automation in the mixer, in MIDI tracks, for instruments, MIDI effects, audio effects and in audio tracks for audio effects. We can add automation by drawing it with a mouse or recording from a MIDI controller like a Novation Launch Control or Ableton’s Push; we can apply automation at clip and track levels.
We use automation for three reasons: because there are jobs where we just don’t have enough hands or fingers to move everything that needs moving; because we often need to recall and repeat certain actions; and because the sound of movement, the sound of controls being tweaked, is a vital part of electronic music production.
Synth sounds and effects without some kind of movement can be horribly sterile, so automation becomes part of the arrangement. Throughout this tutorial, we’re mostly using Session View, but rest assured that Arrangement View automation works along the same lines.
Automation can be applied to anything that responds to MIDI. As well as using it within Live’s audio and MIDI tracks, it can be sending out to external software or hardware,
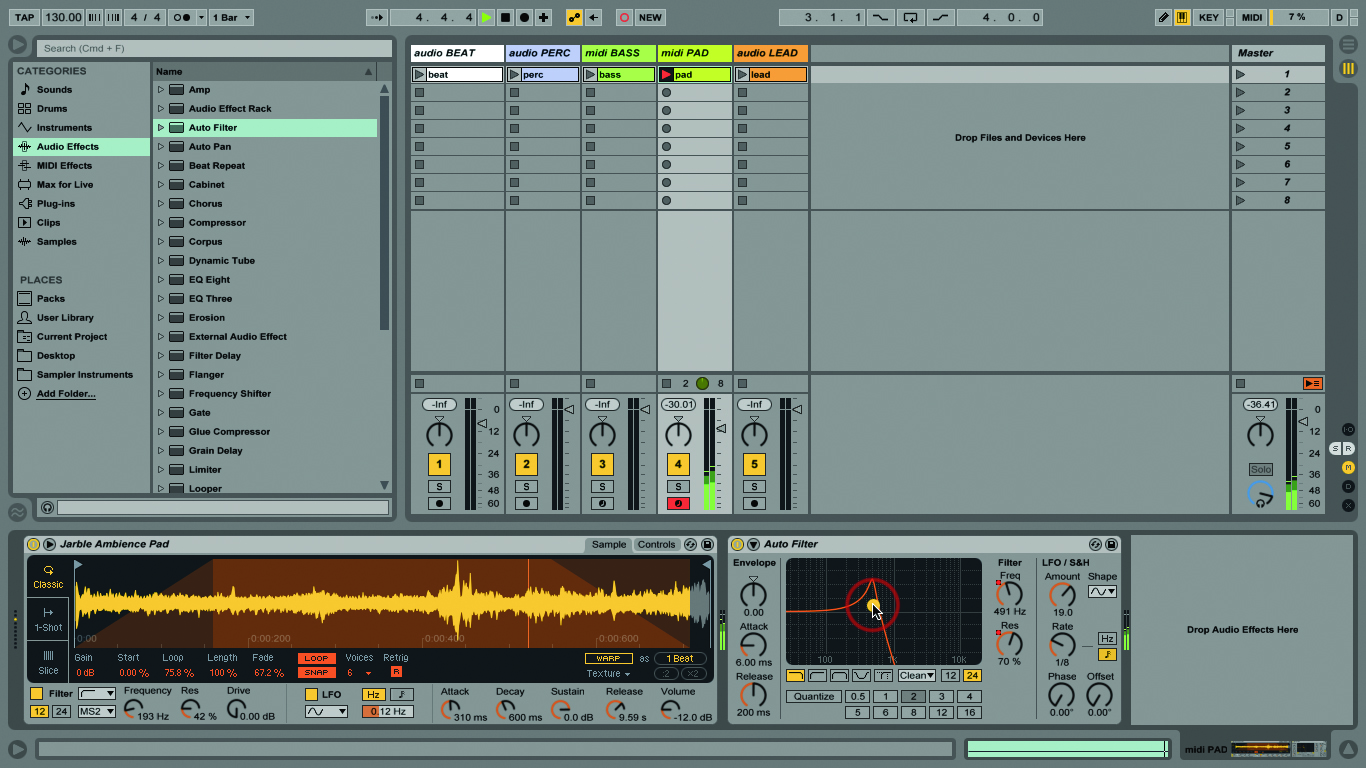
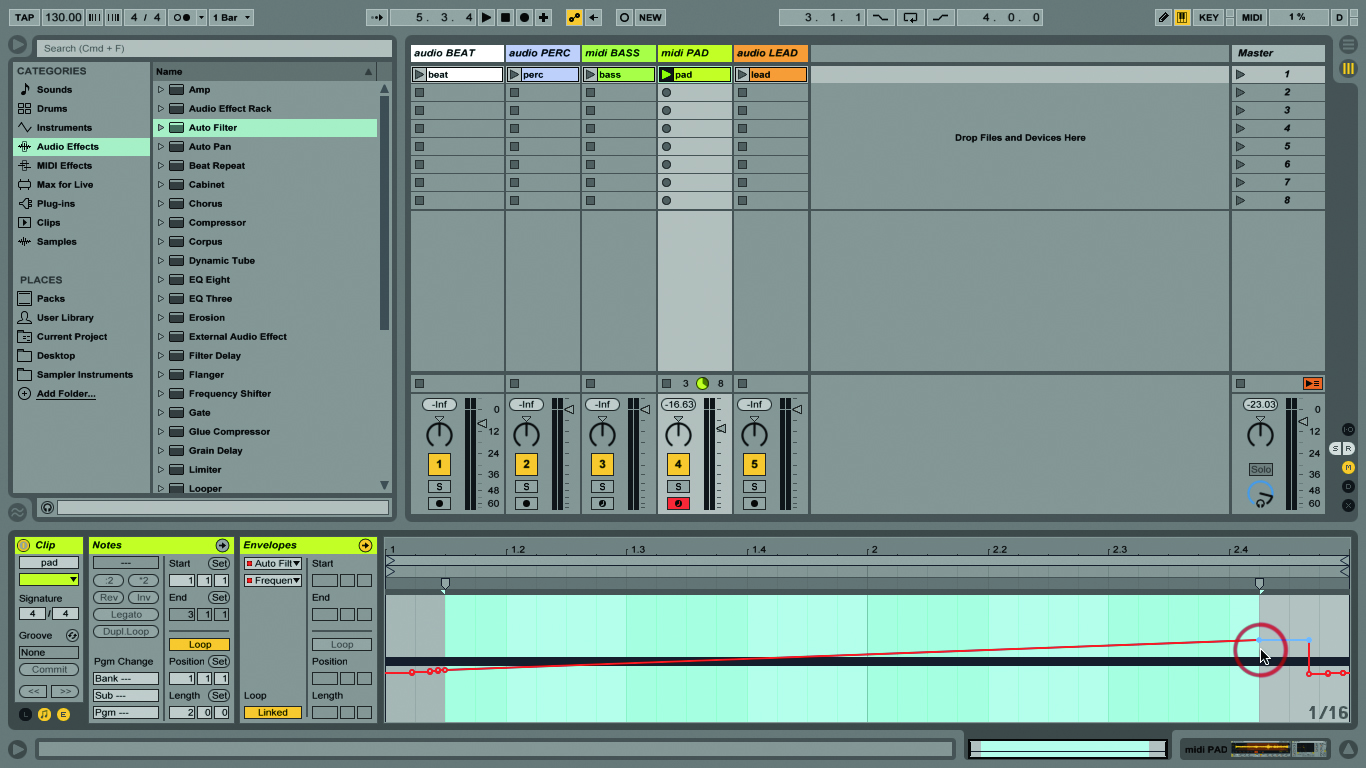
like VJ applications, synthesisers, and lighting rigs. Our example Live set contains both MIDI and audio tracks and clips – they can all be automated to various degrees. If you can’t see the clip envelopes, you’ll need to click the little black ‘e’ button near the bottom left of the screen, and then click on the Envelope’s box name to make sure you’re editing in the right place.
You can run tons of automation on a single clip at the same time which is a great way to experiment and see how much movement you can get from just one little sample or MIDI part. As mentioned in the tutorial, you can draw curves as well as straight lines, something that I use to get fades to behave the way I want.
You also have the option to record automation, as well as drawing it in. Many feel drawing is too clinical and by using the recording method they get a better vibe; you can record mouse movements, but it probably won’t feel so musical. If that’s good for you, do it – a big part of that vibe is about recording with a hardware controller. Controllers such as Push are good for this, as they assign themselves to Live’s controls – you don’t need to do any mapping. Before recording, make sure the Automation Arm button is lit yellow if you want to successfully record automation in either view.
You should think about the MIDI Preferences option where you can choose to record automation into Armed Tracks Only, or All Tracks (I use the first). You can tell if automation’s being recorded, because you’ll see red dots appear on the controls you’re moving.
If you’re automating a looping clip, make sure you’re done by the end of the clip, otherwise you’ll be overwriting the envelope you created on the first pass. As already stated, envelopes work with clips in both views; they’re ‘portable’, too. Drag a clip containing automation from the Session View to the Arrangement,
and the automation within the clip is converted to track automation.
Drag a clip from the Arrangement View to the Session View and anything automated relating to that clip is converted to clip automation. In Arrangement View, you can see many lanes of automation per track by unfolding the track, clicking the little + sign, and choosing what automation you want to see, again indicated by red dots. Repeat as necessary!
We can also automate third-party plug-ins, thanks to the Unfold Device Parameters button in the default plug-in view. Click on that, then the Configure button and you can add as many elements as you like from the plug-in in question – click on a plug-in control to add it to the list. Once added there, you can automate them as usual (Push 2 now supports VST and AUs – some will map automatically, some won’t, so this method is still helpful).
Unlinking envelopes is one of my favourite things. Try it with the clips in the example set. Even more than with linked envelopes, unlinking adds so much sonic ‘value’ to a simple part. There are some non-Ableton tools that we can use to simplify some automation tasks; the Waves Vocal Rider plug-in is a good example. Automating vocals can be tedious – going through and riding the volume fader again and again through the song (you’ll also be using limiters and compressors to manage the dynamics).
Vocal Rider does what the name suggests: set your desired output levels, and it’ll ride an onscreen fader throughout the track, keeping your levels under control. This does a great job of smoothing out vocal tracks. If needed, you can ‘print’ the automation from Vocal Rider to your track as ‘normal’ track automation, as well. However you choose to add them and use them, clip envelopes are at the very least really useful and, at best, they’re an amazingly powerful creative tool that will make your mix active and more interesting.
Focus On Push and Clip Envelopes
Being an Ableton product, Push of course has deeper out-of-the-box integration than anybody else’s controller, and that applies to automation in spades.
Just press that red Automate button while you’re recording, and capture clip envelopes in real time, for whatever parameters Push’s encoders are running at the time. Things can get pretty loose when you record envelopes like this, so luckily for me… er, us… there’s an Undo button as well! Seriously, though, this takes the ‘doing your homework by drawing envelopes in’ vibe out of clip automation, and fits in great with Live’s overall workflow.
Step by Step – Envelopes and Automation In Ableton Live
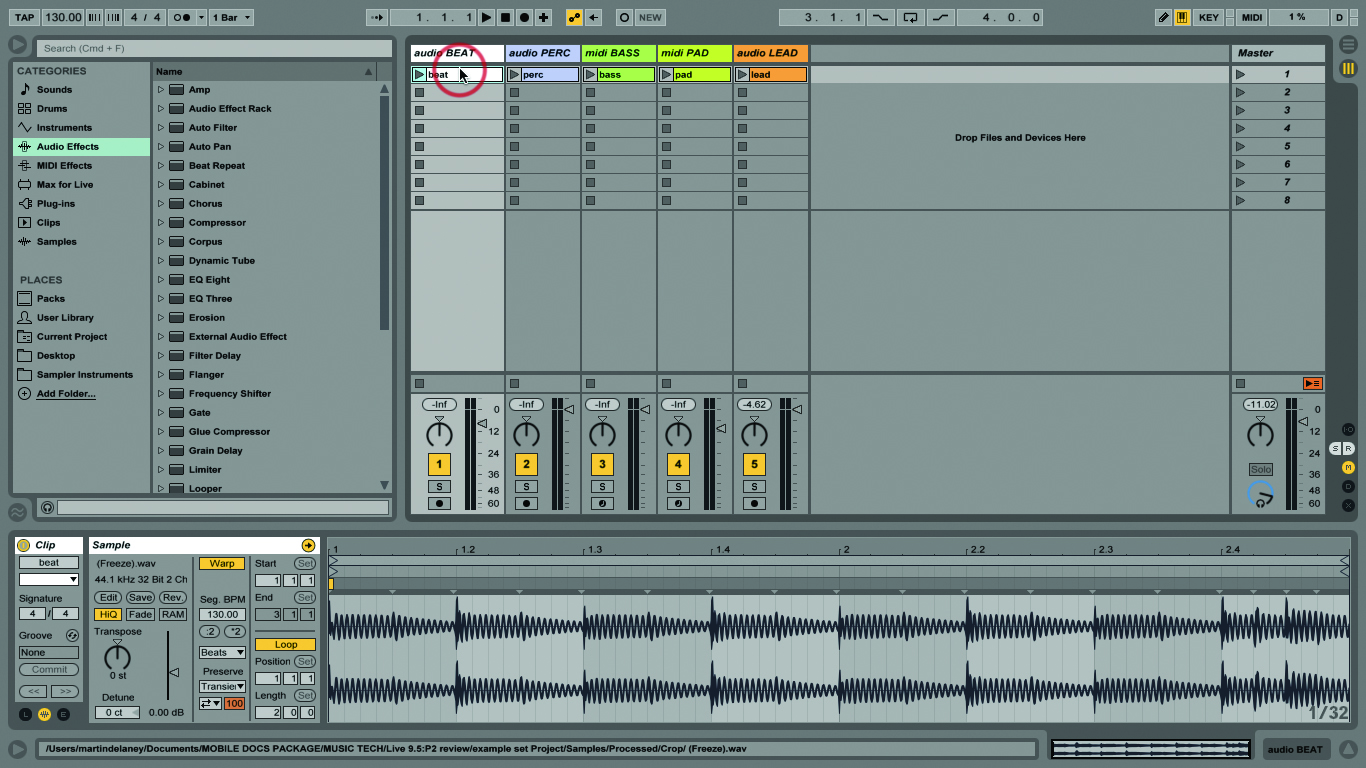
1: Let’s work with clip and track automation. <downloadable here, there’s an example Live set containing audio and MIDI clips to get started. You’ll need a MIDI controller with knobs or faders, or both.
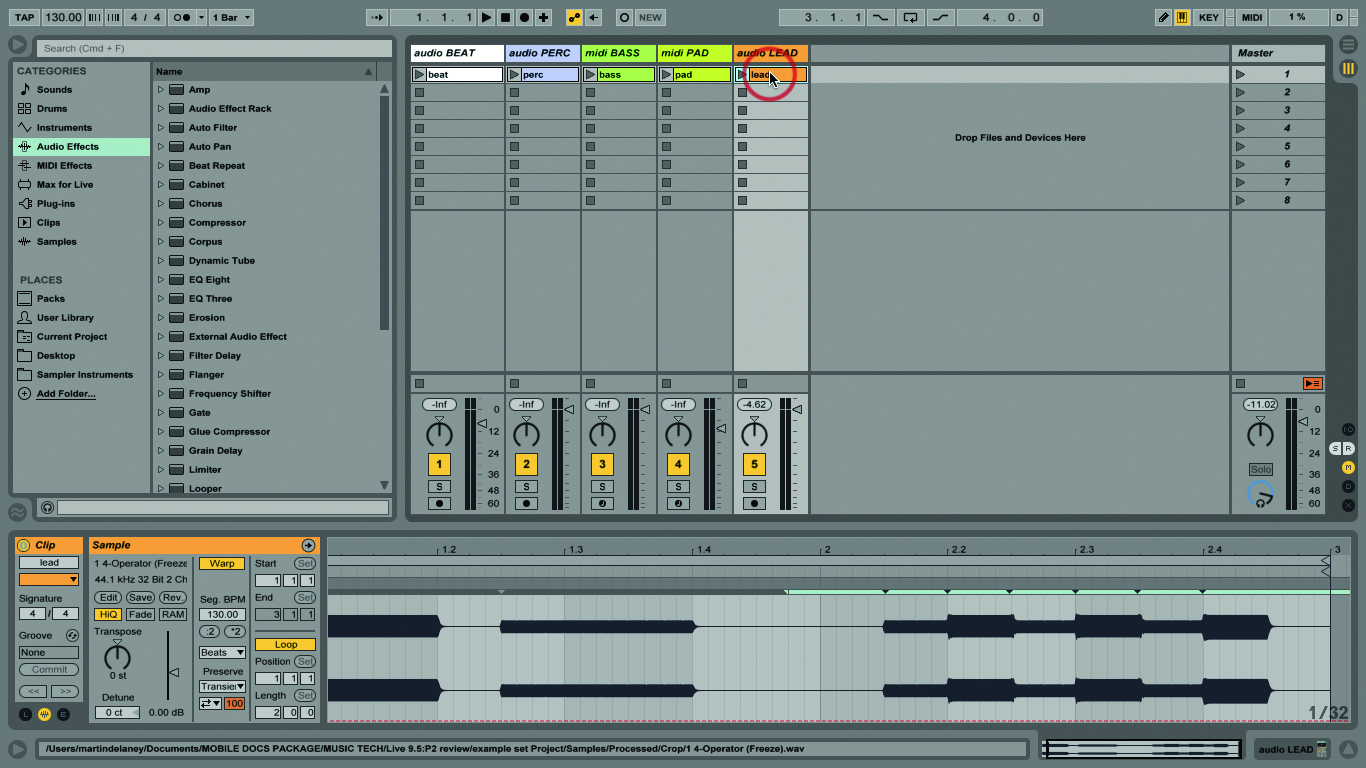
2: We can start with a simple bit of clip automation on the ‘lead’ clip – that track already has a Ping Pong Delay loaded. Double-click on the clip body so you can view the waveform.

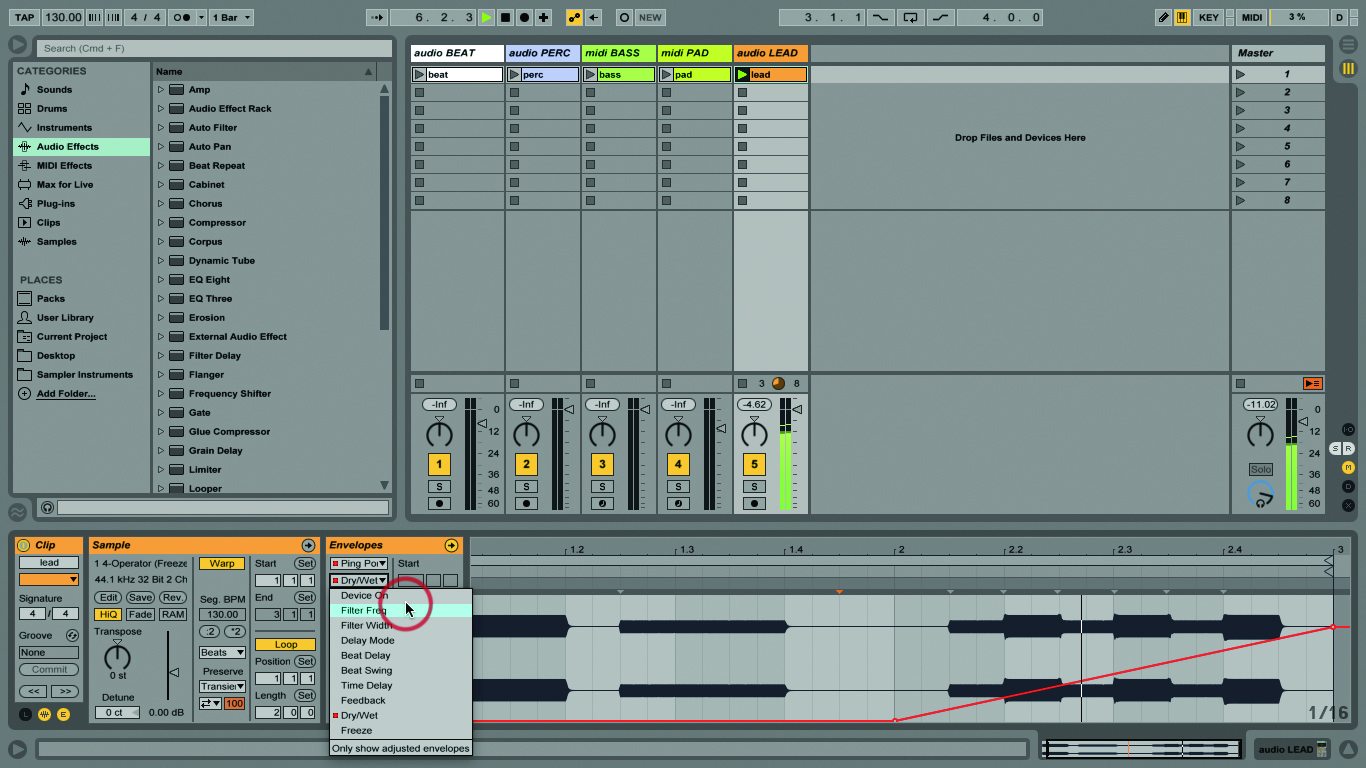
3: Click on the little black ‘e’ button to reveal the envelope box. Click on the top of the editor, then click on the top chooser box and select ‘Ping Pong Delay’ if that isn’t showing already.
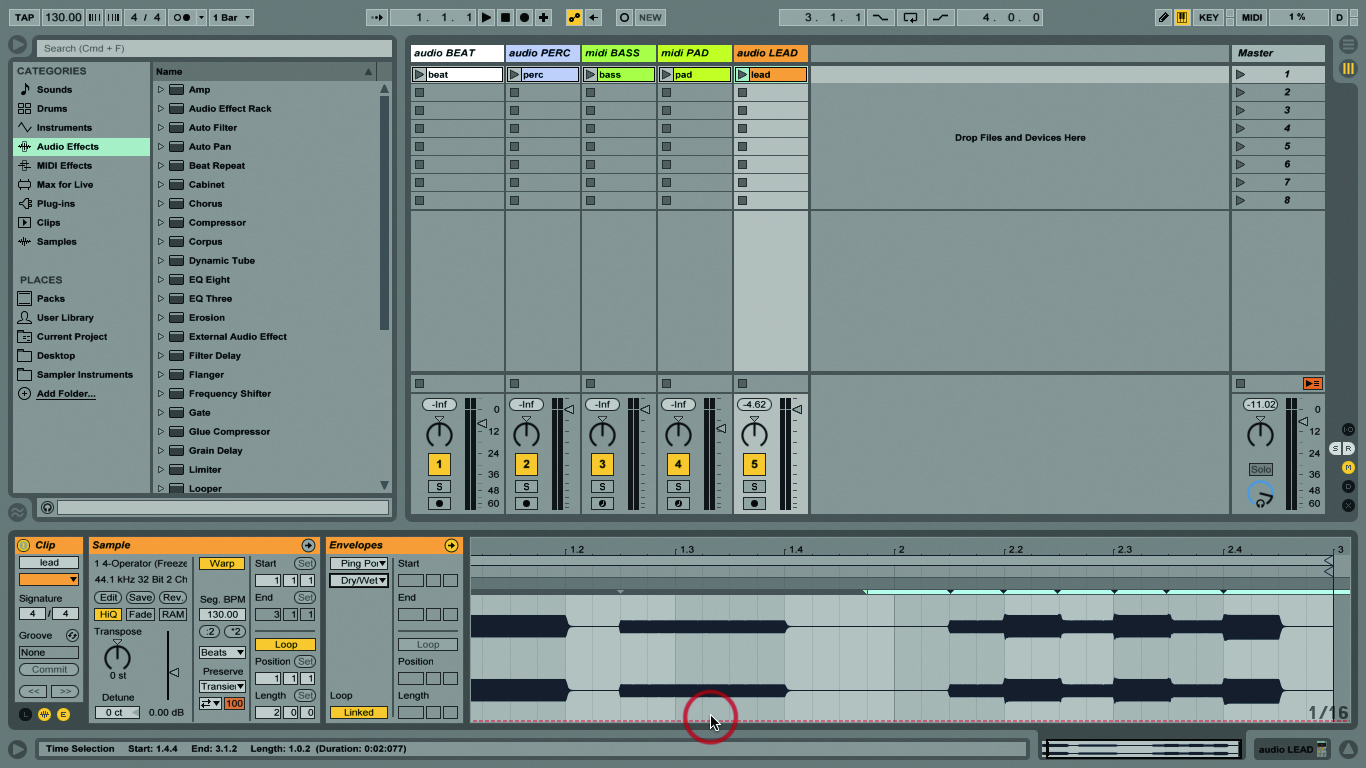
4: In the lower chooser, select Dry/Wet. This controls the amount of delay effect over the clip’s length. In the waveform display at the right, there’s a dotted red line going across – that’s the envelope.
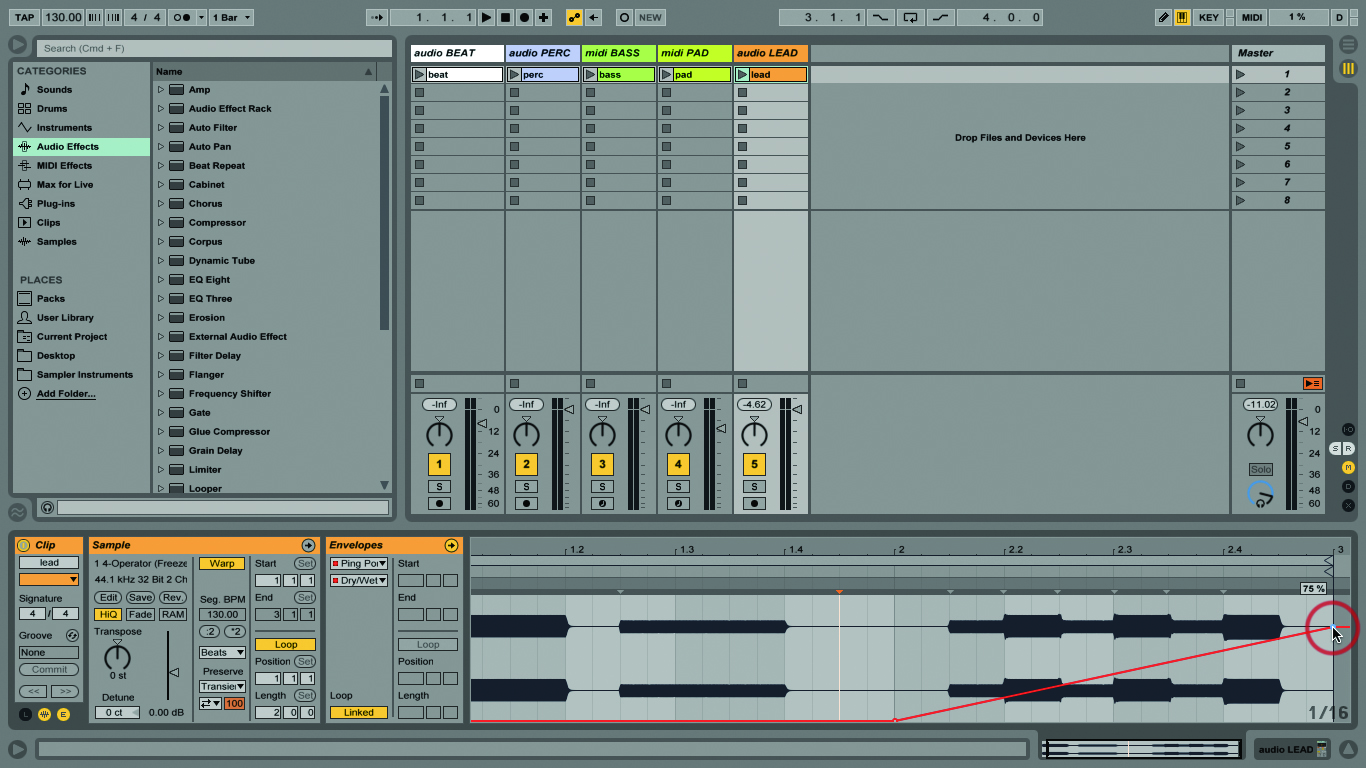
5: Click on the envelope at the beginning of bar 2, adding a dot (breakpoint). Click at the end of the envelope to create another breakpoint and drag that upwards to 75% (the value is displayed).
6: Play the clip and hear the Ping Pong mix change over time. You might’ve noticed that every parameter from Ping Pong is available to automate and, yes, you can use envelopes for them all at once!
Click Here To Continue
