Ableton Live Tutorial: Finishing Your Project – Step-by-Step
Martin Delaney finishes his live project in this step-by-step guide… 1: Time to finish! As usual, see the updated example set on the disc (TUGTAL12). Having refined your mix last time, let’s tweak the master track, mix down our final files, and back up our content. 2: Totally uncompressed music sounds weirdly quiet; we want […]
Martin Delaney finishes his live project in this step-by-step guide…
1: Time to finish! As usual, see the updated example set on the disc (TUGTAL12). Having refined your mix last time, let’s tweak the master track, mix down our final files, and back up our content.
2: Totally uncompressed music sounds weirdly quiet; we want to optimise volume, without smashing the **** out of it! We need to retain dynamics but give it weight to play alongside other music.
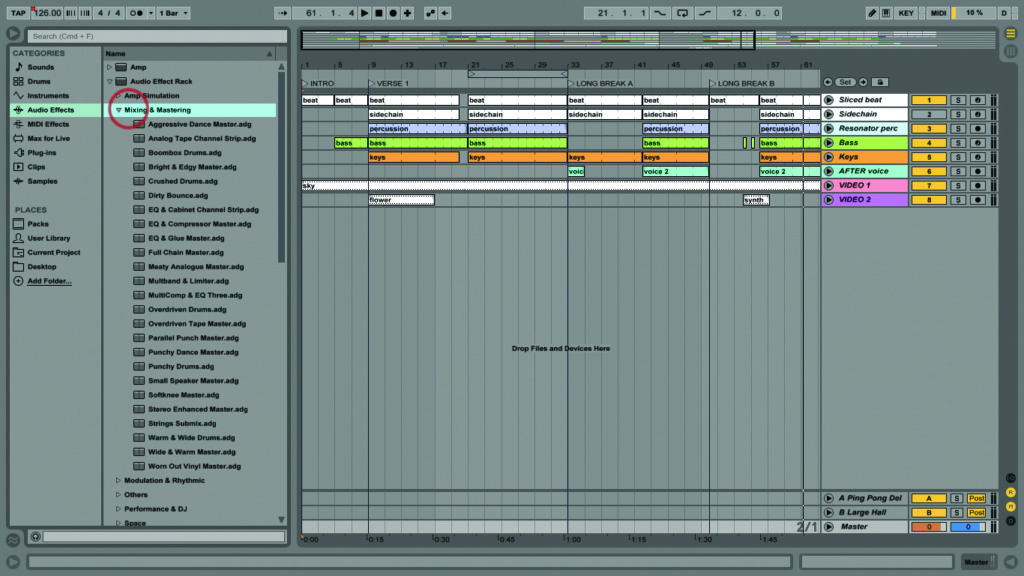
3: Live has the tools for this in devices such as Compressor, EQ Eight, Glue, Limiter, Multiband Dynamics and Utility. The Audio Effect Rack/Mixing & Mastering section includes relevant presets too.

4: None of those presets are ready to use ‘out of the box’ – they all need work to suit your material. Make sure you use those pre-assigned macro controls at the front of the racks.
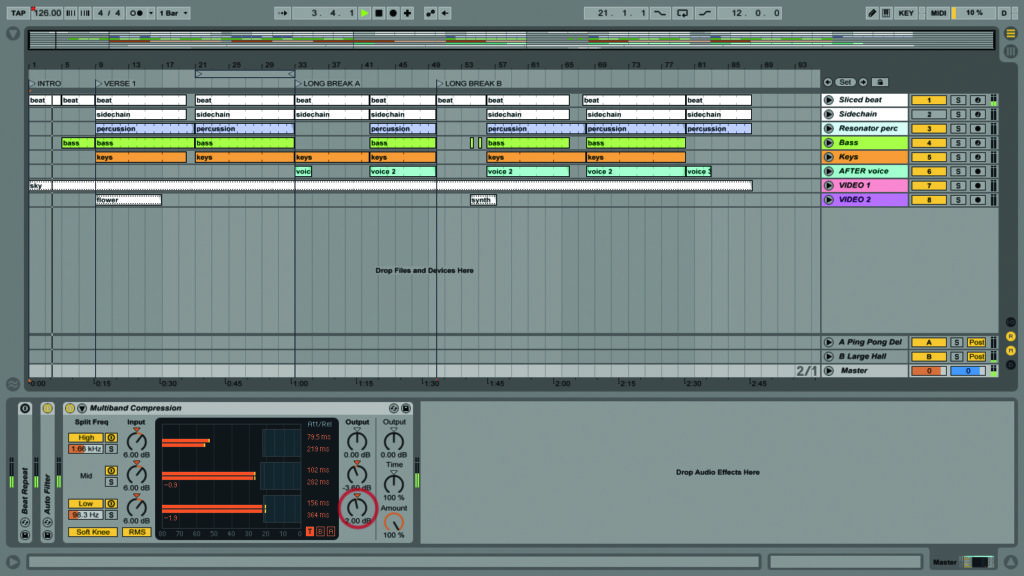
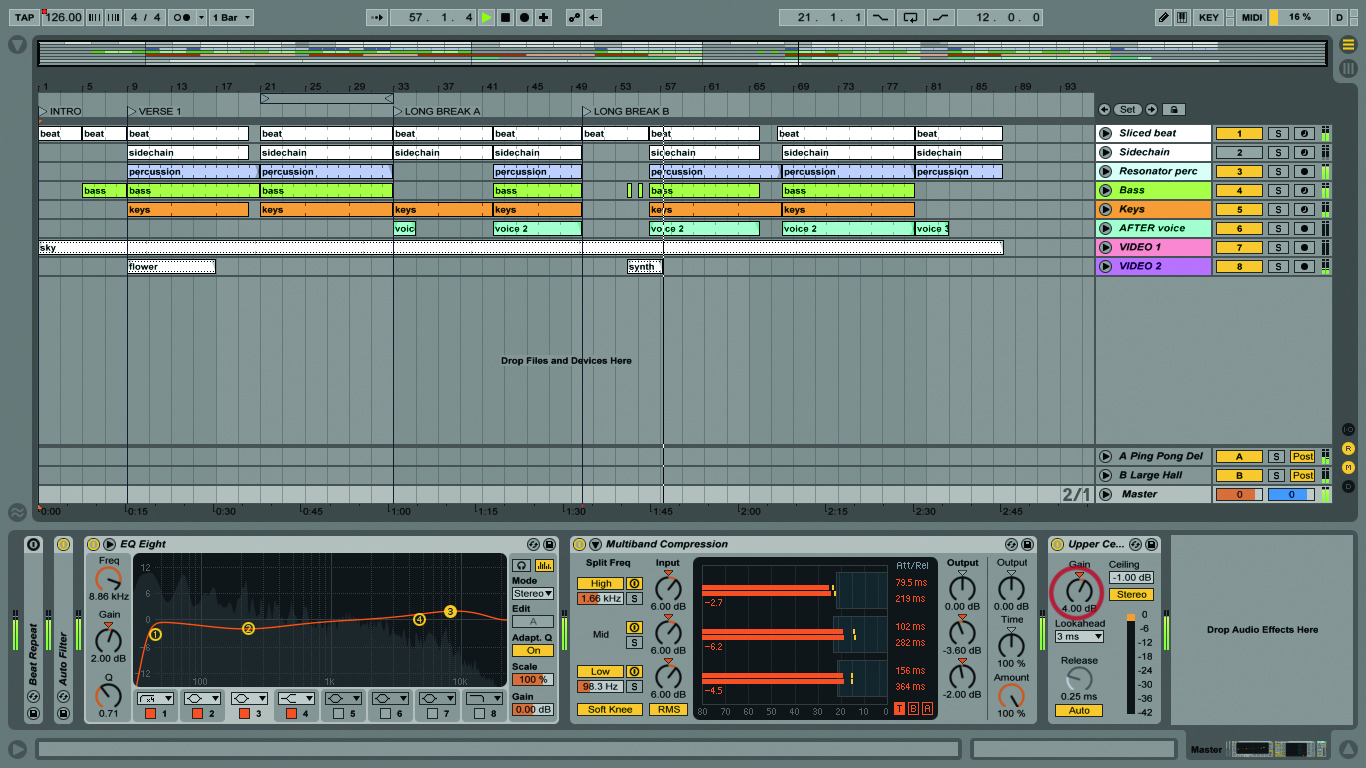
5: The Multiband Dynamics/Multiband Compression preset is loaded on our master track. Reduce the mid output gain to -3.60dB, and Low to -2dB; sounds better to me.
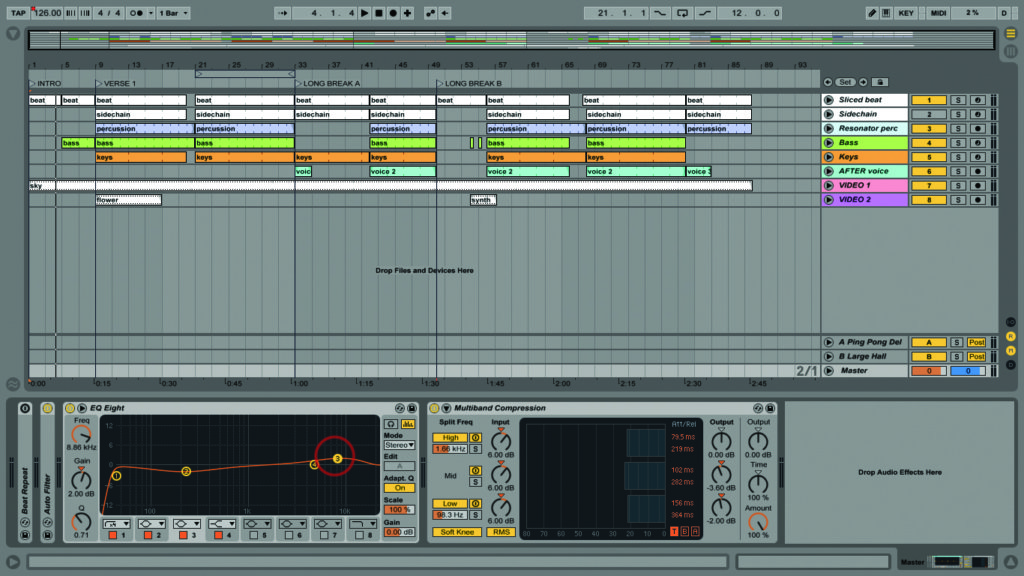
6: Load the EQ Eight before that. Apply a low cut at 40Hz, a cut of -2dB at 220Hz and a boost of 2dB, at 8.86kHz. These are quite typical EQ settings for a stereo mix.
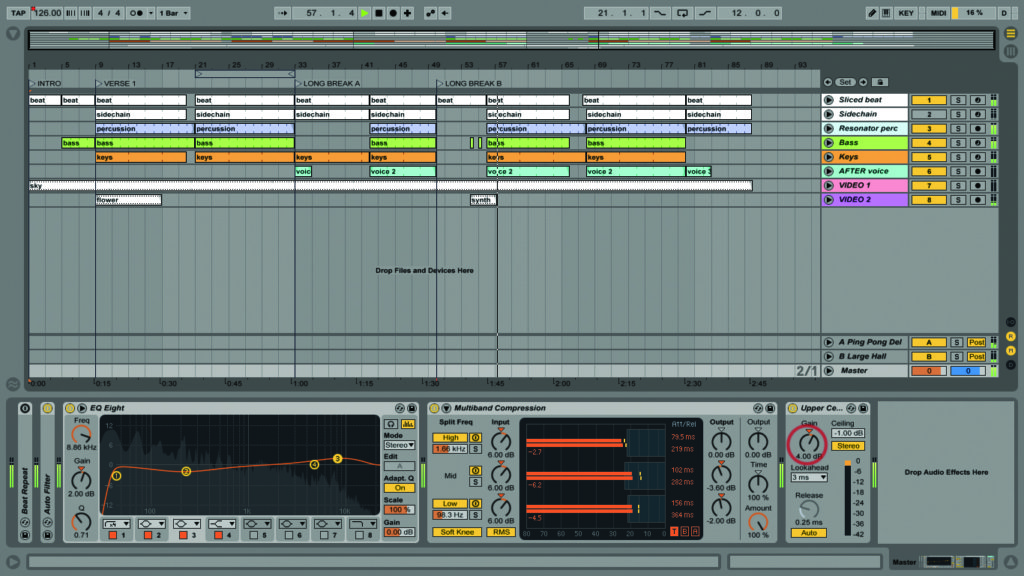
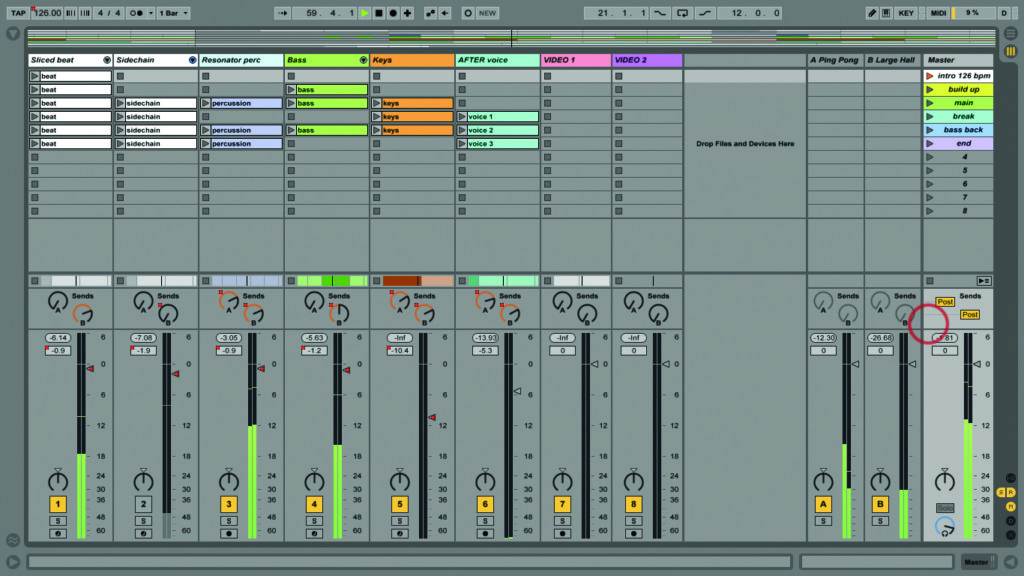
7: Add Limiter/Upper Ceiling after the Multiband, set the ceiling to -1dB. Set the gain to 4dB, to push the limiter. Raise the master track volume to 0dB; nothing will exceed -1dB.

8: You now have something that’s louder and little more controlled frequency-wise, but not pumping too much. Just for fun, briefly move that gain up to +12dB, and hear it overcooking the limiter.

9: Use Shift>Cmd>R to open the Export Audio/Video window. The short version is to say ‘use the default settings until you have a good reason not to’! CD quality is usually good enough.
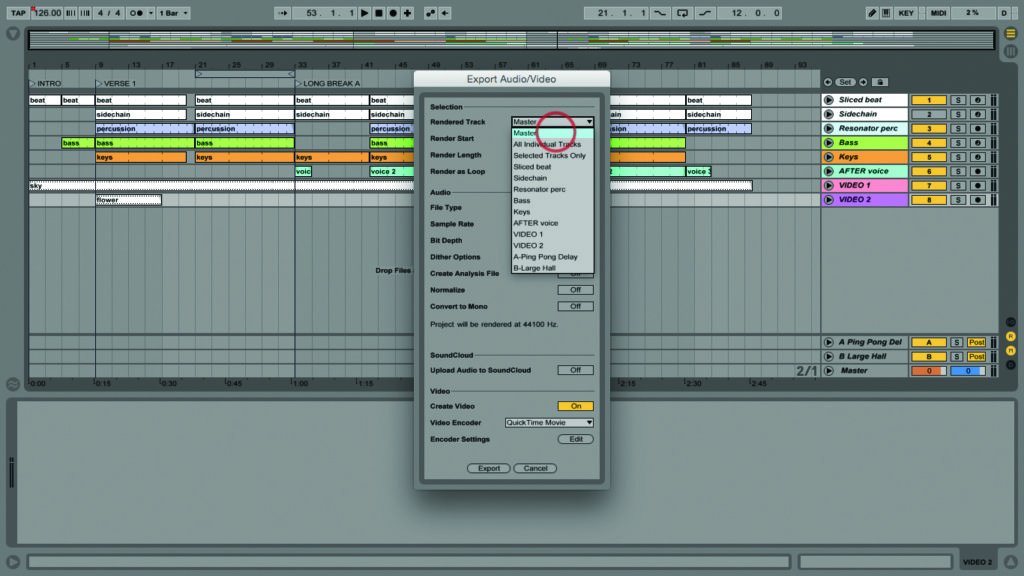
10: Let’s review a few items in that list, though. At the top, choose Master. We want a final stereo mix, no need for separate tracks. Make sure you’re rendering the entire length of the song.
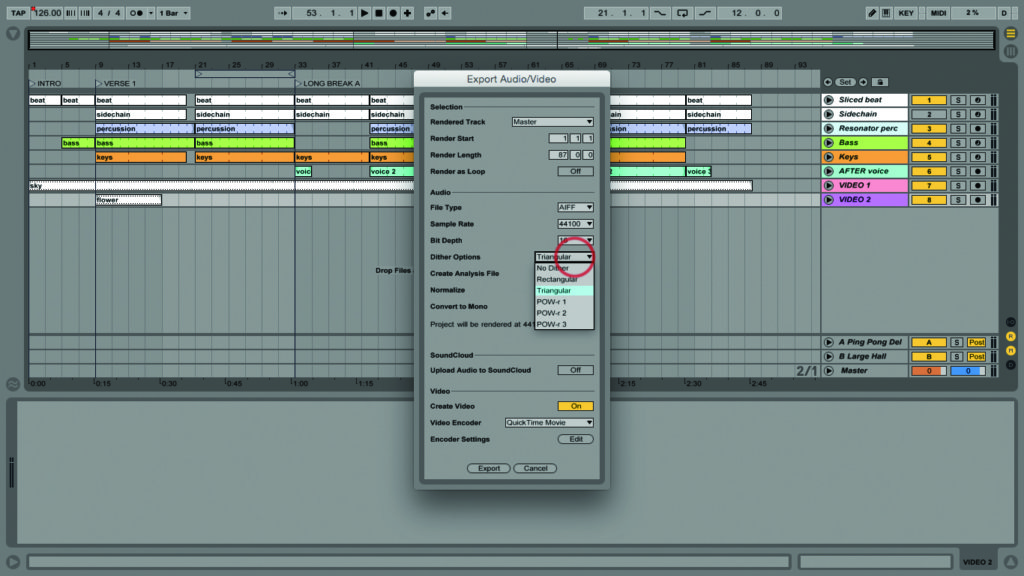
11: Read our main text to learn more about those confusing dither options. Leave Create Analysis File, Normalize (read about that in the main text as well), and Convert to Mono all set to Off.
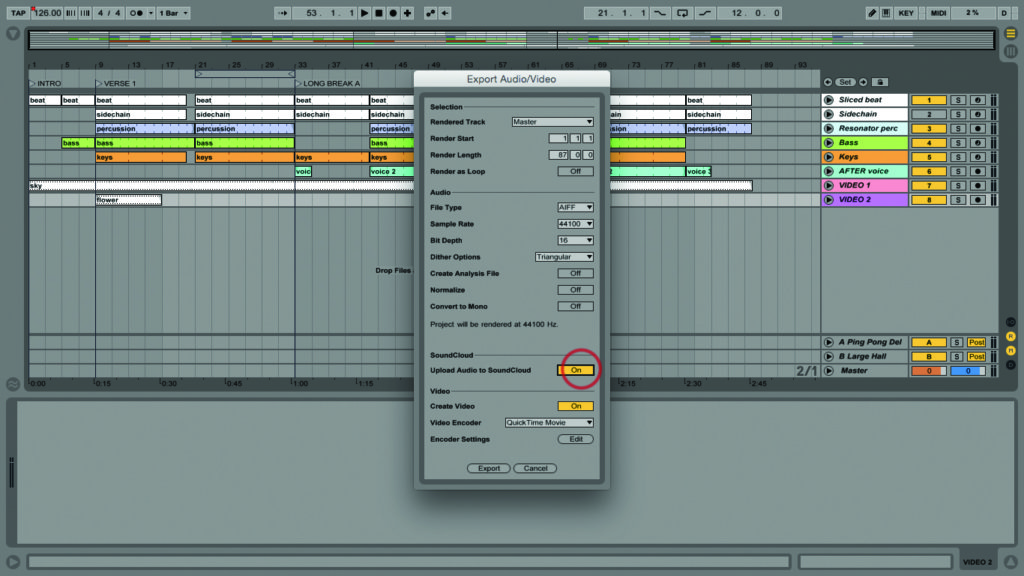
12: You can’t export to formats such as mp3 or AAC directly from Live – you’ll have to use iTunes or another application for that. But you can go to directly to your Soundcloud account.