Ableton Live Loops, Loopers And Layering Tutorial
Working with loops in a fast yet creative way is one of the primary reasons why people love to use Ableton Live. Liam O’Mullane shares his favourite techniques in this Ableton Live Loops Tutorial. We’re aware that not every reader of our Ableton Live Tutorials uses Live as their primary DAW. Many of you will […]
Working with loops in a fast yet creative way is one of the primary reasons why people love to use Ableton Live. Liam O’Mullane shares his favourite techniques in this Ableton Live Loops Tutorial.
We’re aware that not every reader of our Ableton Live Tutorials uses Live as their primary DAW. Many of you will just use it as a creative looping tool to interact with your audio files away from your more preferred environment. But this means that you might not be that savvy with the kinds of approaches that yield great results while requiring very little overall knowledge of how Live works.
Here, we’ll guide you through some simple yet effective techniques that can be applied to drum loops and beyond, then we’ll discuss the various options for exporting your efforts for re-use either within Live or in another DAW. Various loops and layers from the Balkansky: Dark Dub and Glitch-Step samples pack are included in this Workshop’s project files, kindly provided by Samplephonics.
Drag And Drop
You can import loops into Live in a variety of ways – from Live’s Browser:

Your operating system’s file browser:

or, in some cases, from your DAW’s own Media browser and Arrangement pages. Although the last option is feasible, you’ll most likely encounter all sorts of issues when it comes to sharing files and file formats between two pieces of software, so we recommend only the first three options.
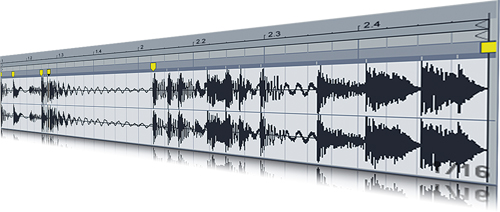
Ableton Live Loops can be dragged into either Session or Arrangement View; most of you will opt for Session View due to its loop-friendly, continuous playback. We’ll cover the use of Arrangement View later on as it can be a handy editing environment.
Once a loop is within Live it will be automatically Warped so that the beats and tempo are detected and played back at Live’s current global tempo.
![]()
If you have issues with the loops at this stage it will usually be due to one of two reasons. The first is when the loop plays at twice or half its intended tempo. This is easily rectified using the Halve and Double Tempo buttons, labelled :2 and *2 respectively.

An example of when this can happen is if you’re working with complex drum patterns like those in drum and bass music. The computer finds it hard to decipher where the main beat is, often identifying it as being in the 85BPM ballpark rather than the 170BPM area it should be in. These buttons can also be used creatively in tandem with the dropdown menu below, which selects the clip’s Warp mode. All but Re-Pitch modes are designed to preserve the pitch of the loop regardless of changes in tempo.
In Re-Pitch mode the pitch will change as you double or halve the tempo. Again, extreme doubling can be a great source for new sounds. Try engaging Hi-Q mode to improve the sound quality in the top end when the loops are slowed down a lot (although you may like the distortion added when this mode is disabled).

From The Source
The second reason a loop might not play in time when imported is if it’s incorrectly edited in terms of length and content. Unwanted silence at the end can be an issue, especially if the loop isn’t from a source with quality-control, such as free internet resources and so on. There are a few ways to correct this, but the simplest is to drag the loop to bar 1, beat 1 in Arrangement View

then listen to it to determine its duration in beats and bars. Set the Loop Brace to this length

and enable Live’s Loop Switch.
![]()
Now disable Warp mode so that the clip plays back at its natural playback speed.

Click on Live’s master tempo and drag it up or down until Live is playing at the right tempo for the loop to play back seamlessly. If it helps, enable the metronome to make it easier to hear if the beats are falling into place with Live’s playback.
![]()
You can now click and drag the end of the audio clip to resize it to the end of the Loop Brace. This will now bring in the overlap of the slower clip to be the correct length.

Right-/[Ctrl]-click (PC/Mac) on this audio clip and select Consolidate. This will render the clip as a new file to this correct length. Warp will be enabled again automatically, but you’ll have to manually enable the Loop button on the right-hand side before dragging it into Session View.
If there are timing issues within the loop, the quickest method is to right/[Ctrl]-click the clip’s waveform view and select Quantize. This will quantize the Warp Marker positions on each transient and tighten up the timing. For best results with drum content, select Beats from the Warp Mode menu. This will preserve the all-important transients as much as possible.
Keep It Clean
If you’ve got a few loop layers going that sound good, you may need to tidy them up for more definition. Before using EQ to try to shape each loop in terms of frequency content to sit together better, try muting any unnecessary parts of each loop by using clip volume automation. This can be done in either Arrangement or Session View and involves pressing the clip’s Show/Hide Envelope button at the bottom of the Clip View box.

Now click the Volume button to the upper right so you can draw out elements of the loop using the Pencil tool in Draw mode. This mode can be enabled or disabled from the Options menu. Try to decide what each layer is adding to the overall sound and mute what isn’t needed. Disabling Draw mode will let you click and drag the anchor points of the automation if you want to create smoother fade-ins and outs.
On Your Marks
Every loop will have a Start Marker position that looks like a play icon above the clip waveform display.

A fun way to interact with loops is to move this marker around on a single loop layer. It’s amazing how much the feel of a main drum loop with a kick, snare and so on can change if you add a hi-hat or percussion sample over the top of it and experiment with its Start Marker position. You can continue this approach with other loops to find out how they interact with your existing material. This is a really handy trick for creating different feels within a single track.
Changing the playing order of a loop is something you may or may not want to do within Live, perhaps because you prefer to export your audio in order to work with more familiar tools in your main DAW. But if you learn to edit as you go with each new loop layer you can create different looping patterns per layer, which is key to creating something with an element of interest to it.
One approach is to right-/[Ctrl]-click each loop and select Slice To New MIDI Track. This will take the loop and slice it into a new track with a Drum Rack, while creating a new MIDI clip to play back the slices in their original form. This can then be easily edited to create variations. However, this approach doesn’t carry over any Audio Devices you may running to process the original loop, so you have to drag those across manually from the original loop’s audio track to retain the sound you’ve sculpted.
The second option is to drag the loop from Session View into Arrangement View and use the Split function from the Edit menu to apply slices, enabling you to delete and re-order your loops. The advantage of this over Slice To MIDI is that it’s visually easy to work with, but it can’t be applied to Session View as only single clips can be played in Session View, not sequenced clips. However, it does use the same audio track, so your audio processing stays in place. In order to get an edited audio loop from Arrangement View back into Session View you need to highlight the slice’s clip parts so you have a clean loop length.

Consolidate them and enable their loop mode.

We generally use this second method when we’re editing loops for Session View, preferring to use MIDI to interact with the parts via a MIDI controller. Try both, and find out what works best for you.
Export Duty
Getting your audio out of Live is a simple task, but there are a few options to decide upon. If you’ve sequenced in Arrangement View you’ll need to set the Loop Brace to the length of your work to export the correct length.

In Session View, you can just go straight for Export Audio/Video from the File menu.

The Rendered Track menu enables you to choose between exporting all that you’re hearing (Master), individual tracks, or All Tracks, which creates a single file for every track and effects return in use. The latter is handy if you want to retain the flexibility to balance and mix your loop layers in your other DAW. Otherwise, select Master.
Render as Loop is another useful option as it will capture tails of effects such as delay or reverb and include them at the start, as you would hear them after a second playback of Live when looping (handy if your sound relies on these effects). After selecting the relevant file format settings, press OK to export your work. If you’ve exported from Session View, a duration option will appear at the very top of this window.

Set this to the desired length for your export.
Another use for exporting is to get new ideas from your current loop layers. Try exporting one new Master audio file, import it into Live in a new project, then re-program it by splitting it up as audio or slicing it up into MIDI. These few simple approaches will certainly yield musical and creative results, and they’re also useful for jump-starting new ideas.