Ableton Live Tutorial: Recording & Manipulating Speech
Time to do some audio recording and get mic’d up. Martin Delaney shows you how to add some speech samples to our ongoing Live project. So far we’ve used MIDI and we’ve used existing audio samples, but we haven’t covered how to record our own audio material. Instead of jumping in at the deep end […]
Time to do some audio recording and get mic’d up. Martin Delaney shows you how to add some speech samples to our ongoing Live project.
So far we’ve used MIDI and we’ve used existing audio samples, but we haven’t covered how to record our own audio material. Instead of jumping in at the deep end and attempting to record fully-blown vocal or instrument takes, let’s make it easy on ourselves by recording a short speech sample that’ll also work inside our ongoing project.
To be honest, this is more frequently the type of recording I do with Live anyway – capturing short snippets to use in the Session View. We aim to record one short sample, then use it to create three different clips. Note, because this is such a variable exercise, and I can’t hear what you’re doing from here(!), I’ve included an ‘after’ voice track to make it clear what kind of result you’re shooting for.
It might not sway Pro Tools snobs, but Live does a great job of recording audio. It has the advantage of two views, so two distinct approaches. As a rule of thumb I record short clips like speech samples and effects into the Session View, and anything like a full vocal track for a song, rhythm guitar parts, and so on, goes into the Arrangement View.
In either View, you can record into multiple tracks at the same time, and Live has very thorough and immediate routing options, so you can send and receive audio freely throughout the application.
There’s also the lovely Resampling input option which provides post-master, post-everything, capture of Live’s output, straight back into the Live set. Live works with audio samples at different sample rates, mono or stereo, and combines .aiff, .wav, and .mp3 files in the same project. Despite what some say, there are no audio quality issues with Live; you’re more likely to experience problems through user error – choosing the wrong Warp mode for time-stretched material or stretching a clip way beyond what any reasonable person would do (we’ll be coming back to that later).
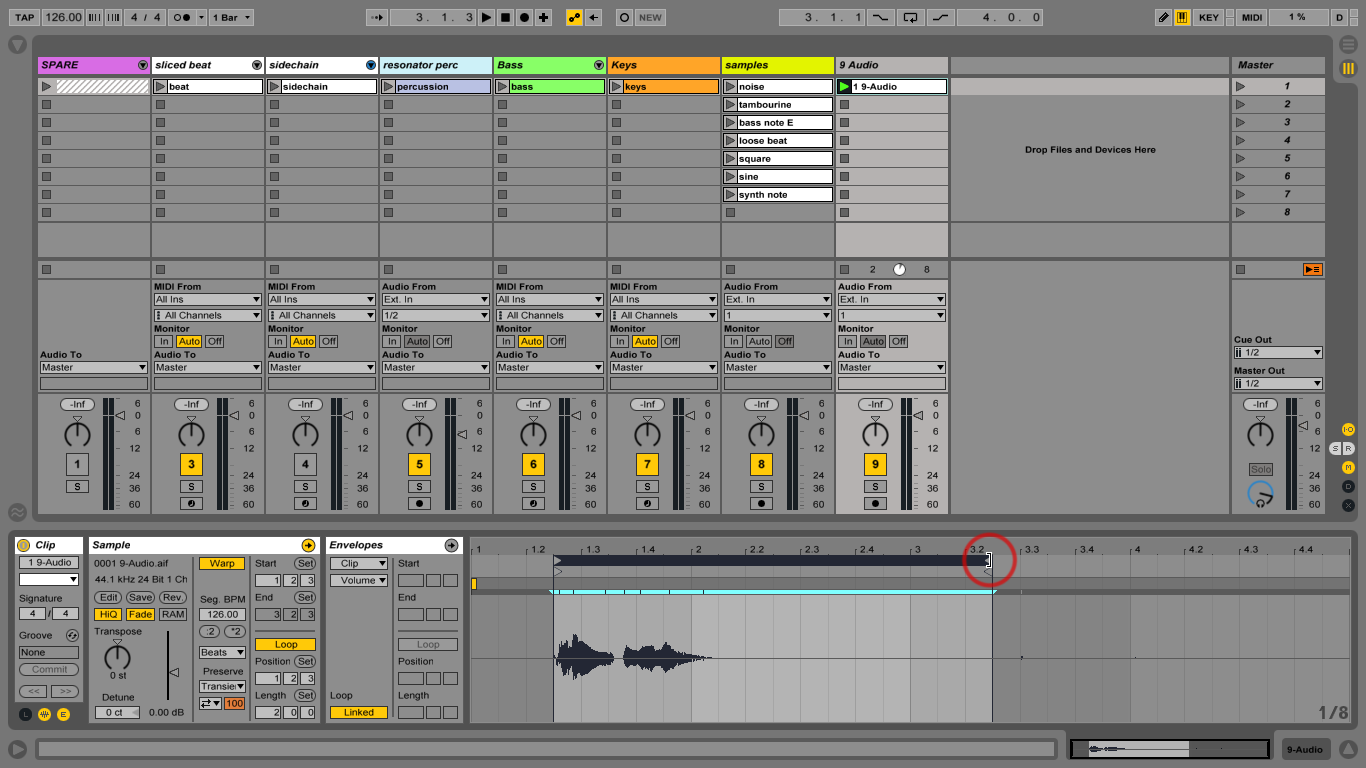
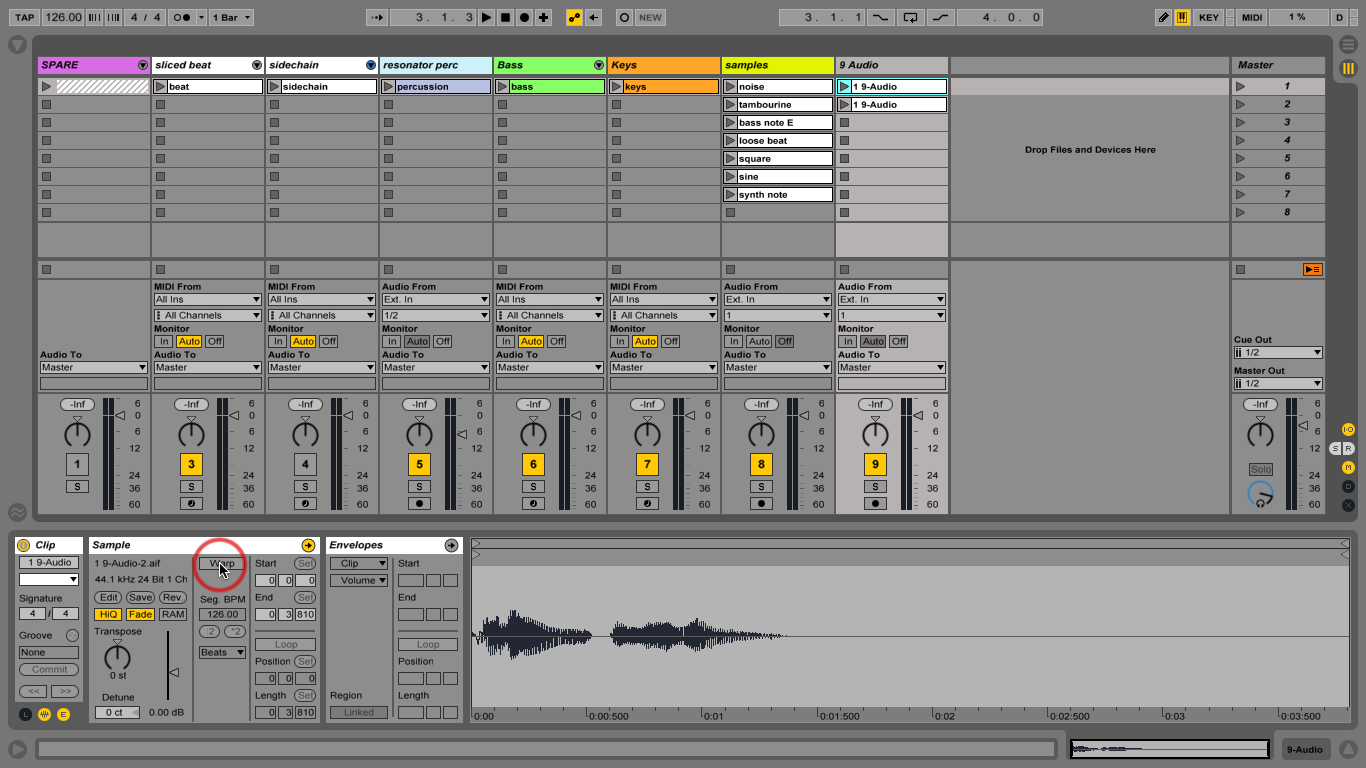
Although Live isn’t an audio editor, it covers some of the basics. Crop Sample, which we use in this tutorial, discards unwanted portions at the start and end of an audio clip; and Consolidate – available only in the Arrangement View – combines two or more audio clips to create a new one. These functions are non-destructive – you’ll find the new samples in the sub-folders inside your Live project folder.
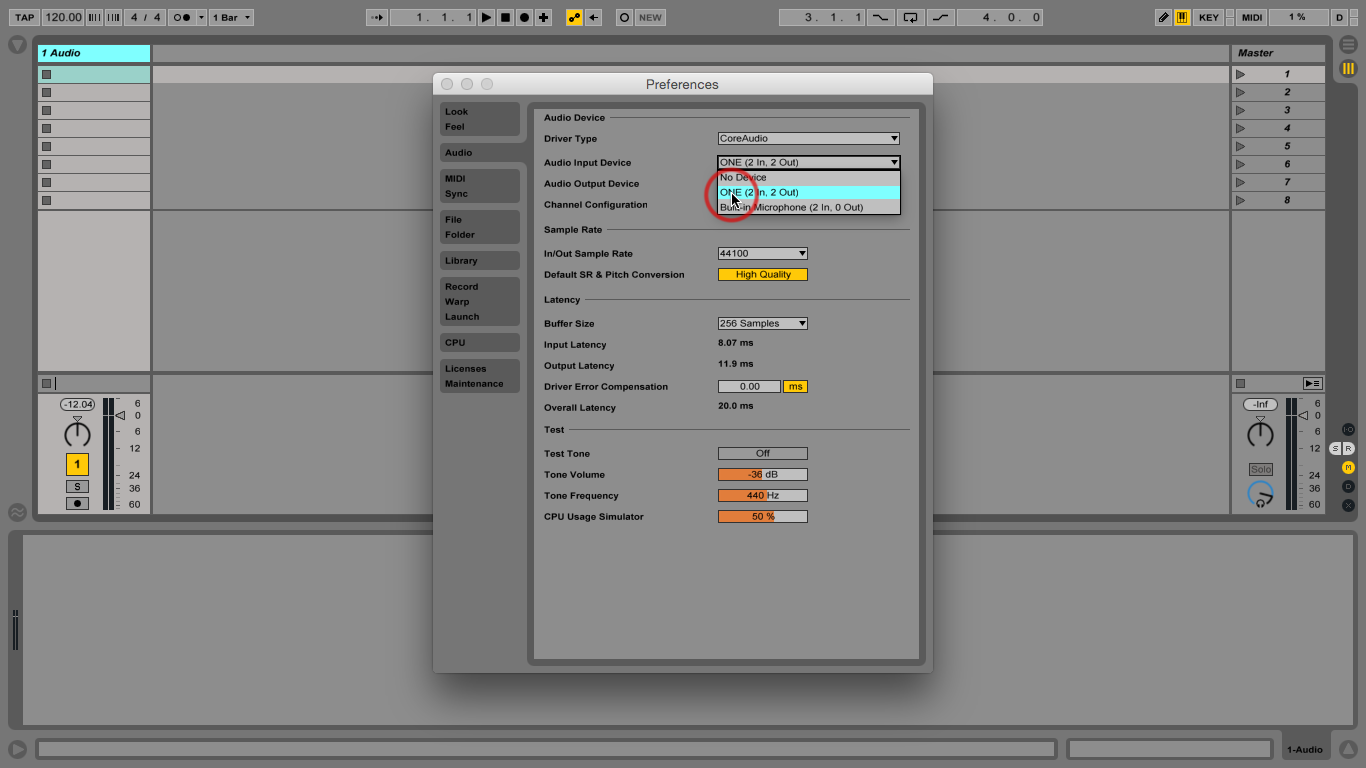
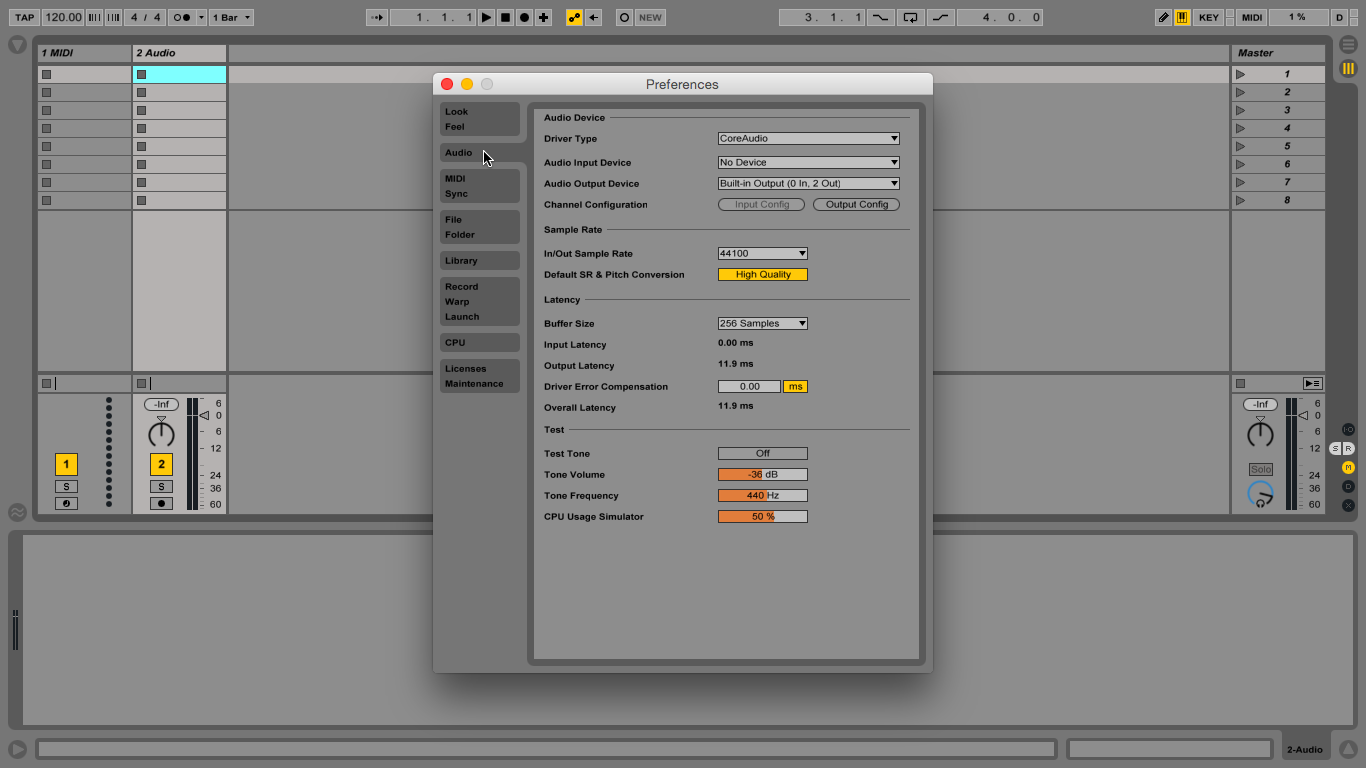
You probably already have the necessary equipment to record a voice sample – most computers have some kind of built-in microphone. Then it’s a matter of scaling up from there with a dedicated microphone and soundcard (as far as we’re concerned, a ‘soundcard’ and an ‘audio interface’ are the same thing).
You can get excellent affordable USB soundcards – look at the Focusrite Scarlett range – and a basic microphone for not much cash at all. There’s an ever-growing number of good USB microphones, too, although you lose the flexibility of a soundcard. There’s also the Apogee One, which is unique because it has connections for a microphone and instrument, but also boasts a built-in microphone. It’s a cool tool for the travelling musician. I’m not going further into this discussion now, because it’s a whole other tutorial… Well, a whole other book, actually!
I’ve suggested that you set the track’s Monitor switch to Auto, which means you’ll hear the mic input when you arm the track, but bear in mind that your set-up might enable – or require – you to monitor somewhere else along the signal chain. As I said, we’re not singing along to a backing track with this exercise, so frankly, accurate monitoring is not so critical.
There are different ways to initiate recording: you can use a mouse or trackpad, your controller, or even your iPhone. You can go into record while Live is already running or enter record to start Live running. Record start and stop are quantised so that means if you’re using the default global quantization of one bar, recording commences on the next bar.
It’s important to remember this and not start talking too soon, otherwise you lose the beginning of your sample. Record ending is also quantised which is great as it gives you ‘pre-cut’ loops, rounded off to bars and more likely to loop in sync with your other content straight off.
The most important thing when recording is to avoid overloading and distorting your input levels. It’s very ‘rock’ to record to tape with everything in the red, and it sounds cool, but sadly it stinks when you do it with digital recording. Live has some great distortion effects, so why not save that fun until later? If you’ve erred on the side of caution and recorded at a low level, use the clip Gain slider to boost the volume. Do this while the clip’s playing, so you can check for the distortion that arises if you go too far!
We’re touching on Warping and audio quantization during our walkthrough; it’s fun to over-stretch audio samples and tweak the Warp modes; I can’t resist it with vocals, which is why we’re doing it here. A bit of quantization also adds to the unreal effect, but it can also make a looping speech sample sit more neatly on the beat.That’s it for now. I hope that over these six workshop parts I’ve given enough tips to inspire and help your music making – happy producing!
Focus On The Microphone
It’s nice to use expensive microphones and recording hardware but you should be willing to work with what you’ve got. It’s easier for us because we’re recording a simple speech sample here so we��’re not tied up in the complexities of recording a sung vocal against backing tracks and creating a headphone mix.
What I will say is that unless you have a very specific idea of what you want, you should always try to get a clean voice recording, without distortion or baked-in effects. Other than that limitation, anything from your computer’s built-in microphone upwards will do fine.
Click Here To Continue
