Ableton Live Tutorial: Become A Power User 1 – Part 2: Audio Sequencing and Editing
Liam O’Mullane continues his look at some of Live’s core features, in particular the audio sequencing and editing options… 1: There are three ways to manipulate audio: using smaller, sequenced individual events, manipulating from within a loop or recording of a performance, or by using Live’s Slice To New MIDI Track function (from […]
Liam O’Mullane continues his look at some of Live’s core features, in particular the audio sequencing and editing options…
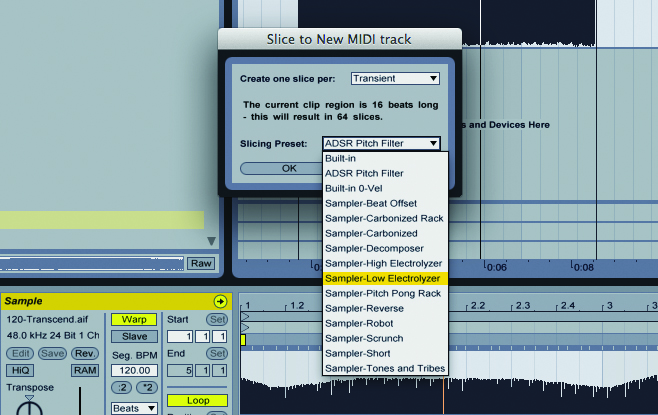
1: There are three ways to manipulate audio: using smaller, sequenced individual events, manipulating from within a loop or recording of a performance, or by using Live’s Slice To New MIDI Track function (from right-click menu) to get audio into a MIDI-controllable form. The latter can utilise techniques from the previous set of steps here, but our recommendation is to fully explore the presets available
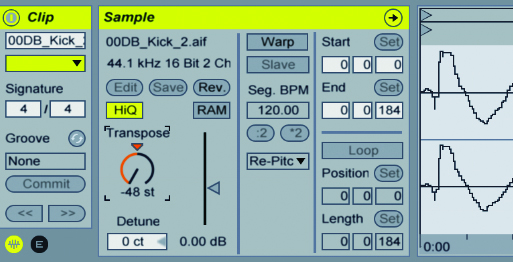
2: The first few variables for an audio file can be discovered quite easily with single sounds. Starting with Warp mode disabled, Transpose will let you pitch the audio up and down with vari-speed. Extreme settings of an octave or more in either direction will cause great sonic changes which can generate very interesting textures and sounds to start an idea with.
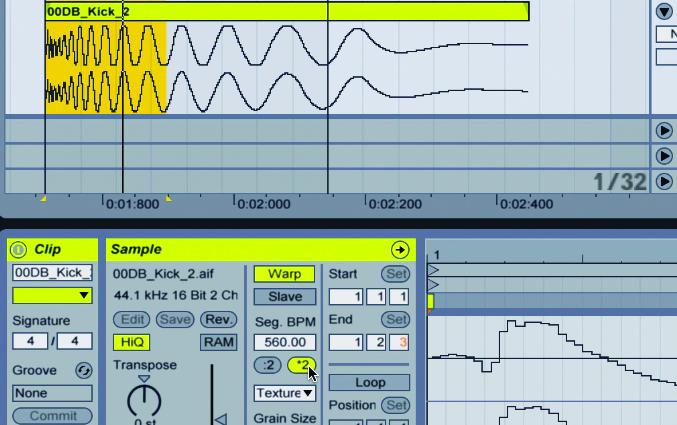
3: As soon as Warp mode is enabled you open up a whole new world of possibilities, the first being an overall time-stretch effect which, like vari-speed transpose, can create dramatic tonal changes at more extreme settings. Hit the half-time button a few times for an immediate granular-type effect.
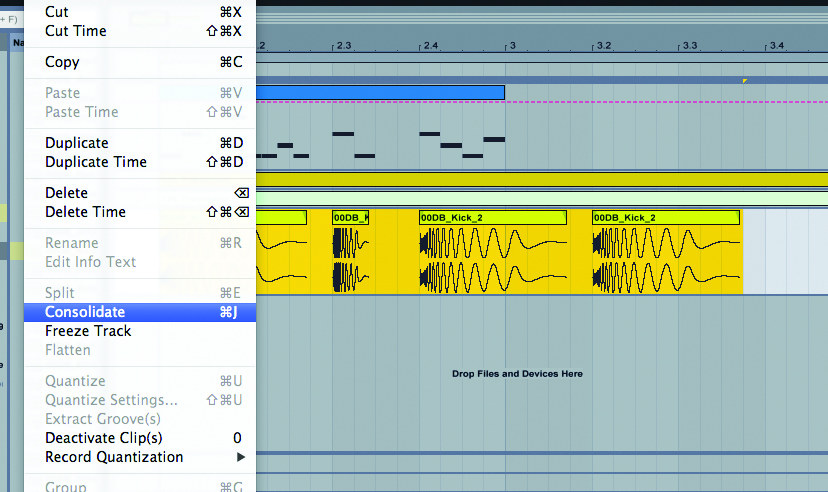
4: Warp-based time-stretching and pitch change are easily applied to loops or recordings, but in order for single sounds to benefit from this you first need to turn them from a sequence into a new single audio file. To do this, highlight all parts on a track and select Consolidate from the Edit menu
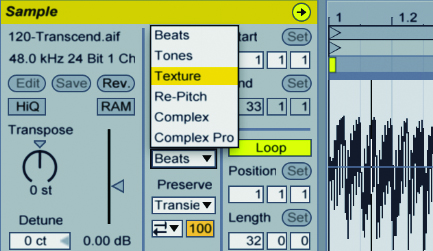
5: To quickly explore the effects of warp markers, use the half- and double-time buttons. Warp modes can be chosen from the dropdown menu below the :2 & *2 buttons and all but re-pitch modes will generate a unique, stretched timbre. Warp markers themselves can be moved around for an in-loop variation of time-stretch and compress effects.
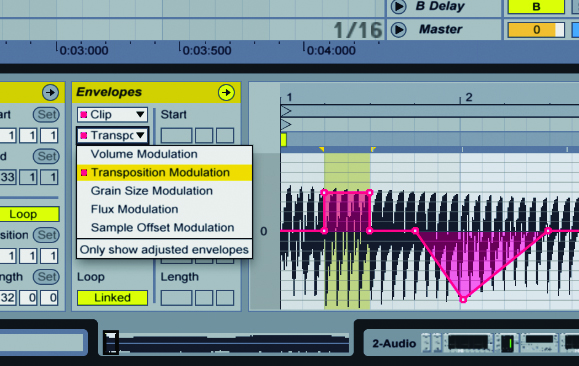
6: Transpose is another useful tool for broad variation. First open the Envelope box by pressing the small E button underneath the Clip box, then select Transposition Modulation and alter the envelope over time. All stretch modes can have their other parameters changed as well, so explore the new tones these can offer you.
