Deeper ways to sync Ableton Live with your hardware
Last time, we talked about using Ableton Link to wirelessly sync compatible music software and hardware. Now let’s recap on how we can connect Live to a wider range of equipment, including older products.
Last time, we talked about using Ableton Link to synchronize software on macOS, Windows, iOS, and Android, over a WiFi network. It also works cabled over ethernet, and even with wifi-enabled hardware such as Akai’s Force sampling groovebox. Link is great, but there are times when we need to use more old-school solutions. This might happen because the other software involved doesn’t use Link, or we want a deeper relationship that includes audio and MIDI routing, or because we’re using hardware gear that doesn’t have WiFi – which is most of it!
On the wire
ReWire provides perfectly timed sync between two or more applications, but it only works within one computer. However, it makes fantastic setups with combos such as Logic and Live, with Live’s spontaneity and Logic’s detailed programming. The other classic ReWire team is Live with Reason. In fact, back in the earlier days of Live, when it wasn’t so well spec’d with the instruments it has today, a Live and Reason setup was almost compulsory.
In our walkthrough, we’ve enabled Logic’s ReWire Playback Mode, which requires less CPU, but can introduce some latency – this is optimised for playing previously arranged/recorded material. The other option is Live Mode, which will lower latency when playing ReWired instruments in real time, but demands more CPU. Note that you might have to quit and relaunch both applications after changing Logic’s ReWire settings. ReWire’s need for a master/slave function can be annoying, especially if you find yourself habitually opening the applications in the wrong order!
Live is very accommodating and will perform either task equally well, while Logic insists on being in charge. This is an advantage of Link – there’s no ‘master’, everybody is free to join and leave whenever they like. ReWire isn’t just about timing; it goes into MIDI and audio communication. In the walkthrough, we send Live’s main stereo output into Logic, but we could equally direct each track to a different stereo pair or mono track inside Logic – ReWire supports up to 64 tracks of audio.
Go to the In/Out View for each track, choose Audio To, then ReWire Out, then Bus 1/2 to 63/64, or if using mono, Bus 1 to Bus 64. It’s important to remember that Link and MIDI work together, so computer A can use Link to sync computer B, while B sends MIDI clock to a drum machine at the same time.
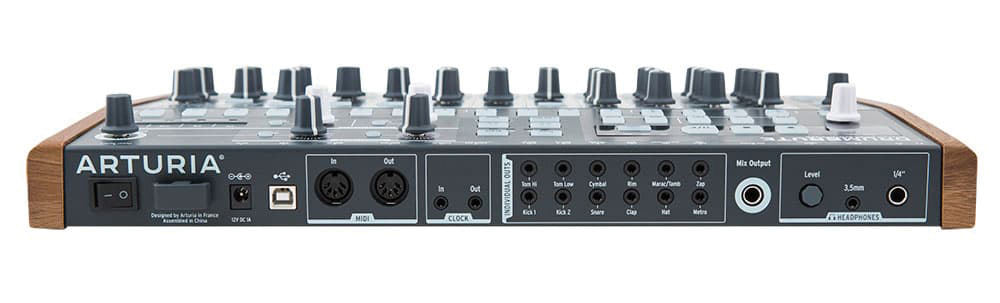
In an effort to save space, some hardware manufacturers put MIDI ins/outs on 3.5mm jacks, which means an adaptor is required to bring it back up to a DIN-type connection. As long as the manufacturer includes the adaptor in the box, and as long as you don’t lose it, then this is fine. Sometimes, USB supplants MIDI ports and cables, which is not cool, and sometimes it coexists alongside them, which is much better and more flexible.
Brute force
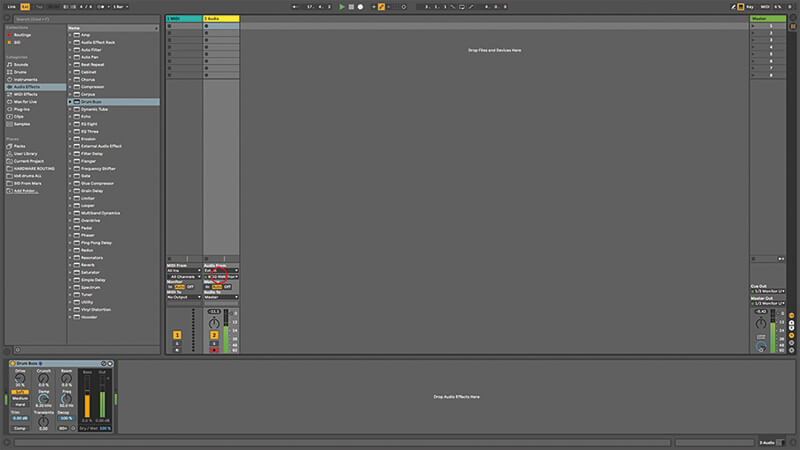
The DrumBrute drum machine in the tutorial is great for testing these setups, because it has full-size MIDI connections, MIDI over USB, and CV sync in/out as well. When you’re setting up to sync Live with a drum machine, you should experiment and see which direction gives you the tightest sync. It’s an idea to defer to the drum machine and let that take charge, on the basis that a dedicated hardware drum machine will have more consistent timing than a computer. But you must test that for yourself with your computer, your interface, and your drum machine.
If you’re processing audio from the drum machine through Live as well, it’s possible you might encounter some latency. If so, experiment with the Buffer Size adjustments in Preferences (which you’ll want to keep as low and fast as possible when dealing with live inputs) and the Track Delay controls, which can be viewed at the bottom of each track, so you can offset the timing of specific tracks. I’ve used Live at gigs with the DrumBrute and with Elektron’s Machinedrum and been able to get all my timing tight – it only goes wrong if you change something in your setup.
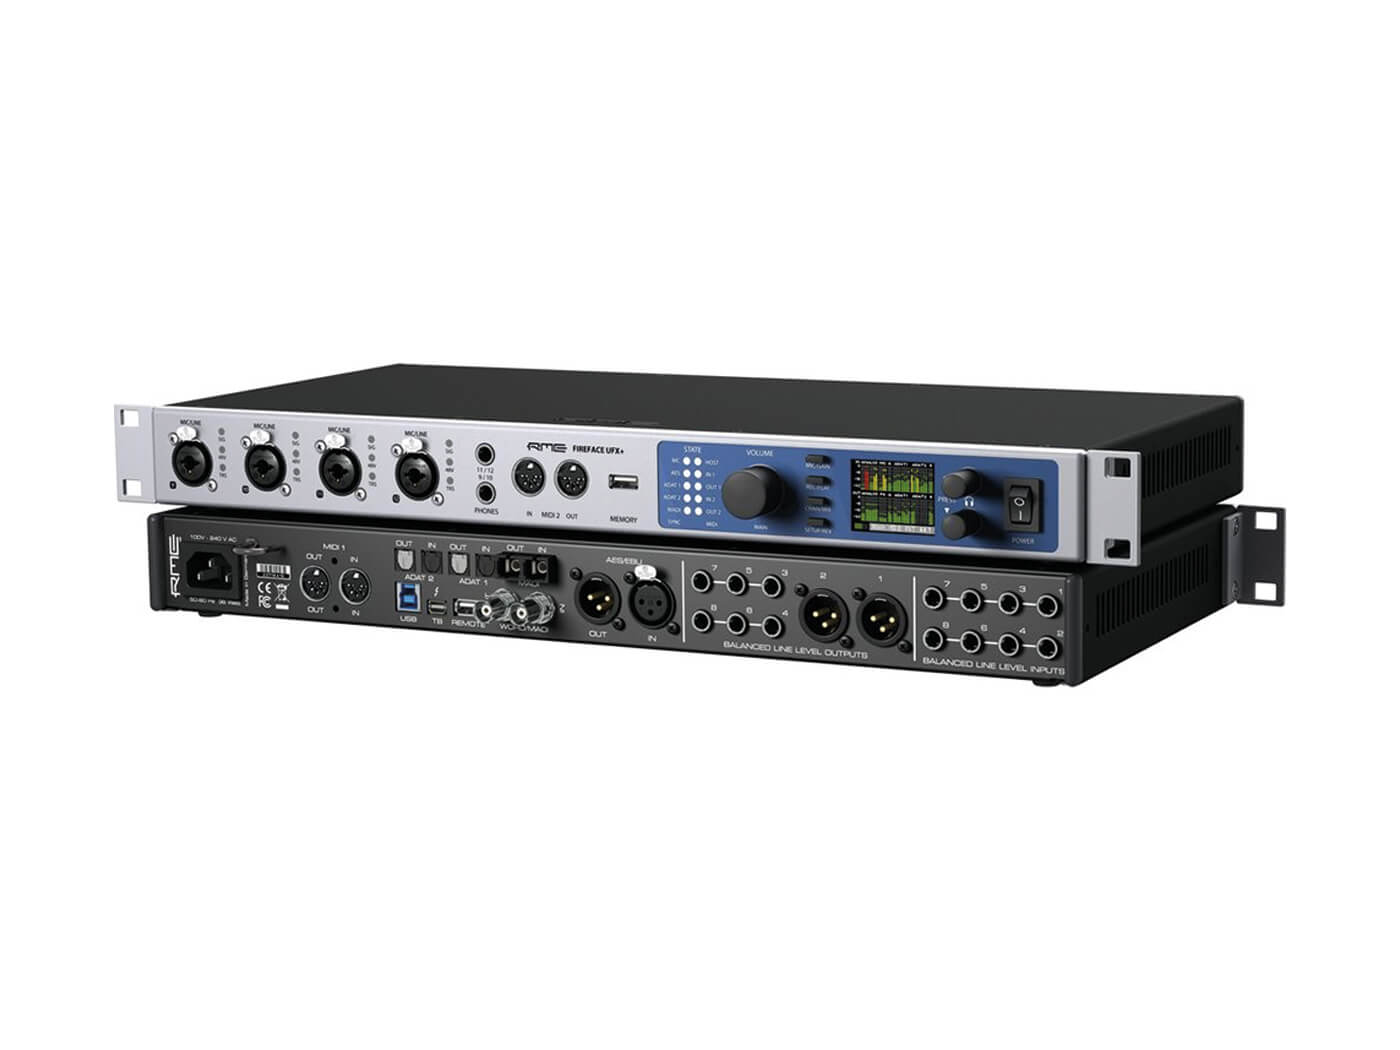
For reassuringly solid sync, you could use a dedicated sync box, like the E-RM Multiclock. This can send MIDI, DIN sync, or analogue clock over up to four outputs and has USB connectivity, too. Each track can be offset to allow for hardware timing problems. A plug-in is available for DAW integration, and an analogue LFO is also included, and yes, it also works with Ableton Link.
There’s always a way to get your gear sync’d, whether it’s with Link, MIDI, CV, Rewire, or tap tempo. It’s a matter of finding the solution that’s in your budget, is reliable, and gives you the control you need over your setup.
Deeper syncing Ableton Live with your hardware: step-by-step
1. Let’s start by ReWiring Live with Logic Pro X. This will mean that both applications run in perfect sync and we can also set up audio and MIDI connections between them, so they operate a bit more like one giant music application.

2. With ReWire, one app must be sync master, and one slave. Live can fulfil either of these roles but Logic insists on being master, so open that first. Then go into Logic’s preferences, and enable Audio/Devices/Rewire Behavior/Playback Mode. Then launch Live.
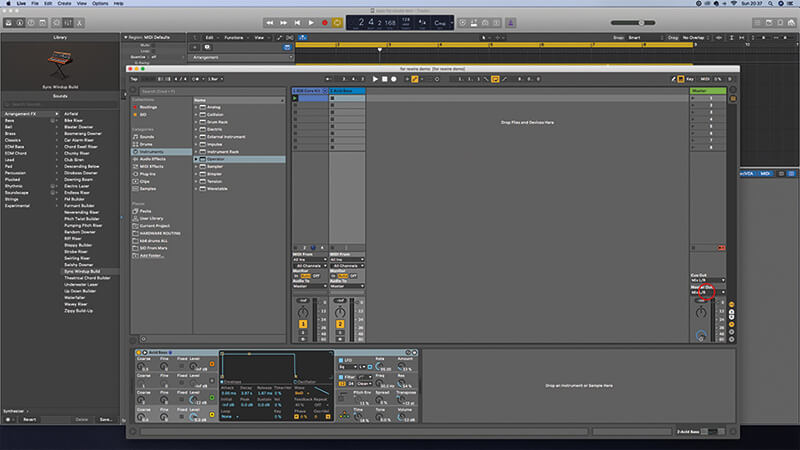
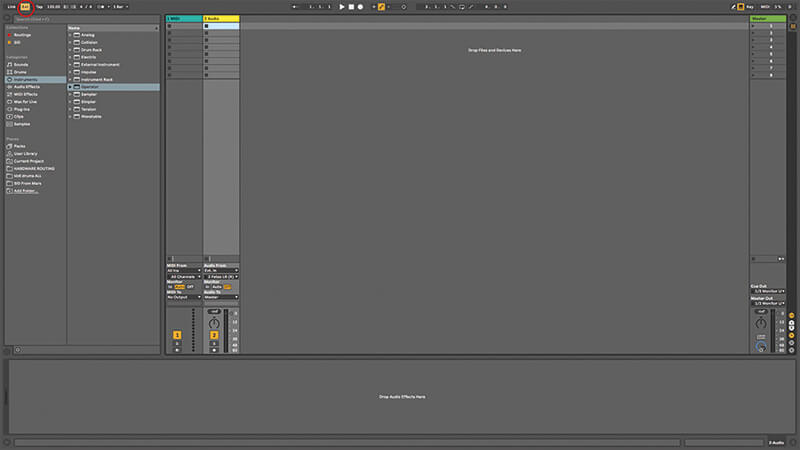
3. Open your chosen Live project, then open the In/Out View, and you’ll see ReWire Out as an option for each track, but for now, let’s choose it (Mix L/R) for the Master track, so all of Live’s audio is going to Logic.

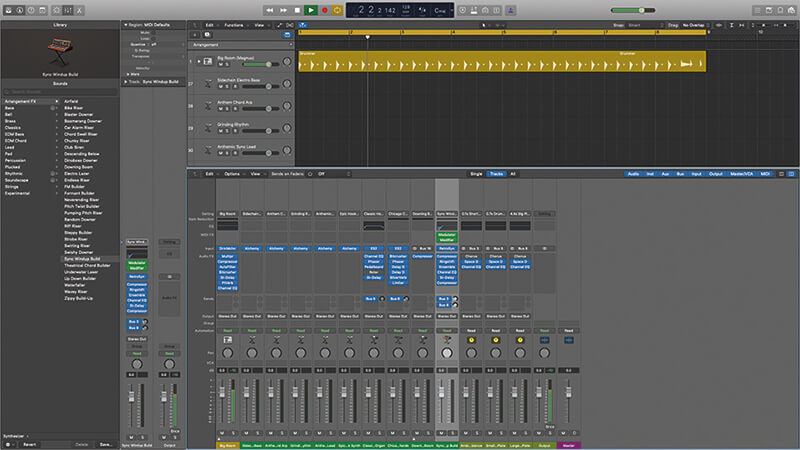
4. Open Logic’s Mixer, and choose Options/Create New Auxiliary Channel Strip. Click in the Input Slot and choose Ableton Live/RW Mix L-R. Now when you start Logic running, Live also starts, and you’ll hear the audio from Live coming through this track.
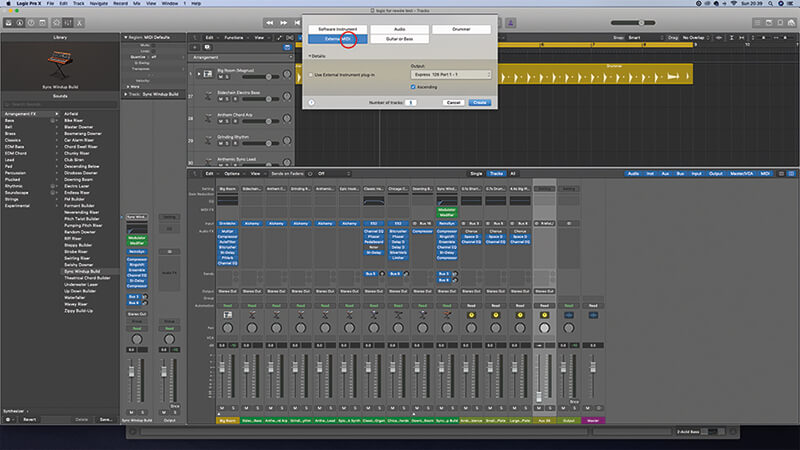
5. Now we can apply Logic’s effects to the incoming Live audio (Logic’s Delay Designer and Space Designer are particularly good). But let’s flip that round. Create an External MIDI track in Logic, and make sure you’ve got an instrument loaded in a Live track.
6. Open Logic’s Library, and you’ll see Ableton Live listed. Click on that, and in the right-hand column you’ll see the available MIDI instrument track. Now we can use Logic’s deeper MIDI tools, including notation, to compose parts that’ll be played by Live’s instruments.
![]()
THAT SYNCING FEELING In the tutorial, we talk about using ReWire to sync and integrate music software running on the same computer, but it only works like that – on the same machine. This isn’t unusual, many sync issues are solved by combining methods such as Link and MIDI.
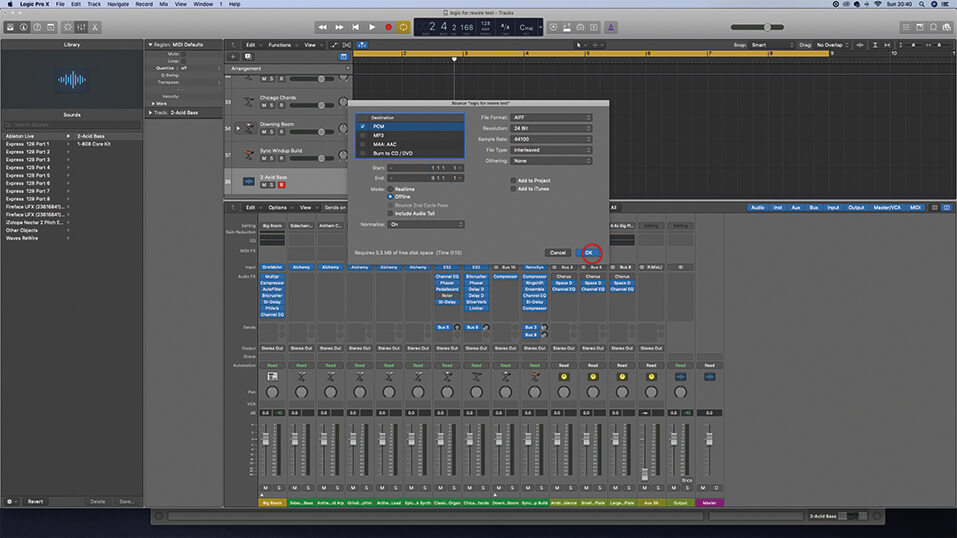
7. When your tune’s finished, there’s no need to render and import stems, or record the inputs from Live in real time. Just export via the Bounce command in Logic, and everything in Live will be included in the final stereo mix – very neat.
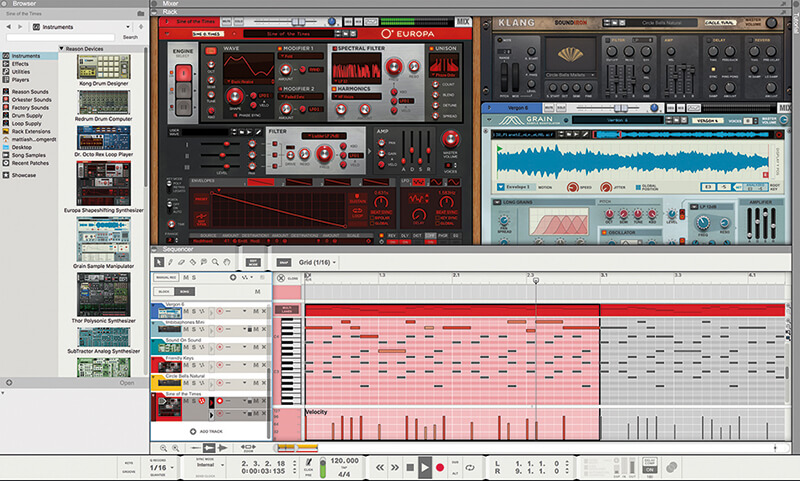
8. This isn’t just a Logic/Live thing. You can get ReWire setups going with Reason (Reason and Live were – probably still are – a killer combination), Cubase, Pro Tools, and others, but not Bitwig Studio.
9. ReWire has no relevance to mobile platforms such as iOS and Android, although you can include them in a ReWire setup by sending MIDI out as usual – it’s not really making use of what ReWire offers, though. Link is better for syncing mobile apps.
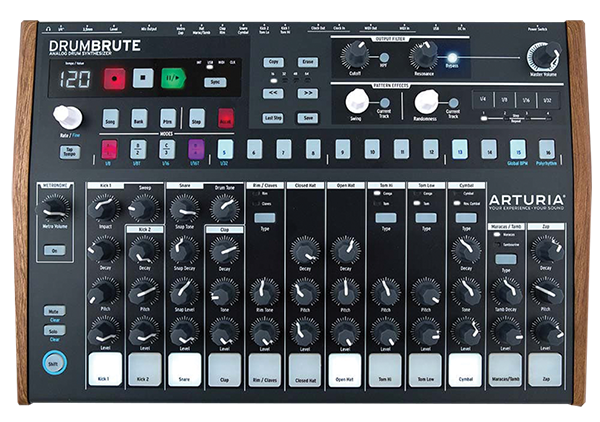
10. Moving on from ReWire, we’re going to connect a drum machine to Live, and sync it with MIDI. We’ll be using the Arturia DrumBrute, but the process will be similar with whatever you’ve got. Be aware that some machines will use MIDI over USB.
11. Connect the drum machine’s MIDI In and Outs to the corresponding connections on your audio/MIDI interface. Some more compact devices will use adaptors to step up in size from 3.5mm jacks on the hardware to the full-sized MIDI DIN plug.
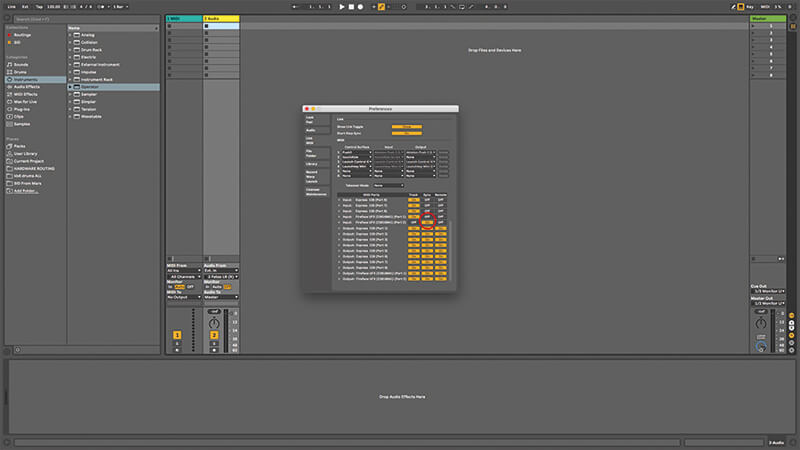
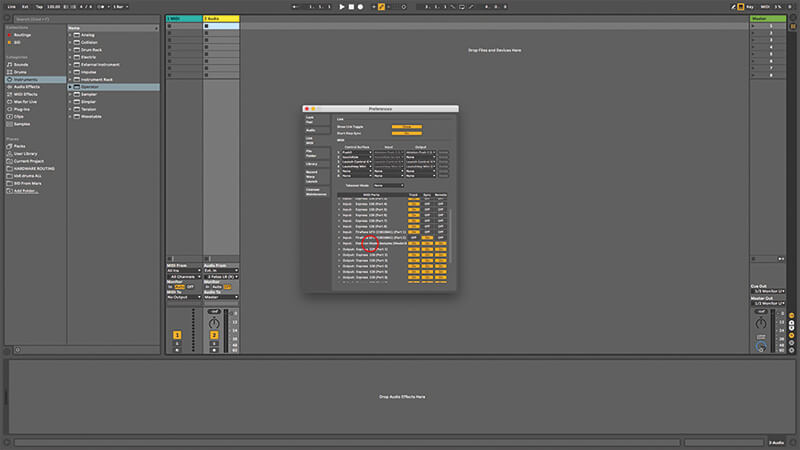
12. Turn on the DrumBrute and launch Live. Open Live’s Preferences and choose the Link MIDI tab. Choose your audio interface’s MIDI In port and enable Sync, keeping Track and Remote off, then enable Remote out to the DrumBrute. Now Live receives sync from the DrumBrute.
![]() TAP DANCE Tap tempo is still the bottom-line solution for getting your stuff to play in time. Live assumes that four taps or clicks on the Tap button is you telling it to speed up or slow down and changes tempo accordingly.
TAP DANCE Tap tempo is still the bottom-line solution for getting your stuff to play in time. Live assumes that four taps or clicks on the Tap button is you telling it to speed up or slow down and changes tempo accordingly.
13. If your drum machine receives MIDI, you can also configure the MIDI outs to send notes, CCs, or program changes, to it. The DrumBrute will load songs or patterns via MIDI, although it won’t do any kind of parameter automation.
14. Close Live Preferences and click the EXT button at the top left of the screen, telling Live it should follow sync from the drum machine. On the DrumBrute, make sure the Sync button is set to Internal, so it’s going to follow its own internal clock.
15. Now, as soon as you press play on the DrumBrute, Live will start running as well. You should see the Live project tempo change to reflect the DrumBrute tempo. You might need to adjust for latency, see the main text for more on that.
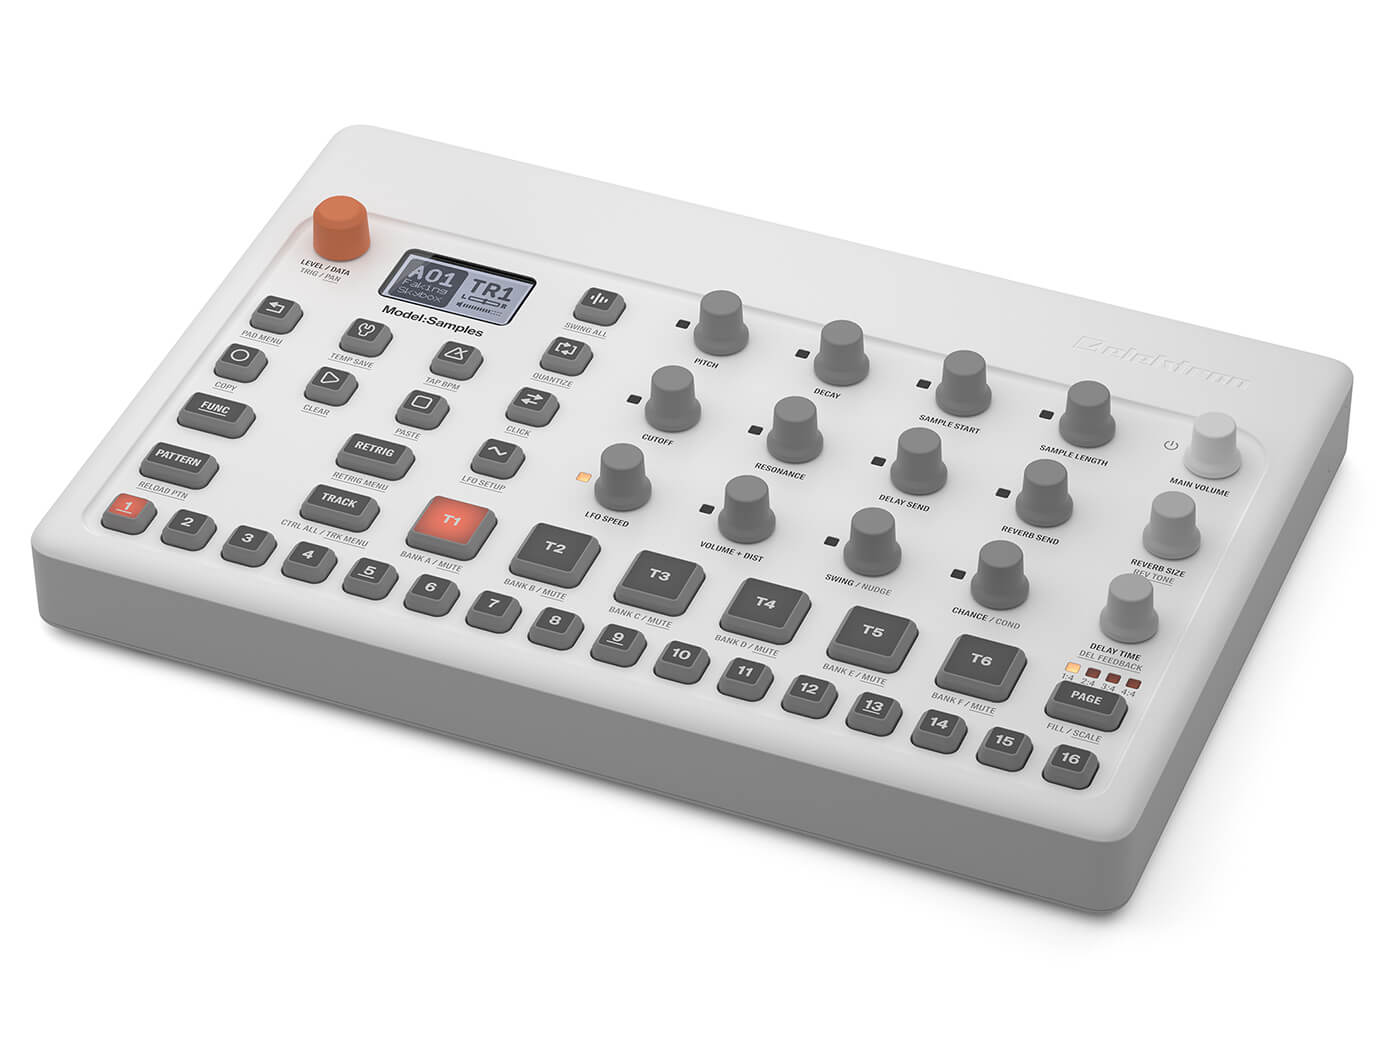
16. More recent drum machines often have the option of MIDI over DIN or over USB. The DrumBrute can do both, as can the new Elektron Model:Samples hardware sampler/sequencer. On the DrumBrute, it’s a button push on the top panel.
17. On the Model:Samples it’s also very simple; use the Settings menu to navigate to the MIDI section, turn on sync, and choose MIDI out. If connected to a computer via USB, it appears inside Live’s preferences as a MIDI Device.
18. Press Play on the Model:Samples and it and Live should begin playing together. It’s an idea to try slaving the software to the hardware first, usually that will provide more solid and consistent timing, but try it both ways round if you’re not sure.
For more Live tutorials and workshops, check here.