How to enhance your tracks with audio effects in Ableton Live
Every version of Live includes audio effects, and getting a handle on them is vital if you want to make the most of your productions and performances.

Audio effects are a key part of Ableton Live, no matter what you’re doing with it, and Live 10 especially boasts some fantastic in-built effects. Sure, eventually you’re bound to reach for some third-party plug-ins to flesh out your library – no DAW does it all. But it’s worth embracing any DAW’s own effects and pushing them to and beyond their limits. After all, you’ve paid for them. Why not see what they can do?
Another enormous benefit of using built-in effects is exactly that – they’re built-in, they’re part of your DAW, tried, tested and approved, likely to be unmarred by latency issues, more stable and less demanding on resources than third-party alternatives. When it comes to live performances especially, it’s much safer sticking with your DAW’s effects devices than it is straying beyond them. Nobody wants to get caught short with stuttering effects in front of a baying crowd.
New kids on the block
There have been audio effects in every version of Live, including the inaugural edition released in 2001, which didn’t even have instruments. For this tutorial, you can use any version but we’d be remiss not to point out that Live 10 boasts some brilliant new effects, including Pedal (guitar-style distortion), Echo (tape echo), and Drum Buss, which might well become your go-to drum tool. These are all sensationally good for adding the kind of dirt, grit and outright noise that Live has, until recently, been sorely lacking in. Add one of Live 10’s effects to a track, and you can use the effect’s dry/wet control to alter how audible that effect is.
There are 12 available return tracks, and each is fed by a send knob that appears in each track as return tracks are added. You can load multiple effects in each return track, as with any other type, but you’ll still only have one send knob to mix them in as a single entity. Drum racks and instrument racks can also contain effects (drum racks even have their own send and return slots), and effects applied to the master track will apply to the entire project. Group tracks can be viewed as an expansion of this.
You can apply master-channel type effects to each group, giving you increased control over the dynamics or EQ of a specific category of sound within the mix. The Live View you’re using at the time makes no difference, the effects parameters will always show up in the detail view at the bottom of the screen.
Audio effects are found in Live’s browser at the left of the GUI. To add one, drag it to any location or double-click and it’ll go into the highlighted track, stacking after any other effects already there. Third-party plug-ins appear in the Plug-Ins list in the same left-hand browser column. They will have their own pop-up windows, as well as a small device-parameters button on the title bar that reveals a Configure button and allows you to assign MIDI controllers to the plug-in.
Keep on moving
Ableton Live’s reputation as an intuitive DAW is in no small part thanks to the audio effects’ consistent and clear interface – you don’t have to relearn where everything is every time you bring a new effect in. Even devices built in Max For Live use the same format. Live performance has always been an Ableton priority too, and Live’s X/Y surfaces, and MIDI and qwerty-keyboard mapping functionality are a major part of that.
It’s amazing to see how far you can take even a live stage set by using key-mapping and a traditional mouse or trackpad. It’s the same with instrument synthesis, the sounds of effect parameters moving are an exciting part of electronic-music production and performance. Ableton Live is rich in X/Y controls but it’s also loaded with LFOs that can impart rhythmic movement to selected parameters, can be synced with the project tempo, and can be given a manual rate in hertz to lend them a touch of organic drift.
LFOs are superb with short note values such as 1/16ths, as well as with long sweeps that last a few bars. You’ll find them in effects such as Auto Filter, Corpus, and Phaser, among others. If one per effect isn’t enough, you can use the Max For Live LFO audio effect too, which lets you assign any other parameters to the extra LFO.
Again, we recommend getting to grips with Live’s bevvy of audio effects before scrambling your brain and diving into the endless third-party plug-in options on the market. There’s plenty of time for that later. Because Live devices all conform to the same design ethos (which, frankly, makes most boutique third-party devices look cluttered by comparison – Ableton does //not// do skeuomorphic), it means that time taken to learn its audio effects will likely pay off when you use the MIDI effects and virtual instruments as well.
Using audio effects in Ableton Live: step-by-step
1. This month’s accompanying DVD features an Ableton Live set, called Basic Effects Project, which contains audio clips that anybody can use. If you don’t have Live 10, get the demo or swipe samples from the Project folder and use them in whatever version you have.
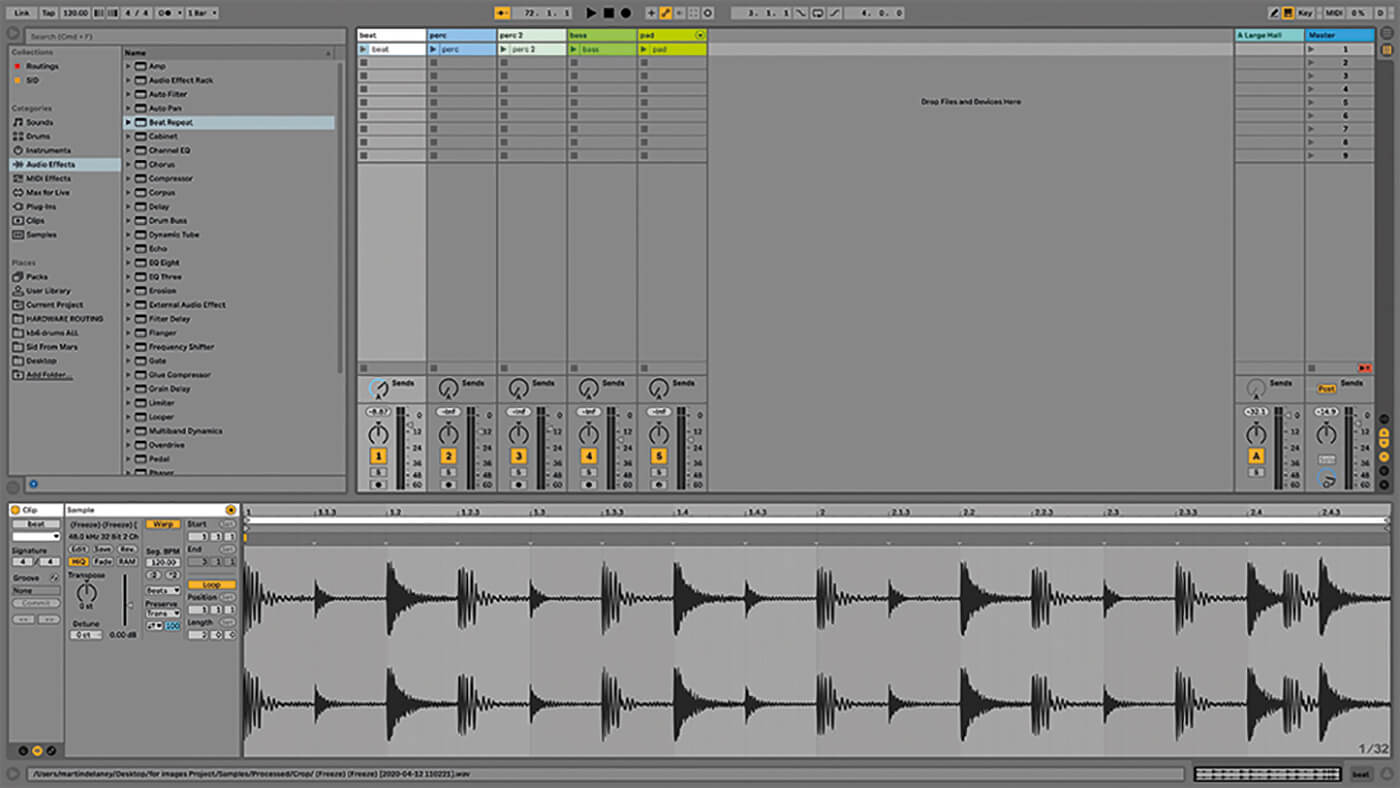
2. There are four main locations where we implement Live’s audio effects: tracks (audio or MIDI), returns, the master track, and racks (drum or instrument). There are good reasons to use any one of these over the others. There’s functionally no difference between the Session and Arrangement views for this exercise.
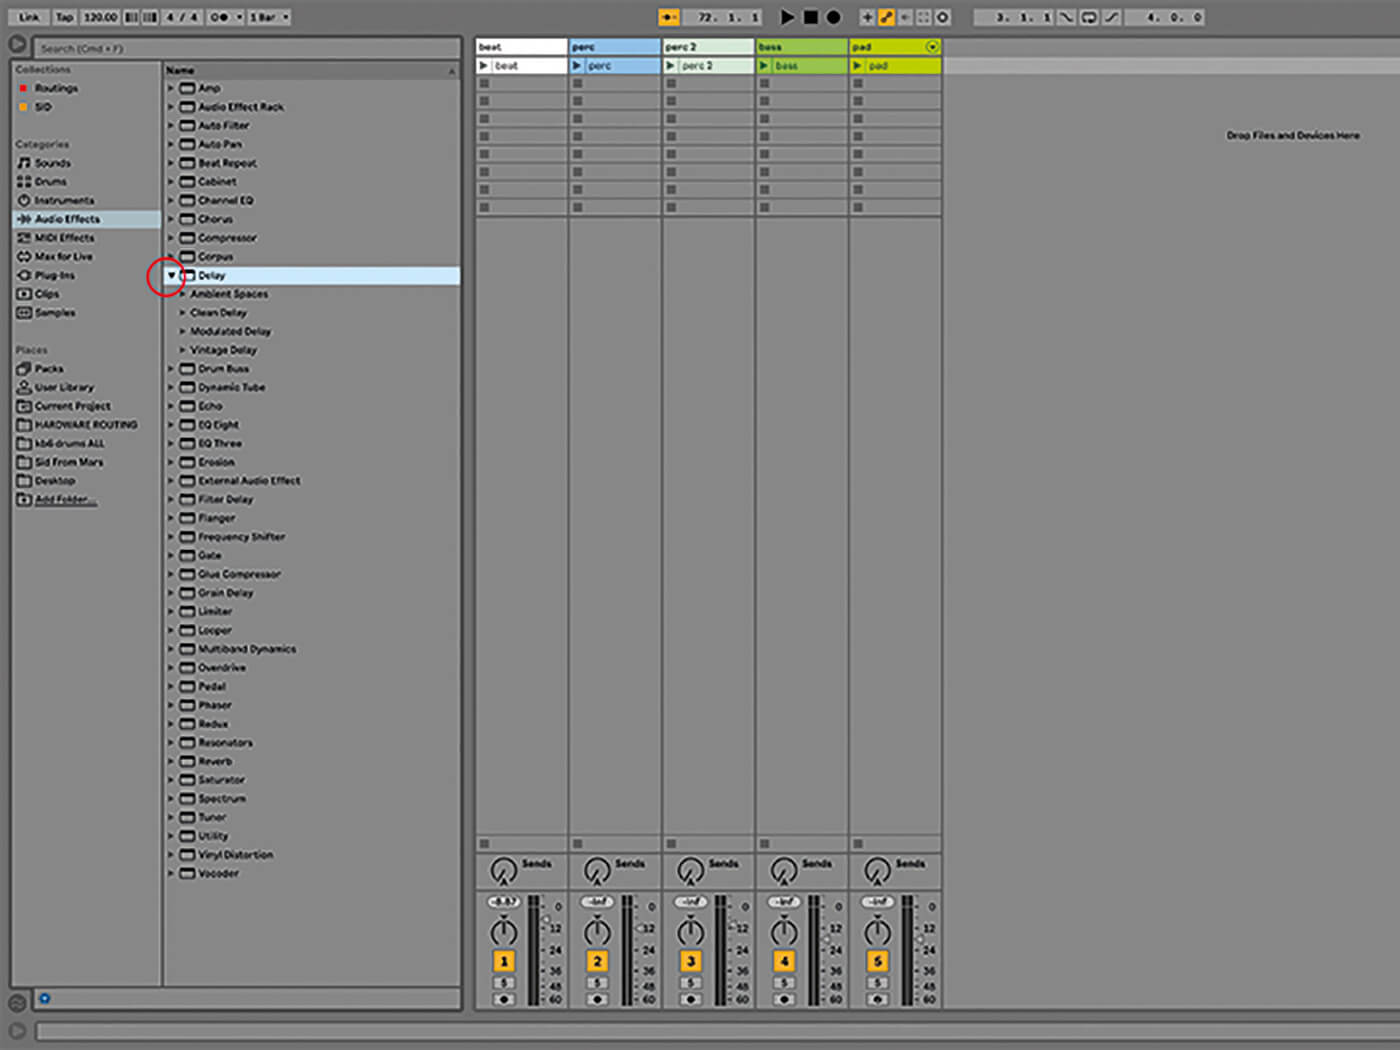
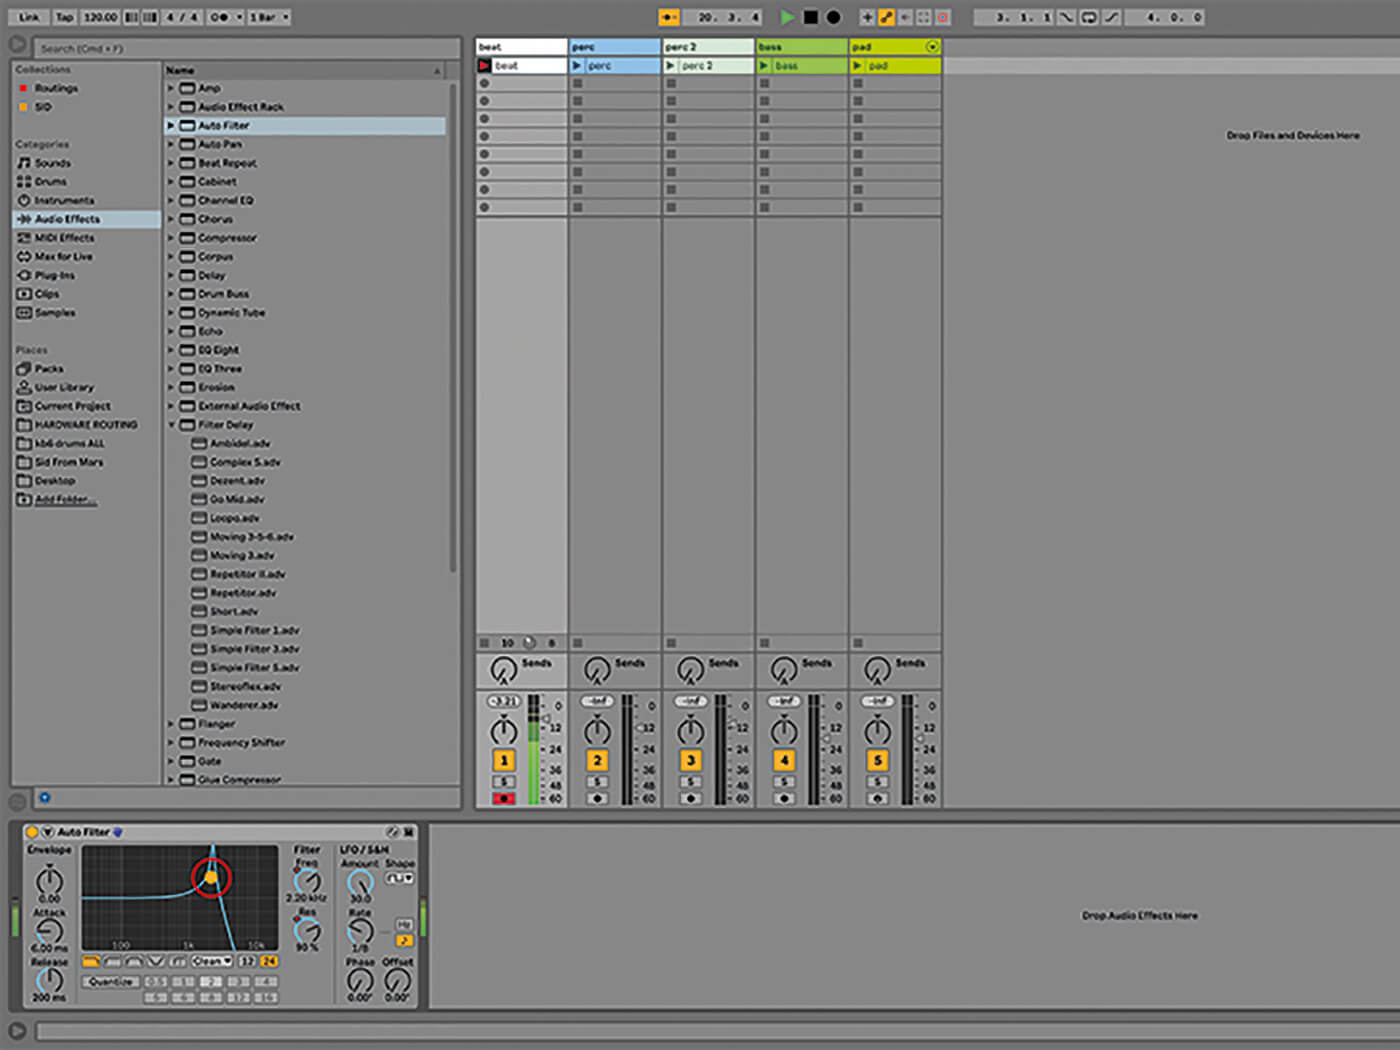
3. Audio effects are located in Live’s Browser. Press Alt+Cmd+B to toggle it or use the triangle at the top-left. Click Audio Effects in the left column then, in the right column, click an effect and view its presets.
4. Double-click a preset to have it load into the highlighted track. If you don’t want it to go there, drag it elsewhere instead, to the track you want to add it to. If there’s already something in that track, the effect will be loaded after it by default.
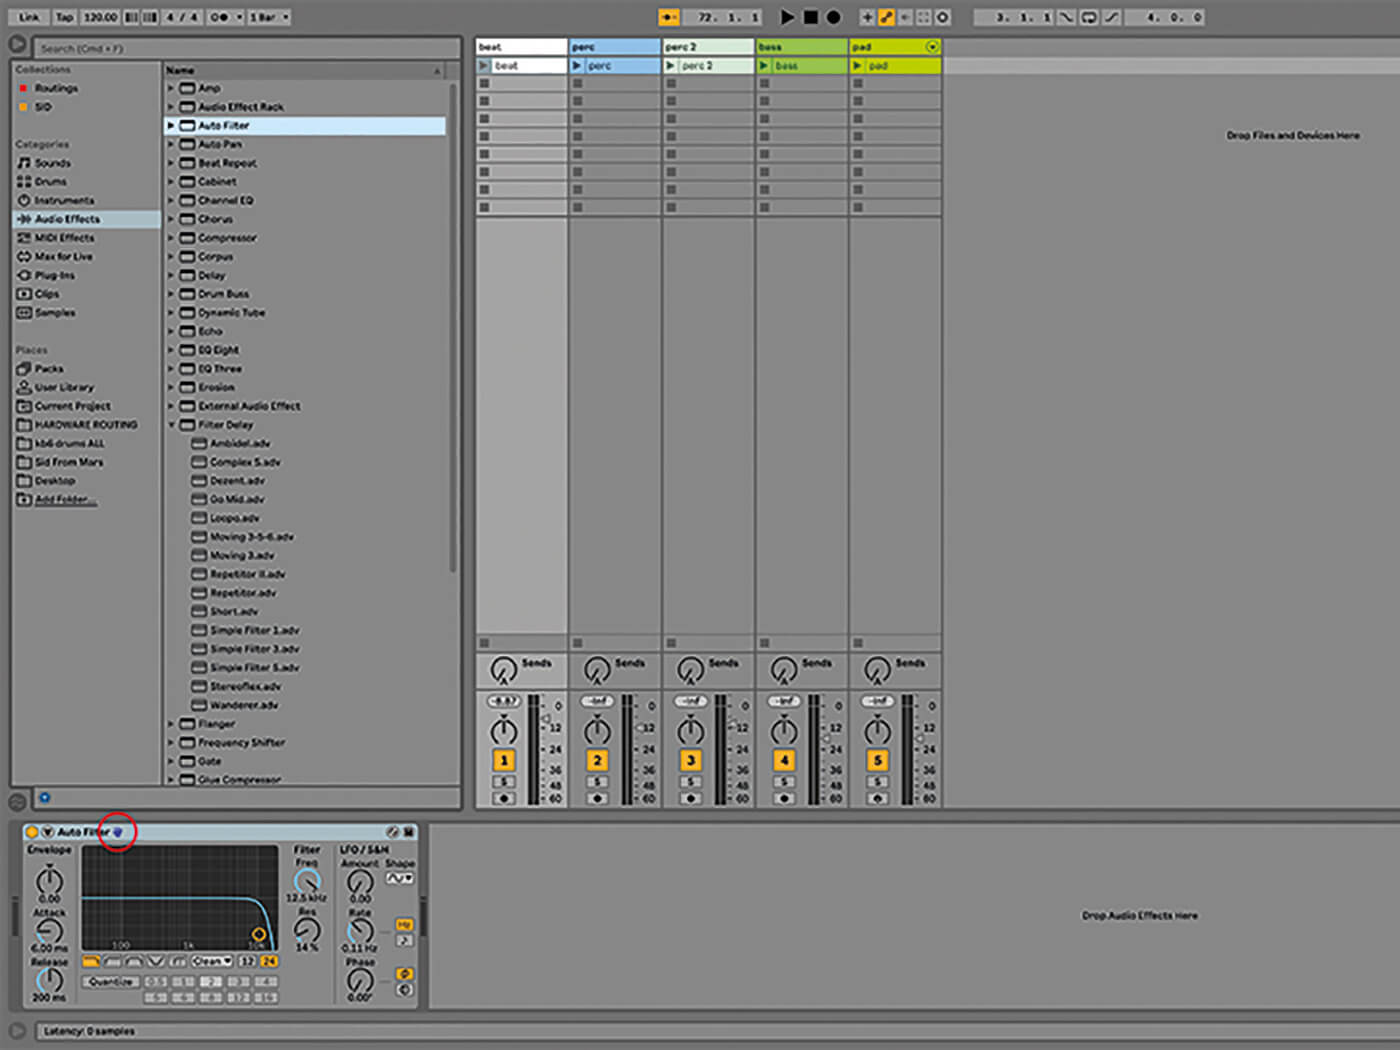
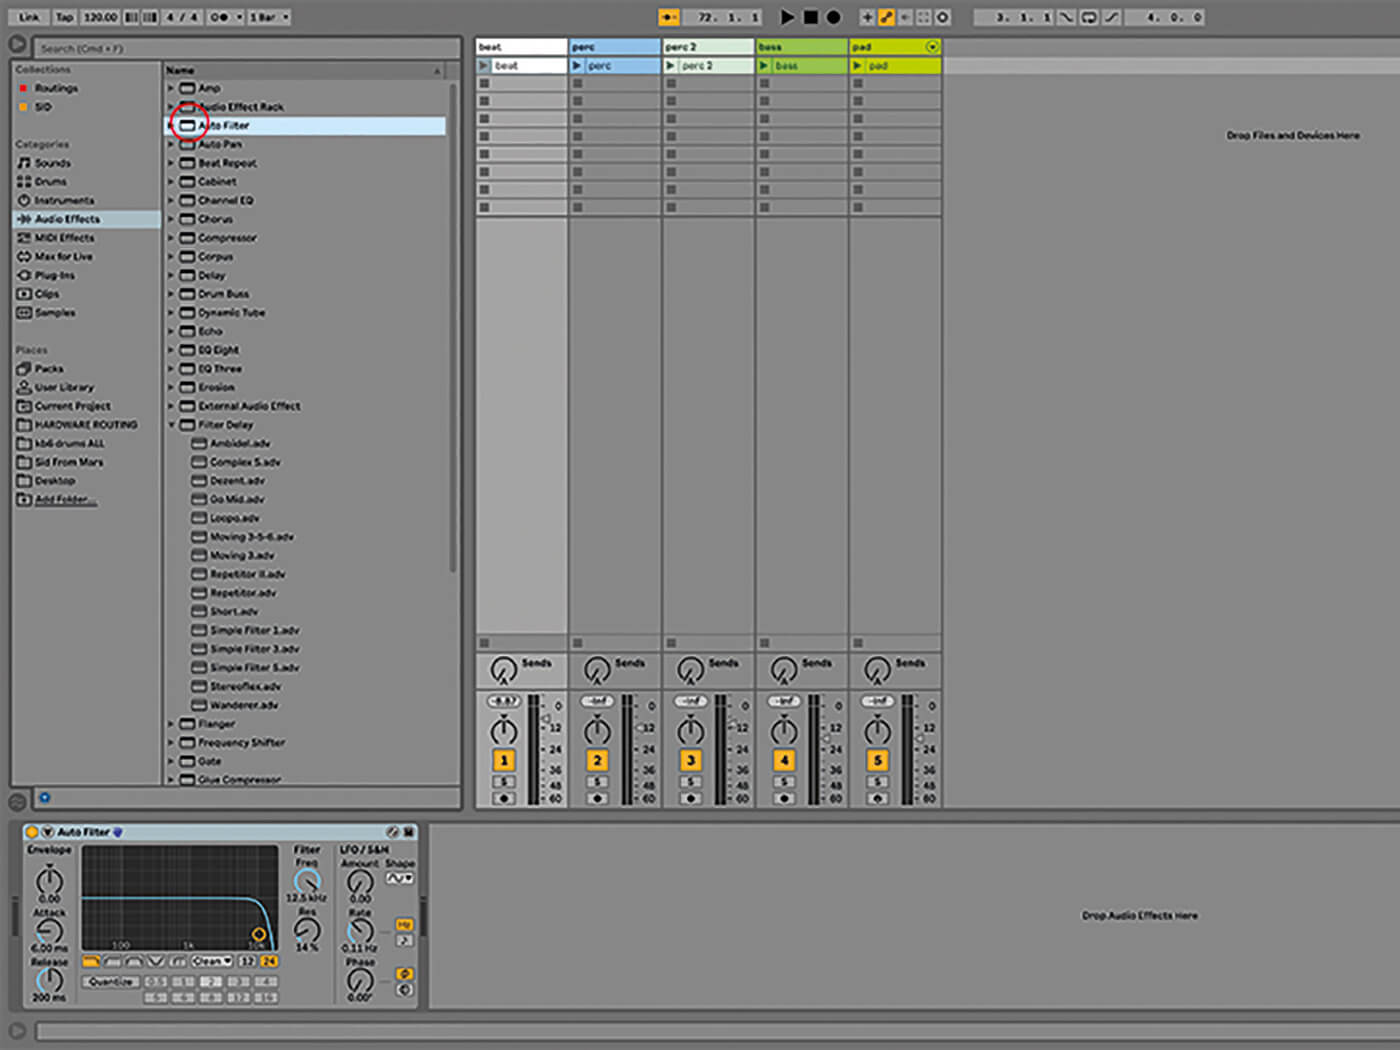
5. Let’s examine a typical effect interface. At the top-left of Auto Filter, for example, you’ll find the activator switch, the device or preset name, and perhaps a blue hand that indicates that a control surface is present. At the top-right there’s the Hot Swap icon and Save Preset button.
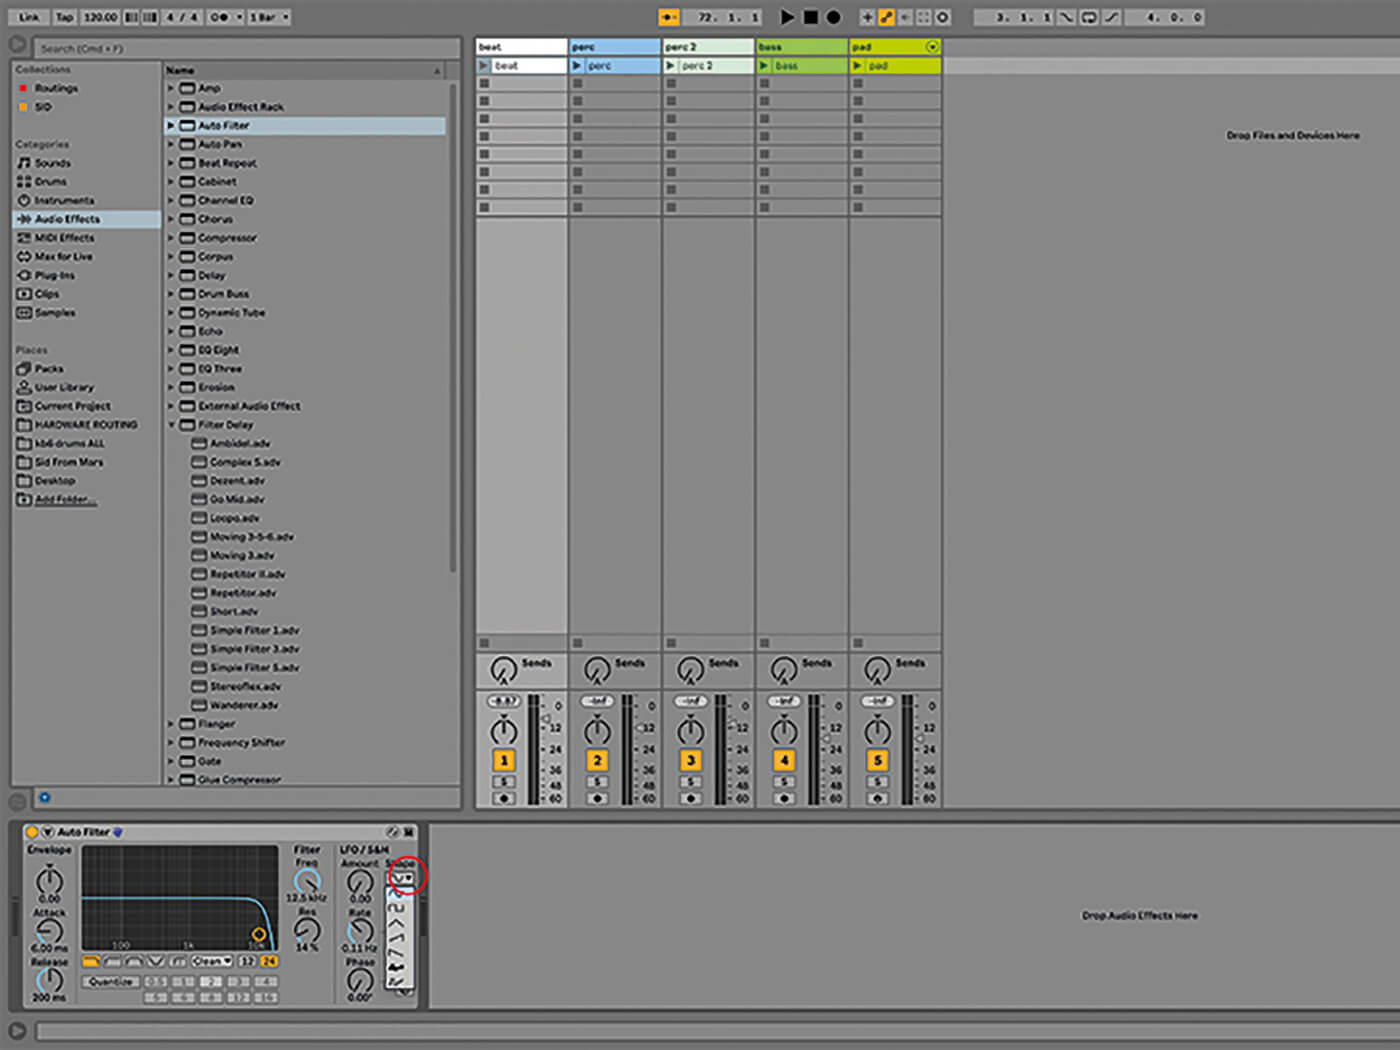
6. The main area features different controls depending on the device. If you see a small triangle besides a text box, there’s a list to choose from. Many effects have a central X/Y panel, where you can drag to control multiple parameters.
![]()
BUTTON UP As far as hardware controllers go, Ableton’s Push provides the ultimate in control over Live’s native audio effects, and does a fine job with third-party plug-ins too. Using Push, you can do almost anything that you might with a mouse and computer, including create and select tracks, browse, audition and load effects or presets, adjust their parameters in real-time, record automation, and control track volume levels.
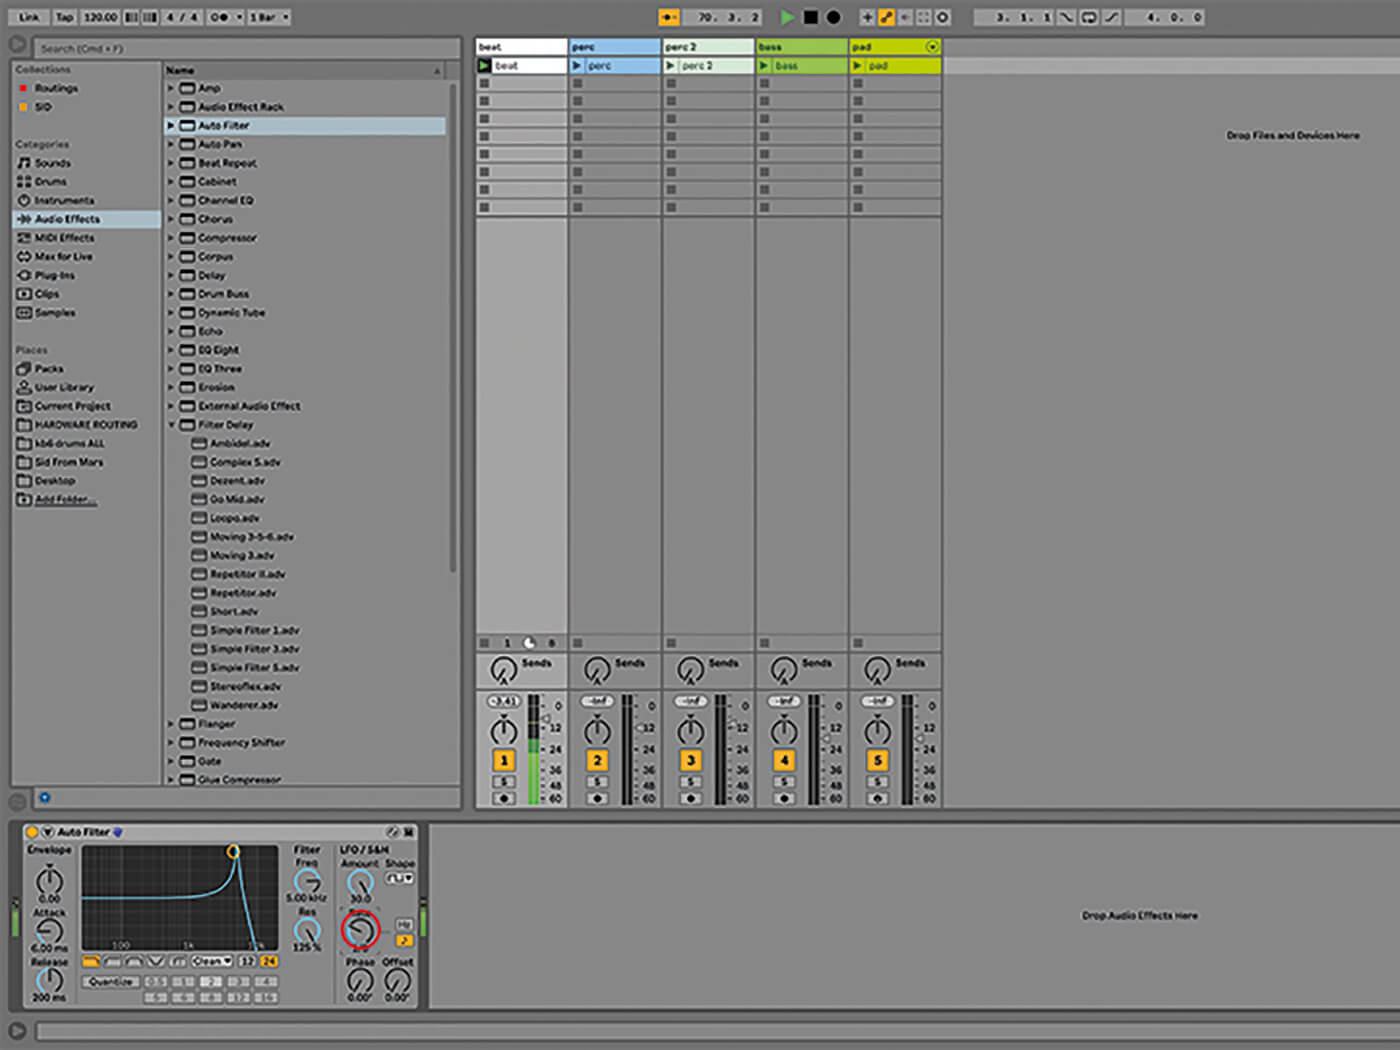
7. Drag the Auto Filter effect onto track 1 (our drum track). Set Freq to 5kHz, and Res to 100%, LFO to 30, Shape to Square, and Rate to 1/4 (with Sync on). Launch the drum clip and experiment with the Rate control.

8. Try dragging the X/Y controller around. Use Cmd+M to enter MIDI Map Mode. Here, everything in blue can be assigned to a MIDI hardware controller, which is where effects become dynamic and interactive (map Freq and Res directly rather than mapping X/Y).
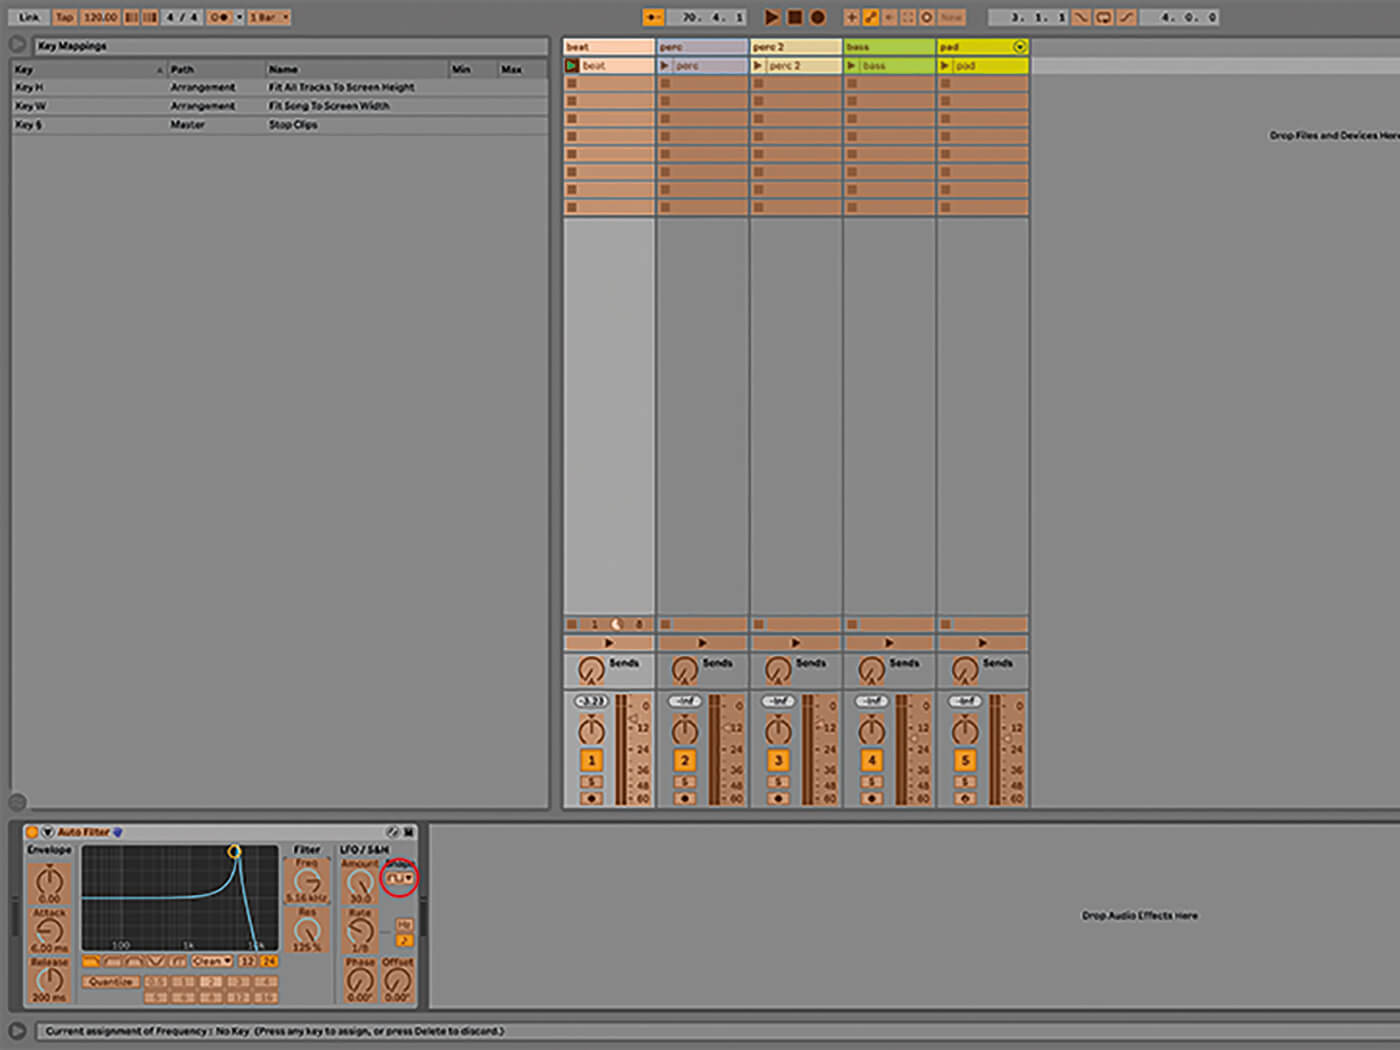
9. If you don’t have a MIDI controller or you need more control, use Key Map Mode – accessed by pressing Cmd+K – and assign any of the highlighted items to your computer keyboard. Watch out for conflicts if the virtual MIDI keyboard is on though.
10. Effect-control movements can be recorded as automation, which can take the form of track automation if recorded during a performance or can be drawn or recorded as clip envelopes. This is useful if you want certain moves to repeat – or you just run out of hands.
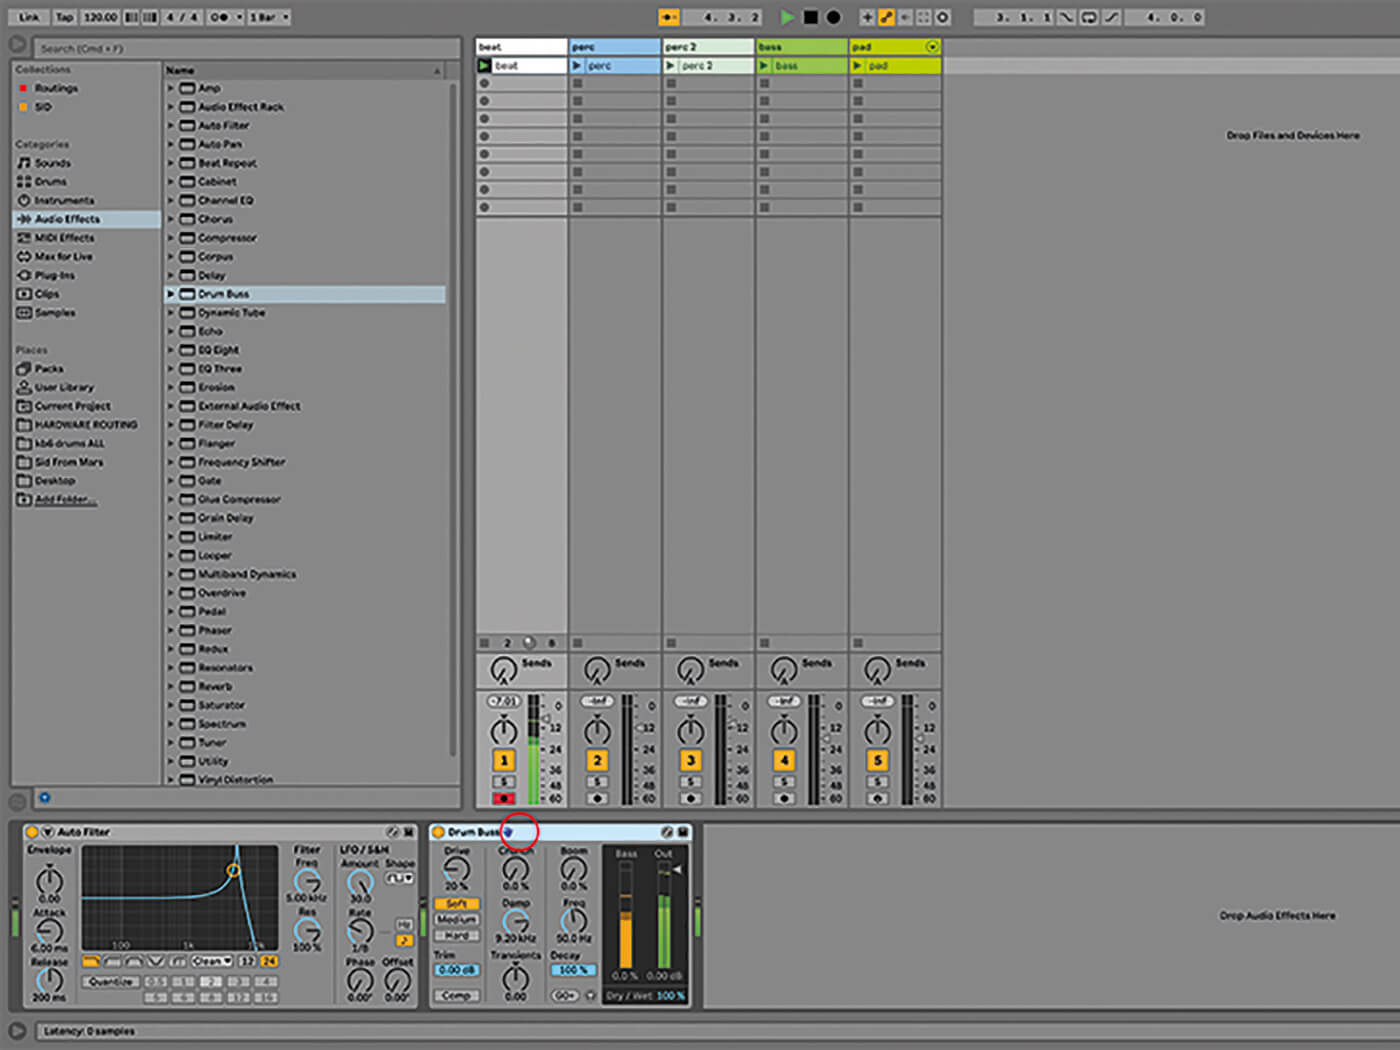
11. Add the Drum Buss effect to the same track. It will be added after the filter via the default setting but you can reposition effects by clicking and holding the title bars and dragging them around. With some effect combinations, the sound changes depending on the order they’re in.
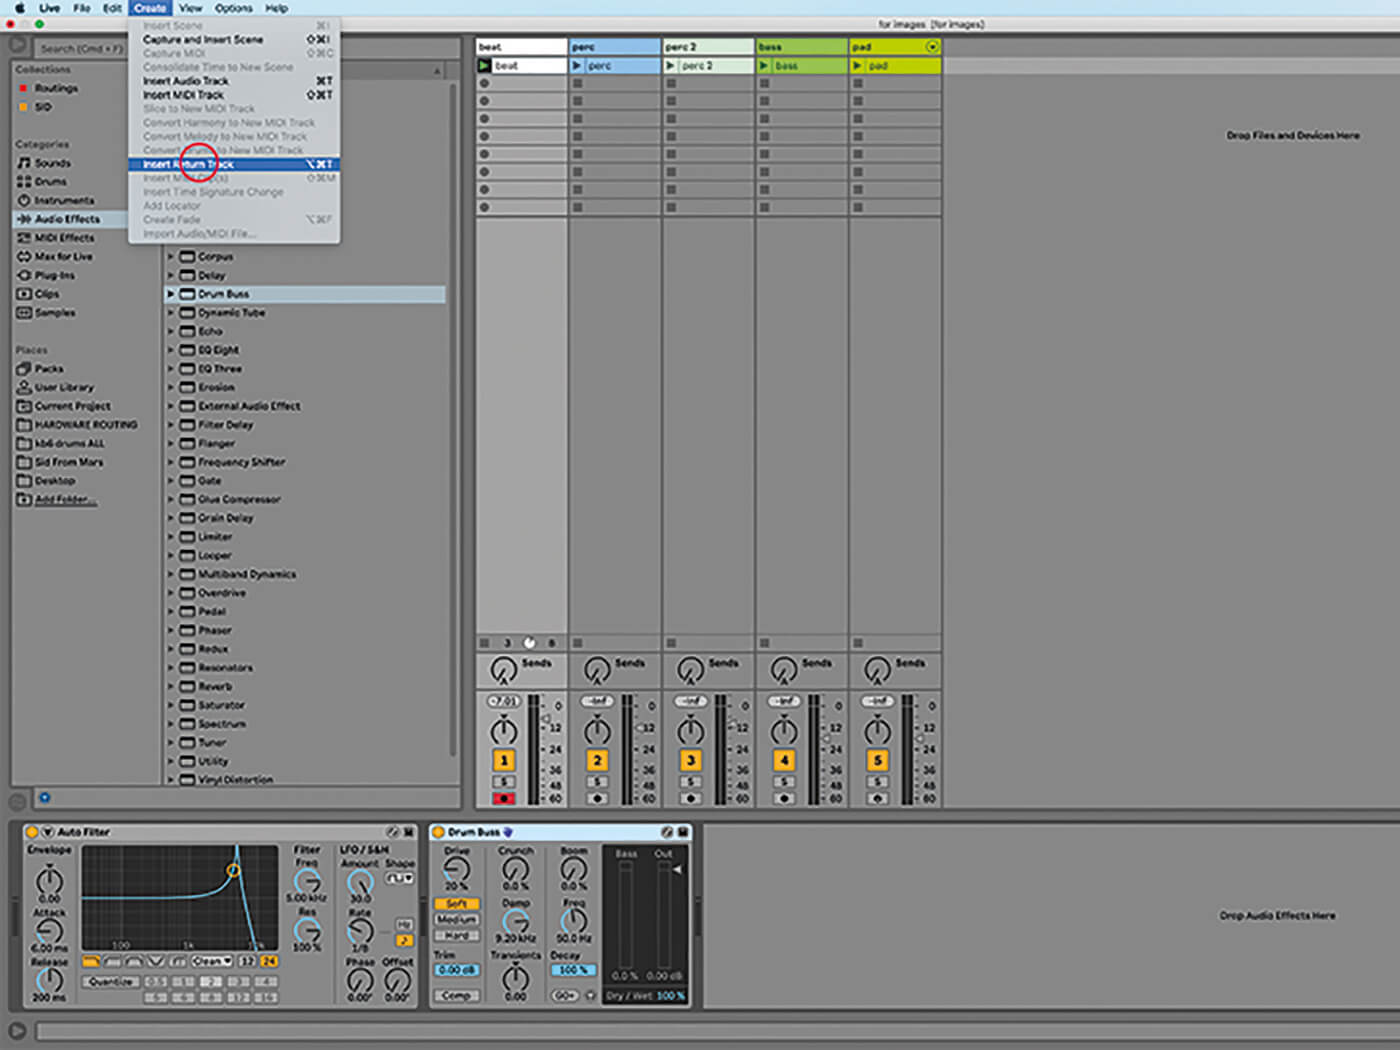
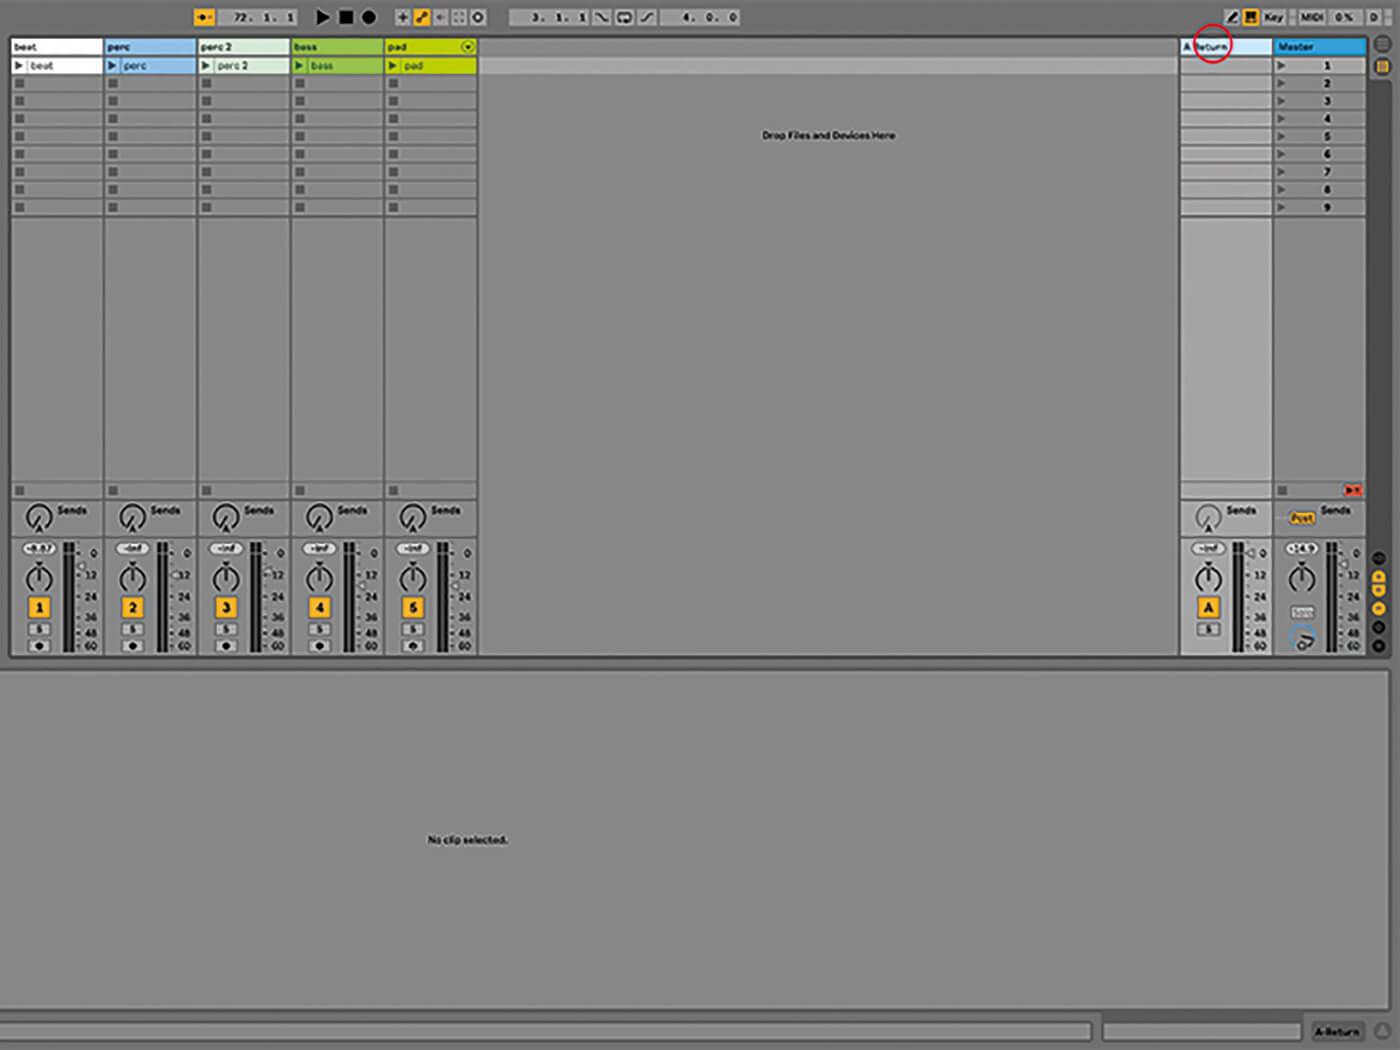
12. Use Alt+Cmd+R to view Live’s Return tracks or hit Shift+Cmd+R to create one if necessary. Drag the Reverb/Large Hall effect into Return A. Press Alt+Cmd+S to view Live’s Sends. There should be a knob labelled Sends under each track.
![]()
PORTABLE EFFECT CONTROL Push aside, if you want the same level of effects control outside of the Live environment, consider iPad app TouchAble. What it lacks in tactility, it makes up for with portability and customisable layouts.
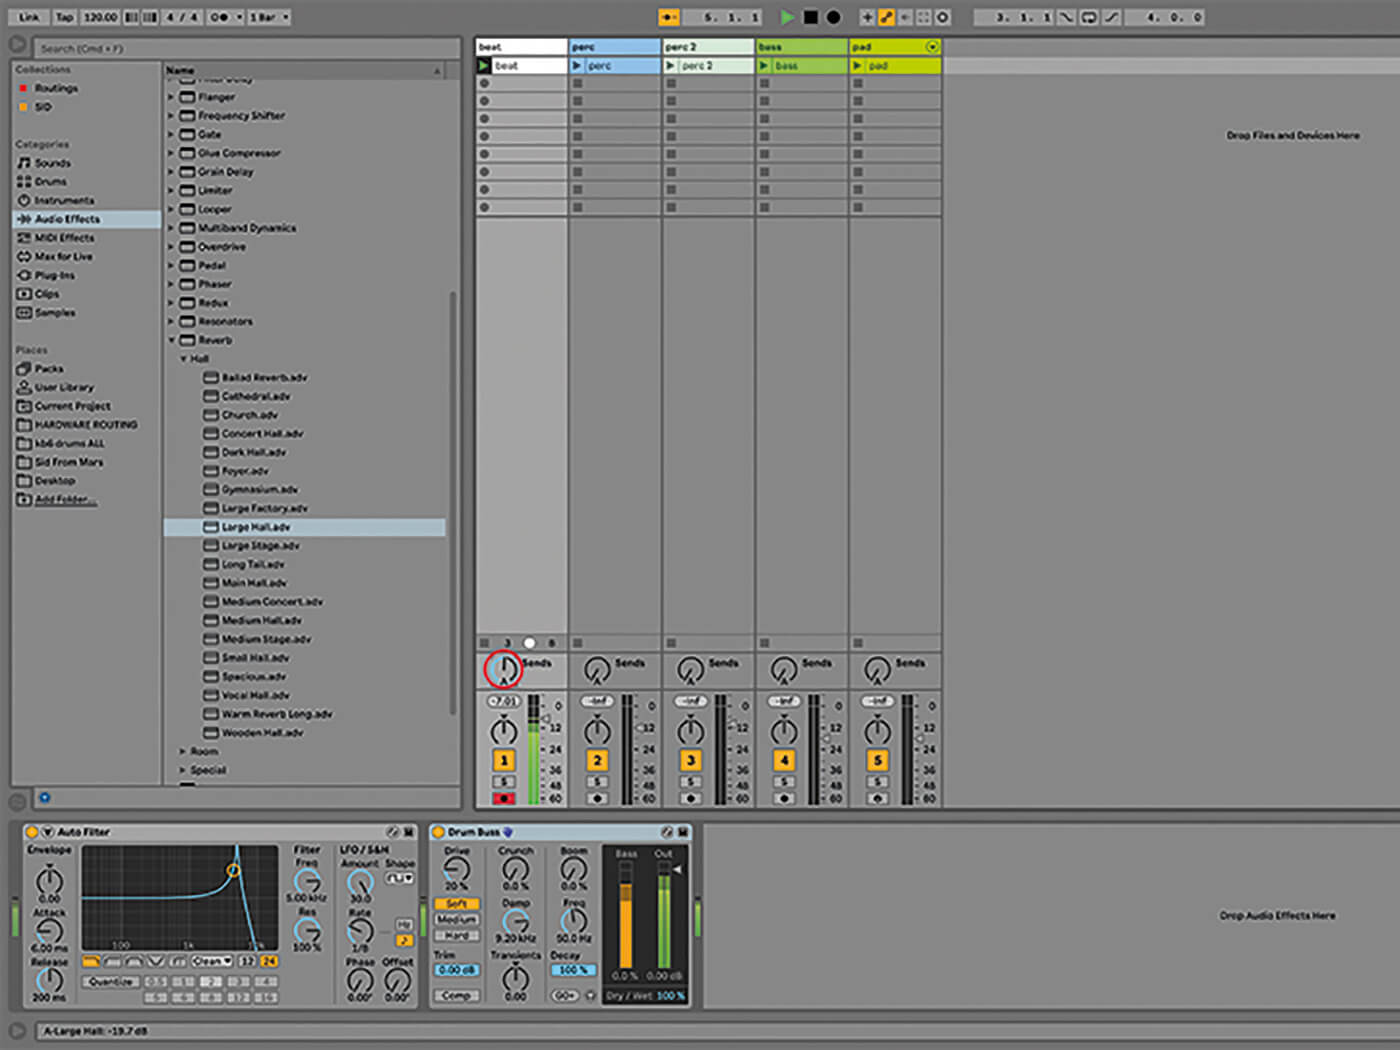
13. Grab Send A under the drum track and drag it to about the one o’clock position. You’ll hear the reverb effect gradually mixed in with the dry drum sound. Effects such as reverb work well in this position, while filters are better used on individual tracks.
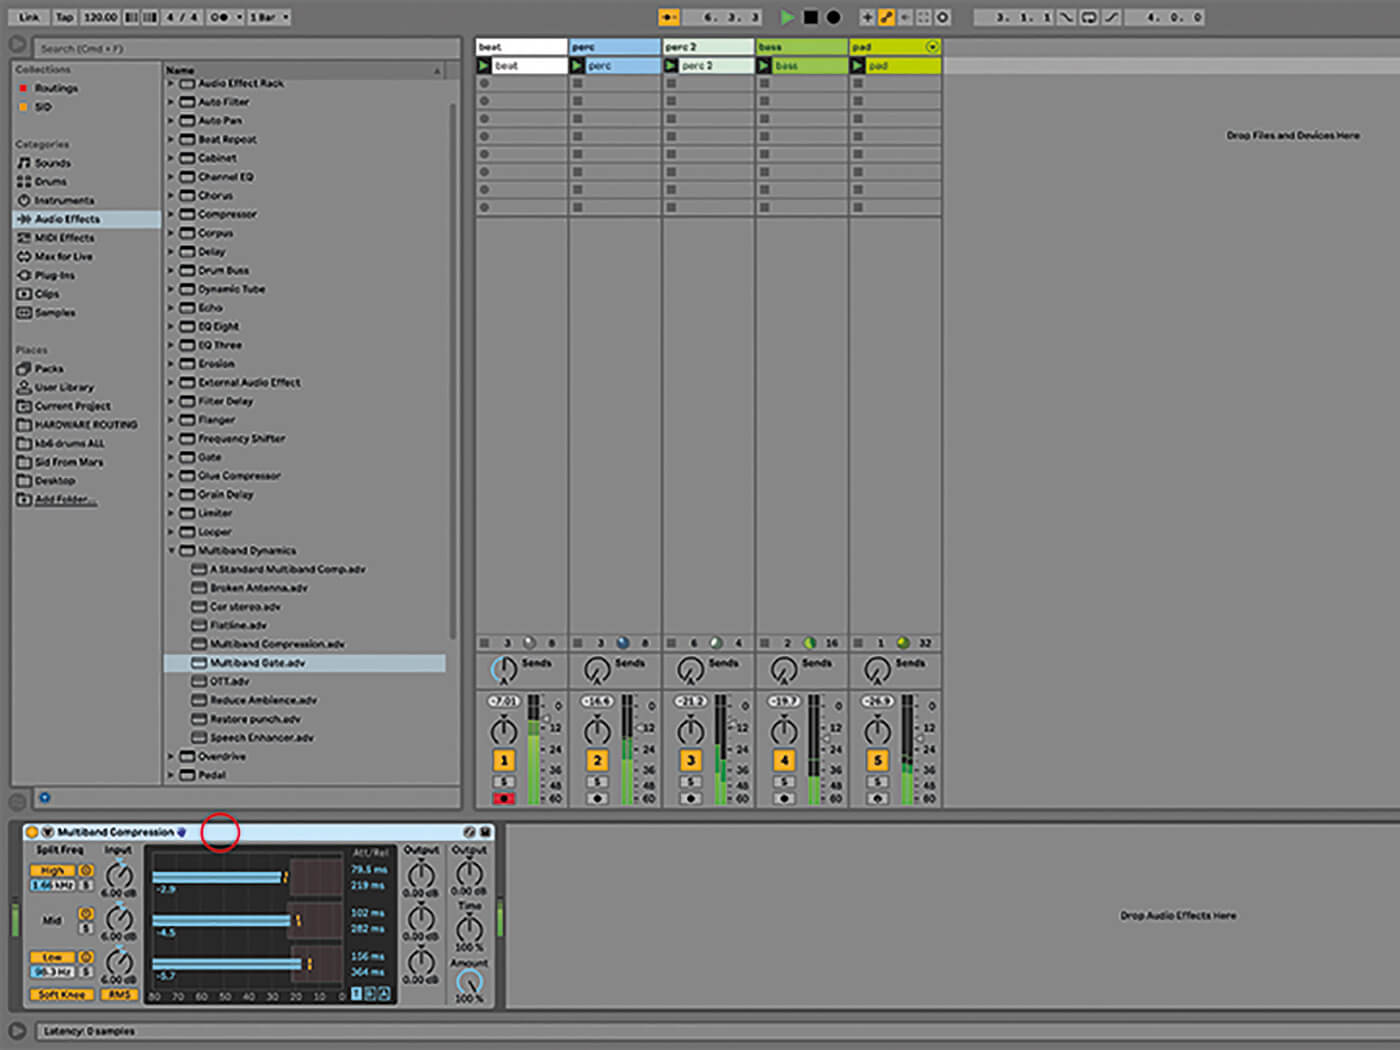
14. Add the Multiband Dynamics/Multiband Compression to the master track. Effects in the master track apply to all tracks in your project. Launch a few combinations of clips and toggle the Multiband on and off for reference.
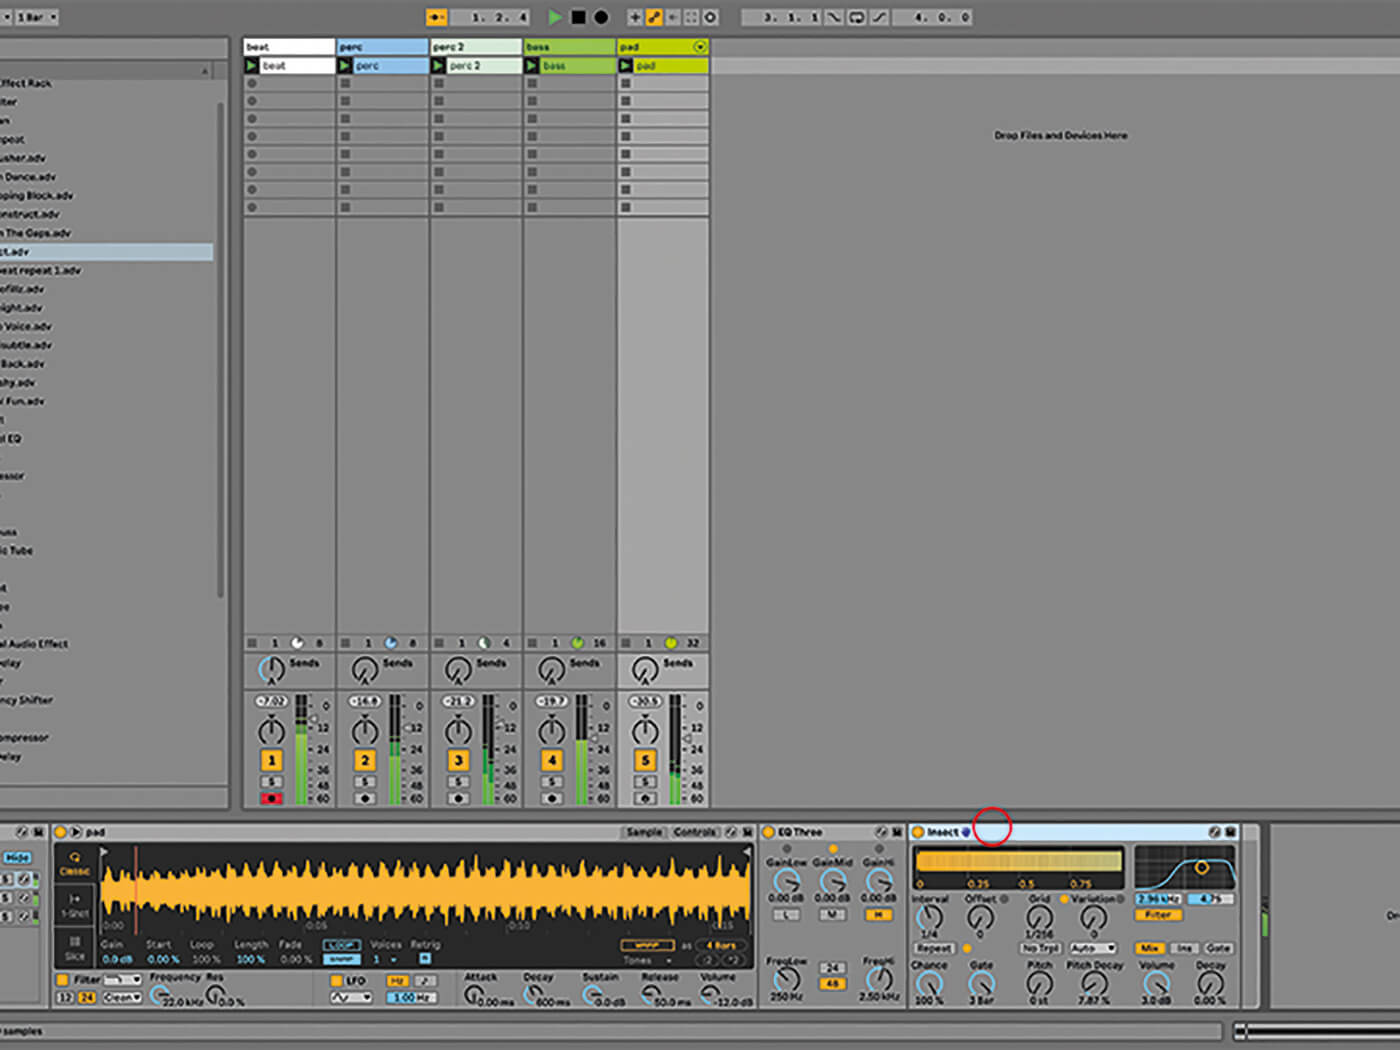
15. The pad track contains an instrument rack with three parallel Simpler instruments in it. Drag the Beat Repeat/Insert preset onto the top chain, labelled ‘Hi’. When you trigger that sound with a clip or a keyboard, the effect applies to that chain only.
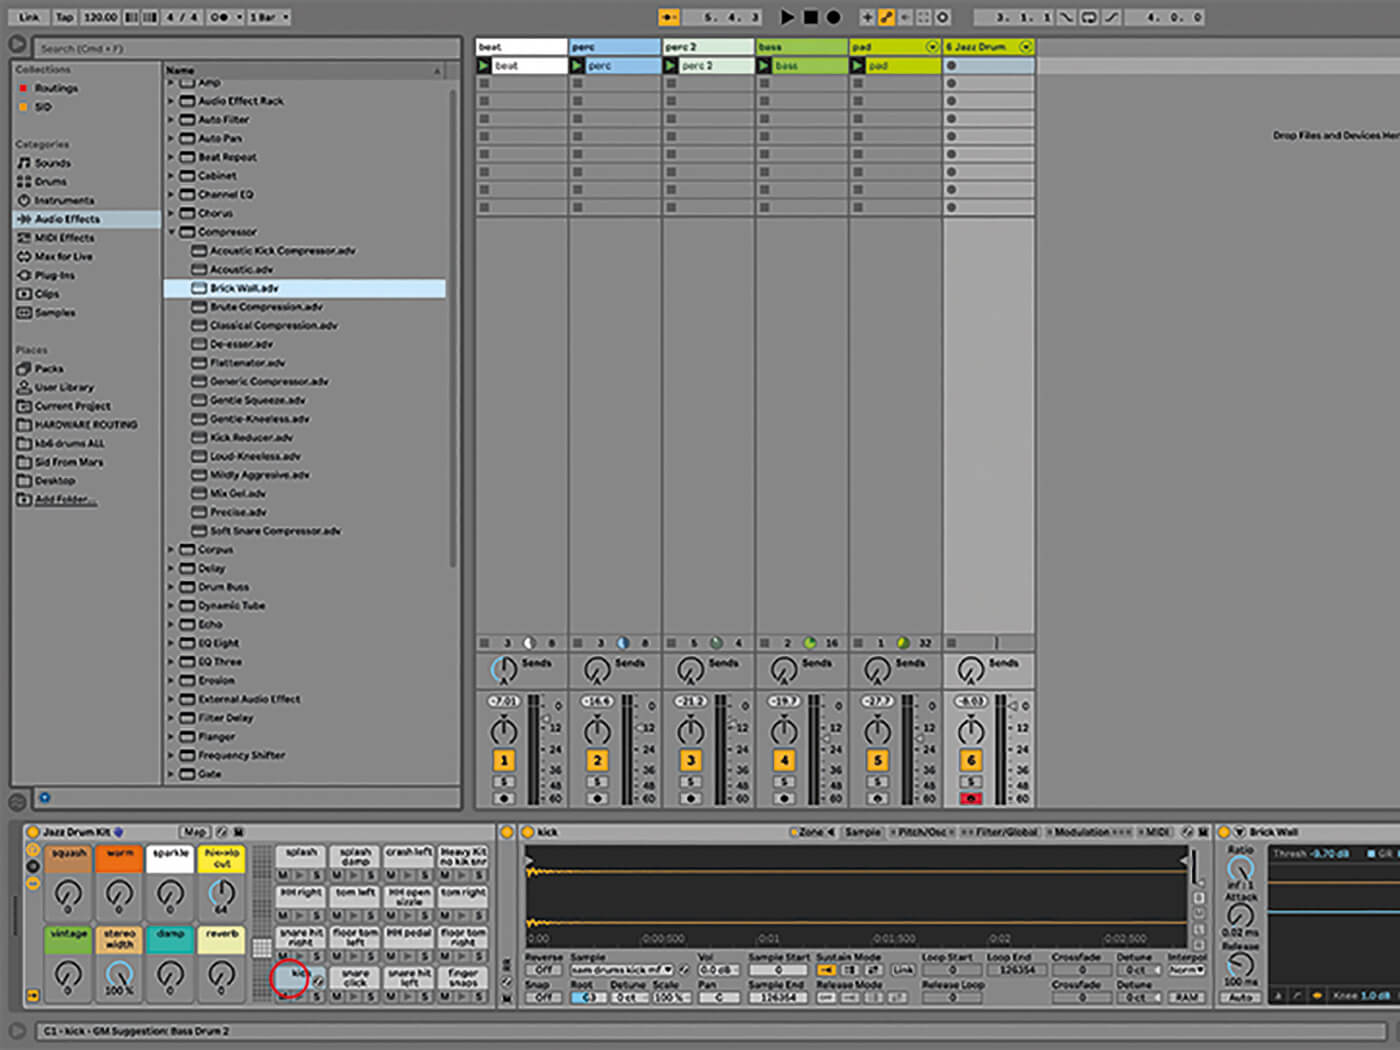
16. The same goes for the drum racks. Unfold the chains and drag an effect onto one or straight onto a pad and it will apply one to that drum hit. You can build complex kits with different effects on each pad, and use more than one too.
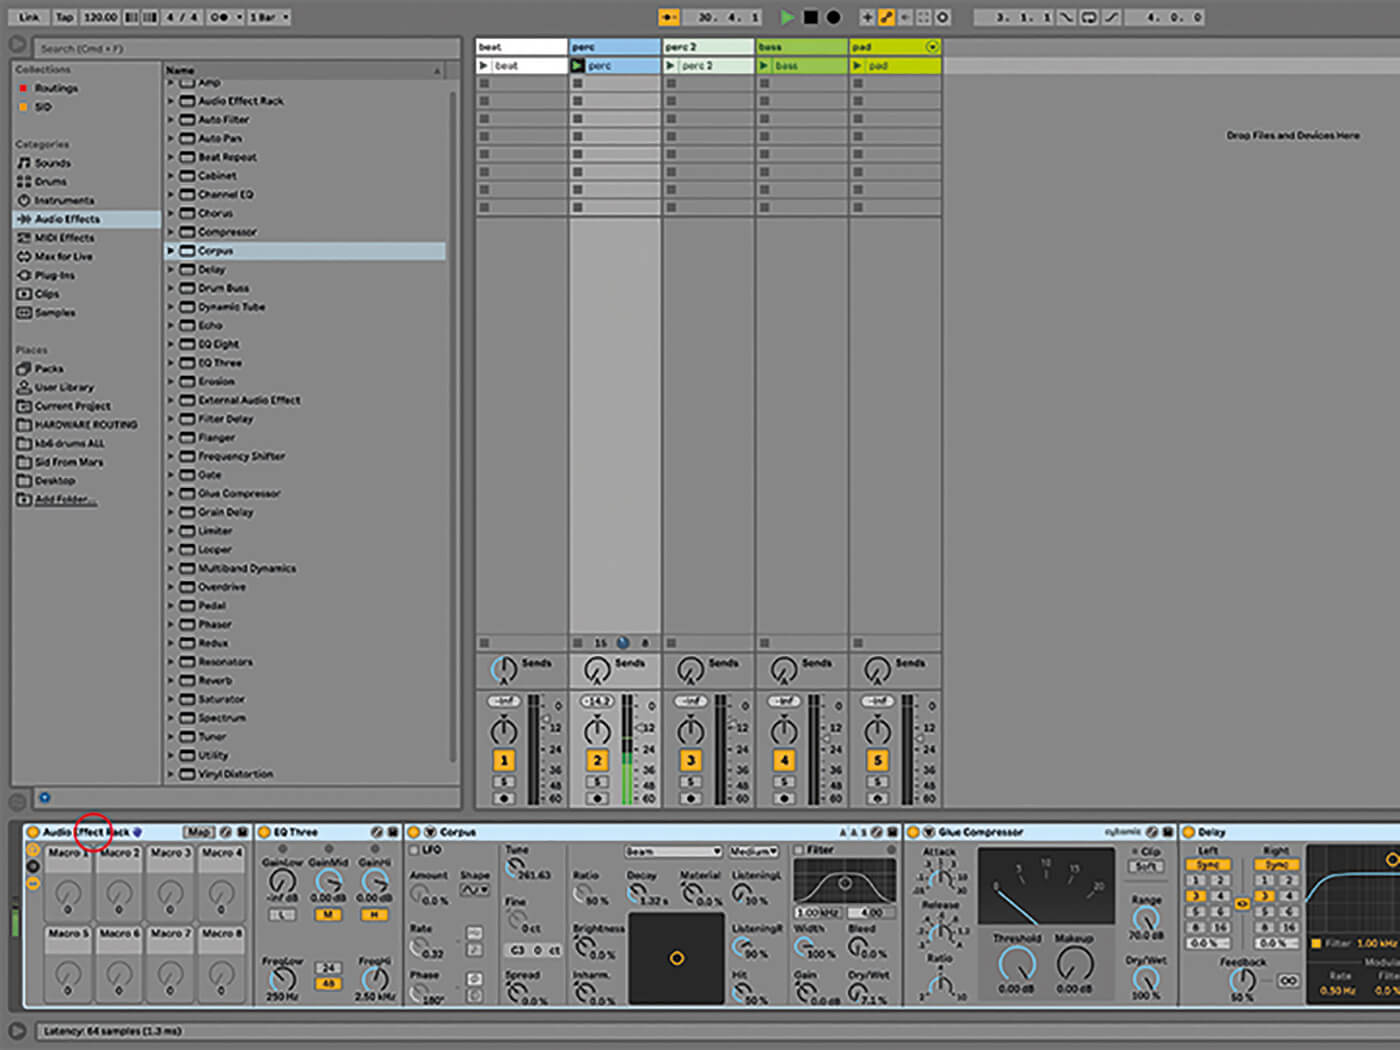
17. There’s no restriction to how many audio effects you can use in a single track. If you come up with a combination you’re likely to use again, shift-click to select all audio effects in the track using and press Cmd+G to make an effects rack.
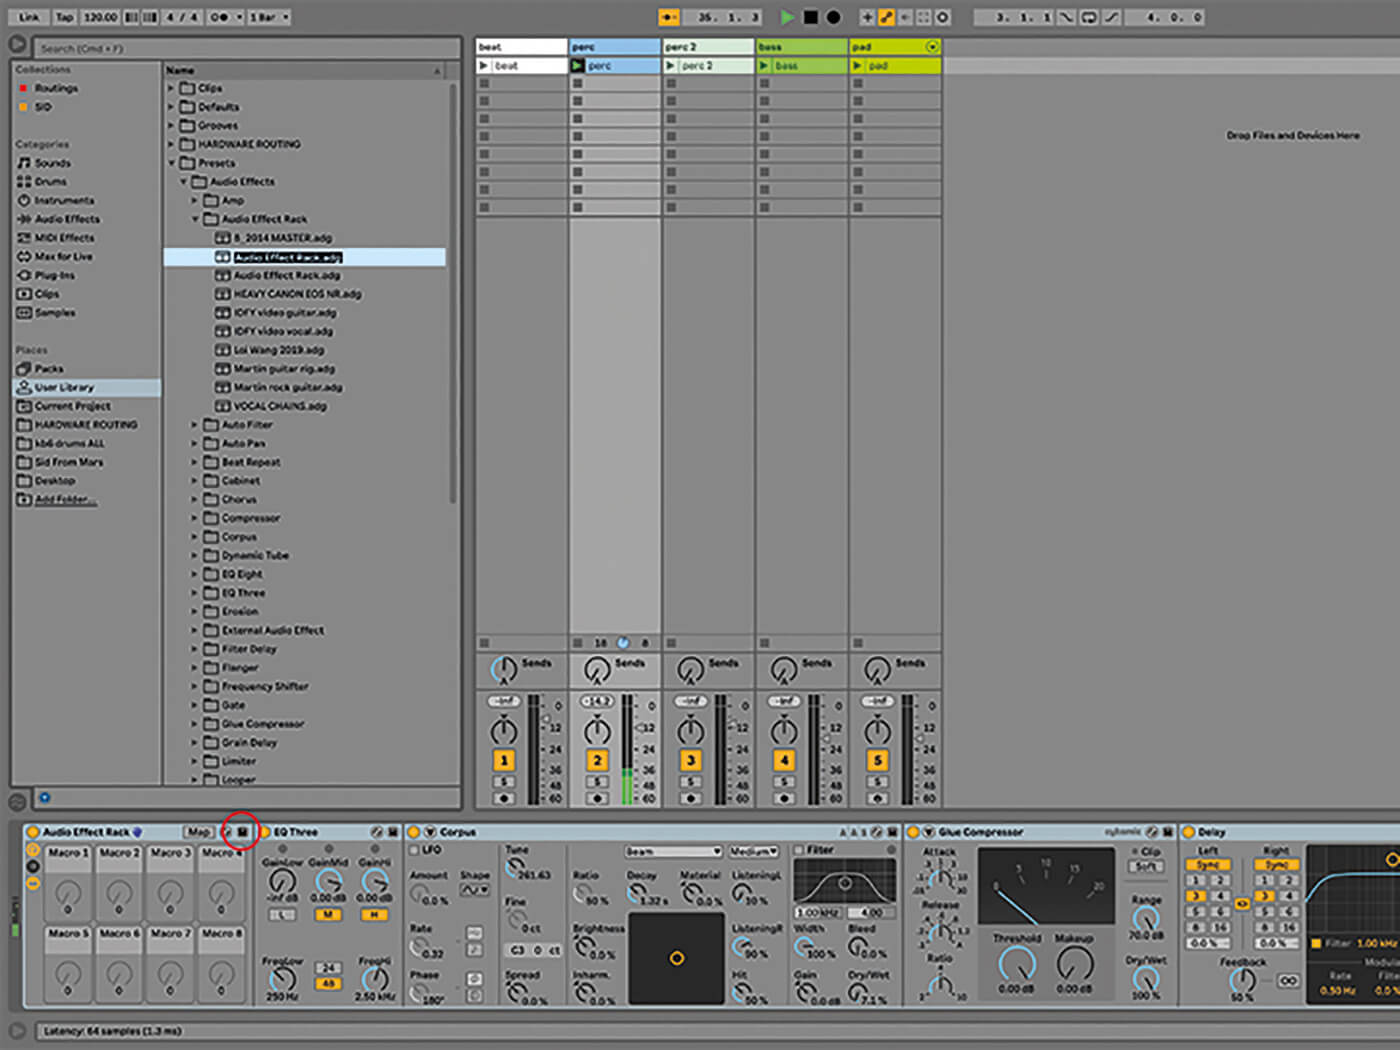
18. Click on the small disk icon to the right of the device title bar to save a preset. Live will take you to the correct location in the Browser so that you can give it a memorable name.
For more Live workshops, check here.