Updated automation and editing features in Ableton Live 10.1
Electronic music sounds better when things are moving – but you haven’t got enough arms to move all the controls at once. That’s where automation comes in and Live 10.1 includes yet more usable automation features
If the concept of automation is new to you, it basically refers to the way that you can record the movements of controls – such as faders on a mixer, or the frequency and resonance knobs on a synthesizer – and edit them and replay them afterwards. This principle has revolutionised music production, enabling us to easily apply complex micro-adjustments to our songs without inconveniently having to do a final ‘live’ mix where we’d hit record and frantically run around tweaking everything in the studio.
An invaluable part of our creation and production workflows, automation can be captured during a real-time performance, or drawn in, in a more calculated way, using a mouse or trackpad. Either way, we can end up with sounds and mixes that would be difficult or impossible to achieve otherwise.
Nearly everything in Ableton Live can be automated. Once you’re in record mode, any control movement you make will be captured as part of that process. You can tell if something in Live has automation attached, because it’ll have a red dot on it (or blue, if you’ve applied modulation, which is similar-but-different), and the control will move as the song plays back. It’s fun to watch if you’ve really gone to town and automated a lot of elements – just enjoy them dancing around as the song progresses.
If you’ve recorded any automation by mistake, which is easy to do, the first thing to remember is that you can right-click on that red/blue dot and choose ‘Clear Envelope’ to get rid of it quickly.
Improved accuracy
Live has been doing automation for years, but there are some changes and additions in Live 10.1 – this is a typical Ableton move, adding new free stuff on what would often be considered as a mere point update – and that’s the kind of move we like!
In our opinion, the most significant change to Live’s automation is 10.1’s ability to – finally – type in precise automation values for each breakpoint, using the Context Menu. It’s such a relief to type in, say 85%, rather than click and drag breakpoints around until it’s a matter of ‘close is good enough’ – perfect for those times when you need that kind of absolute accuracy. Choosing that option is an artistic or technical decision, depending on what you’re working on. Live always gives us the option to keep things as loose and organic as we want, or dead-on precise and machine-like.
Another example would be with the LFOs that are all over Live’s instruments and effects – these can be set to precise note values, for sync with project BPM and each other, or set to Hz, where their value is set manually by ear, which might mean some drift occurs over the length of a tune. But it sounds more human and old-school, especially when you’re trying to recreate the vibe of vintage recordings, where that looseness would be a natural part of the process.
Making things simple
The other extreme from that precision approach is the live recording of automation, probably as you operate a hardware controller with knobs and faders. Some of those envelopes will have red lines and breakpoints all over the place, but Live 10.1 gives us a way to rein that back a little, with a very cool feature called ‘Simplify Envelope’. Select the section you want to work on, and right-click/control-click, bringing up the Context Menu, then choose Simplify Envelope. Live will remove a number of breakpoints from the envelope, while preserving the general progression of the automation. This only works one time per section – if you attempt to repeat it, you’ll get a message saying ‘No more automation events could be removed’. In Arrangement View, you can even apply it across a bunch of clips at once, just select the ones you want to apply it to and execute the command.
It’s important to understand the difference between automation and modulation and once you’ve got it in your head, it’s useful to be aware which one you’re looking at onscreen! If the envelope is red, it’s automation, if it’s blue, it’s modulation. Given modulation is defined by offsetting from the automation, it’d be good if in the future we could view both at once for a particular clip or track.
The use of automation reaches way beyond electronic music, pretty much any modern music you listen to is likely to be using it, from riding vocal levels through the song, to a simple fade in or fade out.
There are times when automation can be a bit of a nuisance to handle, especially if your preferred software doesn’t handle it as well as it should (luckily, Ableton Live handles it very well), but it adds another dimension to your sound design, production and mixes, so it’s worth taking the time to get to know what automation can do for you.
Automation and editing in Ableton Live 10.1: step-by-step

1. To properly explore automation, we need something to automate, so we’ve prepared a Live set that contains some audio and MIDI content. This tutorial is about what’s new in Live 10.1, so you’ll need some kind of version of 10.1, even if it’s just the demo.
2. Let’s begin in Session View; we’ll move to the Arrangement View later on. The parameters available to edit in an audio clip are quite different than those in a MIDI clip with a software instrument, so we’ll explore both types.
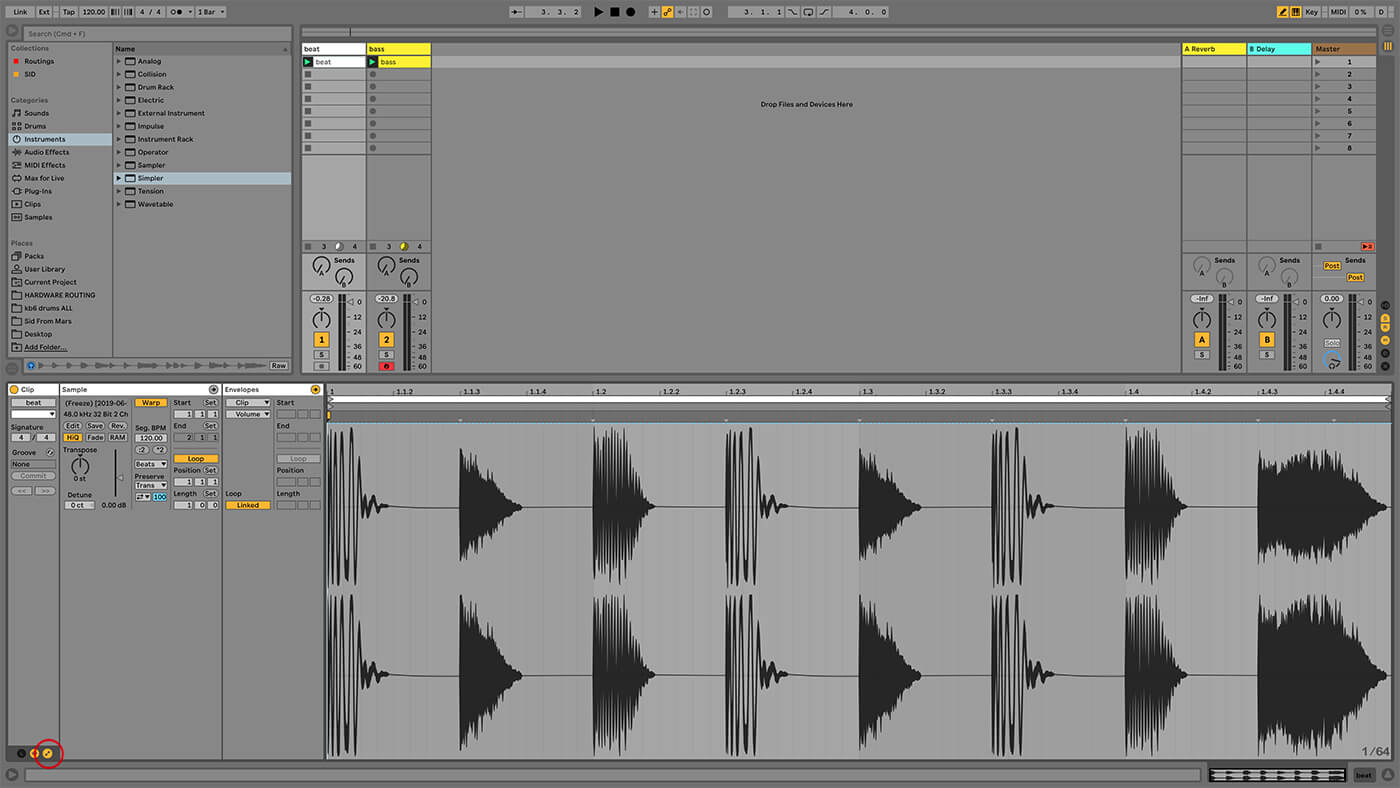
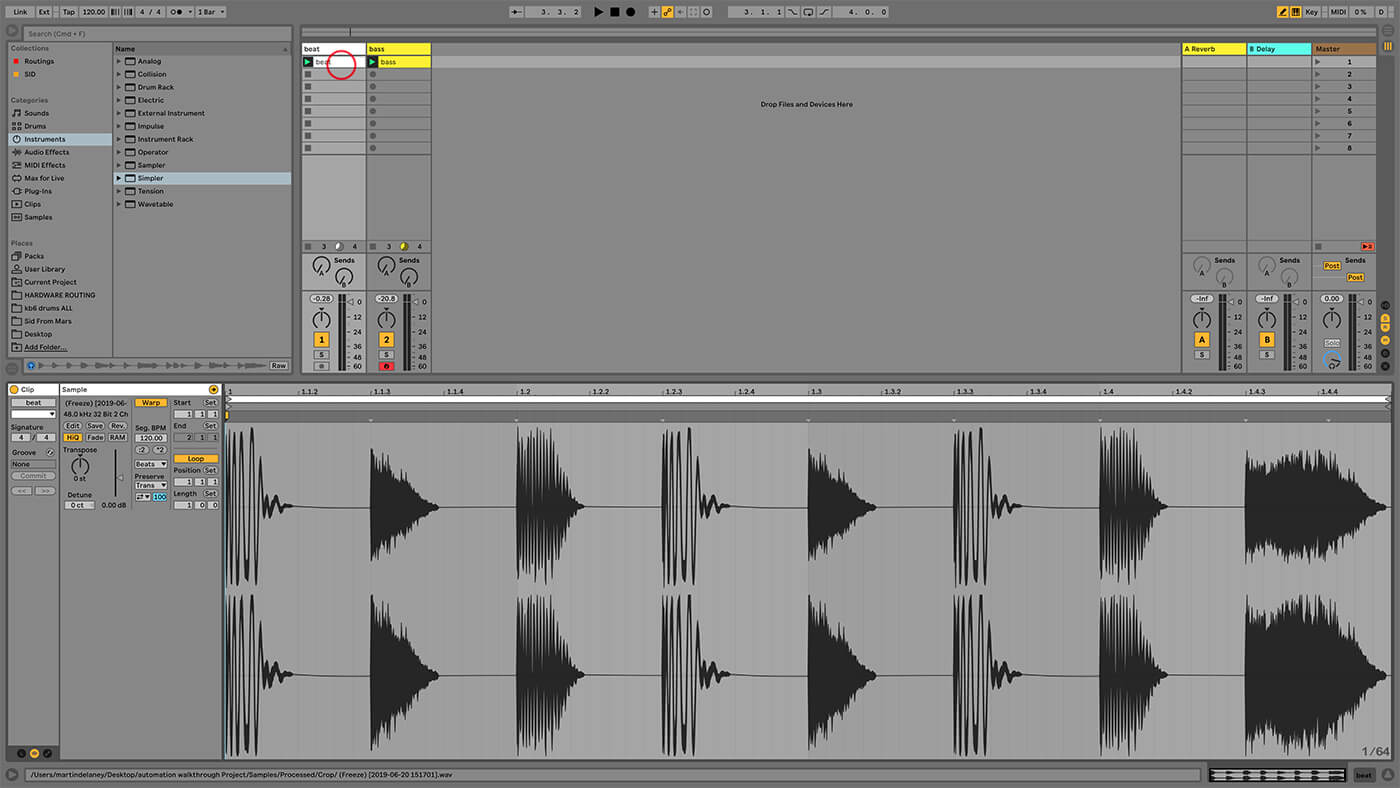
3. Double-click the beat clip so you can see the waveform. Listen to the clip a few times so you get a feel for it – it’s a drum beat, of course. Click on the Show Envelopes Box button near the bottom left of the screen.
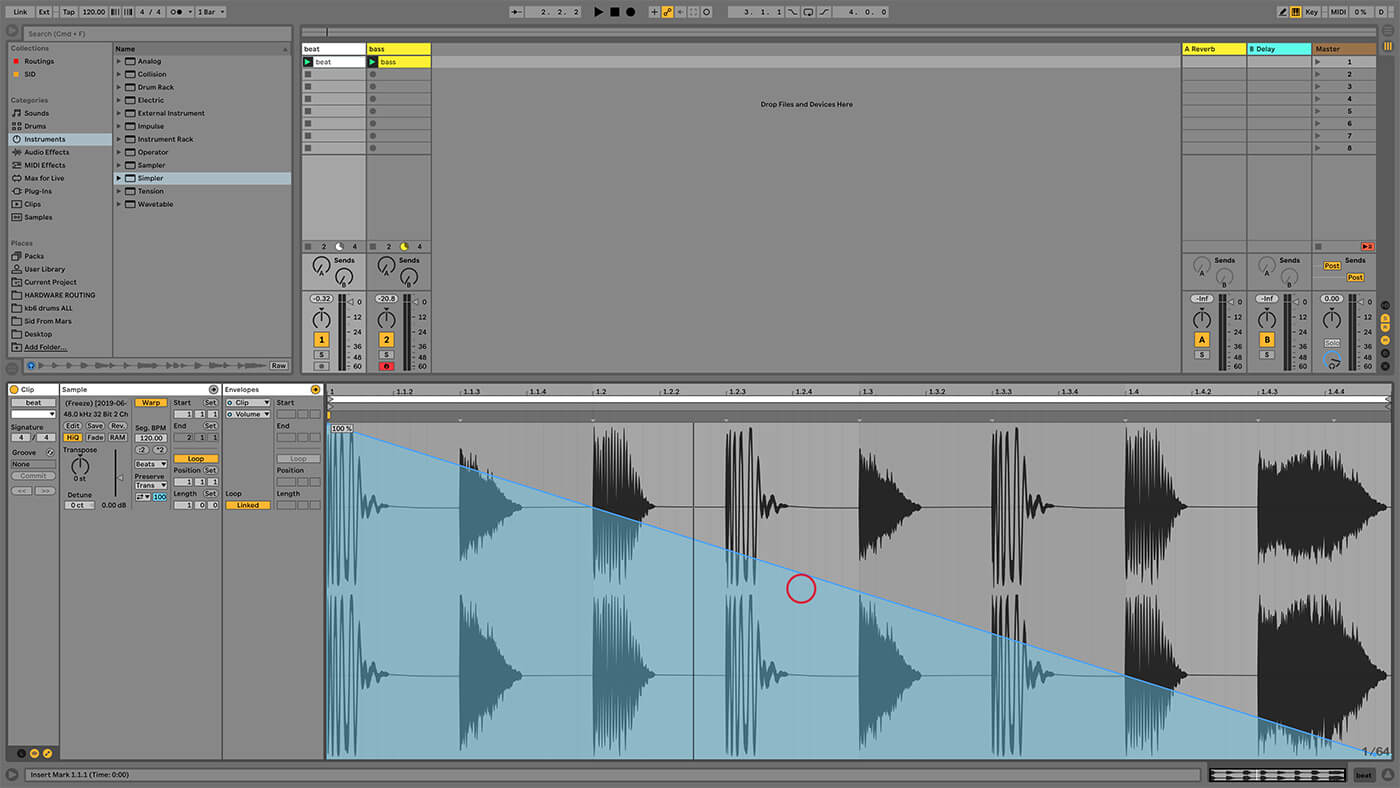
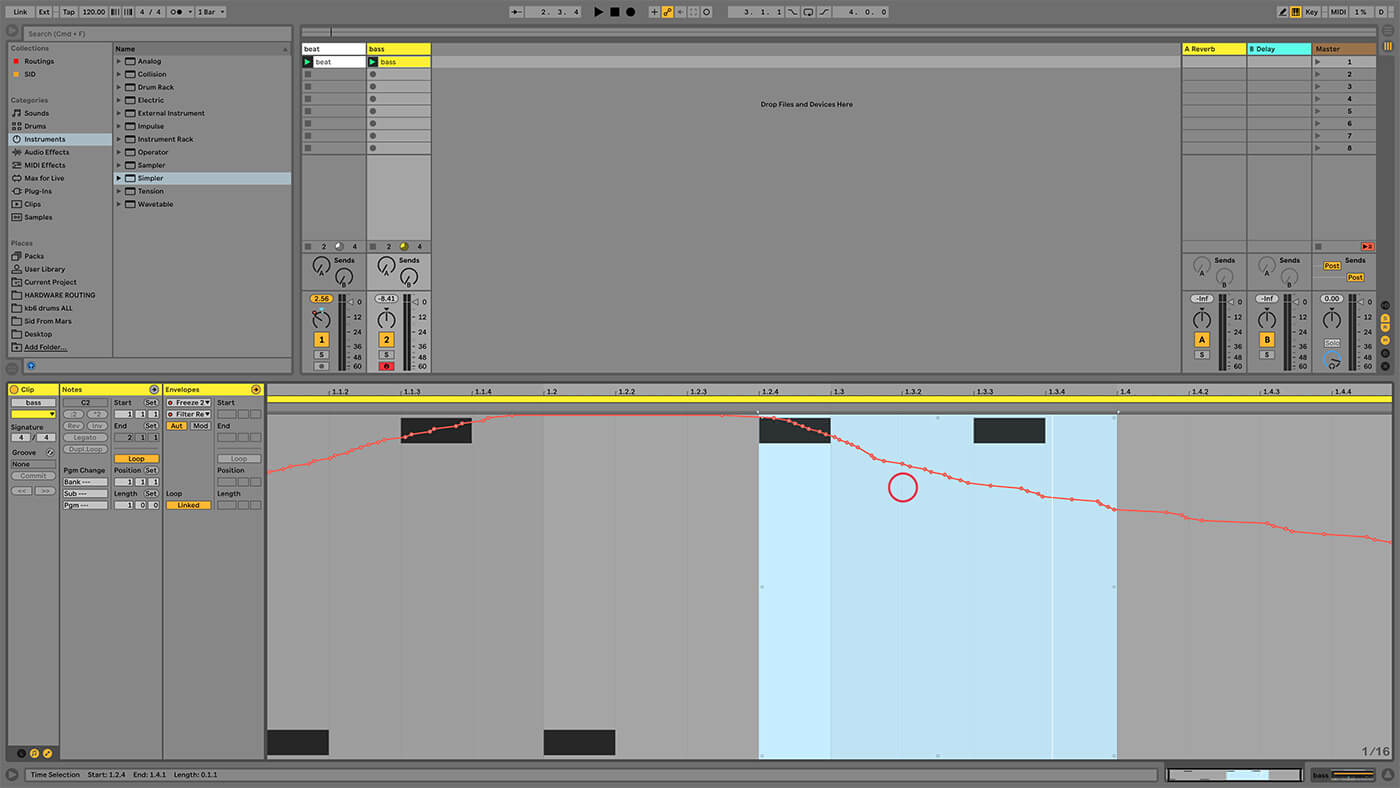
4. Now you can choose the Volume parameter box at the left of the waveform. Click to make a new breakpoint at the top left in the waveform and you’ll see a 100% value. At the far right, add another breakpoint and drag it to 0%.
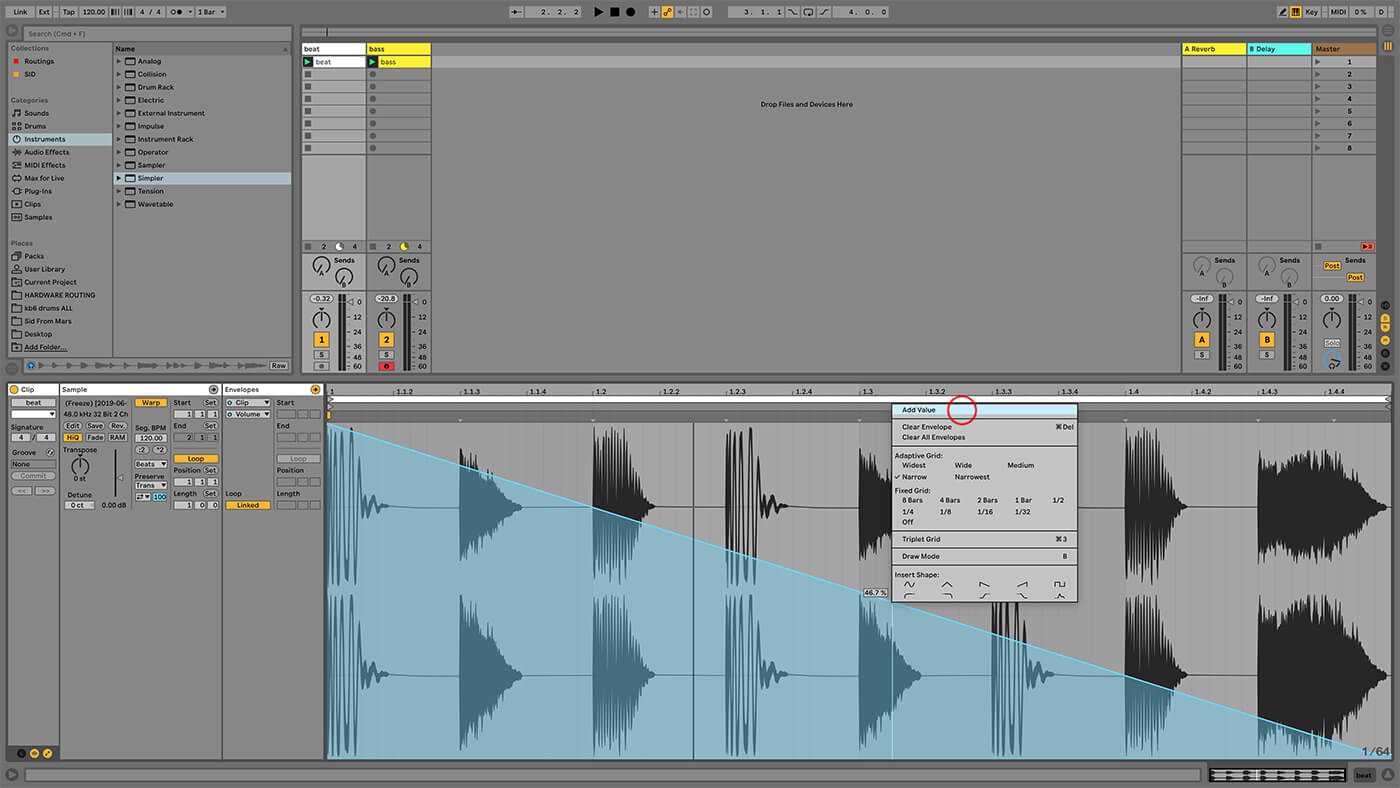
5. Instead of dragging breakpoints in an attempt to get the exact desired values, right-click on them and choose Edit Value and you can type in precisely what you want. This is a massive time saver and a gift to the control freaks among us.
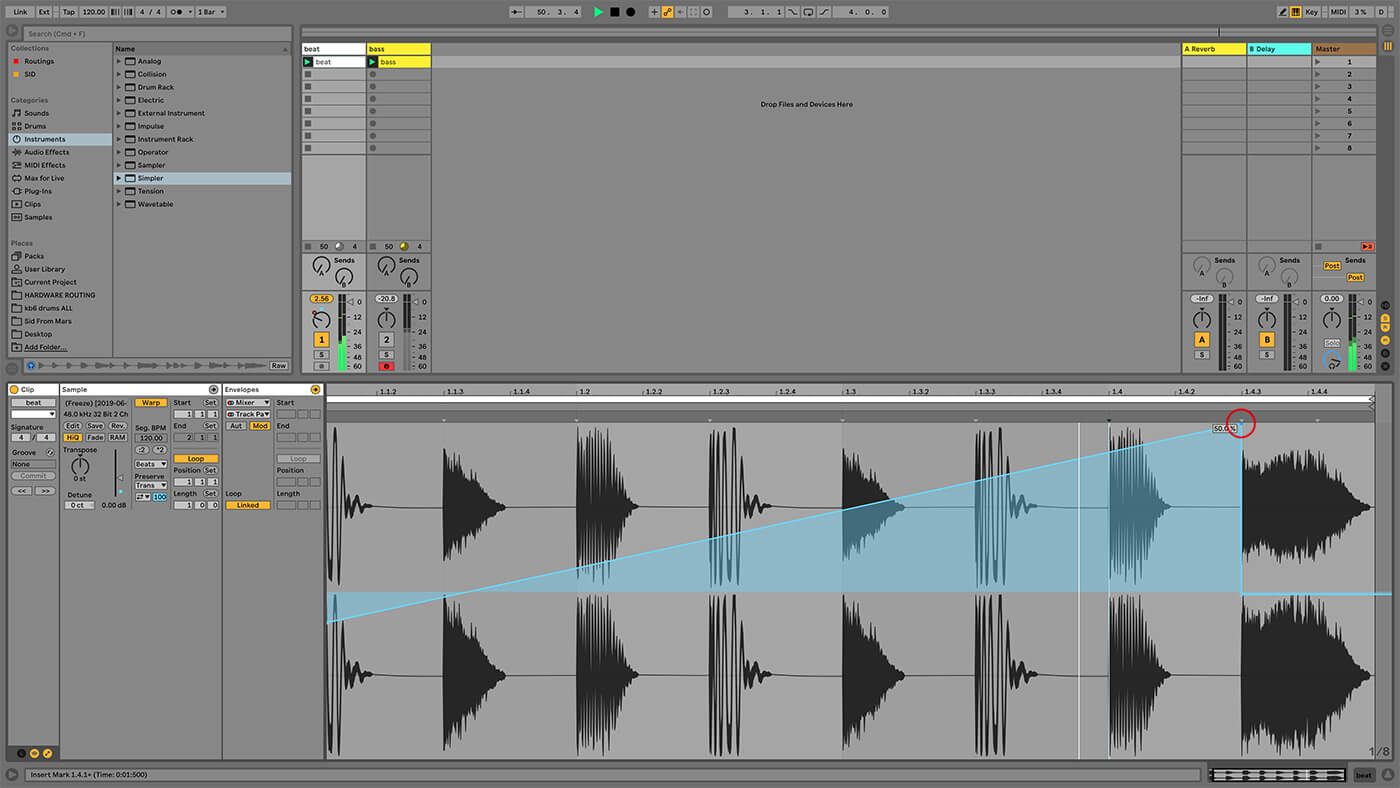
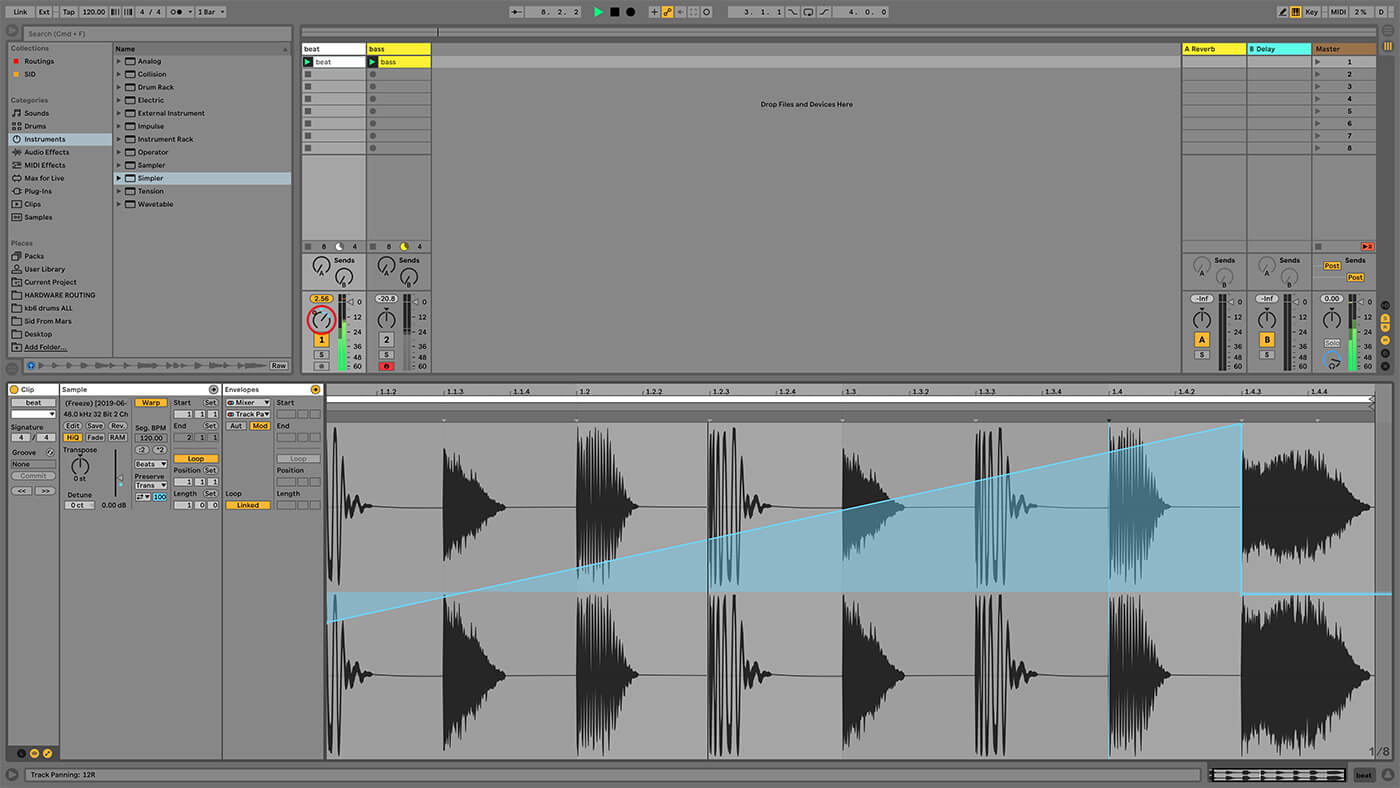
6. In those boxes at the left of the waveform, choose Mixer in the top, and Track Panning in the bottom. Note the Aut (Automation) and Mod (Modulation) buttons below them. Make sure Aut is enabled, then draw an envelope from top left to top right.
![]()
THE MOUSE TRAP Traditionally, using automation means recording as you manipulate a controller, or drawing it in with a mouse. It’s a fiddly business for sure, but using a ‘smarter’ controller can help – and of course, the smartest of all are Push (hardware), and touchAble PRO (iOS/Android app).
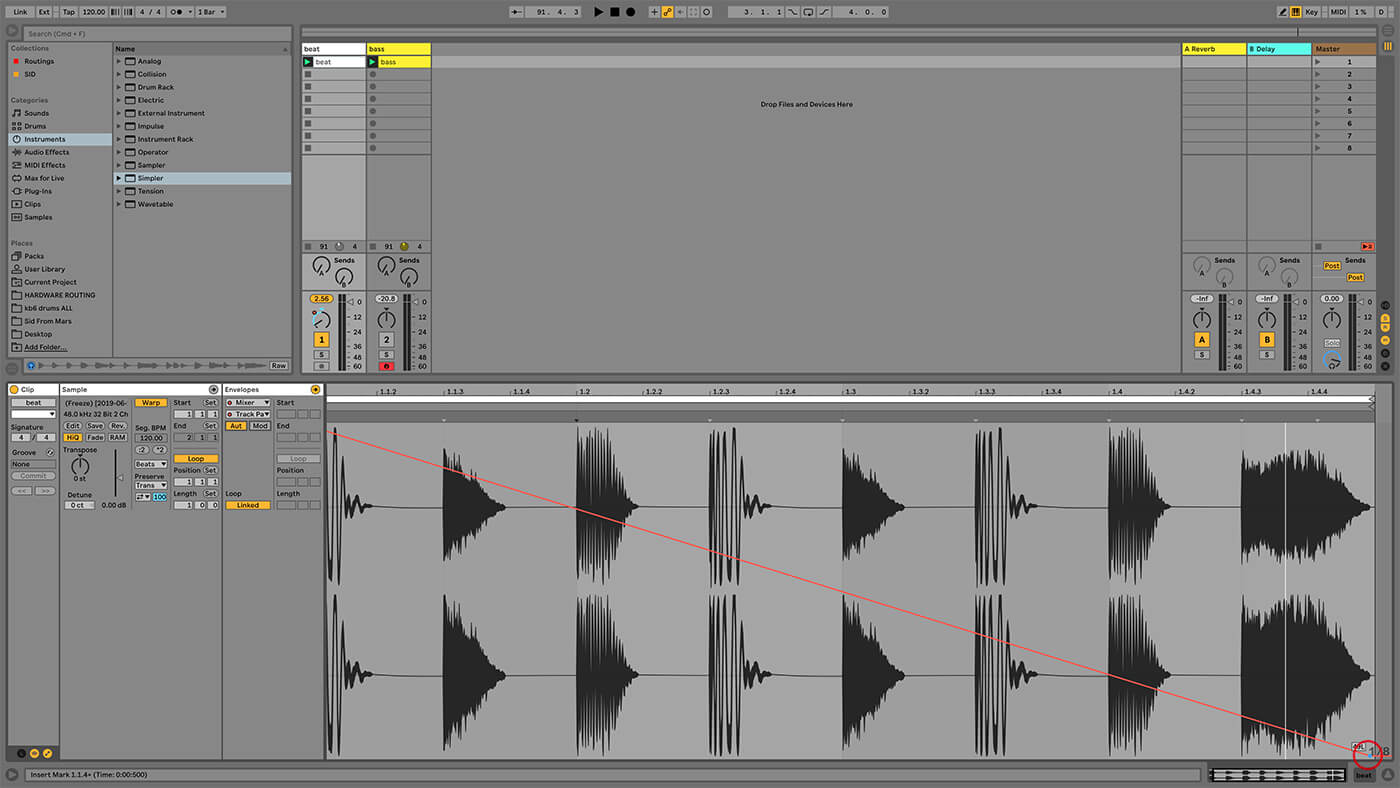
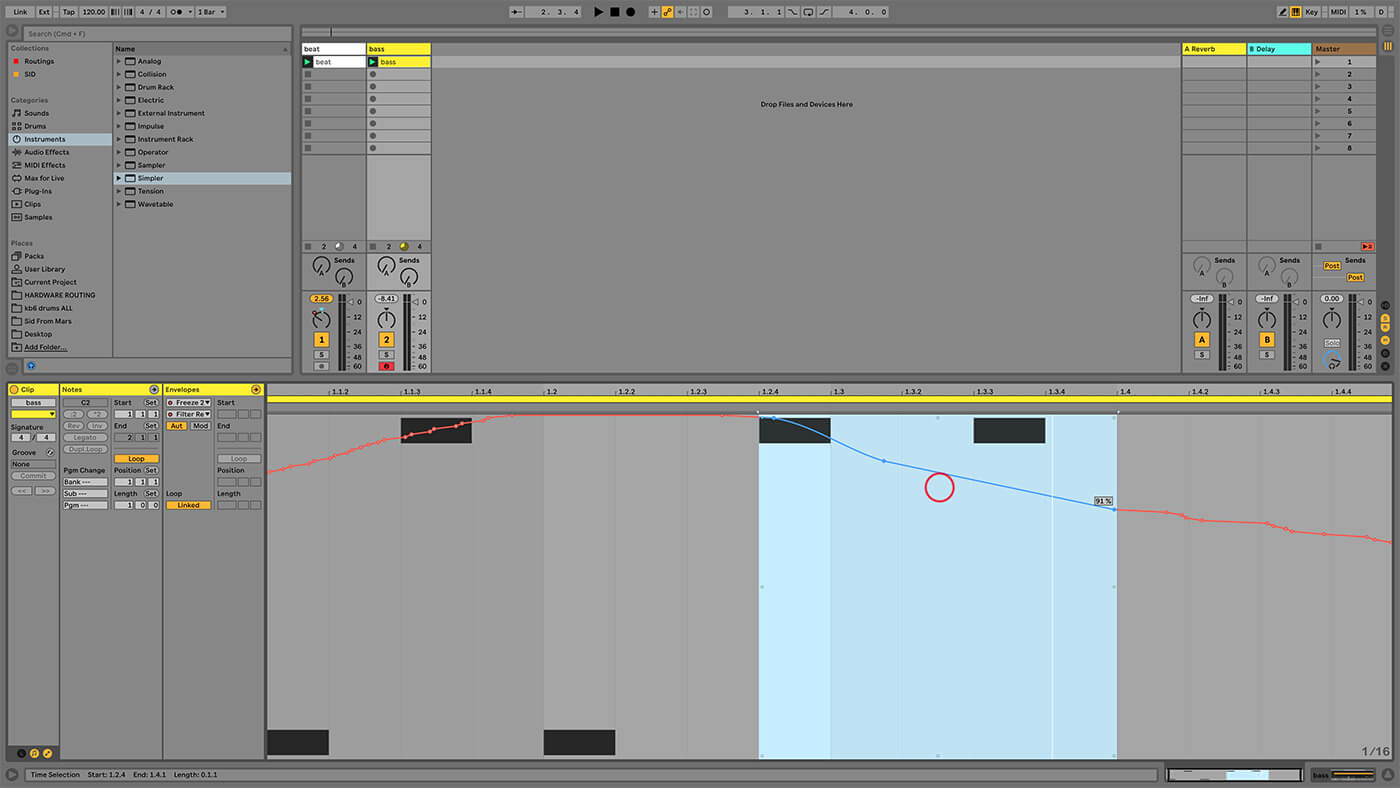
7. Listen to the result – the beat pans from right to left as it fades out. Now click on Mod, and tap B on the keyboard, and draw in a shape like the one shown in the screenshot – modulation will appear as a blue envelope.
8. Automation will set a value for a control – like a mixer setting, or instrument or effect parameter. Modulation is a second control that offsets again from that value. You might need to experiment some more with different parameters to get a handle on the difference.
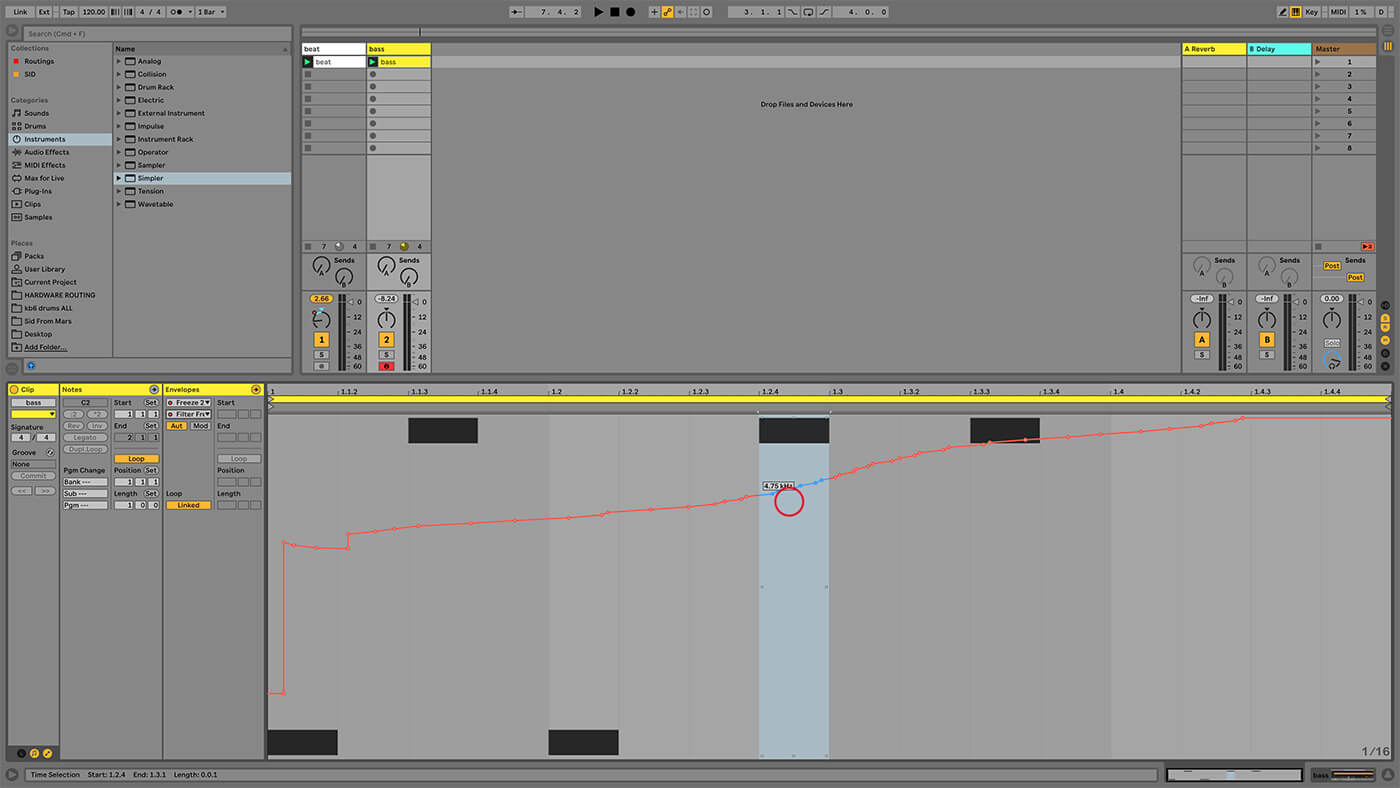
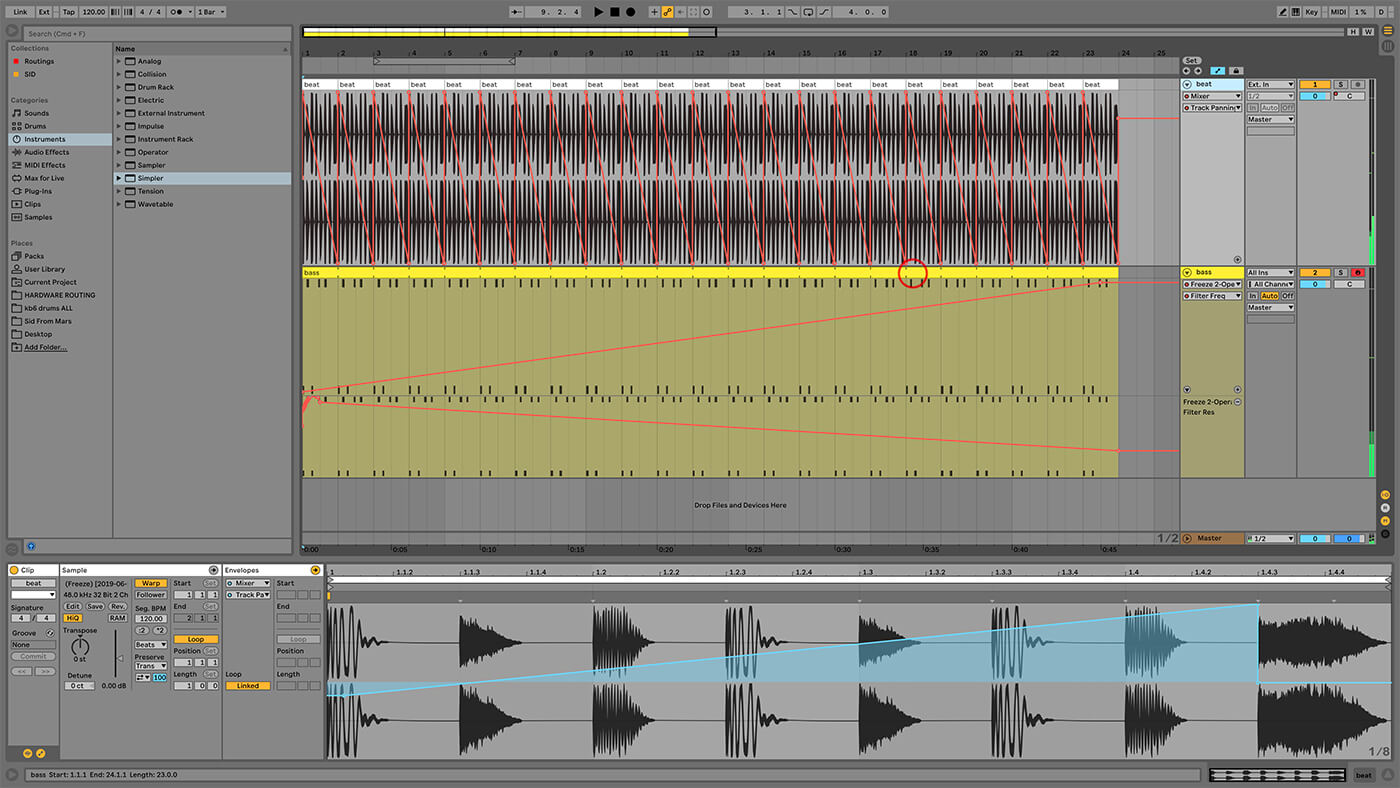
9. In the bass track, click the Automation Arm button near the top of the screen, then launch the bass clip and move the Simpler Filter Freq and Res controls. As it loops, be careful not to overwrite automation from the previous pass.
10. Stop playback or click the play button again to finish recording, which the clips keep running. Any controls that have automation or modulation will be marked with either red or blue dots. Play the clips and you’ll see the relevant controls move.
11. Automation and modulation can be viewed in the Envelopes Box after recording. Make sure to choose Aut or Mod as required (shame you can’t view them both at once, though). Live 10 has new ways to edit envelopes – like being free to drag segments horizontally.
![]()
SPECIAL PROJECT Try copying and pasting an automation envelope from one parameter to another, or onto a few, maybe even across different instruments and tracks. It’s an interesting sound-design experiment. Draw some fancy, involved, envelopes and keep them in a special project for future recall.
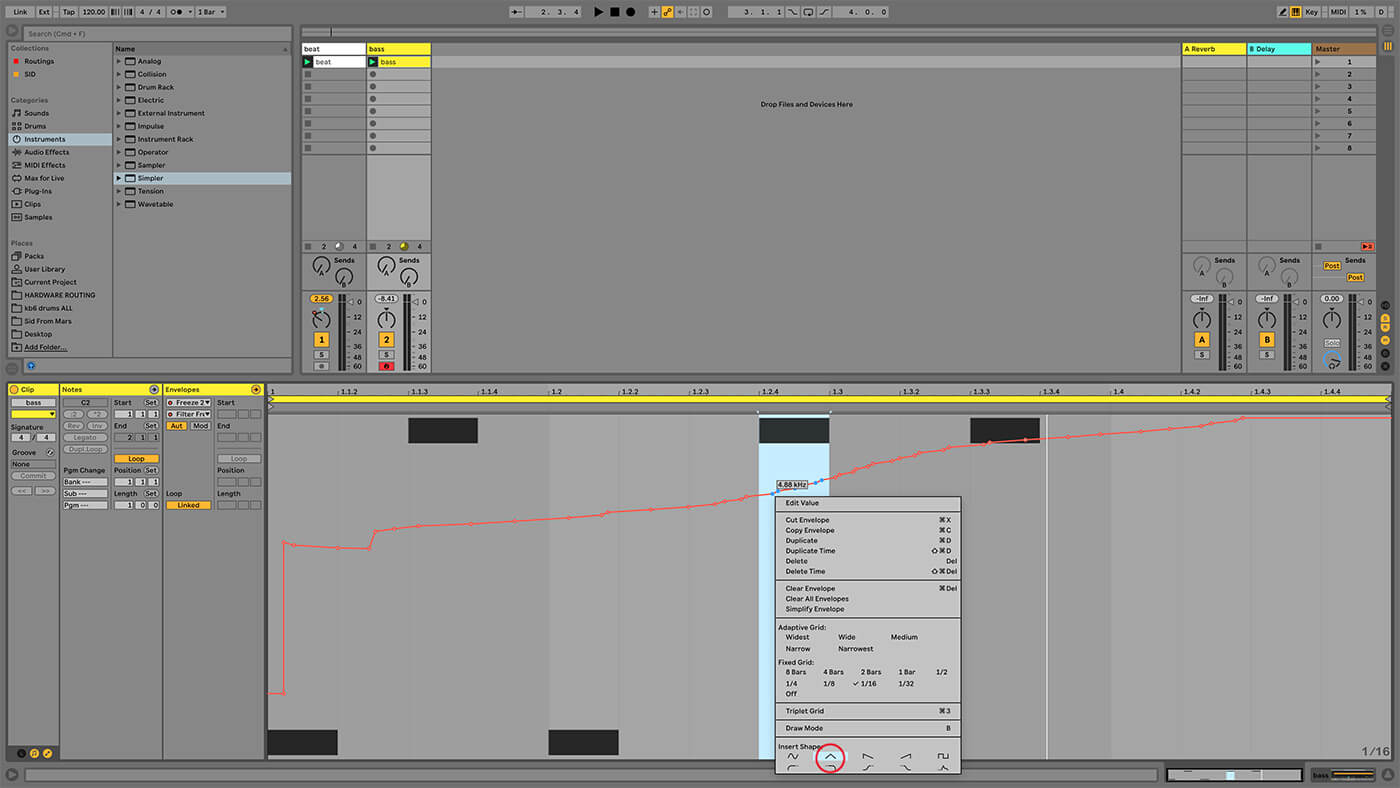
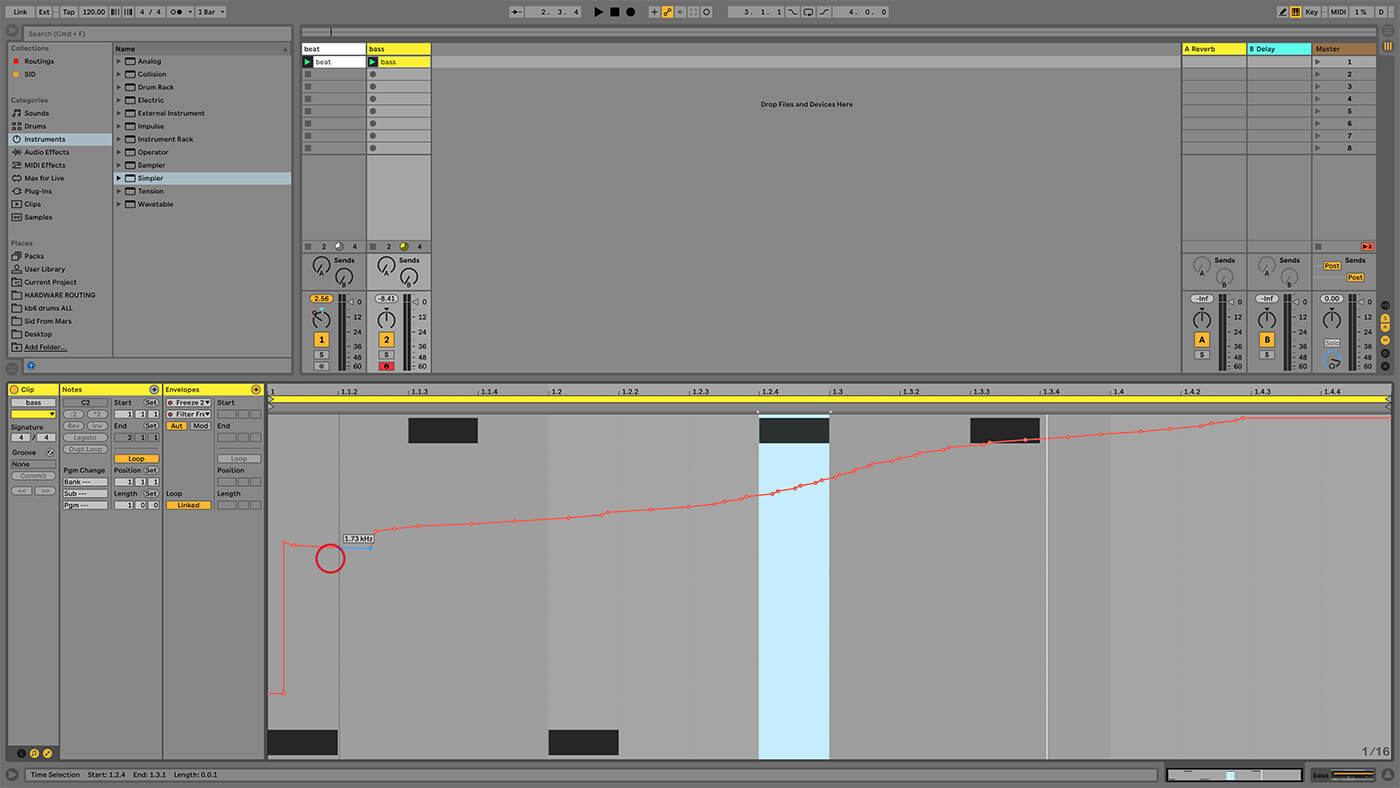
12. You can also enter new breakpoints by double-clicking anywhere in the envelope view, without having to carefully select the envelope first. Live 10.1 includes a new list of 10 predefined automation shapes – right-click on any envelope and choose a shape.
13. There’s another new one in Live 10.1, which is particularly useful if you’ve recorded rather than drawn in, your automation. Recording can create more organic sounding movement, but it can also be imprecise, chaotic, and sloppy (which is of course sometimes just what you want)…
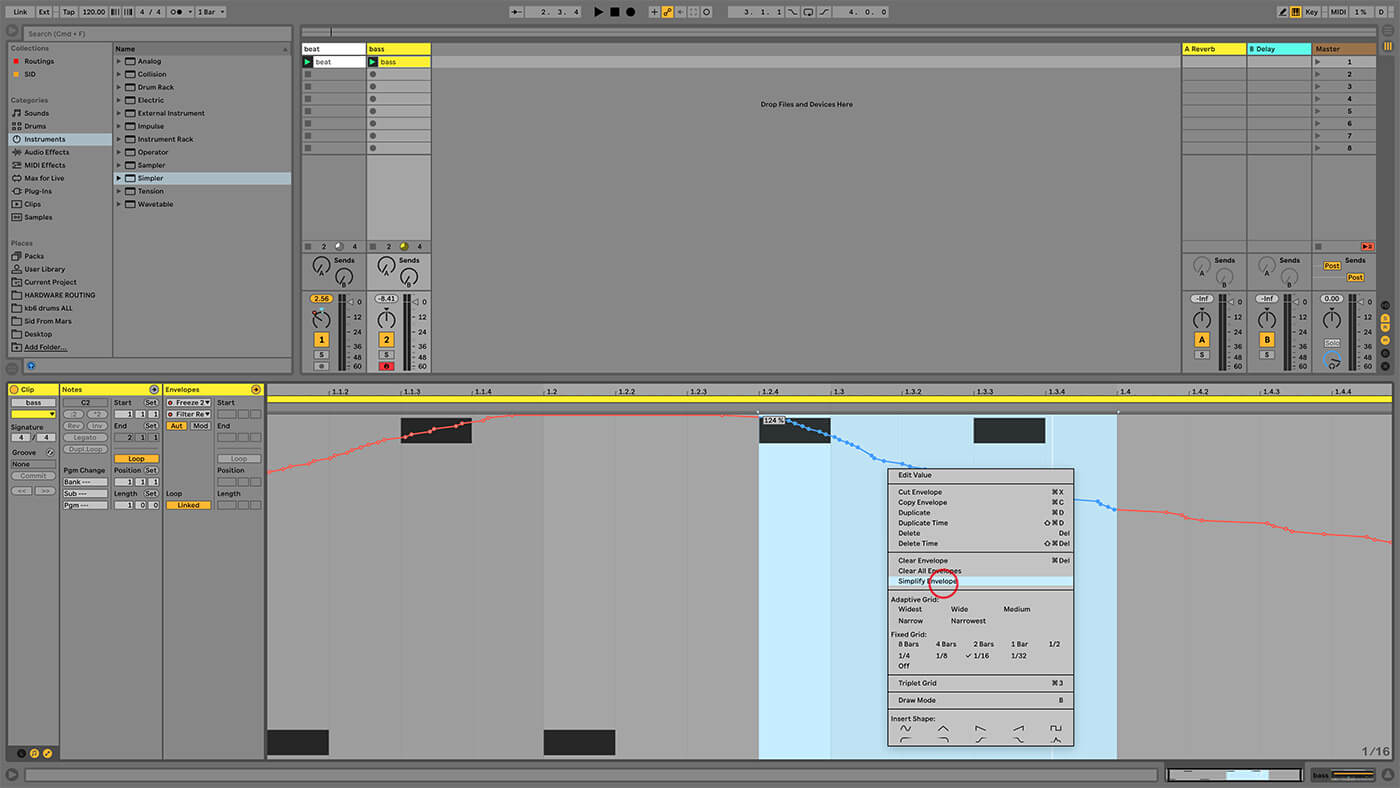
14. Click and drag to highlight the specific section of recorded automation or modulation, then right-click to bring up the Context Menu and choose Simplify Envelope. This will strip out a lot of the intermediate breakpoints and, where relevant, insert ‘C’ or ‘S’-shaped curves.
15. Stating the obvious, maybe, but the Simplify Envelope command won’t work on parameters where there are no incremental/gradual envelopes. So while it’ll work on a fade, for example, it won’t work on a device on/off switch that’s been automated.
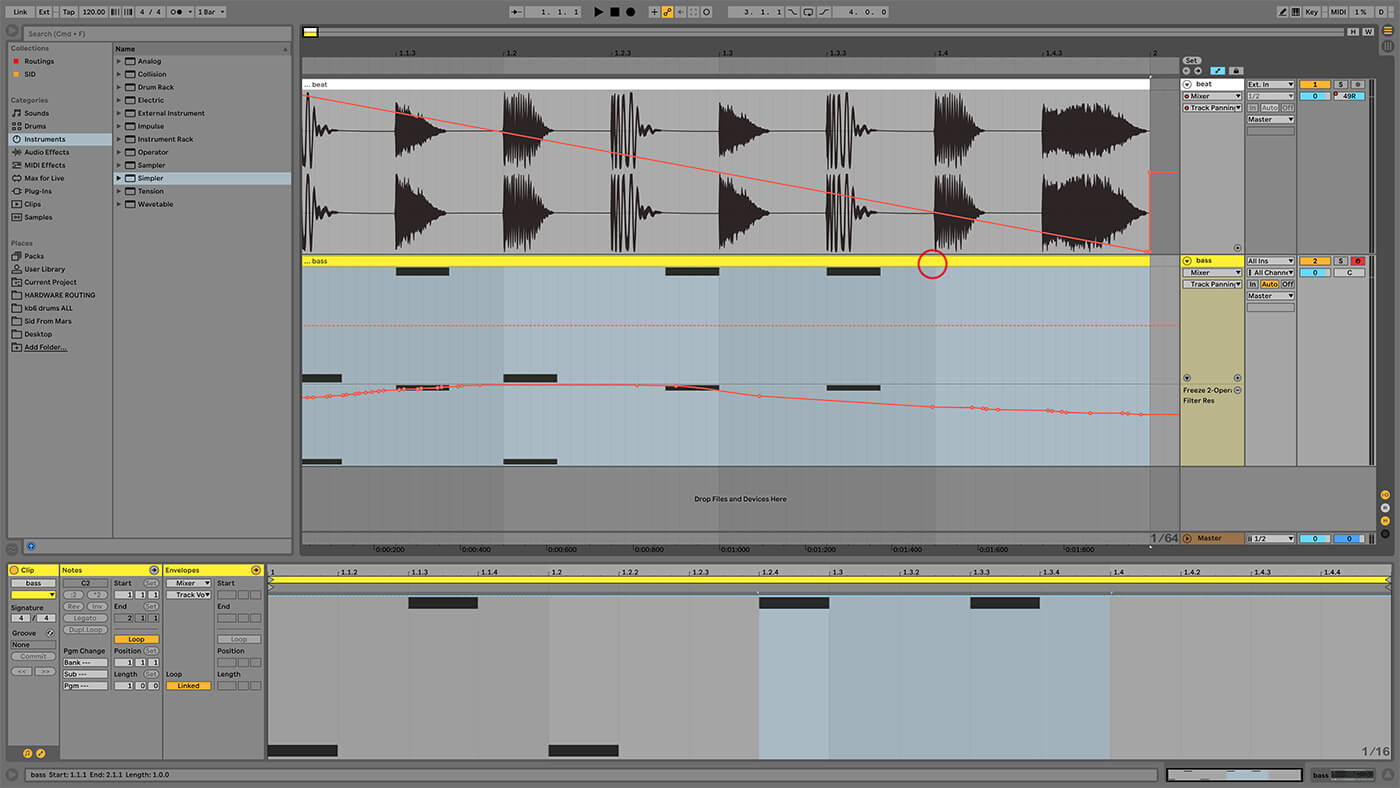
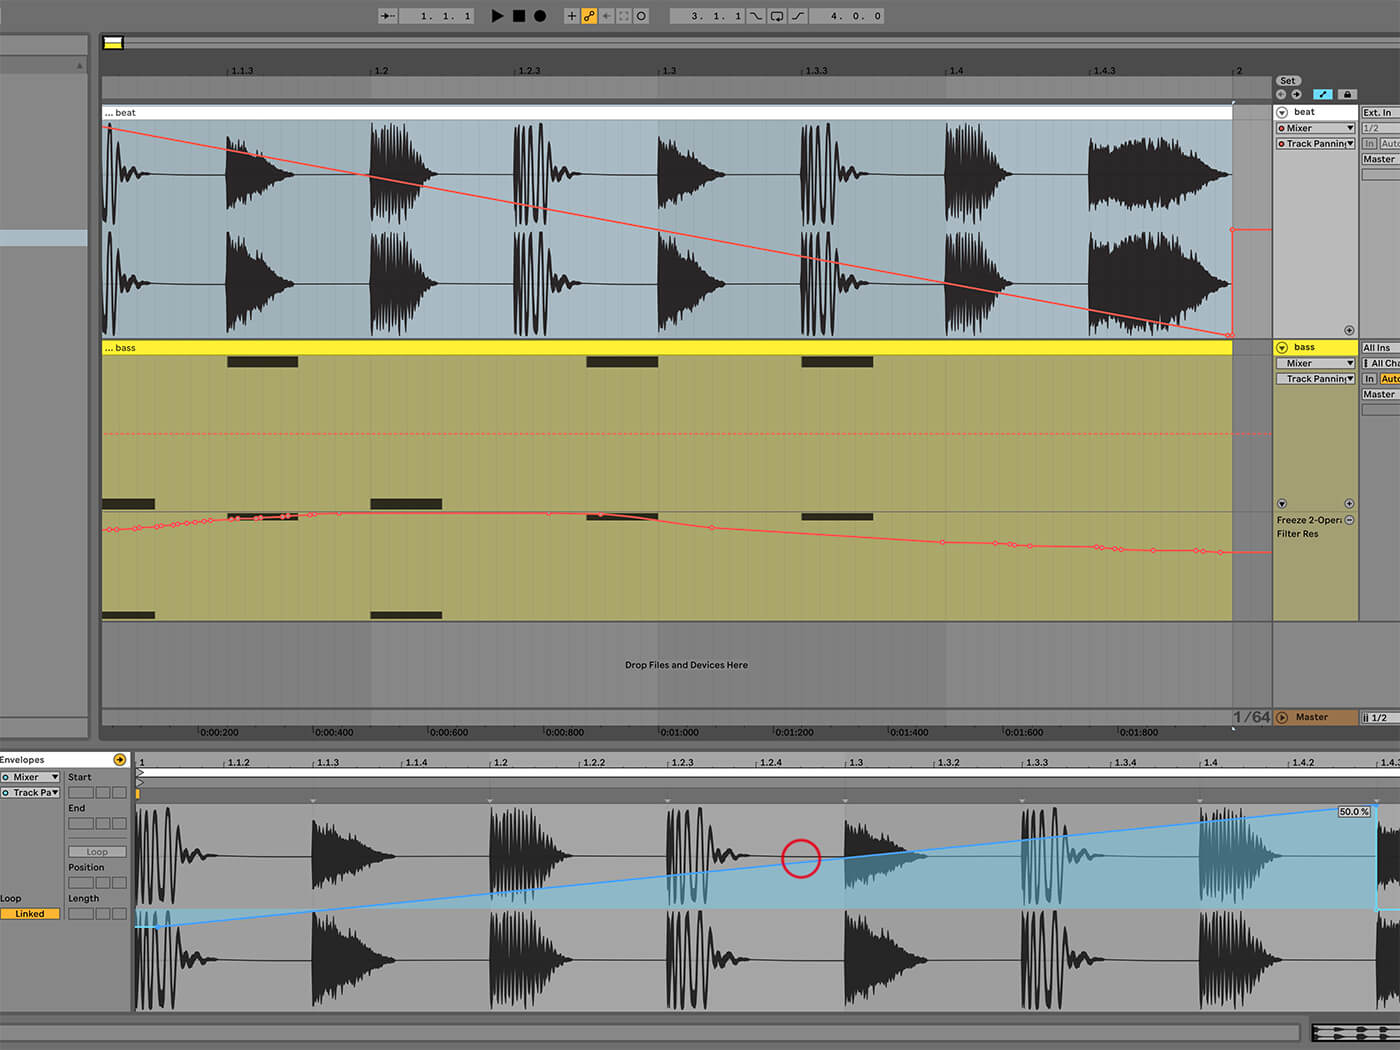
16. If you copy and paste the clips to the corresponding tracks in the Arrangement View – Cmd-C then Cmd-V, then look in the envelopes box, you’ll see that the automation envelopes created in Session View now appear in the track automation lanes.

17. However, to see the modulation envelopes, you’ll still need to look in the clip envelopes box at the bottom of the screen. This makes sense on one level, but it’d be preferable to view them all together.
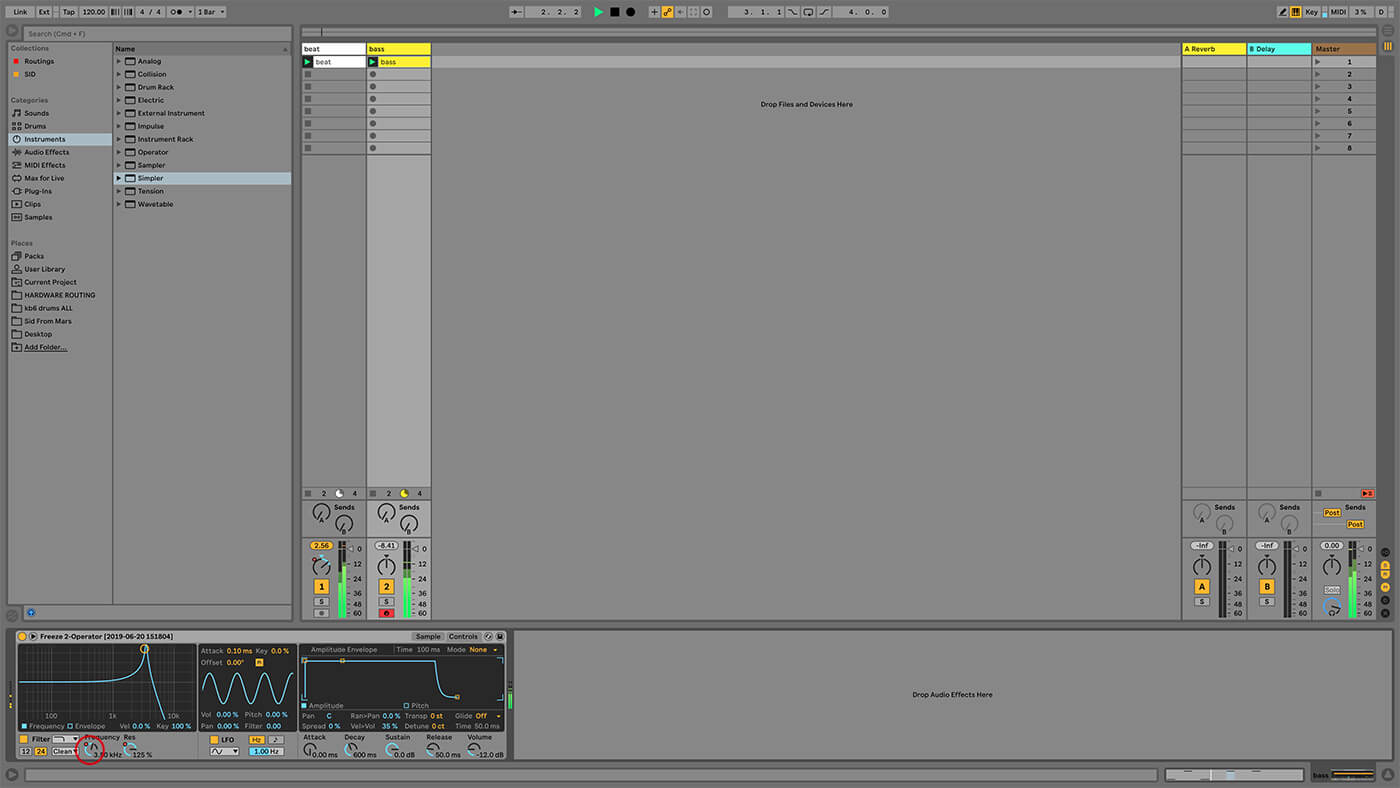
18. Drag the Simpler MIDI clip out to 24 bars, then tap A to view the automation and change the filter Freq and Res sweeps so they take place over the full length of the part. Those long, slow control moves are fun to automate.
For more Live tutorials and workshops, check here.