Ableton Live Tutorial: Become a Power User Part 2 – Making The Most Of Push
Learning to use Push entails more than simply understanding its functionality. Liam O’Mullane shares best practice for starting ideas and laying out a song in the second part of our ‘Become a Power User of Ableton Live’ series… Push raised many an eyebrow when it was announced alongside the release of Live 9. At first […]
Learning to use Push entails more than simply understanding its functionality. Liam O’Mullane shares best practice for starting ideas and laying out a song in the second part of our ‘Become a Power User of Ableton Live’ series…
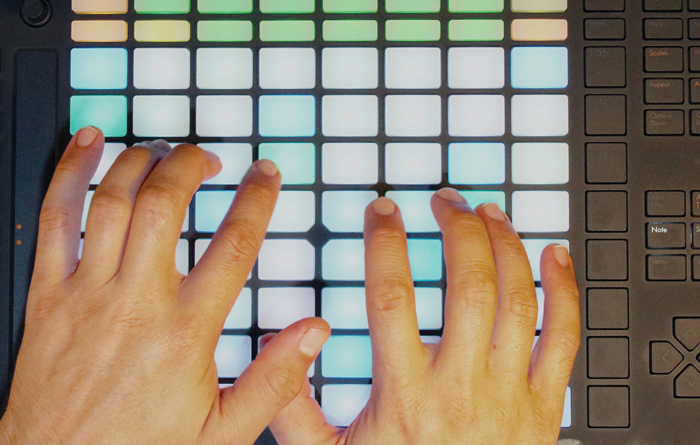
Push raised many an eyebrow when it was announced alongside the release of Live 9. At first glance it appeared to be just another control surface, to be used much like a Novation Launchpad S or AKAI APC40. But the more we looked into its feature set, the clearer the real focus of Push became. Although Push can indeed work in a Session View-type mode – like the APC and Launchpad – a much greater emphasis is placed on giving the user the tools they need to create songs from scratch. All of this can take place within Push itself, without you ever needing to look at your computer. This enables you to get the bulk of your composition work done while remaining in a creative headspace rather than a technical one, when you use your eyes as much as your ears.
Ableton has branded Push as an instrument rather than a controller, and this side of its nature becomes increasingly evident as you spend time with the device. It’s designed for fast and intuitive access to most of Live’s essential tools, but that being said, there’s very little information on how you exploit them to get rapid, productive results.
This lack of direction is reminiscent of the early years of Live, when users defined different working methods and workflows, not Ableton. And like Live, Push has an open framework that enables users to work in any way they see fit. But without the experience of already having created songs with Push, it can be difficult to understand how you might go about using the device. Sadly, because Push doesn’t give you access to all of Live’s features, you can’t simply apply your usual techniques as you would when working with Live alone. Here we will demonstrate some proven working methods for using Push to get from an initial idea to a full song arrangement.
Before we start, we’re assuming that you’ve learned the basic functionality of Push’s features; if not, there are some excellent video tutorials at www.ableton.com or you can check out Live’s manual, accessed via the Help menu. The videos cover creating beats, playing chords and melodies, tweaking and mixing, Session mode, pad sensitivity and workflow. From there on, we’re going to show you how to make the most of Push’s strengths, as well as how to work around a few weaknesses. Ideally, you will already know an undo from a redo, the difference between clip and scene launching, step sequencing and Push’s innovative scale system. If all these sound familiar, let’s get stuck in.
Programming a Drum Pattern
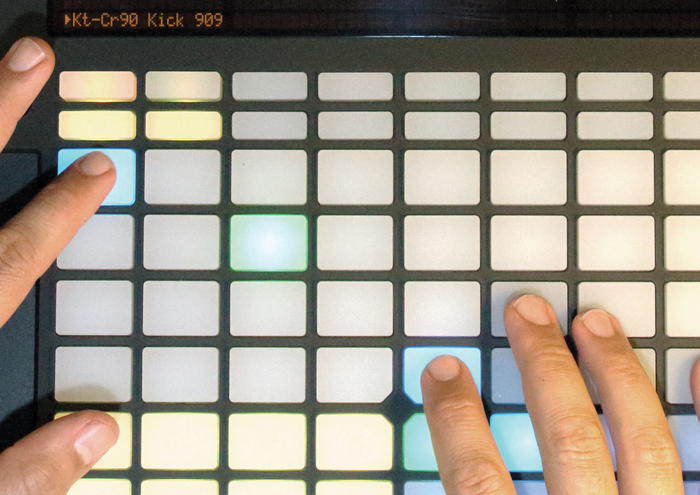
1: Program in a kick drum or hi-hat on the beat as this can be used as a pleasant-sounding metronome. Creating a new clip will trigger playback the moment you enter the first note, so if you don’t want to hear the pattern as you work, either press stop immediately or put your first note at the end of the bar, giving you time to then program in the rest before the clip repeats.
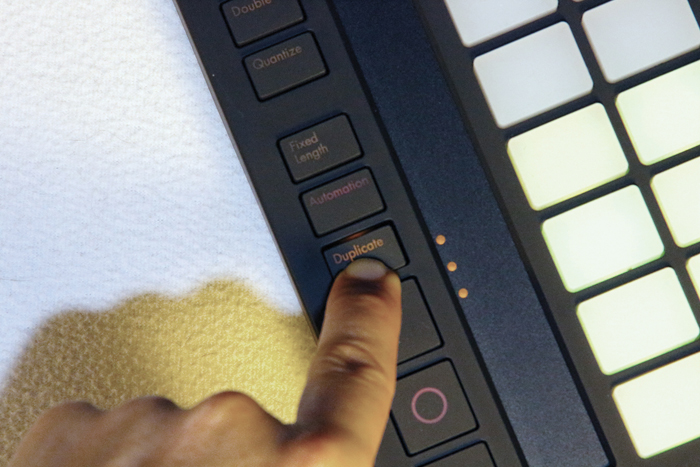
2: It’s a good idea to hit the Duplicate button every time you create a new rhythmic layer. This approach makes it much easier to access different variations of the drum pattern to work with. We’d press Duplicate now if we feel that we may later want to strip things right back to the fundamentals of our song.
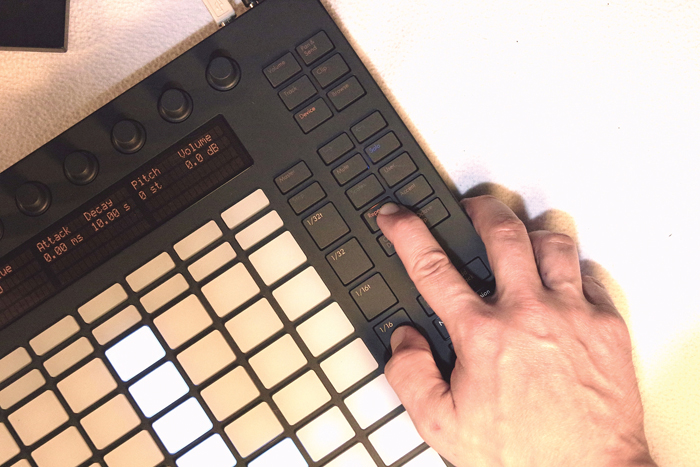
3: For parts that play more frequently (such as hi-hats or shakers), enable Repeat mode, hit record, and then select the repetition speed you want from the quantize division buttons to the right-hand side of the main pads. Disable Accent to use the pressure sensitivity of the pads for immediate dynamic control of the repeated note’s velocity as you play.
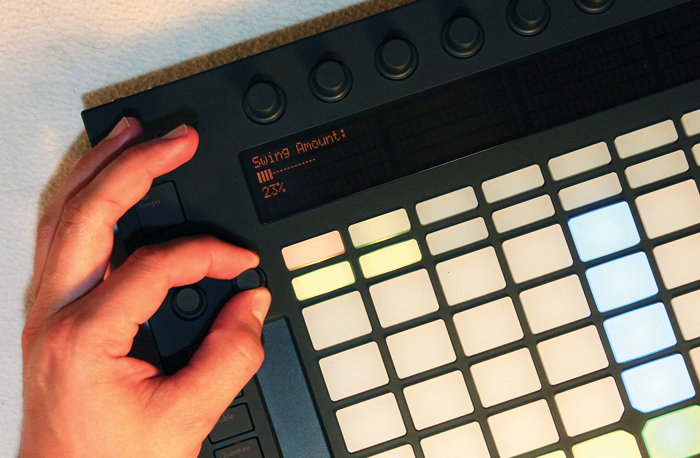
4: Swing can be applied globally via the second dial in on the left-hand side of Push. This works very well for getting an immediate sense of feel in your pattern. If you have more time, though, we’d recommend editing your patterns on a note-by-note basis as this offers a much finer degree of control.
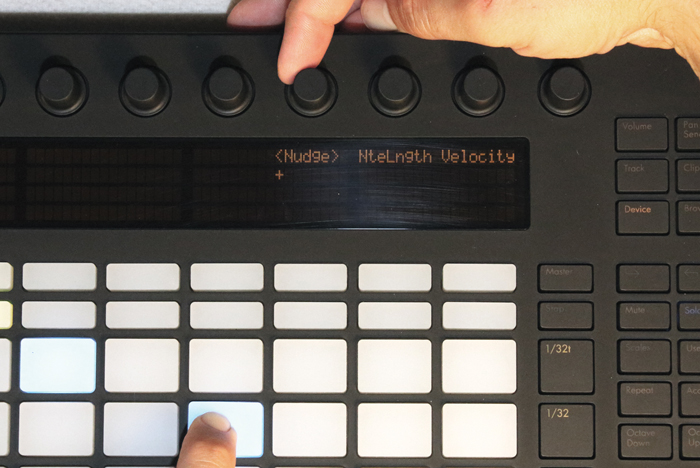
5: Note Nudge becomes available when you hold down a note in your drum pattern. Explore nudging for a sense of feel; moving certain sounds a little later in time can give a rhythm more of a laid-back feel. Moving sounds earlier gives them a sense of urgency and makes your pattern sound like it’s pushing itself ahead in time. You can fine-tune velocity values here as well
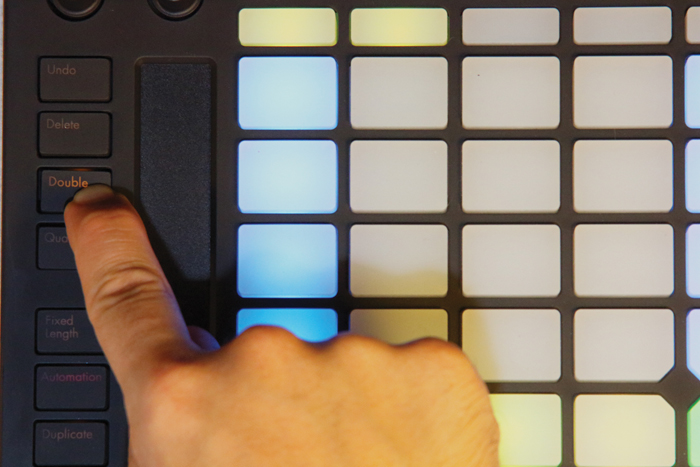
6: You are now at a stage where you can add some more sporadic percussive sounds to create a longer pattern with more variation. First press the Double button a few times to create a longer pattern, then hit record and play in a part that doesn’t repeat itself too much. This is often easier to do when you perform it live, but you could always do it via step-sequencing, with careful use of Nudge as well.
Continue to composing Melody and Arranging with Push >
