Ableton Push: Composition & Sound Design – Continued
A tune a day Like drums, the process of composing melodies and chords can be an explorative one, and this is when Push’s Scale and Key functions really shine. We like to develop ideas on the pads and then explore pitch changes by switching key while still playing the same patterns or shapes […]
A tune a day
Like drums, the process of composing melodies and chords can be an explorative one, and this is when Push’s Scale and Key functions really shine. We like to develop ideas on the pads and then explore pitch changes by switching key while still playing the same patterns or shapes with our fingers. If you just want to jam, set a new clip to record and capture your session, edit it using Clip mode and Loop Position to vet your efforts and focus in on your best ideas.
If you are open to a more interactive experience, explore some MIDI devices and craft their output by automating parameters. We also like to use a classic drum sync technique for bass parts by duplicating the drum track to make a copy of its clips on a new track. This clip can then be used as a basis for your bassline’s rhythm. Hold Delete on the drum pad of any sound that plays any overly busy material, as we want just core aspects of our drums to trigger the bass.
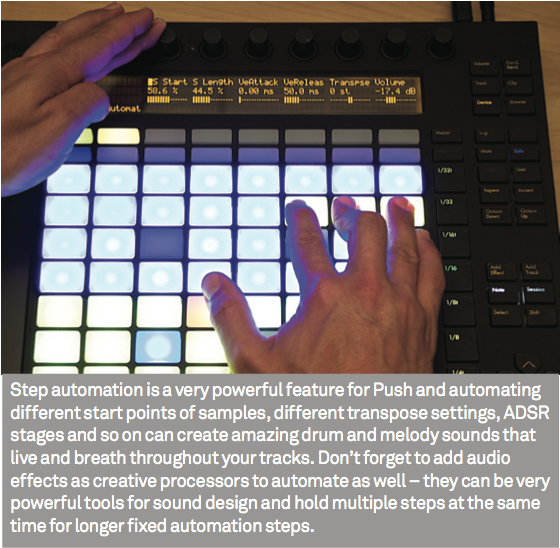
Now Browse for an instrument to replace this new track’s Drum Rack and you have a rhythmic but not yet musical bass part. You can’t edit the pitch of a MIDI note in situ using Push’s step sequencer, so replacing one note for another will lose any groove you crafted from your drums. As a work-around we added a Pitch MIDI Device and then step-automated its Pitch parameter to create a musical bassline fitting the existing groove. This requires a good ear as there’s little visual feedback for musical information.
Melody is either a hands-on process of experimentation with the notes themselves or a marrying of note and sound-design choices. You may find you leave this stage of the process with a very strong musical idea, or you need to develop some sketches with potential as you interact with timbres and additional rhythmic aspects through the next stage of sound-design and automation.
Re-working your own work through re-sampling
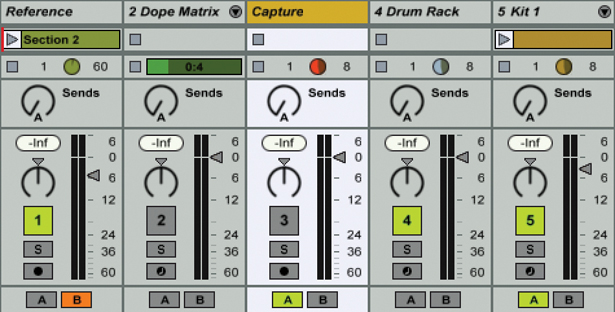
1: With a capture track loaded into your Live set and its Audio From set to Re-sample, you can re-sample your master output at any given time which can be a great way to commit certain layered sounds to new clips. Just solo out the relevant tracks and then hit record on the Capture Track.
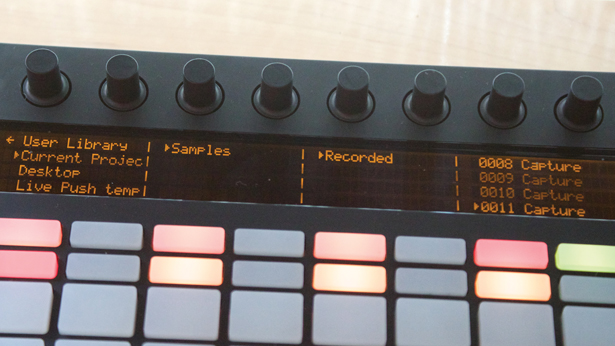
2: We love creating synth samples using this method: start with a single synth sound, add some Amp Simulation from Audio Effects Racks, then do a few automation passes and static parameter tweaks to create something interesting. When recorded, these re-sampled clips will appear in your Current Project folder
in Push’s Browser.
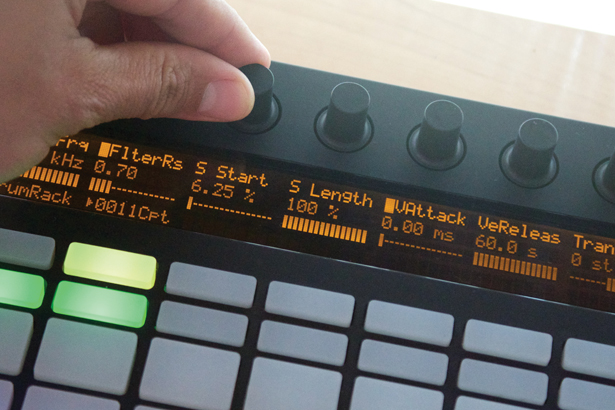
3: Now you can load these onto individual Drum Pads within a new Drum Rack. You can then go and re-sample a new sound, or load the same clips onto different pads and alter their pitch, sample start position and so on. This is just one of many ways to create new ideas and re-edits of the same patch.
Click here to continue the tutorial…
