How to use Alchemy’s additive powers to create pads in Logic Pro X
Alchemy can produce some beautifully pure ambient pads, thanks to a flexible architecture and the wonders of additive synthesis. We continue to explore the synth to create some exceptional atmosphere.
As we saw in our last workshop, Alchemy is a powerful synth that can recreate many of the classic pad sounds that you’d expect to hear on synths like the Roland Jupiter-8 or a Sequential Prophet-5.
Beyond these, however, there’s a range of other pad sounds that Alchemy can produce that really add to the musicality and flexibility of the instrument. One good example is that of additive synthesis, which creates pad sounds with an Eno-like purity that’s perfect for ambient tracks or softer forms of electronic music. In many ways, it’s the polar opposite of what we explored last time, but it also highlights how you can approach synthesis – and indeed, Alchemy – in quite radically different ways.
Additive synthesis, as the name suggests, is a process whereby harmonics are added together to produce the final output. By contrast, our previous workshop focused on a subtractive approach using harmonically rich waveforms that had harmonics removed to make a softer timbre. These different methodologies create a contrasting sonic output, adding to the musical sound palette you can produce from Alchemy.
Pure Alchemy
Alchemy includes a dedicated additive section, but to better understand the concepts, we’re going to initially start with the parts of the synthesiser we used last time. As before, we’ll start with the VA oscillators, although this time we’re going to opt for a choice of purer waveshapes rather than the sawtooth of PWM square waves used last time.
As the principles of additive synthesis involve the layering of individual harmonics, you’ll need waveforms largely based on the fundamental – either a sine wave (the purest waveshape) or a triangle. We also need to use all four of Alchemy’s oscillators – A, B, C and D – if we want the sounds to have a sense of sonic interest.
The key to additive synthesis is the tuning of each oscillator, often following the same ordering as the harmonic series. Oscillator A, therefore, becomes our fundamental, tuned to the same pitch as the played note. Oscillator B is then pitched an octave higher, forming the second harmonic, while Oscillators C and D are pitched +19 and +24 respectively, to form the third and fourth harmonic.
Sonically speaking, what you should notice is an organ-like quality to the sound, arguably with the oscillators representing the different pipe lengths in a pipe organ, for example, or the drawbars of a Hammond organ.
With just four oscillators to play with, this additive-like approach will never produce harmonically rich sounds, but it does open the door to a level of purity that a filtered saw can never deliver. You can also perform some quick workarounds, filling out the subsequent harmonics using waveforms that have additional harmonic content.
The triangle and square waveshapes, for example, only contain odd-ordered harmonics, so mix well with sounds using sine waves for even harmonics. Even so, you may want to deploy a degree of filtering to remove some of the brightness and retain some purity in the overall effect.
With this additive-like approach, you’ll notice that the relative level of the oscillators becomes the principal way to define timbre, rather than the filter. One of my favourite effects is to use three LFOs connected to the oscillator level and have the harmonics slowly drift in and out of the mix in a way that would be impossible to achieve with a low-pass filter. Likewise, adding LFOs to ‘flutter’ the pitch of the harmonics can produce an effect like a Leslie speaker.
Feeling partial
With this basic understanding of additive synthesis under our belts, we can turn our attention to Alchemy’s dedicated additive section. Rather than having to lose an oscillator for each harmonic, we can use a single oscillator with up to 600 partials (a partial being the term used in additive synthesis to describe each harmonic). Although the dedicated additive section misses the precise control that we had using the VA oscillators, it does provide some handy features that let you fine-tune the partial on a macro level.
In Alchemy, it isn’t really a case of using either subtractive or additive techniques, but instead using combination of both to produce a range of harmonically interesting and diverse sounds.
Ambient additive pads in Alchemy: step-by-step
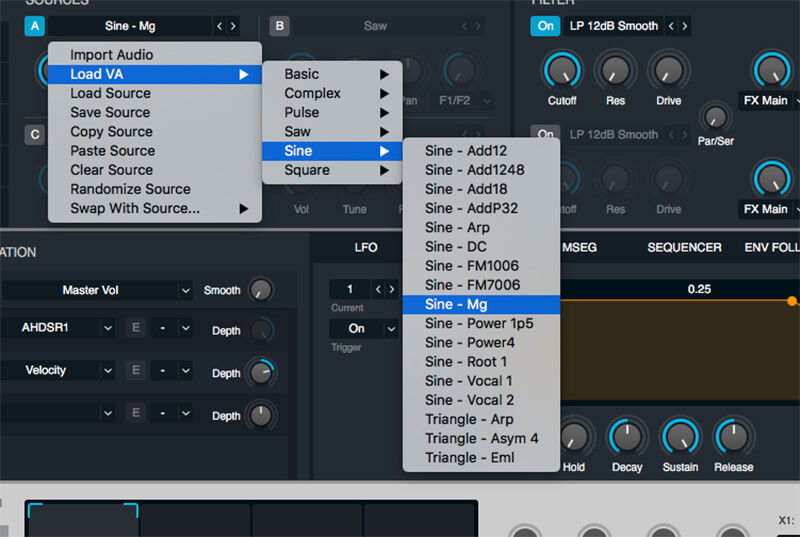
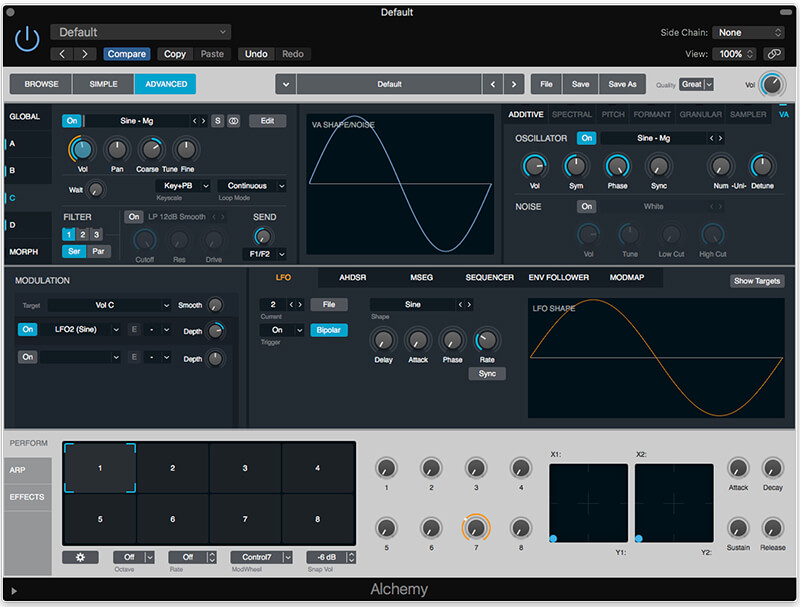
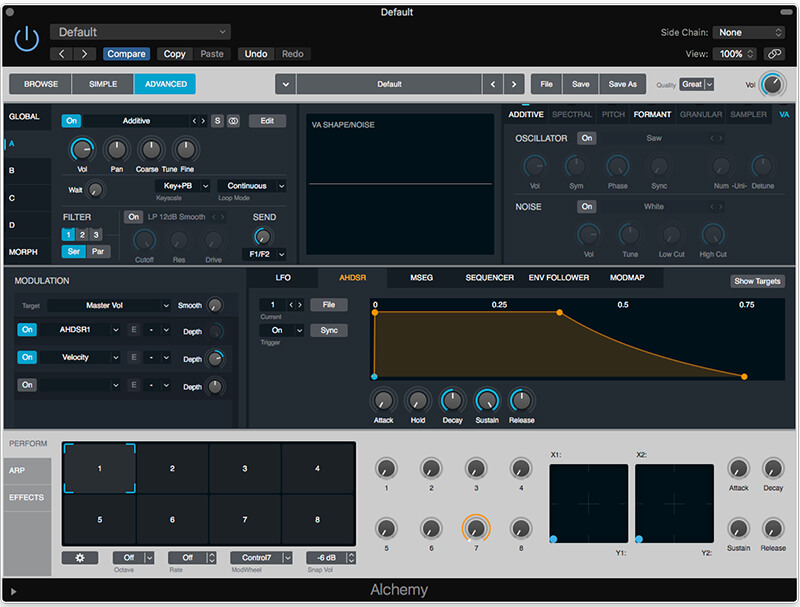
1. Start with an initialised patch (File>Initialize Preset) and load the VA source Sine – Mg into the waveform selection for the Oscillator A. This forms the fundamental frequency, without any additional harmonics at this stage.
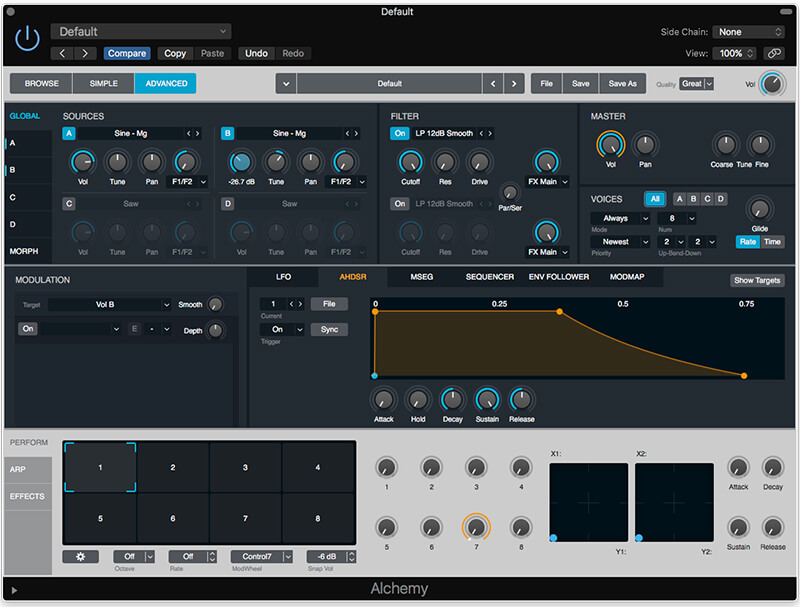
2. Load the same Sine – Mg waveshape into Oscillator B, tuned 12 semitones higher than Oscillator A. This is the second harmonic, which should be at a lesser amplitude than the first (in this case, -26.7dB).

3. Use Oscillators C and D to produce the third and fourth harmonics, using a tuning setting of +19 and +24 respectively. Each time you move up the harmonic series, ensure each partial is progressively quieter.
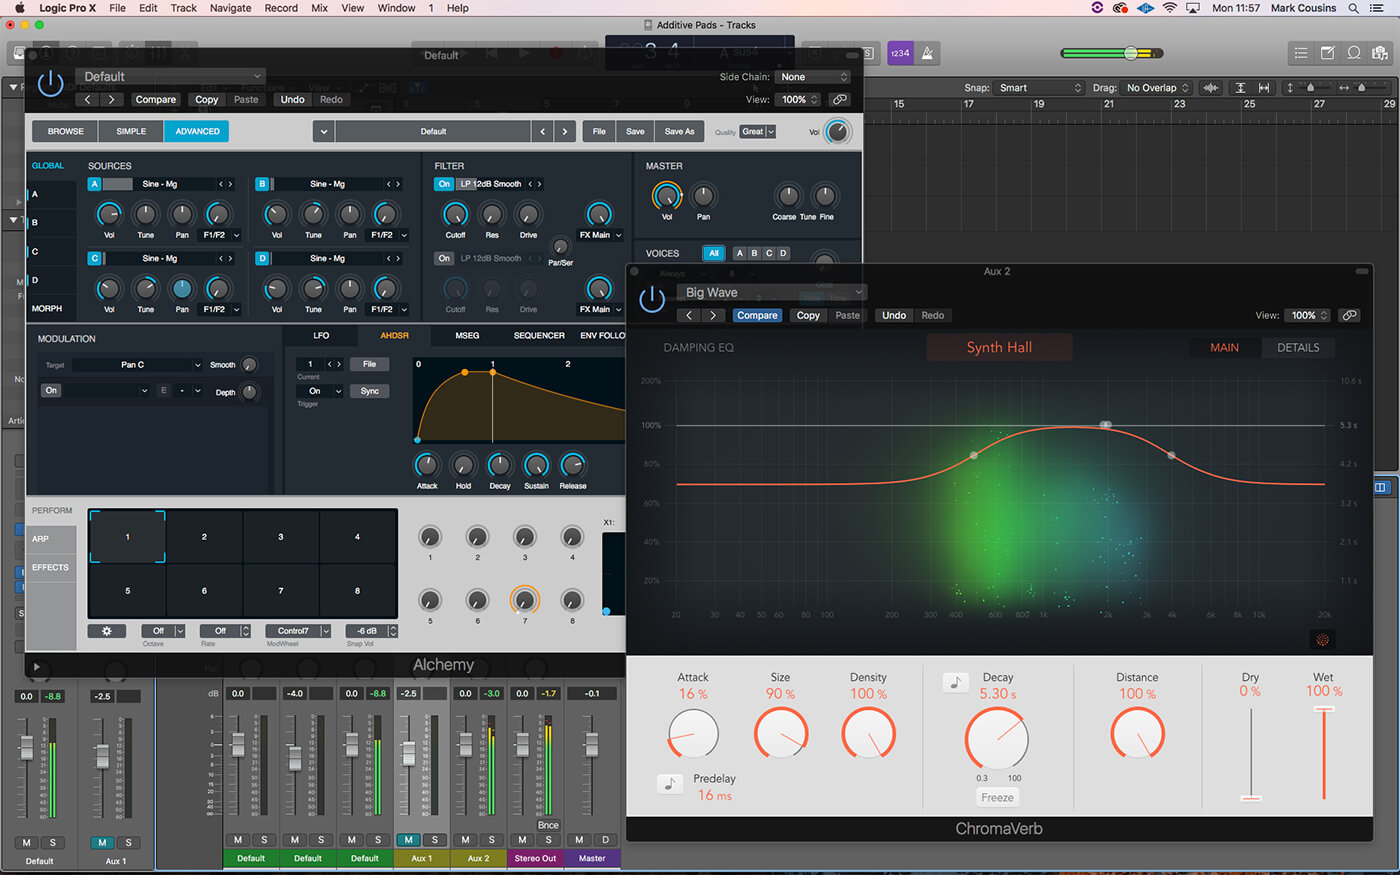
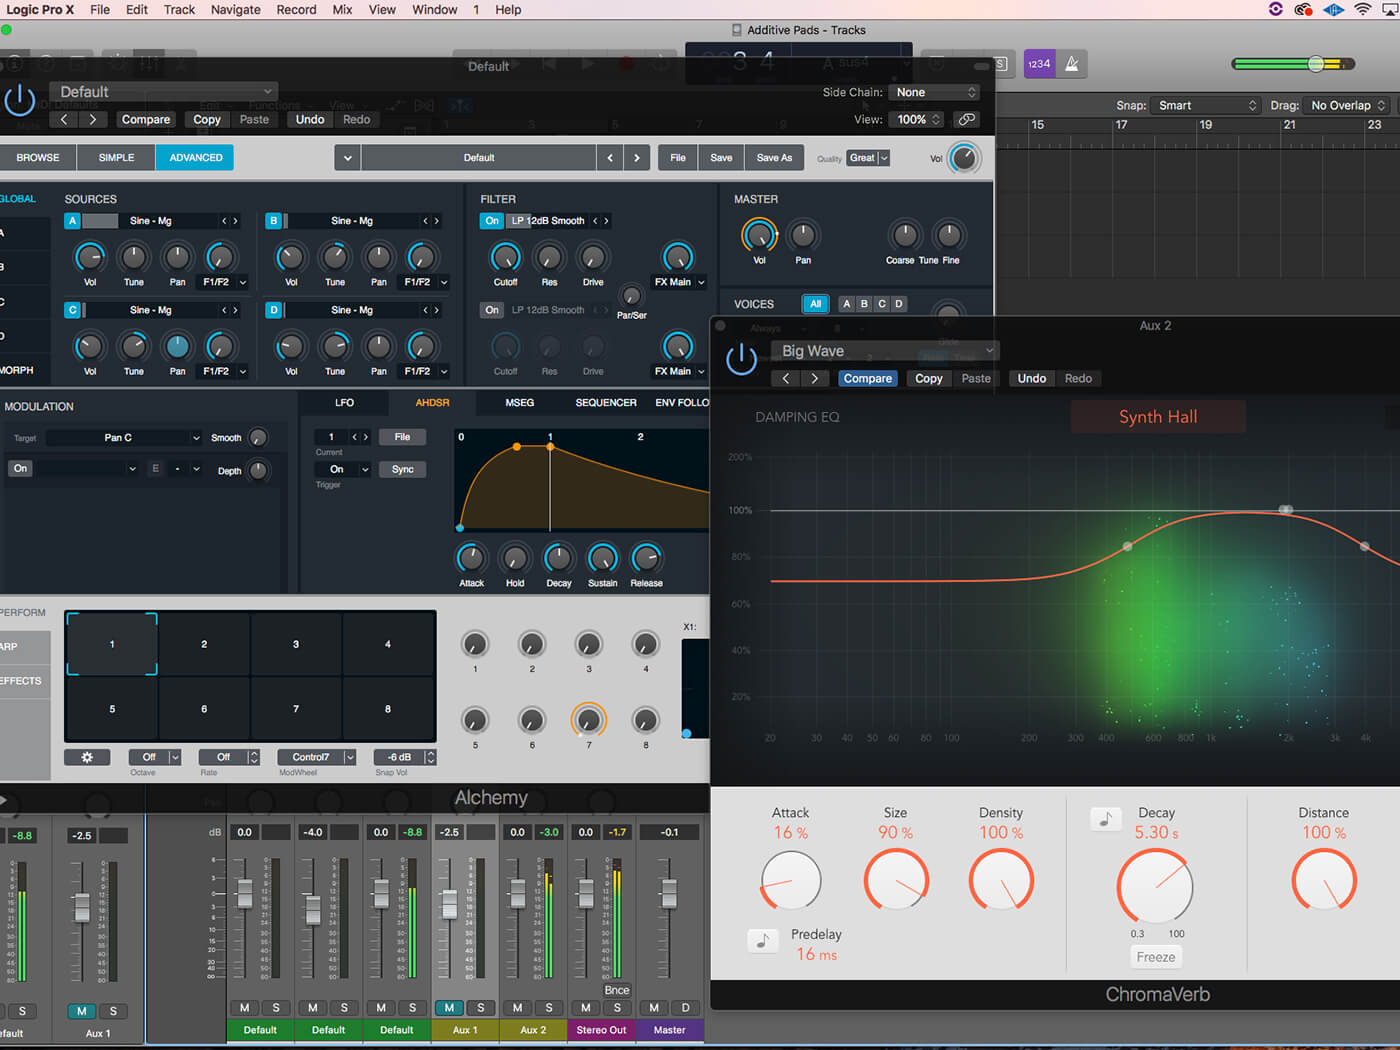
4. We now have a basic additive pad sound. To make it more pad-like, use a slow attack/slow release envelope, and then add the Big Wave reverb (from the Halls folder) on ChromaVerb.

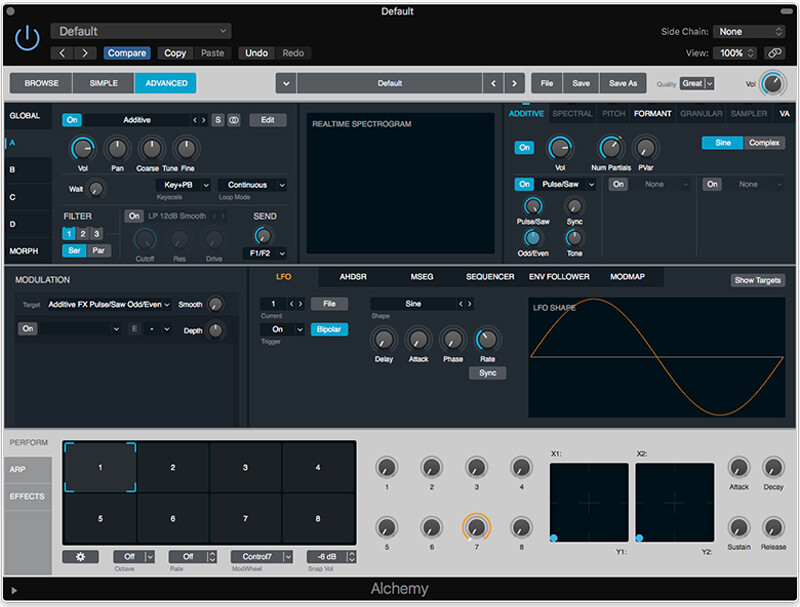
5. What’s interesting is how we might consider adding modulation to this basic sound. Use LFO 1 to modulate the Fine tune control of the second harmonic. The result sounds like a Hammond Organ’s Leslie speaker.
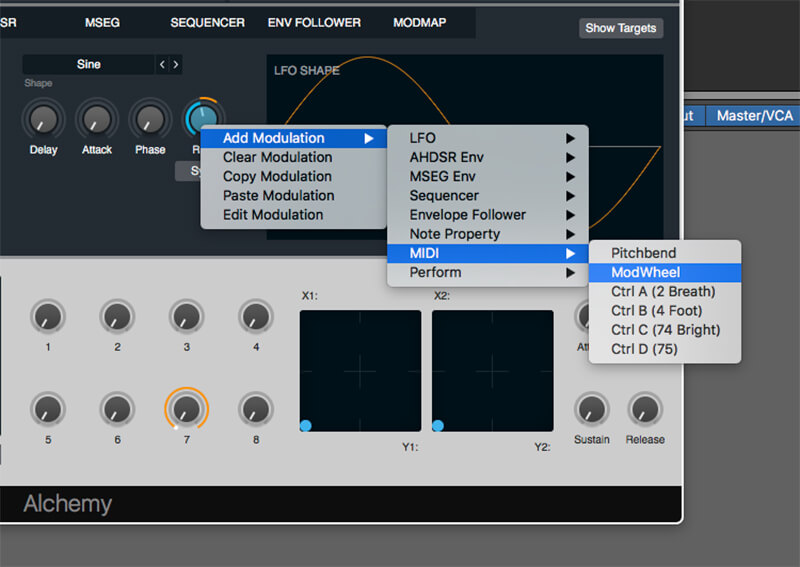
6. The complete the Leslie speaker effect, try Ctrl-clicking on the Rate control for LFO 1 and setting that to be mapped to the mod wheel. Raising the mod wheel should now increase the ‘wobble’ rate.
7. Turn your attention to the third harmonic on Oscillator C. Use LFO 2 as a new modulation source to modulate the volume of the third harmonic. Select a slow rate of around 1Hz.

8. Now repeat on Oscillator D, this time setting a different LFO rate (you’ll need to use another LFO for this). Notice the subtle timbral shifting as the two upper harmonics drift in and out of the sound.
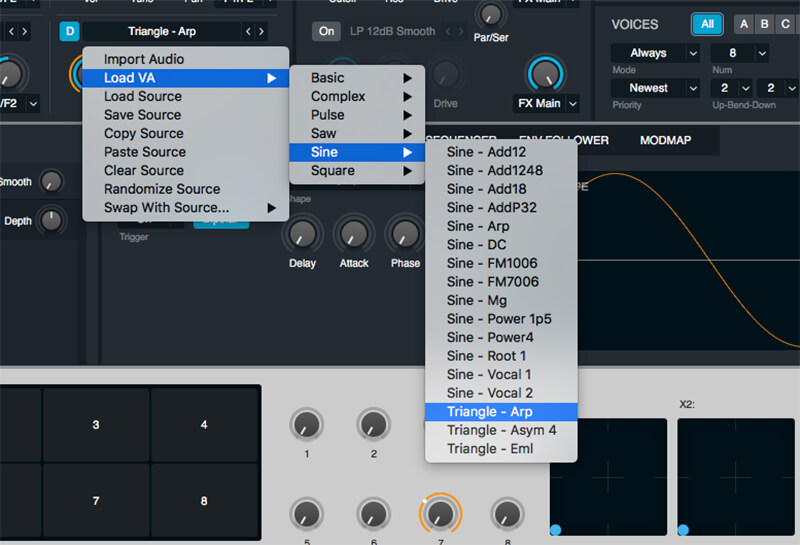
9. So far, we’ve stuck to using sine waves, so that it’s clear what each oscillator contributes to the results. You can, however, use a triangle wave on the top harmonic to fill out the upper harmonics.
![]()
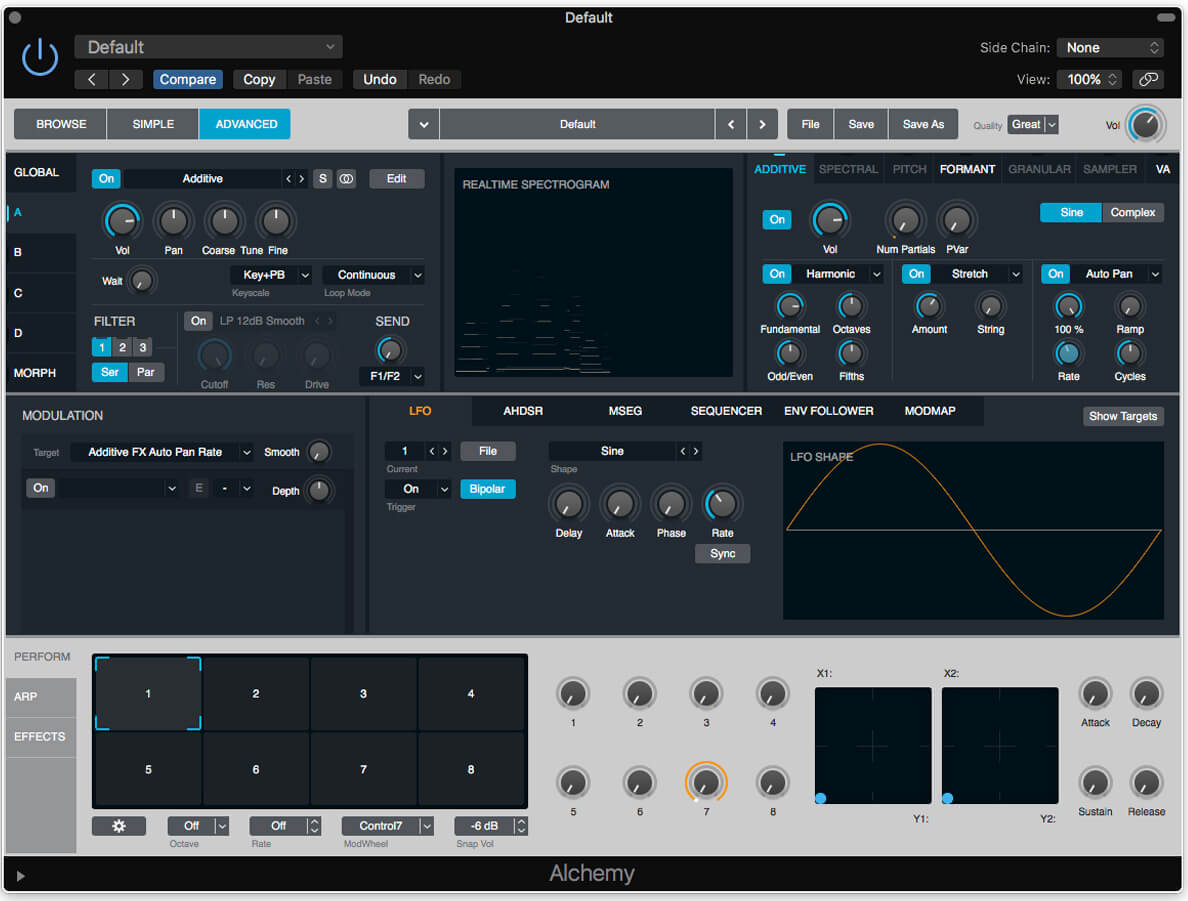
THE STRETCH FEATURE AND AUTO-TUNE in Alchemy’s dedicated Additive section offer very different results. Stretch shifts the tuning, creating inharmonic bell-like tones, whereas the Auto Pan effect positions the partials around the soundstage for a super-wide stereo effect.
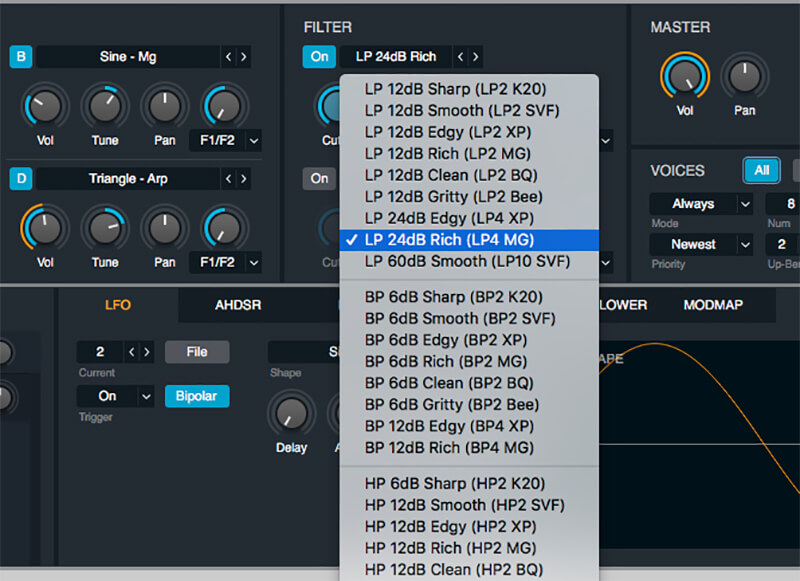
10. If you do use waveforms like triangle or square with additional harmonic material, it might be helpful to add a filter (like the LP 24dB Rich) to tame the high-end and keep the sound pure.
11. Let’s initialise a new patch to explore Alchemy’s dedicated additive section. Click on the VA tab on the far right-hand side of the screen in the Single Source view and disable the VA Oscillator.
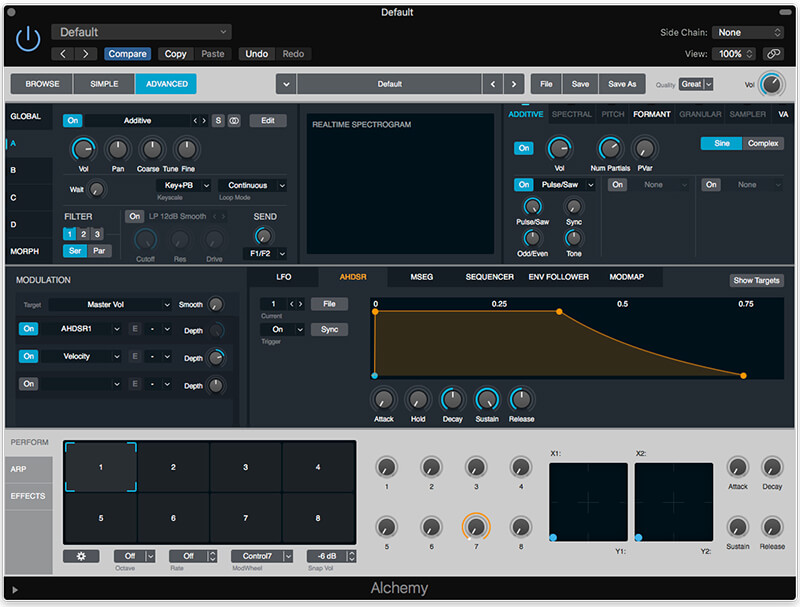
12. Click on the Additive tab and enable the Additive oscillator using the On button. The current sound is somewhat similar to a sawtooth wave, although this waveshape is formed with 256 separate partials.

13. Try lowering the number of partials. With around four-to-eight partials, the sound is similar to what we’ve created with the VA oscillators. Experiment with an LFO slightly modulating the Num Partials parameter.
14. The three blocks in the bottom of the Additive section work like effects, manipulating the partials. Temporarily raise the number of partials to hear how the Pulse/Saw sections work, changing the balance of odd harmonics.
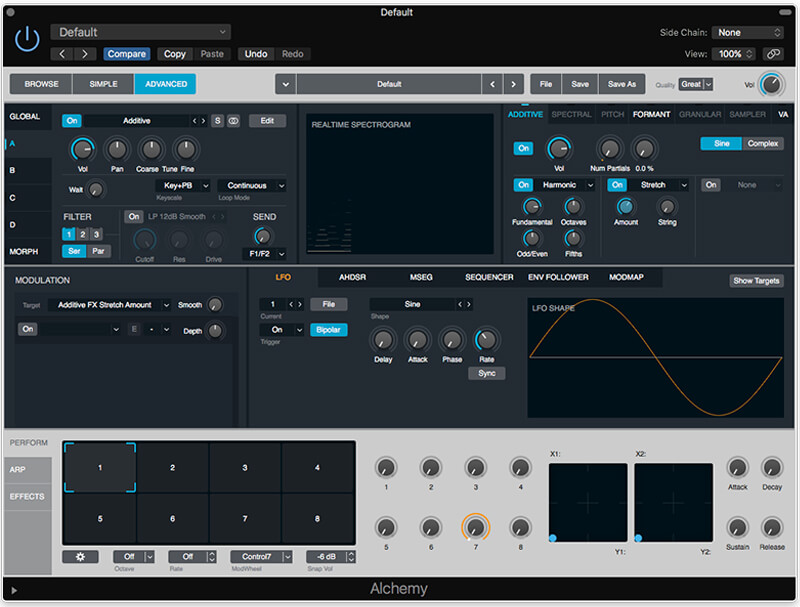
15. Lower the number of partials again. Change the first block to Harmonic mode and increase the Fundamental level. Add Stretch on the second block and increase the amount to around 19 per cent, creating a bell-like tone.
16. On the final block add Auto Pan and set the amount to 100 per cent. The result of this block is a panning effect where each partial is spread across the stereo soundstage.

17. To add another layer to the sound, try adding a detuned, two-oscillator sawtooth pad similar to our last Workshop. Add an ADSR envelope to the volume with a slow attack and graduated release.
18. Note the separate filter routing controls in the Oscillator section labelled F1/F2. This lets you filter the two sawtooths via Filter 1 (set to low pass), while bypassing the Additive oscillator using the bypassed Filter 2.
Powered by:
![]()