Logic Pro Tutorial: Vintage B3 In Detail – Step-by-Step 2
Our step-by-step guide to Vintage B3 continues… 11: Pressing the Select By Keyboard Option lets you move between presets using the MIDI keys C#0 to B0. You can also do this with the note held down, which create some interesting steeped timbral shifts that can be quantized in time with your track. 12: No Hammond […]
Our step-by-step guide to Vintage B3 continues…
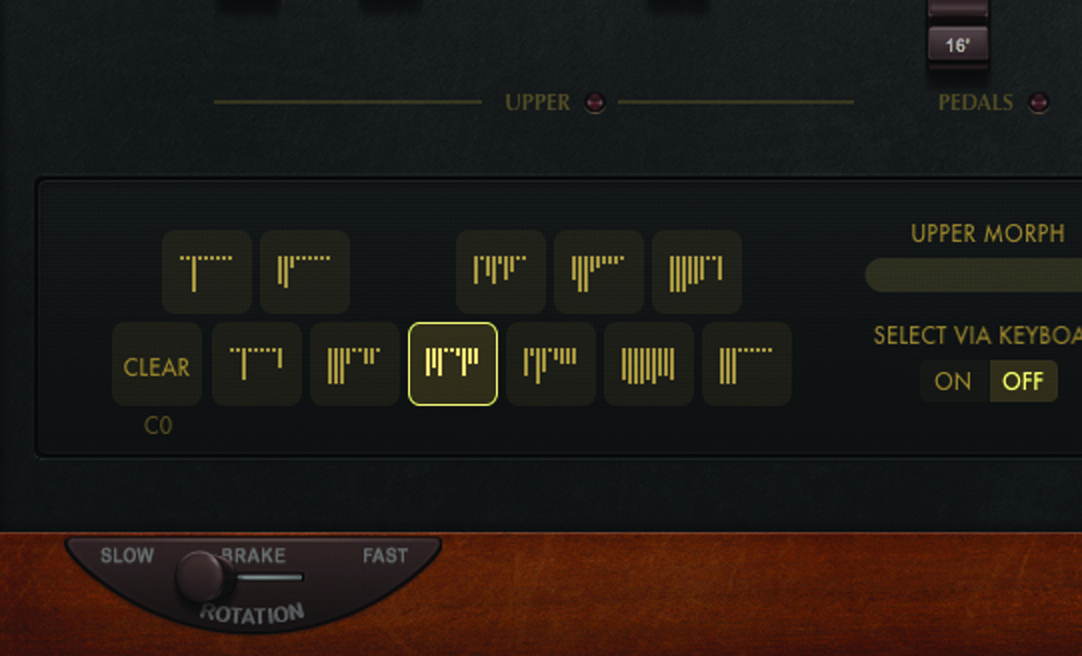
11: Pressing the Select By Keyboard Option lets you move between presets using the MIDI keys C#0 to B0. You can also do this with the note held down, which create some interesting steeped timbral shifts that can be quantized in time with your track.
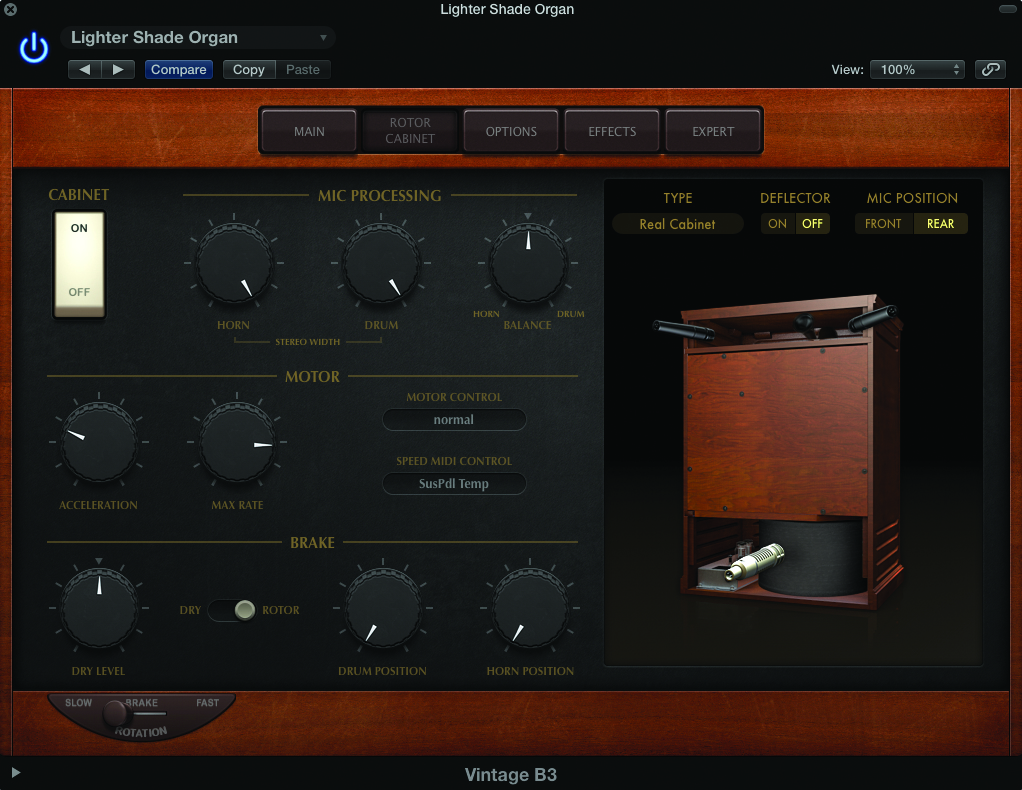
12: No Hammond sound would be complete without the addition of a Leslie speaker, which can be found under the Rotor Cabinet tab. You can bypass the Cabinet completely using the On/Off button, and also move between two speeds using the Rotation control.
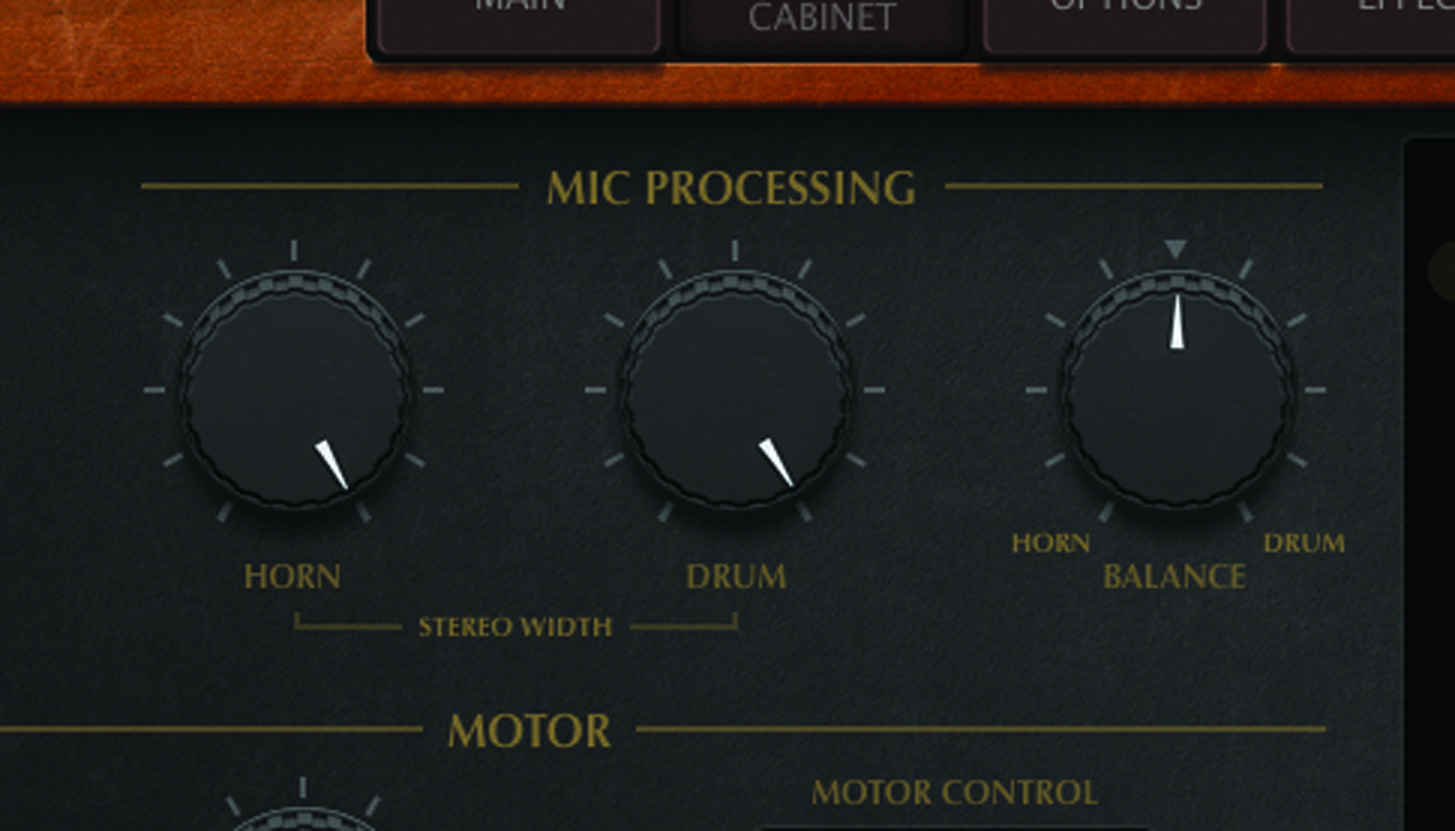
13: A key attribute of the Leslie sound is the balance between the mics placed on the Horn and Drum. In effect, the Balance control works like a form of treble and bass control, while the individual Stereo Width parameter lets you define the ‘stereoness’ of the spin.
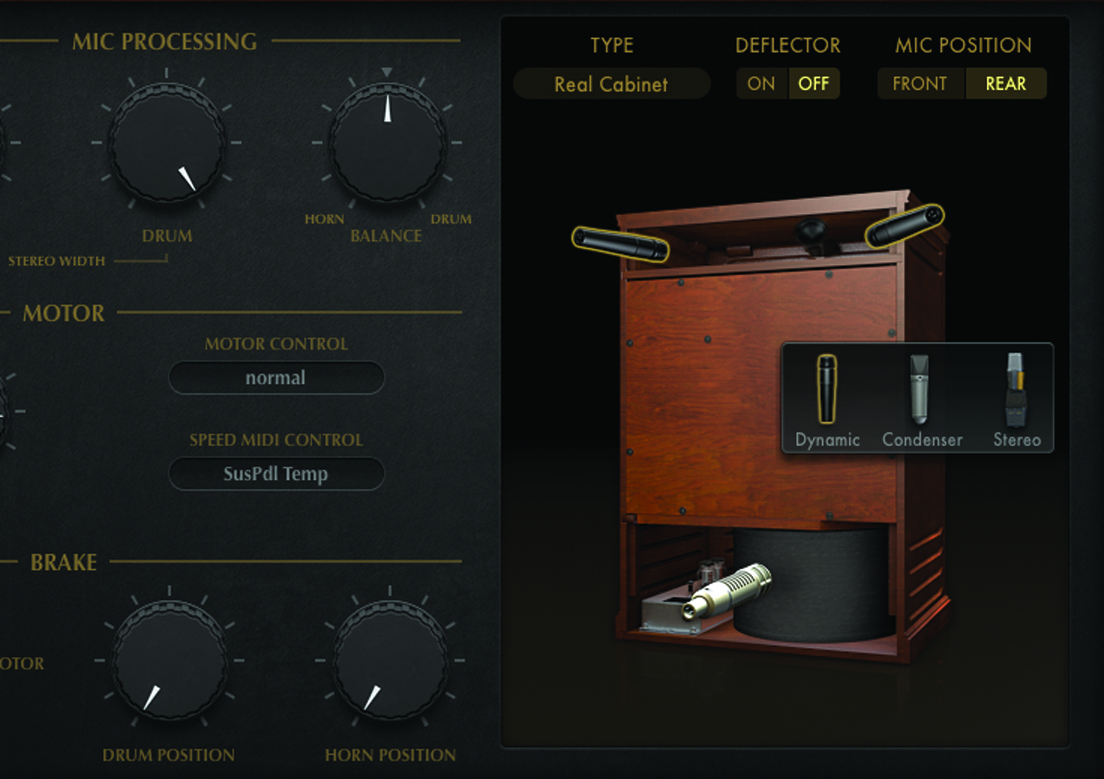
14: The Vintage B3 includes both modeled and IR-based versions of the Leslie, with the Real Cabinet option being the most intuitive to use. With the Real Cabinet you can switch between three mic types as well as move between micing from the front or rear.
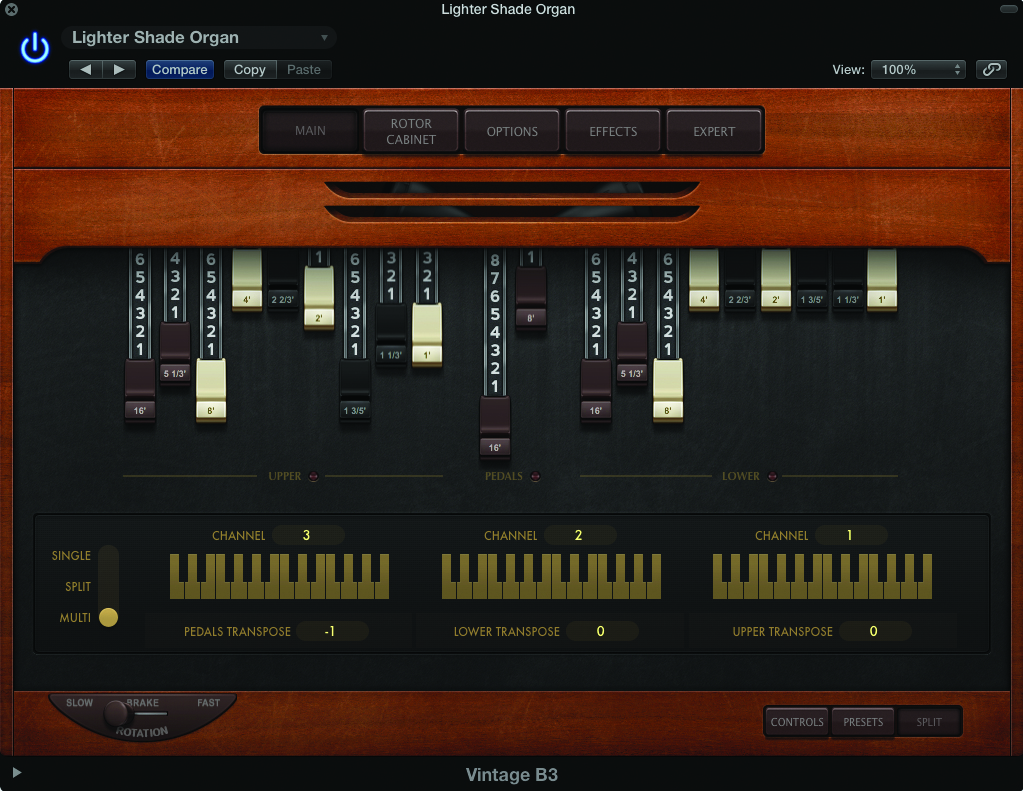
15: The best way of accessing all three manuals is to use the Multi option found under the Split tab (located in bottom right-hand corner of the Main page). Split assigns each manual – Upper, Lower and Bass Pedals – to a different MIDI channel.
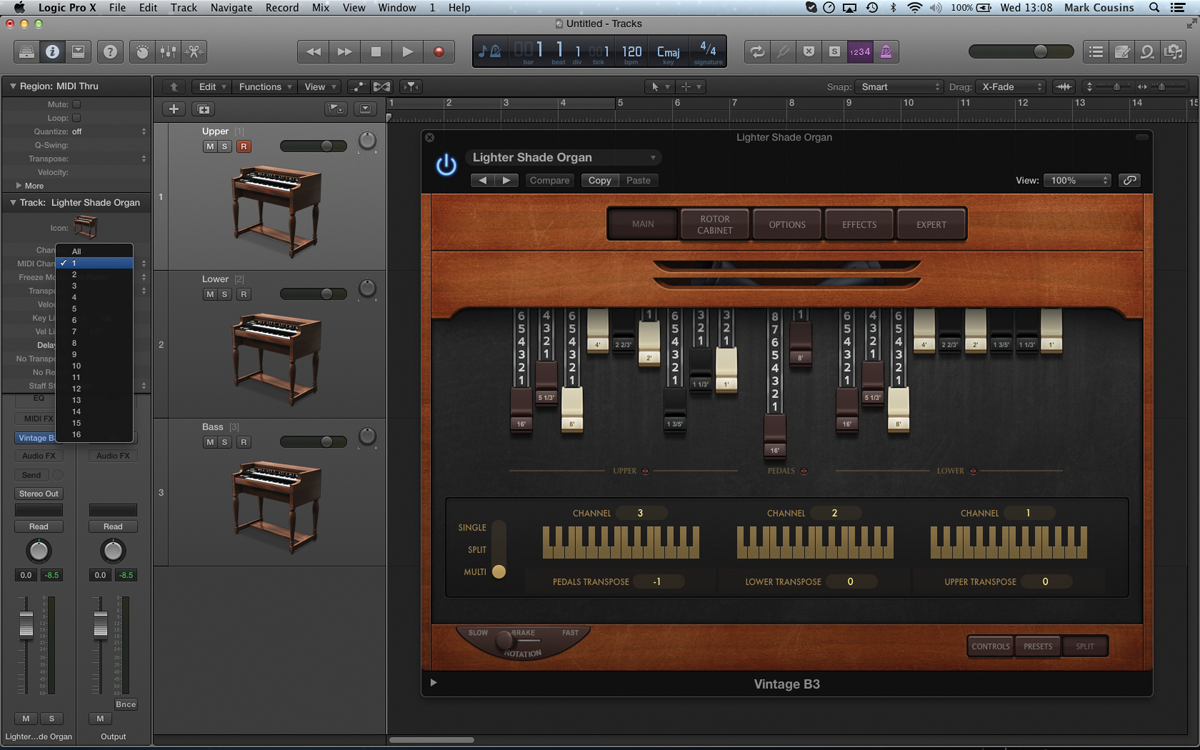
16: You’ll need to create a unique track lane for each Manual. To do this, set the track to MIDI Channel 1 and then choose the menu option Track > Other > New Track with Next MIDI Channel. Do this twice to have three Manuals accessible.
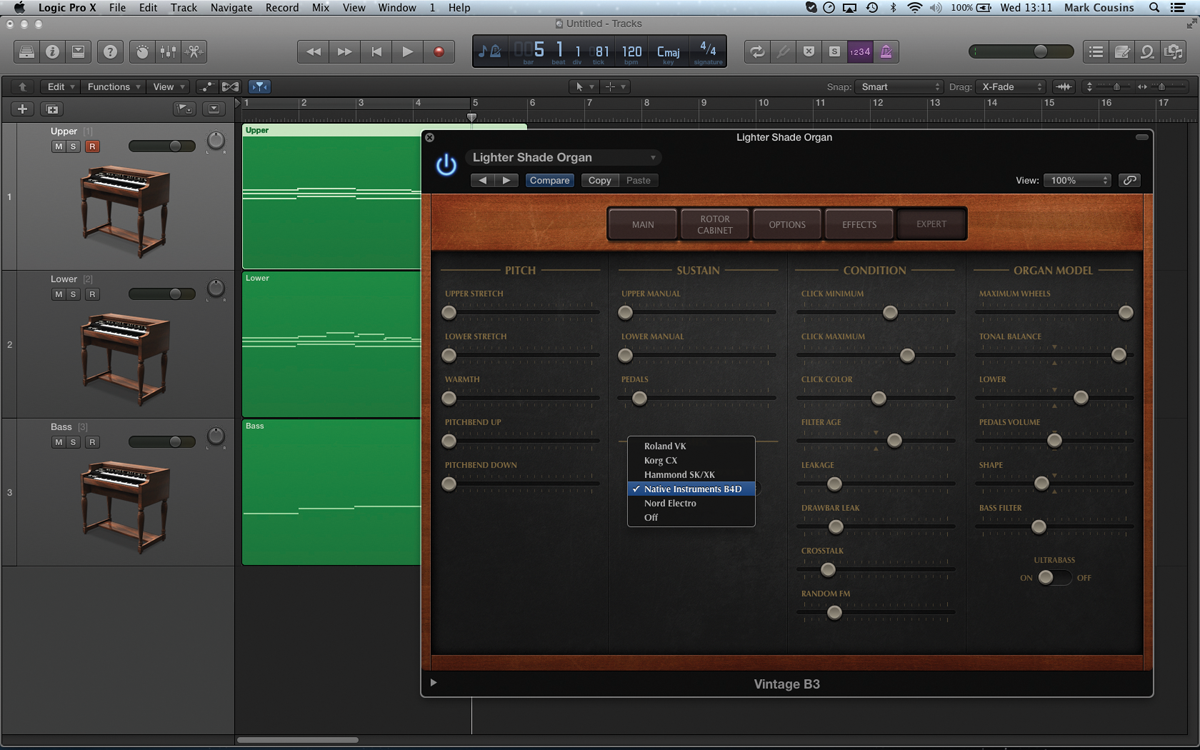
17: Now record each Manual as a separate pass (which is useful if you’re not a keyboard-playing genius!). It’s also worth changing the MIDI mapping to Native Instrument B4D (under the Expert Tab) so that the Mod Wheel can control the Leslie speaker.
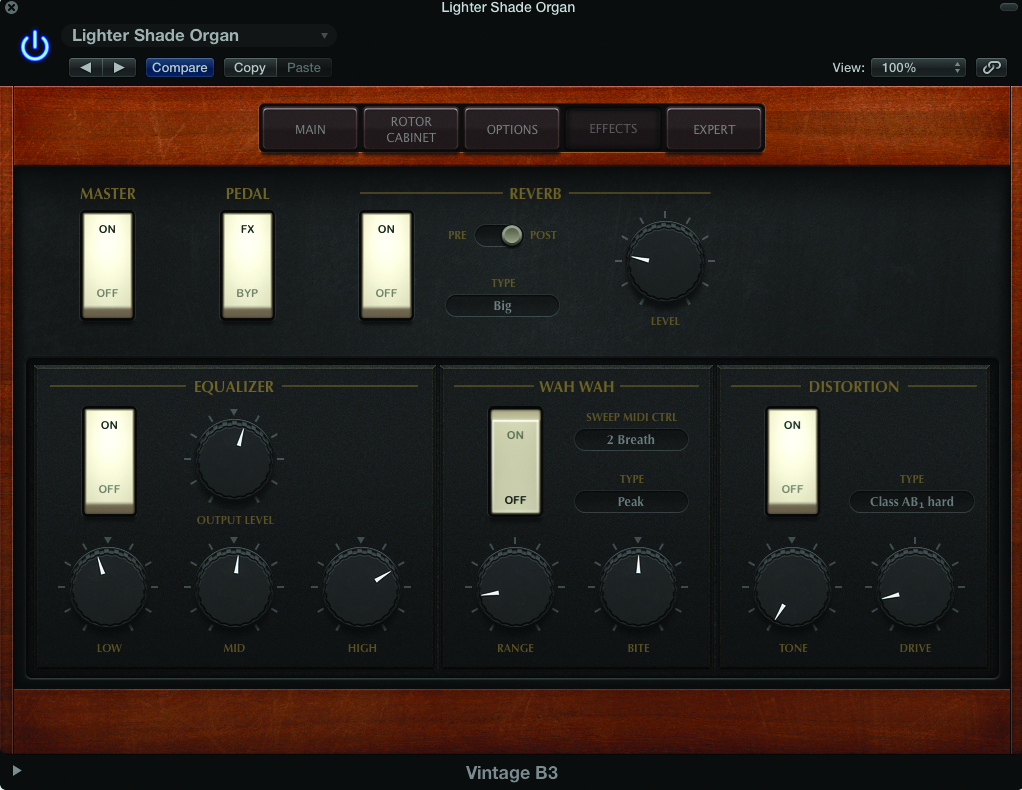
18: The Effects tab is the final icing on the cake. Reverb can be applied both pre and post the speaker emulation. Use a pre setting for a more retro sound, or post if you want a more studio-like sound.