Beat and Pattern Sequencers in Cubase 9.5: Step-by-step (Continued)
In part 2 of his beat and pattern sequencers tutorial, Adam Crute loads up Beat Designer and runs us through some of its in-depth features… 7. Close the Drum Map Setup panel. Still within the Track Inspector, locate and open the MIDI Inserts section. Click in the first MIDI Insert ‘slot’ and select Beat Designer […]
In part 2 of his beat and pattern sequencers tutorial, Adam Crute loads up Beat Designer and runs us through some of its in-depth features…
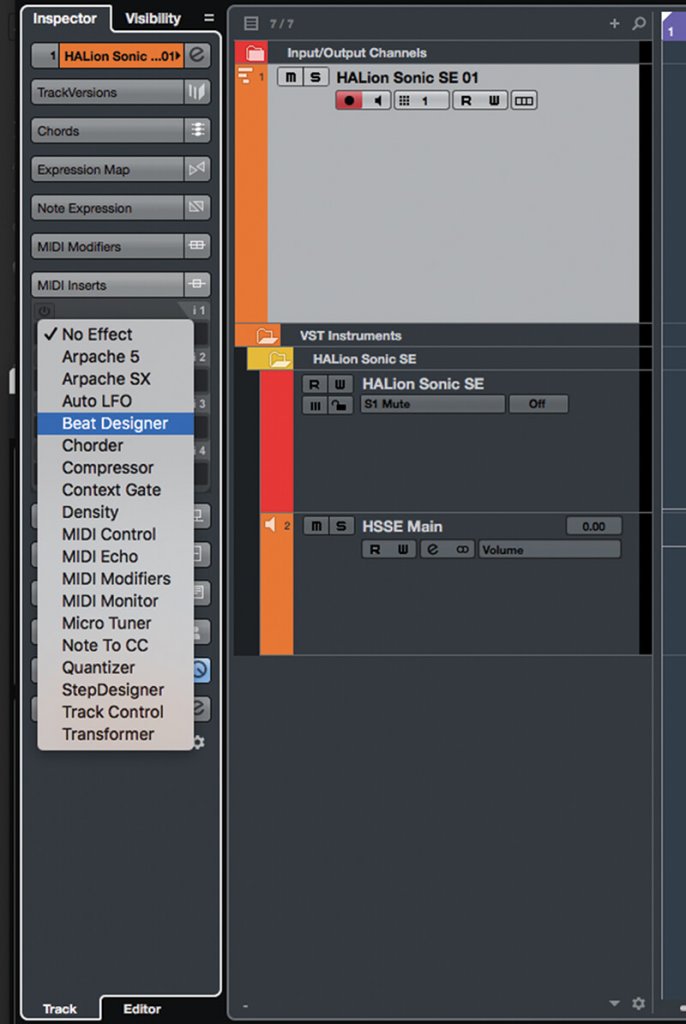
7. Close the Drum Map Setup panel. Still within the Track Inspector, locate and open the MIDI Inserts section. Click in the first MIDI Insert ‘slot’ and select Beat Designer from the list of plug-ins that’s shown.
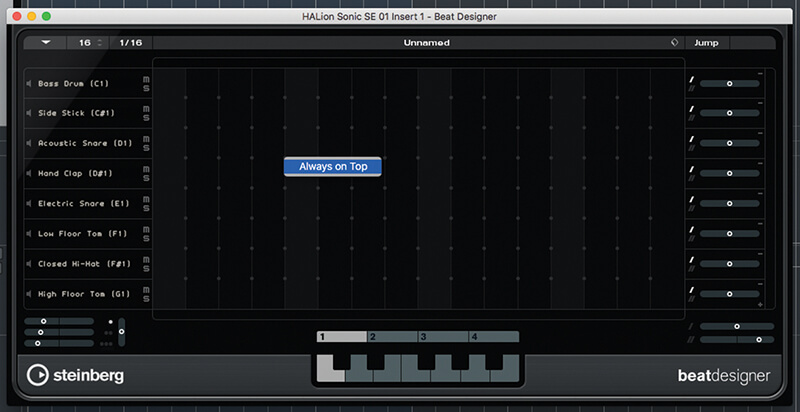
8. The Beat Designer window opens. If you aren’t using a multi-monitor set-up, right-click anywhere on the window and activate Always On Top if it isn’t already activated – this will save a lot of frustration!
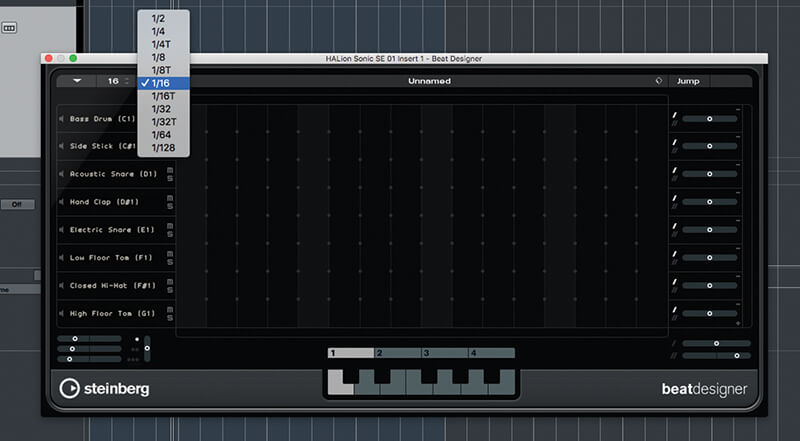
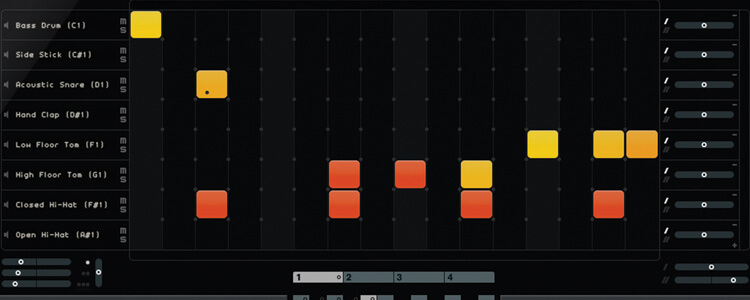
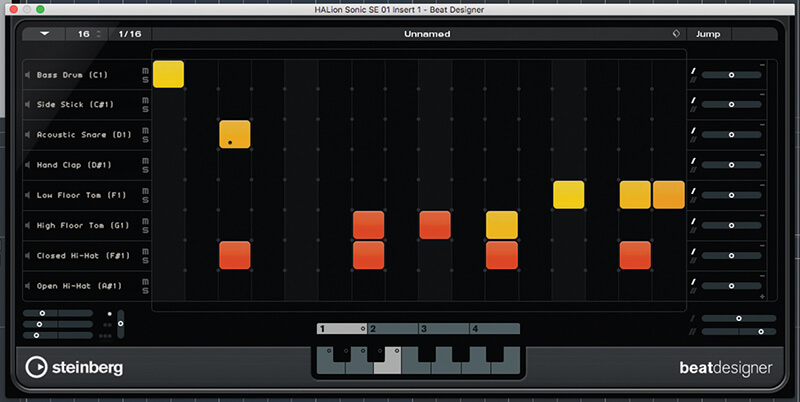
9. Beat Designer’s initial pattern is 16 steps long and uses a 16th-note (semi-quaver) step resolution – it’s a one-bar pattern. The length and resolution are modified via the controls at the top of the panel.
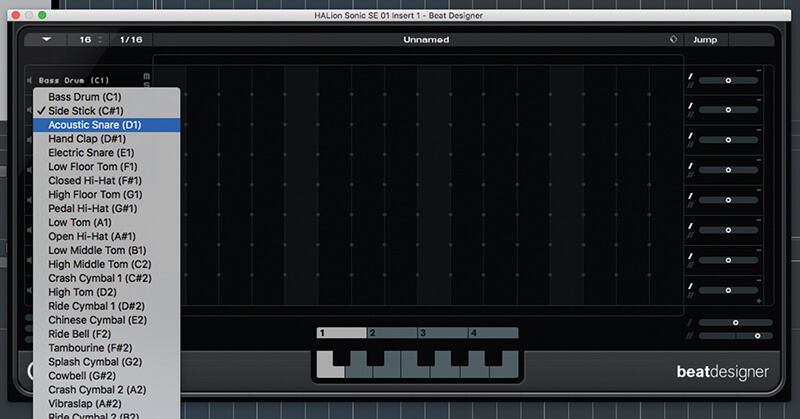
10. Clicking on the name of a lane opens a list of drum sounds and their corresponding notes – the list is derived from the track’s assigned drum map. Changing a lane’s instrument does not change the lane’s pattern.
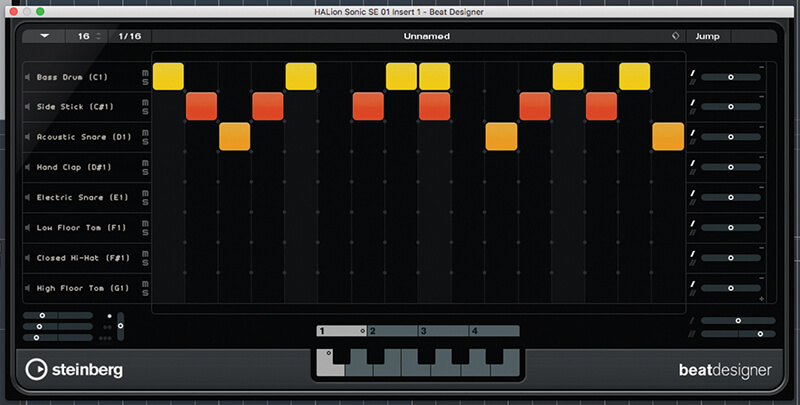
11. Select a few instruments that you like, and then click in the grid to create a pattern (start Cubase playback to start Beat Designer playback). Notice how the velocity of each hit is indicated by colour.
12. Velocity is determined by how high in a grid cell you click when creating a hit: the higher in the cell you click the higher the velocity. To adjust a hit’s velocity, click it and drag up or down.

Pattern-player MIDI plug-ins can be a bit esoteric in use: Beat Designer’s straightforward enough, but Arpache SX can produce surprising effects if poked at, and Step Designer can be uncooperative. Persevere, because once you’re familiar with these tools they really are invaluable.

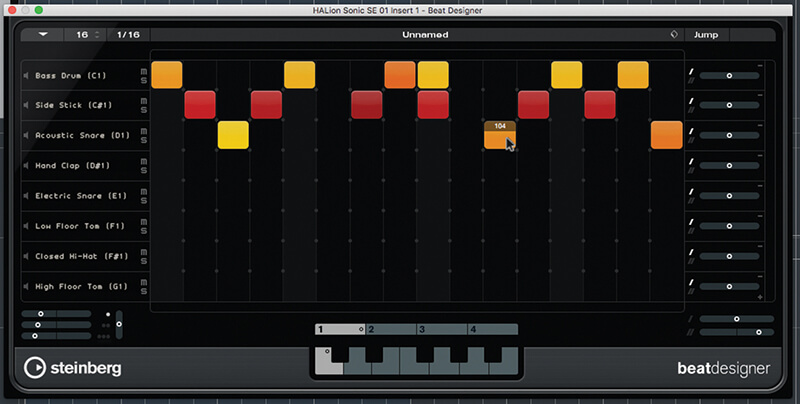
13. To add a flam to a hit, hold the mouse over its bottom edge and then click to select the flam ‘level’ – 1, 2 or 3. These levels correspond with the master flam settings, below the instrument names list.
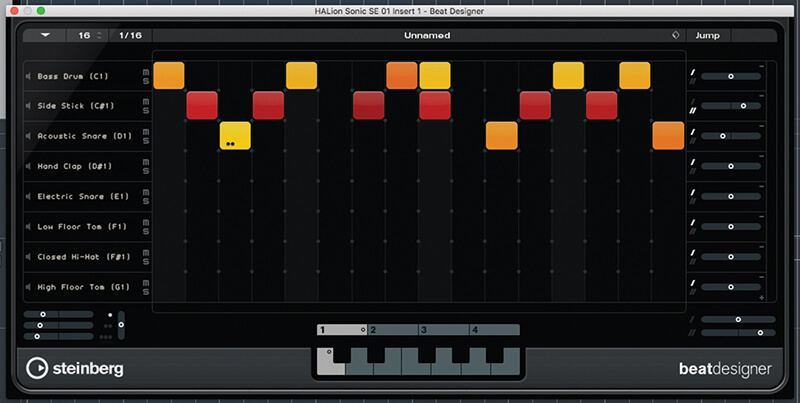
14. At the left of each lane you’ll find its swing and offset controls. The offset can be applied per-lane, but the offset applied by the two swing levels is determined by the master swing settings, below the grid.
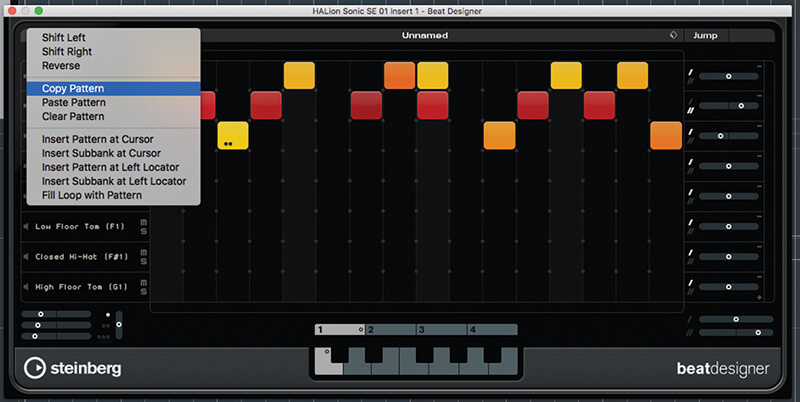
15. Open the functions menu by clicking the drop-down arrow at the top-left – copy the pattern. Click the C# key on the keyboard graphic – this opens the next pattern ‘slot’ – and select Paste Pattern from the functions menu.
16. Make some modifications to the pasted pattern, and then repeat the copy-and-paste technique until you have a palette of patterns, each assigned to a different key on the keyboard graphic.
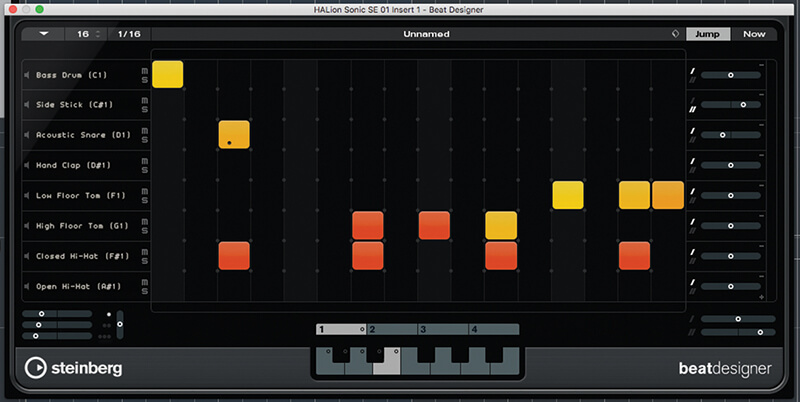
17. Activate the Jump button, located at the top-right of the panel. This allows patterns to be selected via MIDI note. Playing patterns will complete before changing, unless the “Now” button is also enabled.
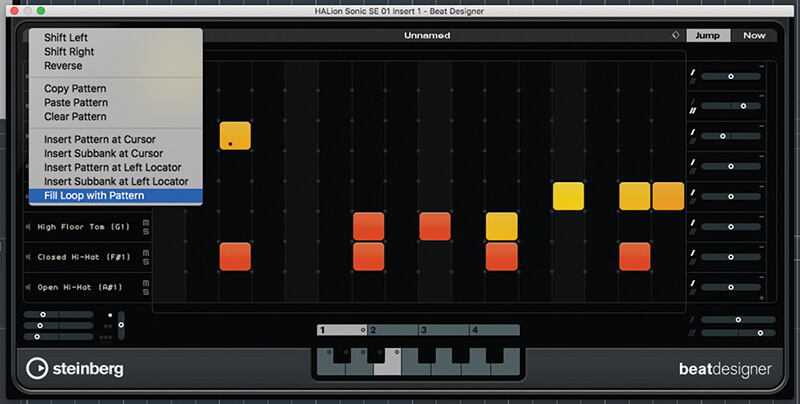
18. Sequence patterns by recording the MIDI notes that trigger each part, or by selecting one of the Insert options from the functions menu; convert a pattern to MIDI by dragging it from the keyboard graphic to a MIDI track.