Utilising Beat and Pattern Sequencers in Cubase 9.5
Analogue-style beat and pattern sequencers are essential – and Cubase can handle them just fine without external plug-ins. Adam Crute shows you how… The interplay between repeated – and subtly evolving – patterns and loops lies at the heart of most genres of electronic dance music. Whilst this is no surprise when you consider that […]
Analogue-style beat and pattern sequencers are essential – and Cubase can handle them just fine without external plug-ins. Adam Crute shows you how…
The interplay between repeated – and subtly evolving – patterns and loops lies at the heart of most genres of electronic dance music. Whilst this is no surprise when you consider that analogue synthesis and sequencing technologies were the progenitors of the EDM sound, it does mean we need to mimic such technologies in order to create authentic and compelling dance music.
While there are DAWs that harness this approach – Propellerhead Reason being the obvious example – and any number of analogue-style synth plug-ins available, analogue-style beatbox, step sequencer and arpeggiator plug-ins aren’t as common; those that can be found are typically built as audio plug-ins, which can prove somewhat cumbersome when used for what is essentially a MIDI-based activity. This is where Cubase’s MIDI effects plug-ins can help.
MIDI effects
Just like audio plug-ins, MIDI plug-ins are used to create, morph and modify the content of the track they’re applied to. Adding a MIDI plug-in to a track is easy: select a MIDI track and then click on the MIDI Inserts section of the Track Inspector to reveal a set of four insert slots; click on a slot to open a list of 18 plug-ins to chose from.
MIDI Inserts can be applied to Instrument tracks too, but when using Cubase’s MIDI effects I find it more convenient to use MIDI tracks that are bussed to instruments in the VSTi Rack – it makes it easier to work with multiple tracks that are driving the same instrument, a scenario that’s common when working with pattern sequencers.
It’s worth noting that – just like their audio counterparts – MIDI Inserts are non-destructive. For example, if recording chords to a track that has an arpeggiator inserted on it, the chords will be recorded as-played, whist the arpeggiated notes will sound but not be recorded.
Arping on
Cubase’s simplest arpeggiator, Arpache 5, is very much like the arpeggiators found on classic synths: the input chord is broken into its constituent notes, and then each note is played in turn using a simple up, down, up and down, or random ordering. Arpache 5 also has a User mode that allows you to program the order in which a chord’s notes will be played.
More interesting is Arpache SX, which features two operating modes: Classic and Sequence. In Classic mode it has much in common with Arpache 5, but provides more control over transposition and timing, and offers a collection of preset patterns in place of a User mode.
Switching to Sequence mode, however, opens up a whole raft of creative possibilities, as it allows us to base arpeggiator patterns on MIDI parts dragged in from the Cubase Project window. The Arpache SX engine can introduce some timing and dynamic changes, but the result is – to all intents and purposes – a polyphonic pattern player that can be triggered with a key press, and transposed by changing the key pressed.
Step Designer
Step Designer is an emulation of a classic monophonic step sequencer, which allows us to assemble patterns of notes and CC values on an editing grid and then call up those patterns with incoming (or recorded) note messages. Unfortunately, though, the Step Designer has a problem: pattern recall is very laggy (on a Mac, at least), which is unforgivable given the purpose of the plug-in. There are workarounds, though…
One method is to apply a negative track delay so that the notes that trigger the pattern changes are played ahead of time; however, this will not help when live playing the pattern changes, and it will take some trial and error to work out a suitable delay time for your system.
The second workaround is to convert each Step Designer pattern into normal MIDI data on a track: all MIDI Insert slots feature a record button that causes the output of the insert to be looped back to the track so it can be recorded. Thus, all we need do is create a record range that matches the pattern length, hit record to ‘render’ the pattern back to the MIDI track, and then duplicate and arrange this new part in the timeline in the normal way.
If doing this, don’t forget to disable the plug-in before playing back the rendered parts, or arrange the rendered patterns on a separate MIDI track so you can switch between them and the ‘live’ patterns by muting and unmuting the relevant tracks.
Incidentally, this record to track technique is useful with all of the MIDI plug-ins, as by converting patterns to normal MIDI data we can make edits and adjustments in specific places without the need to create entire new patterns to accommodate those tweaks.
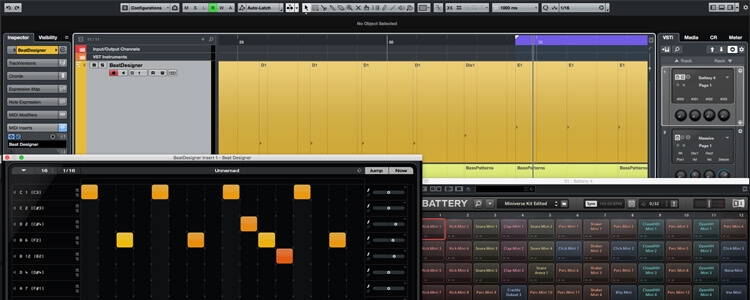
Beat Designer
Beat Designer works much like a classic drum machine, and is a particular favourite. Its timing is tight, its interface is focussed, and, when hooked up to a good sample set, engenders a workflow very similar to working with a classic beatbox.
Analogue-style effects: step-by-step
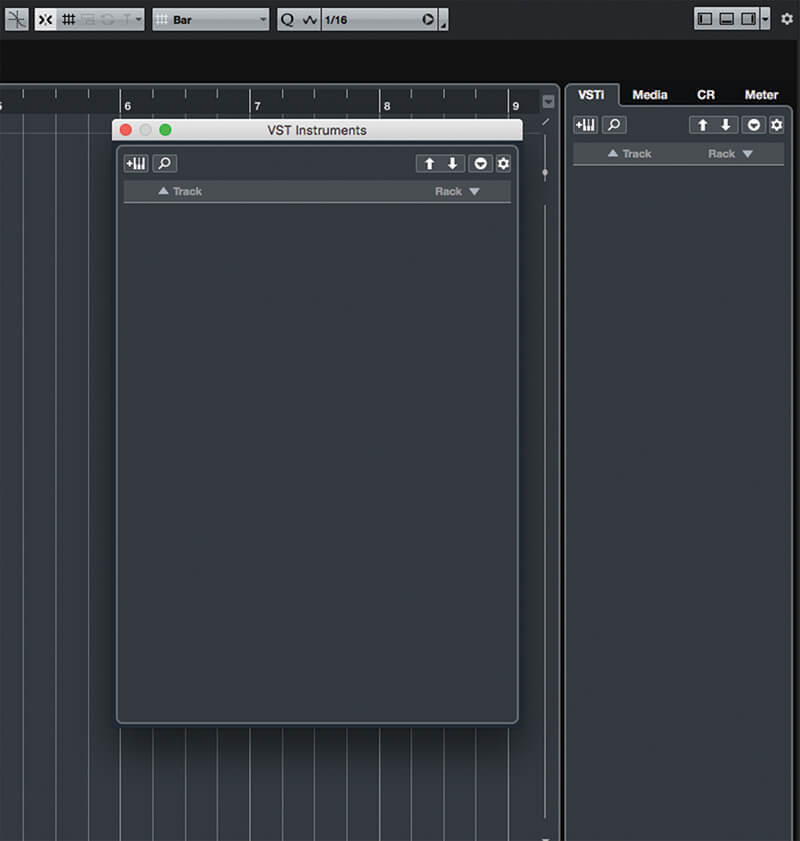
1. Fire up Cubase and create a new project. Open the right-hand zone and click the VSTi tab; alternatively, open Cubase’s Studio menu and select the VST Instruments item to open the floating VST Instrument’s panel.
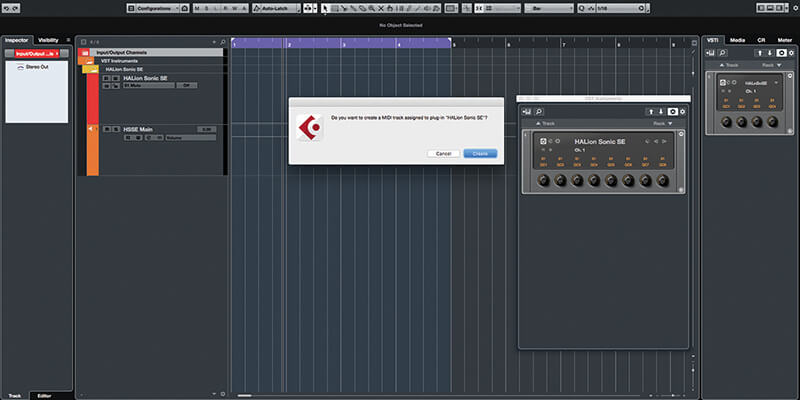
2. You can use any drum sound source you like, but here I’ll use HALion Sonic SE. Add an instance as a Rack instrument and, when prompted, allow Cubase to create a MIDI track for the instrument.
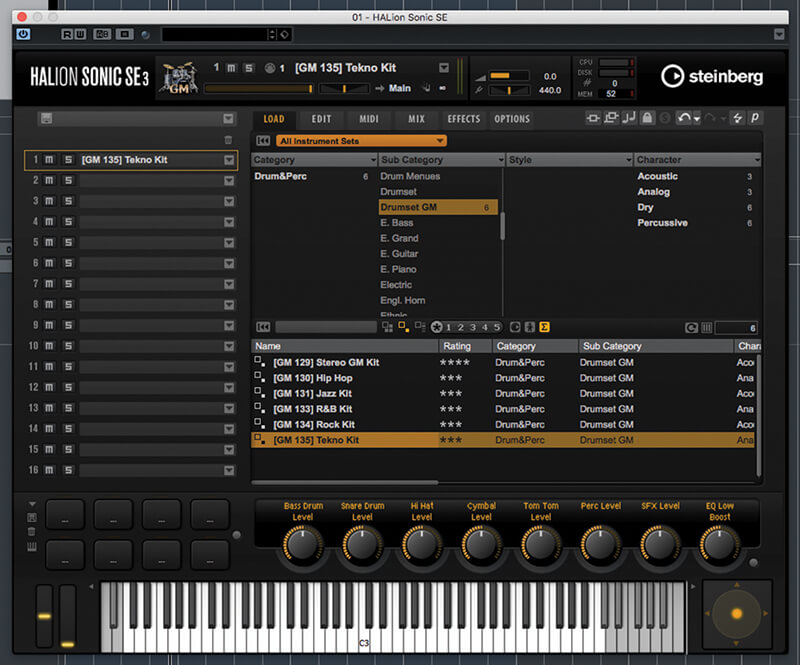
3. Make sure all patches are visible in HALion Sonic’s browser by clicking the orange drop-down above the browser and then selecting All. Select the Drumset GM sub-category, and load one of the GM drum sets.

Patches
As with audio and instrument plug-ins a MIDI plug-in’s settings can be saved as a ‘patch’. When doing this with the pattern-player plug-ins, all of the patterns/sequences defined inside the plug-in are saved along with the plug-in’s configuration. With Beat Designer, the currently-assigned drum map is not stored.
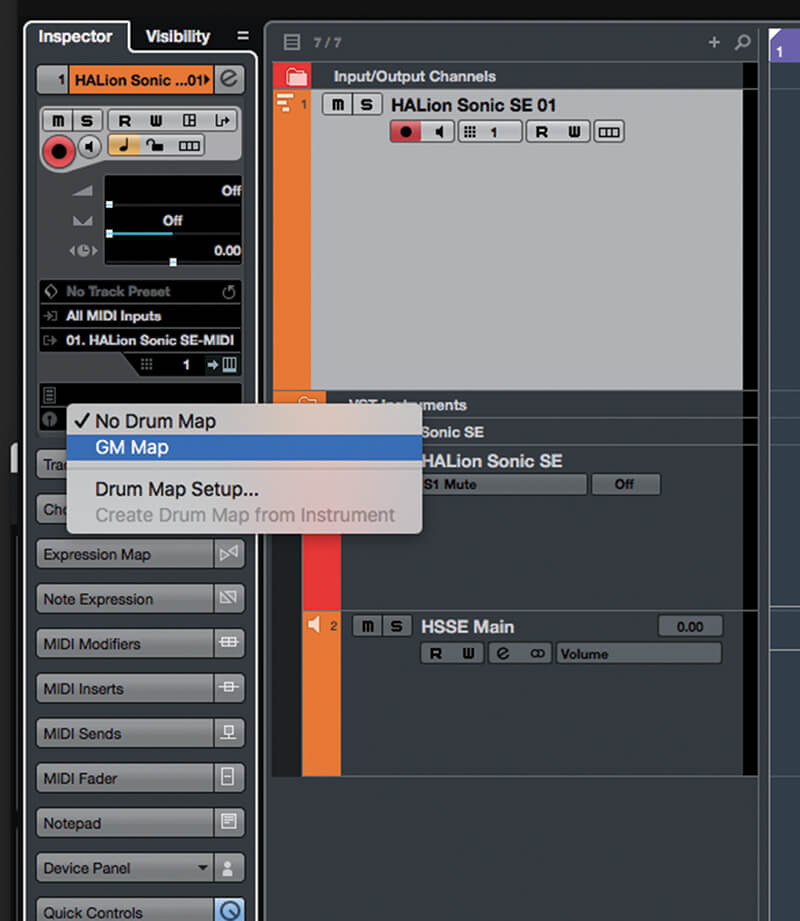
4. Close the HALion Sonic window and then select its MIDI track. In the Track Inspector locate the drum map selector (which will currently say No Drum Map), click it and select GM Map from the pop up menu.
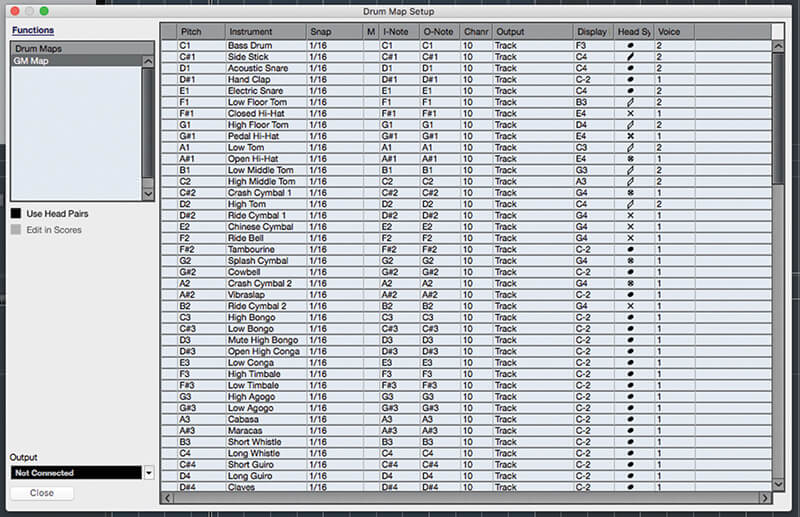
5. Click again on the drum map selector and select Drum Map Setup from the menu. Beat Designer makes use of a number of details from the drum map, specifically drum name and note, MIDI channel and output.
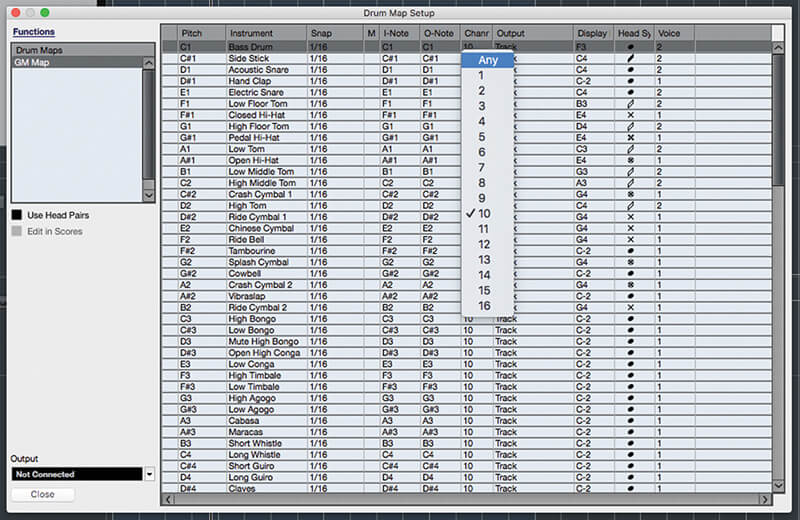
6. By default, the drum map will override the track’s MIDI channel assignment, but here we want to follow that assignment: Click in the Channel column of any drum instrument, hold down Cmd (Mac) / Alt (PC), and select Any.