Better Bass In Logic Pro X – Step By Step (Continued)
We continue to dig deeper into Logic Pro X’s secret weapons for creating some truly earthshaking bass end to your mix… 7. As with the compressed treatment, the art is in how much of the distorted signal you blend in with the kit. Experiment with the Aux plug-ins – what does the compressed signal sound […]
We continue to dig deeper into Logic Pro X’s secret weapons for creating some truly earthshaking bass end to your mix…
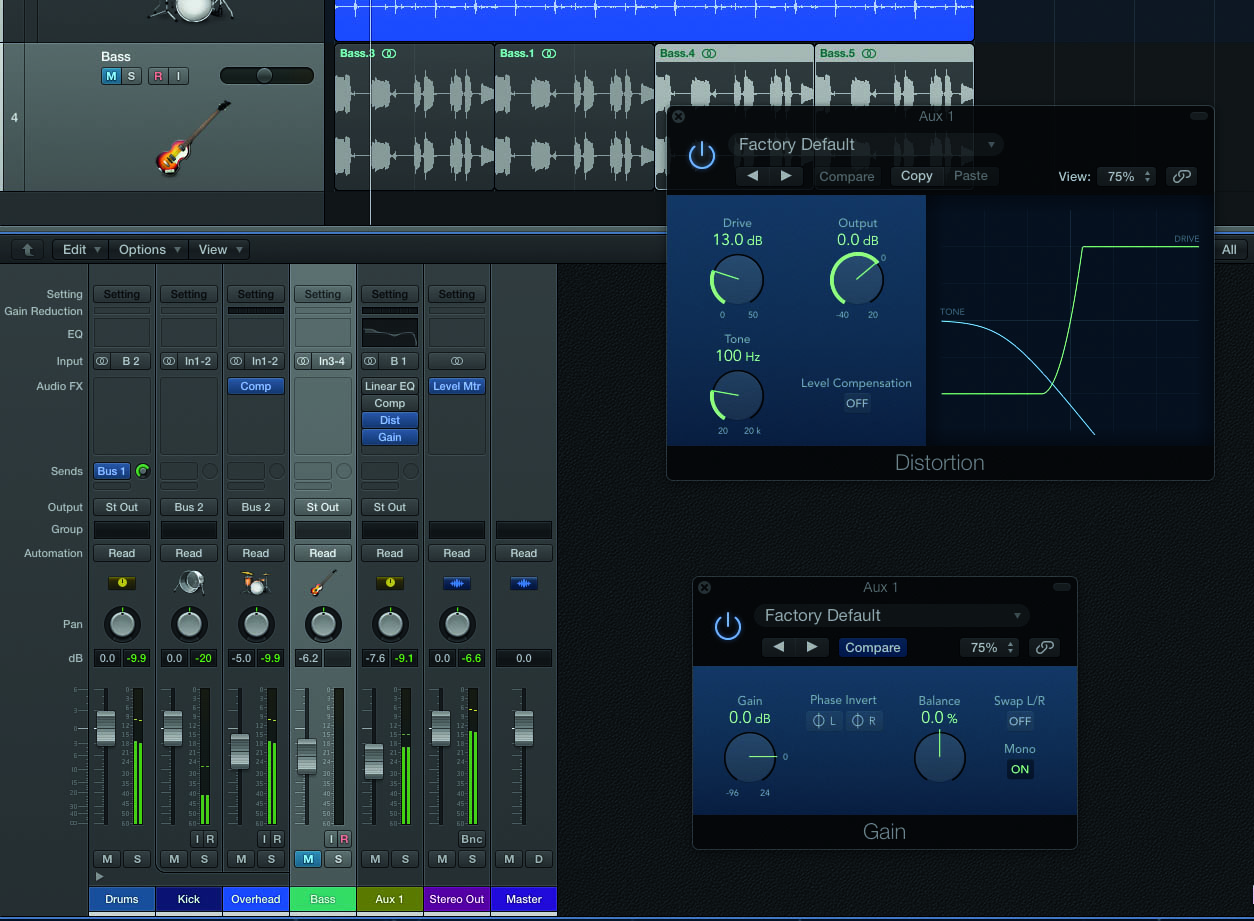
7. As with the compressed treatment, the art is in how much of the distorted signal you blend in with the kit. Experiment with the Aux plug-ins – what does the compressed signal sound like in mono?
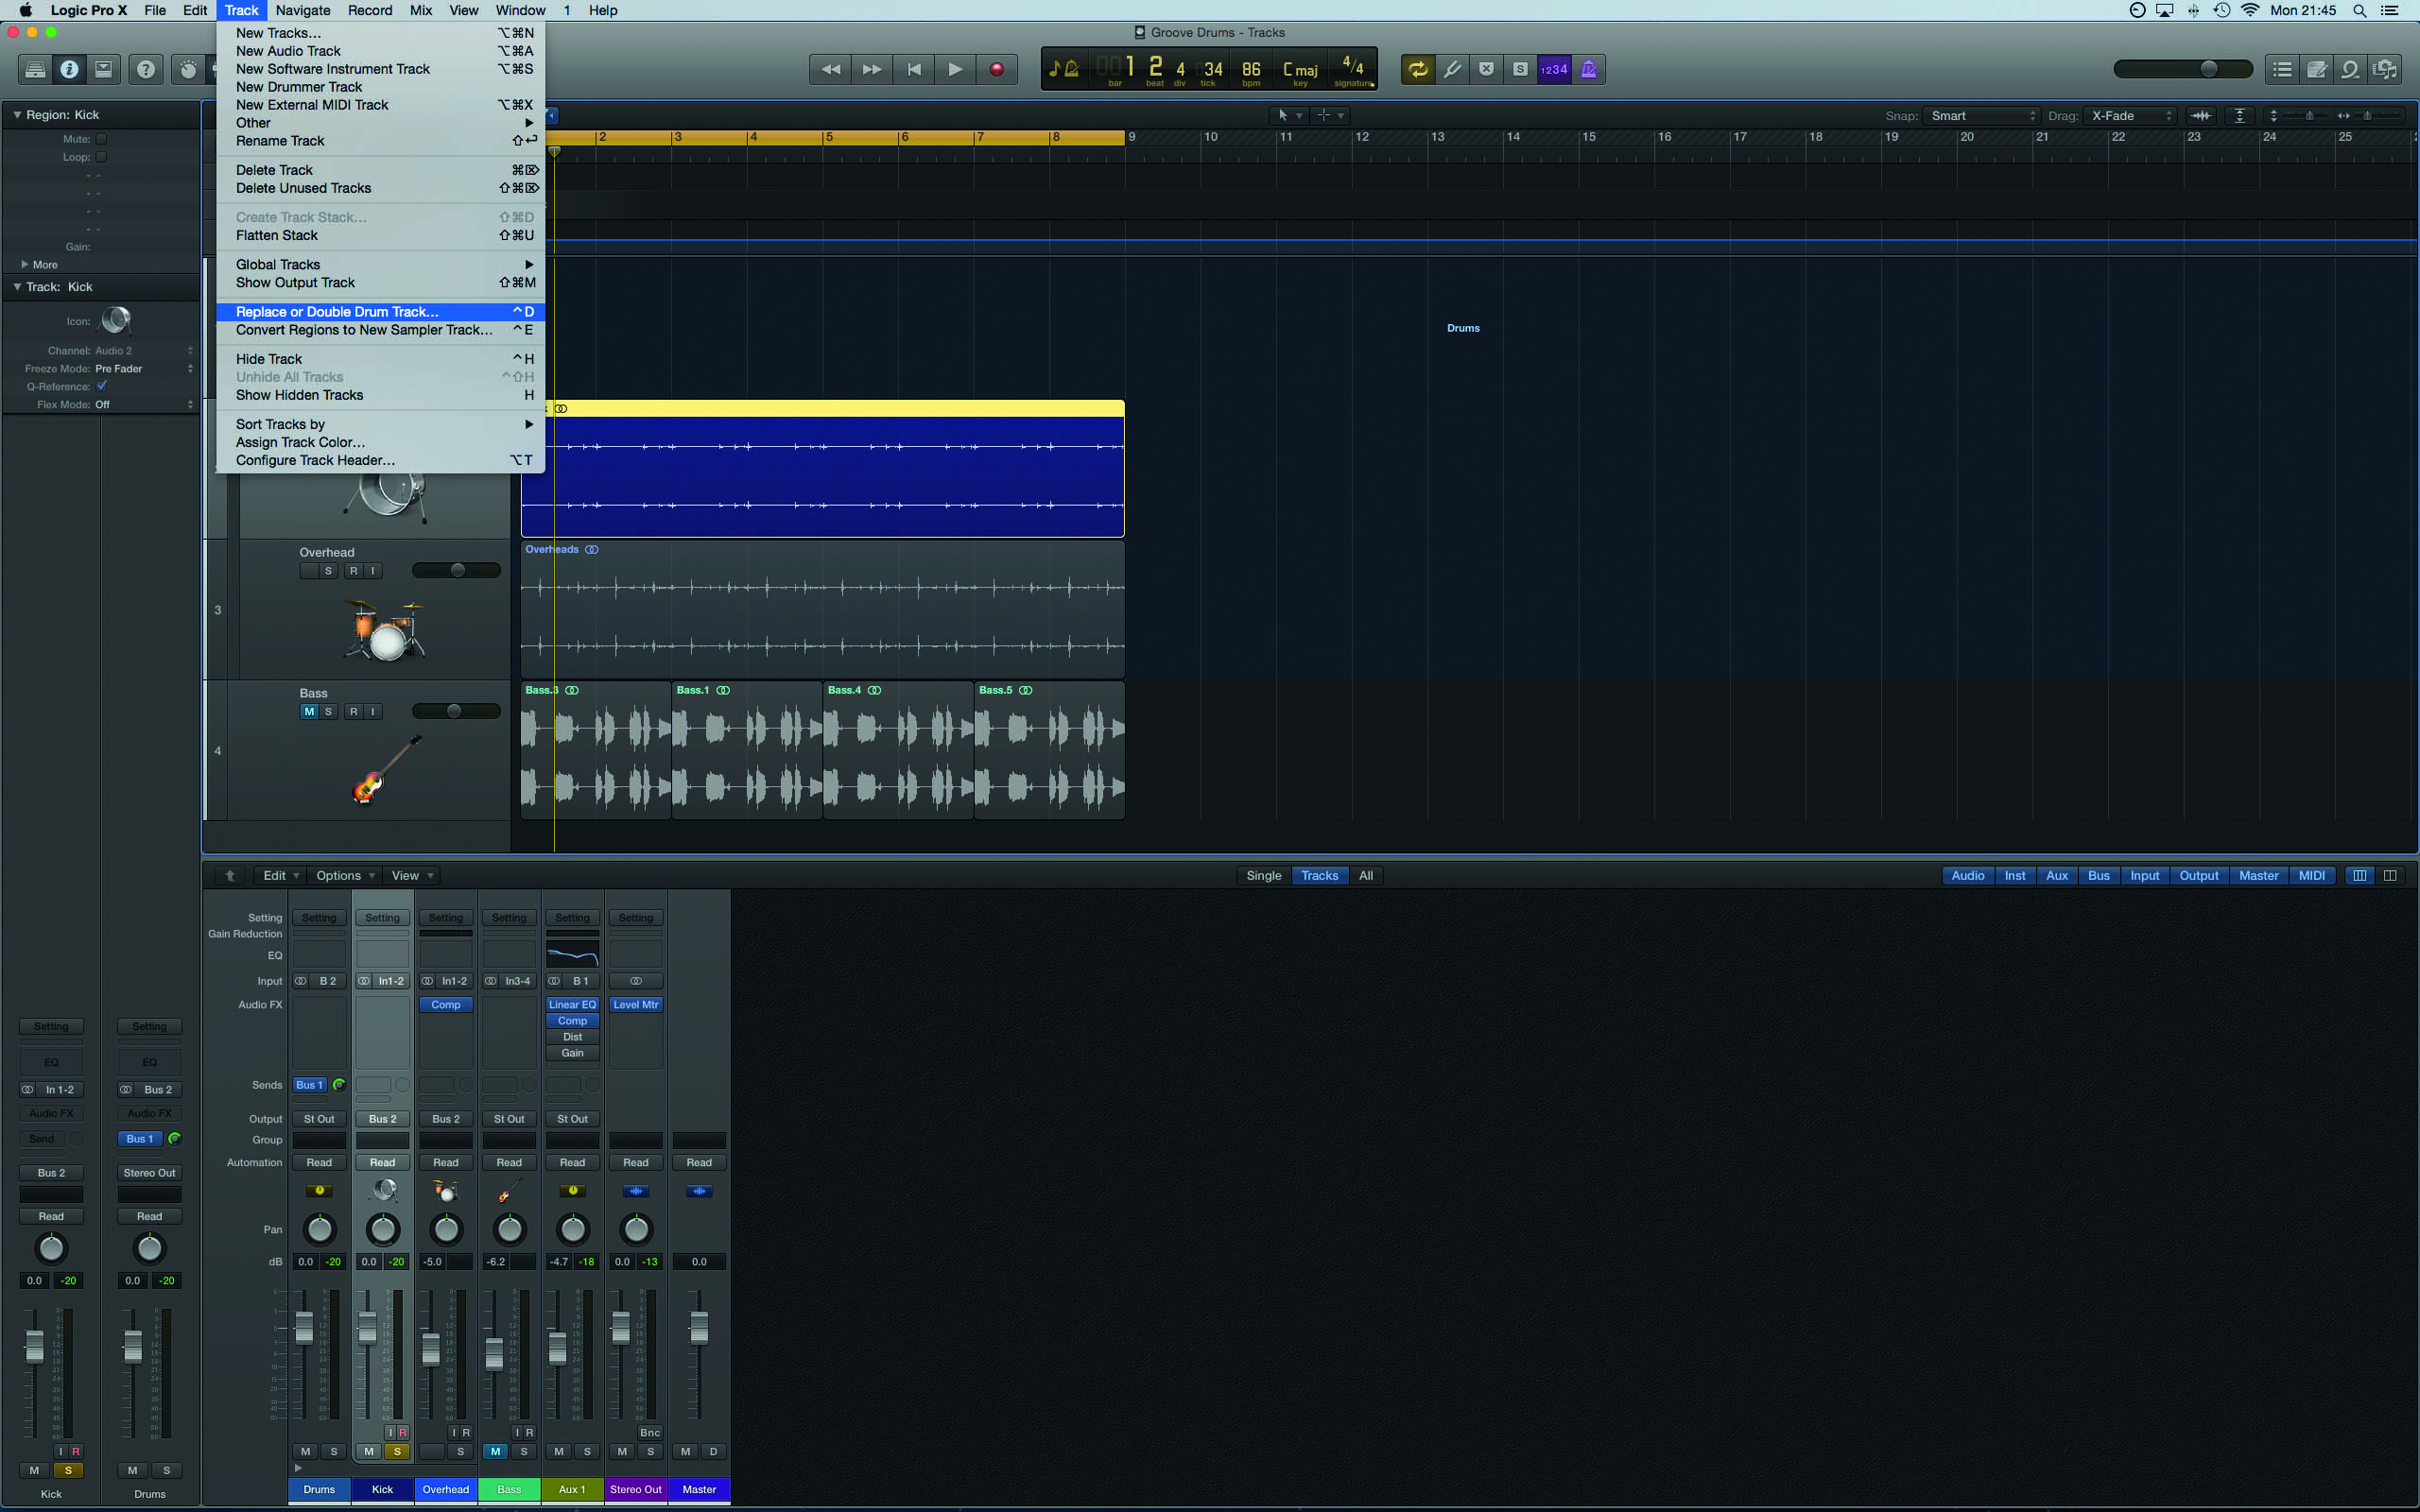
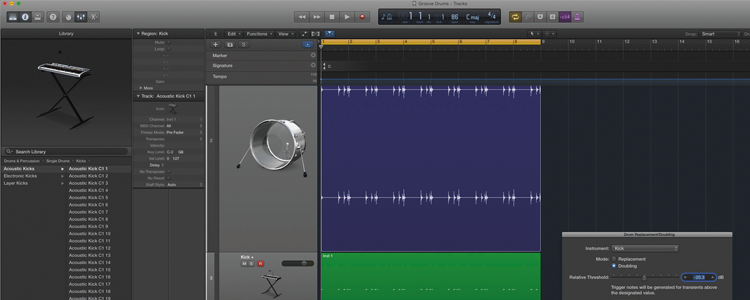
8. Now, we’ll use audio instruments for subsonic frequencies that go deeper than those of real instruments. Highlight the kick-drum track and use the menu function Track > Replace or Double Drum Track.
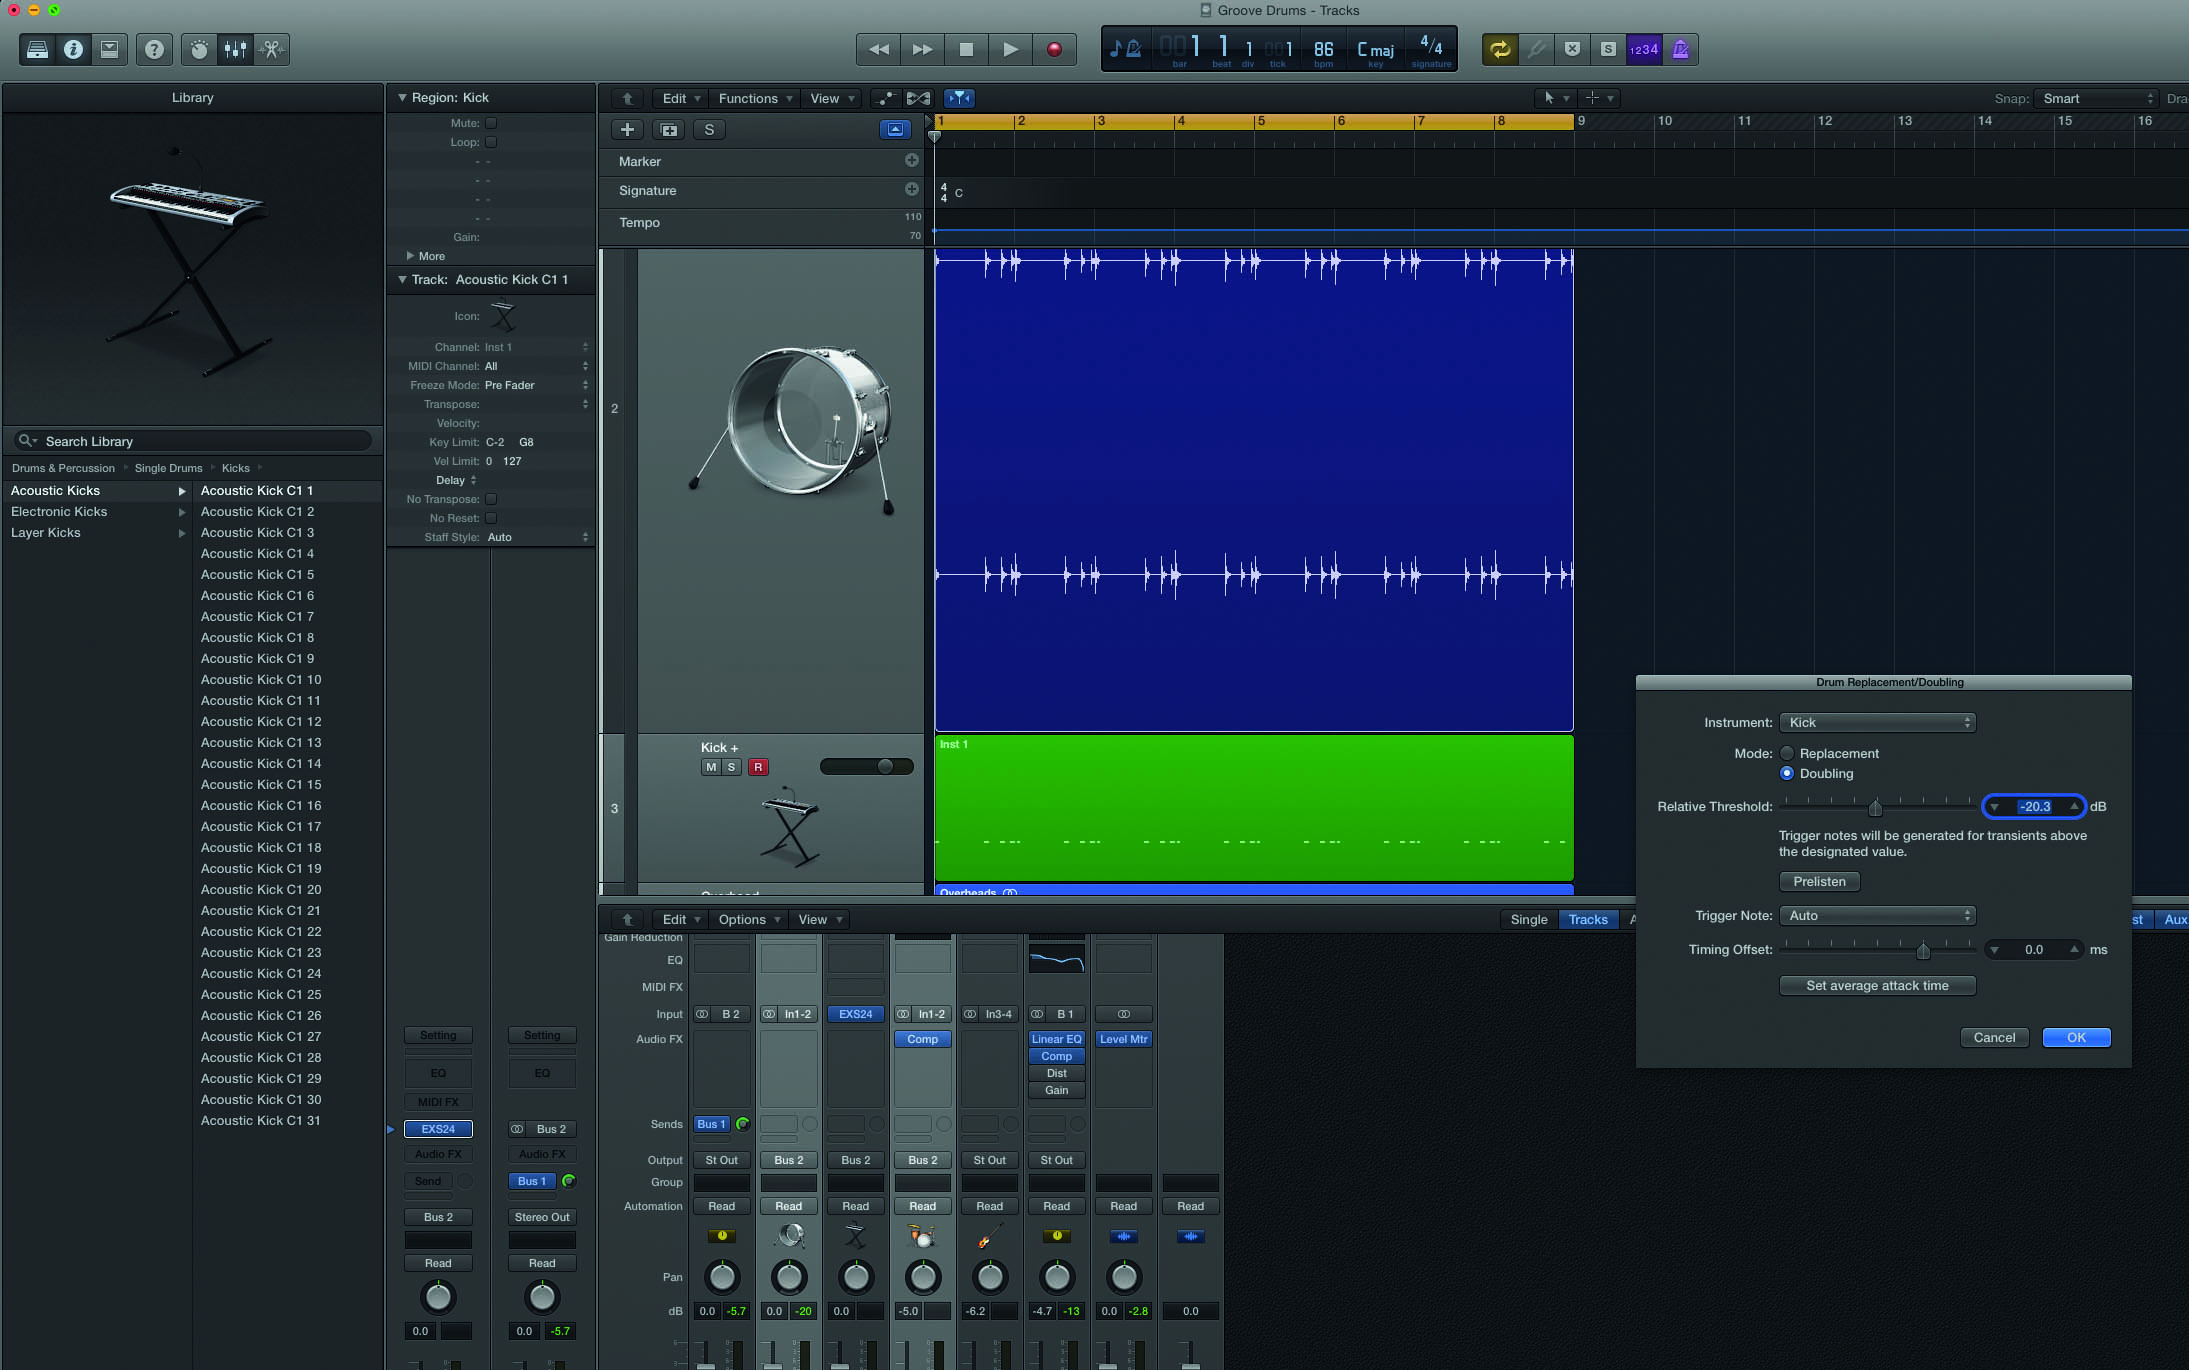
9. Set Kick as the instrument, the Mode to Doubling, and fine-tune the Relative Threshold to capture all the hit points. Logic will load an acoustic kick into ESX24, but we’re not interested in this.
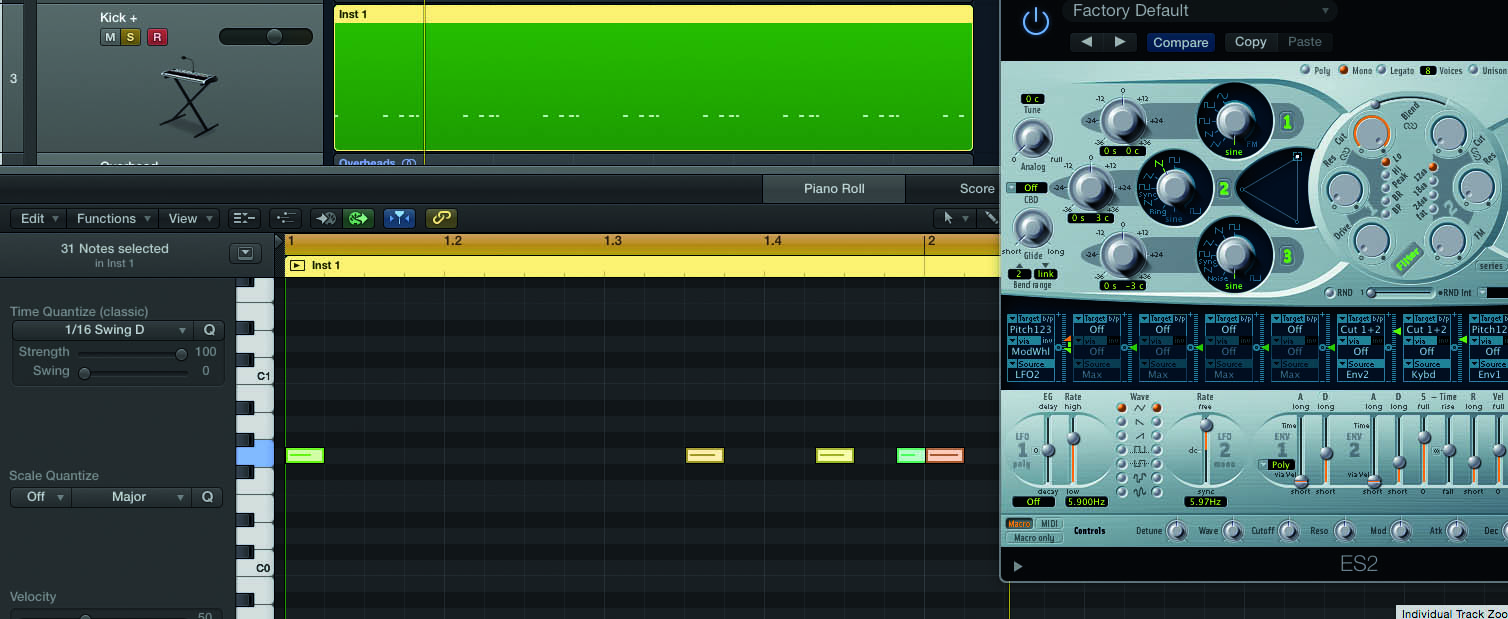
10. Switch the EXS24 to the ES2. Setup a basic patch using a Sine wave on Oscillator 1, with the mode set to Mono. To match your song’s key, adjust the pitch of the trigger note in the Piano Roll editor.
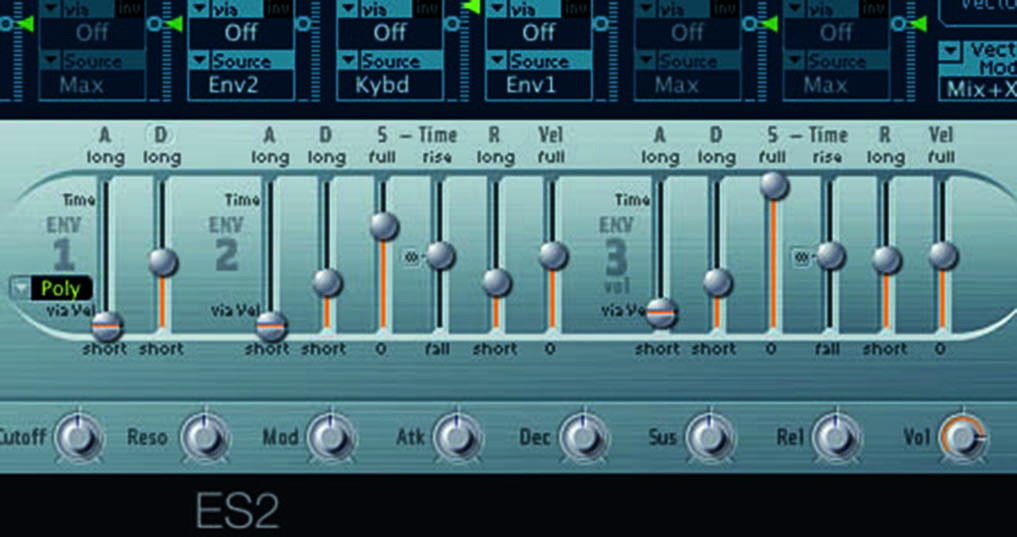
11. Adjust the Volume Envelope (3) so the subsonic enhancement follows, or extends, the kick-drum envelope. Keep the Attack fast, and adjust the Decay and Release for subsonic enhancement.
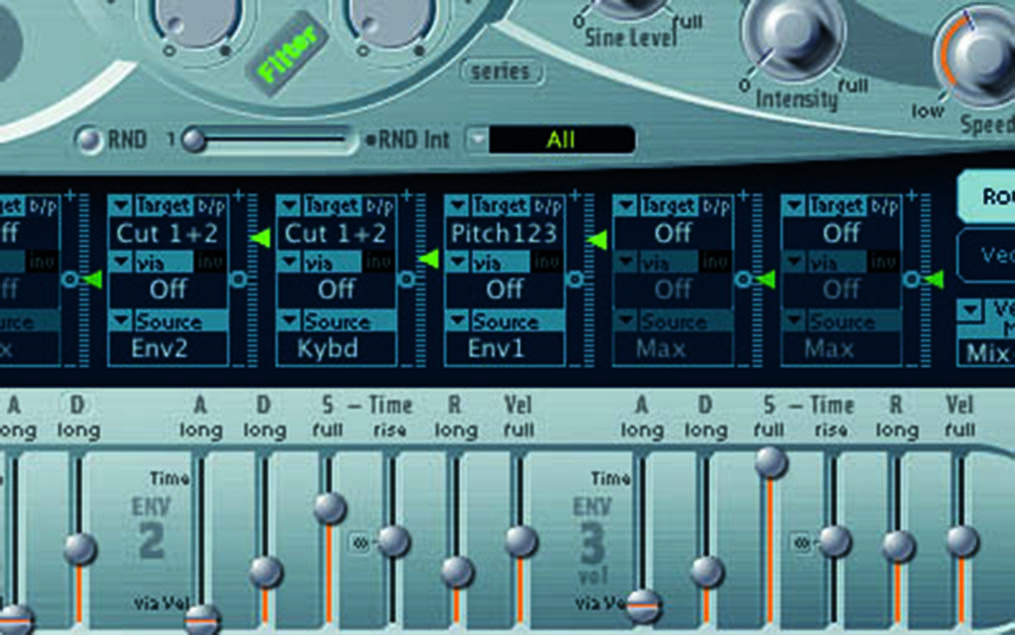
12. For a more drum-like sound, apply a basic AD envelope to the pitch of Oscillator 1. Fine-tune using the amount of modulation on the matrix router and the relative decay time on Envelope 1.
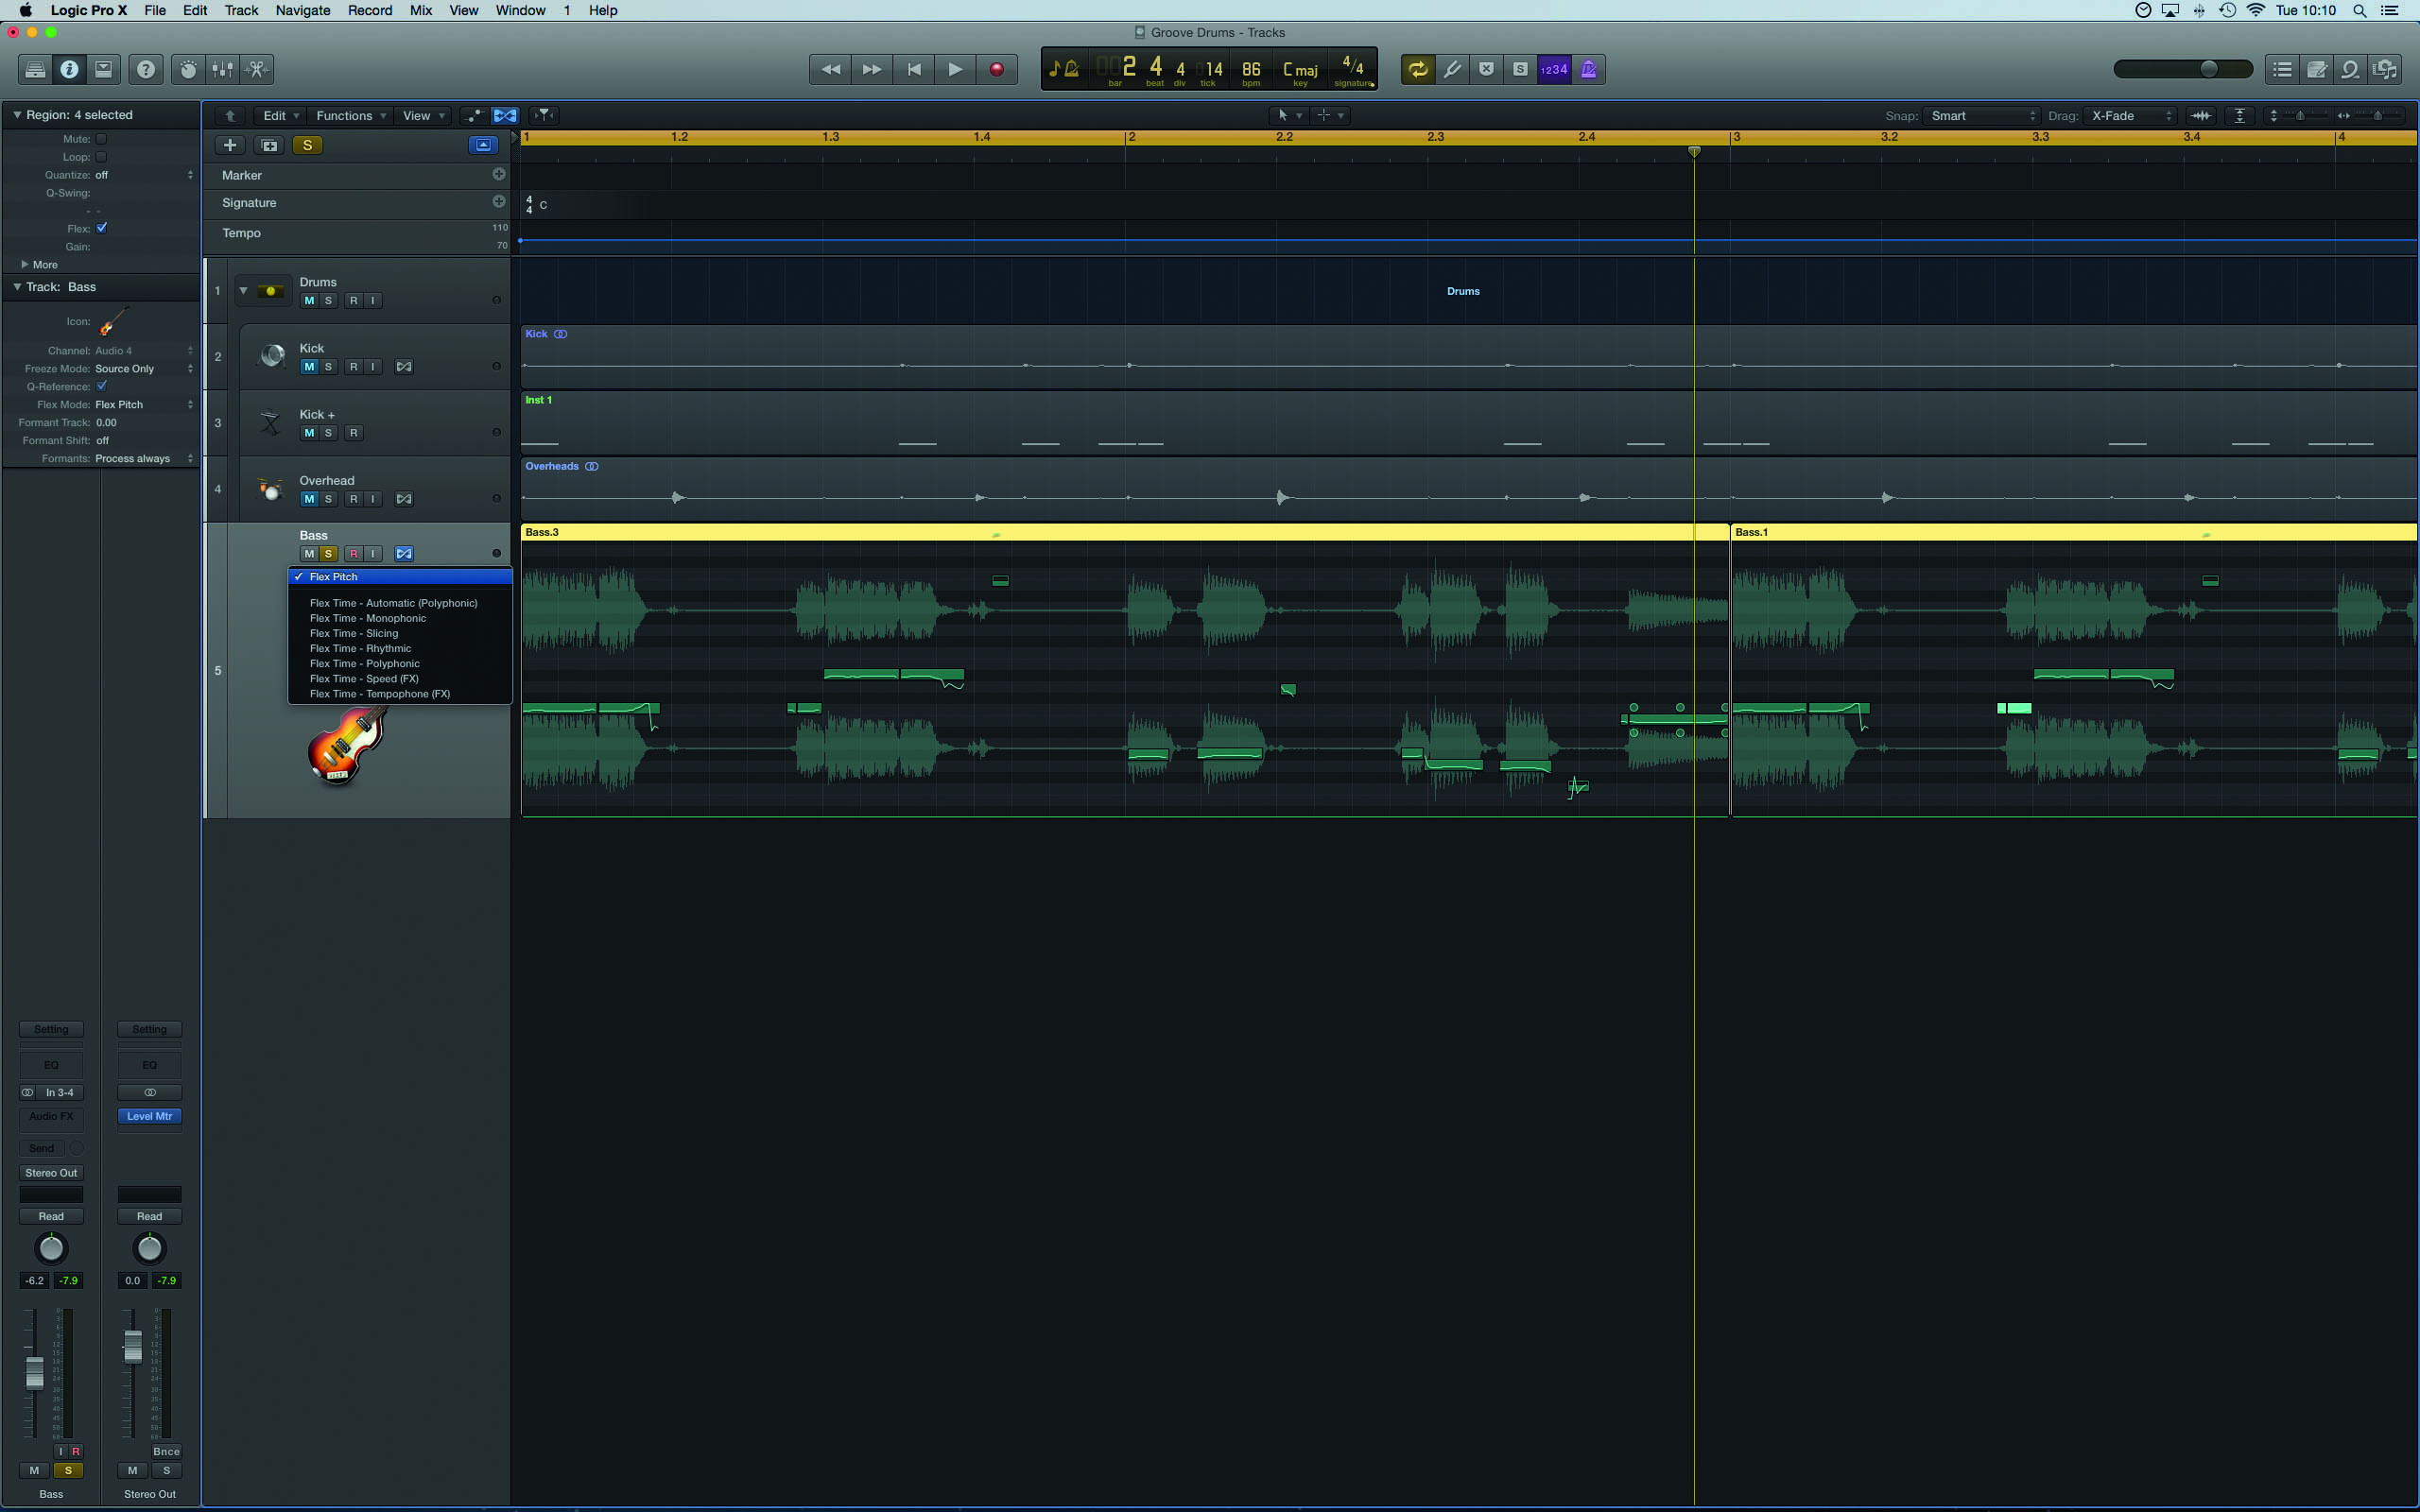
13. Now, let’s turn to the bass part and how we can double the audio track with MIDI. Enable Flex View (Edit > Show Flex Pitch/Time) and from the track list, change the current Flex mode to Flex Pitch.
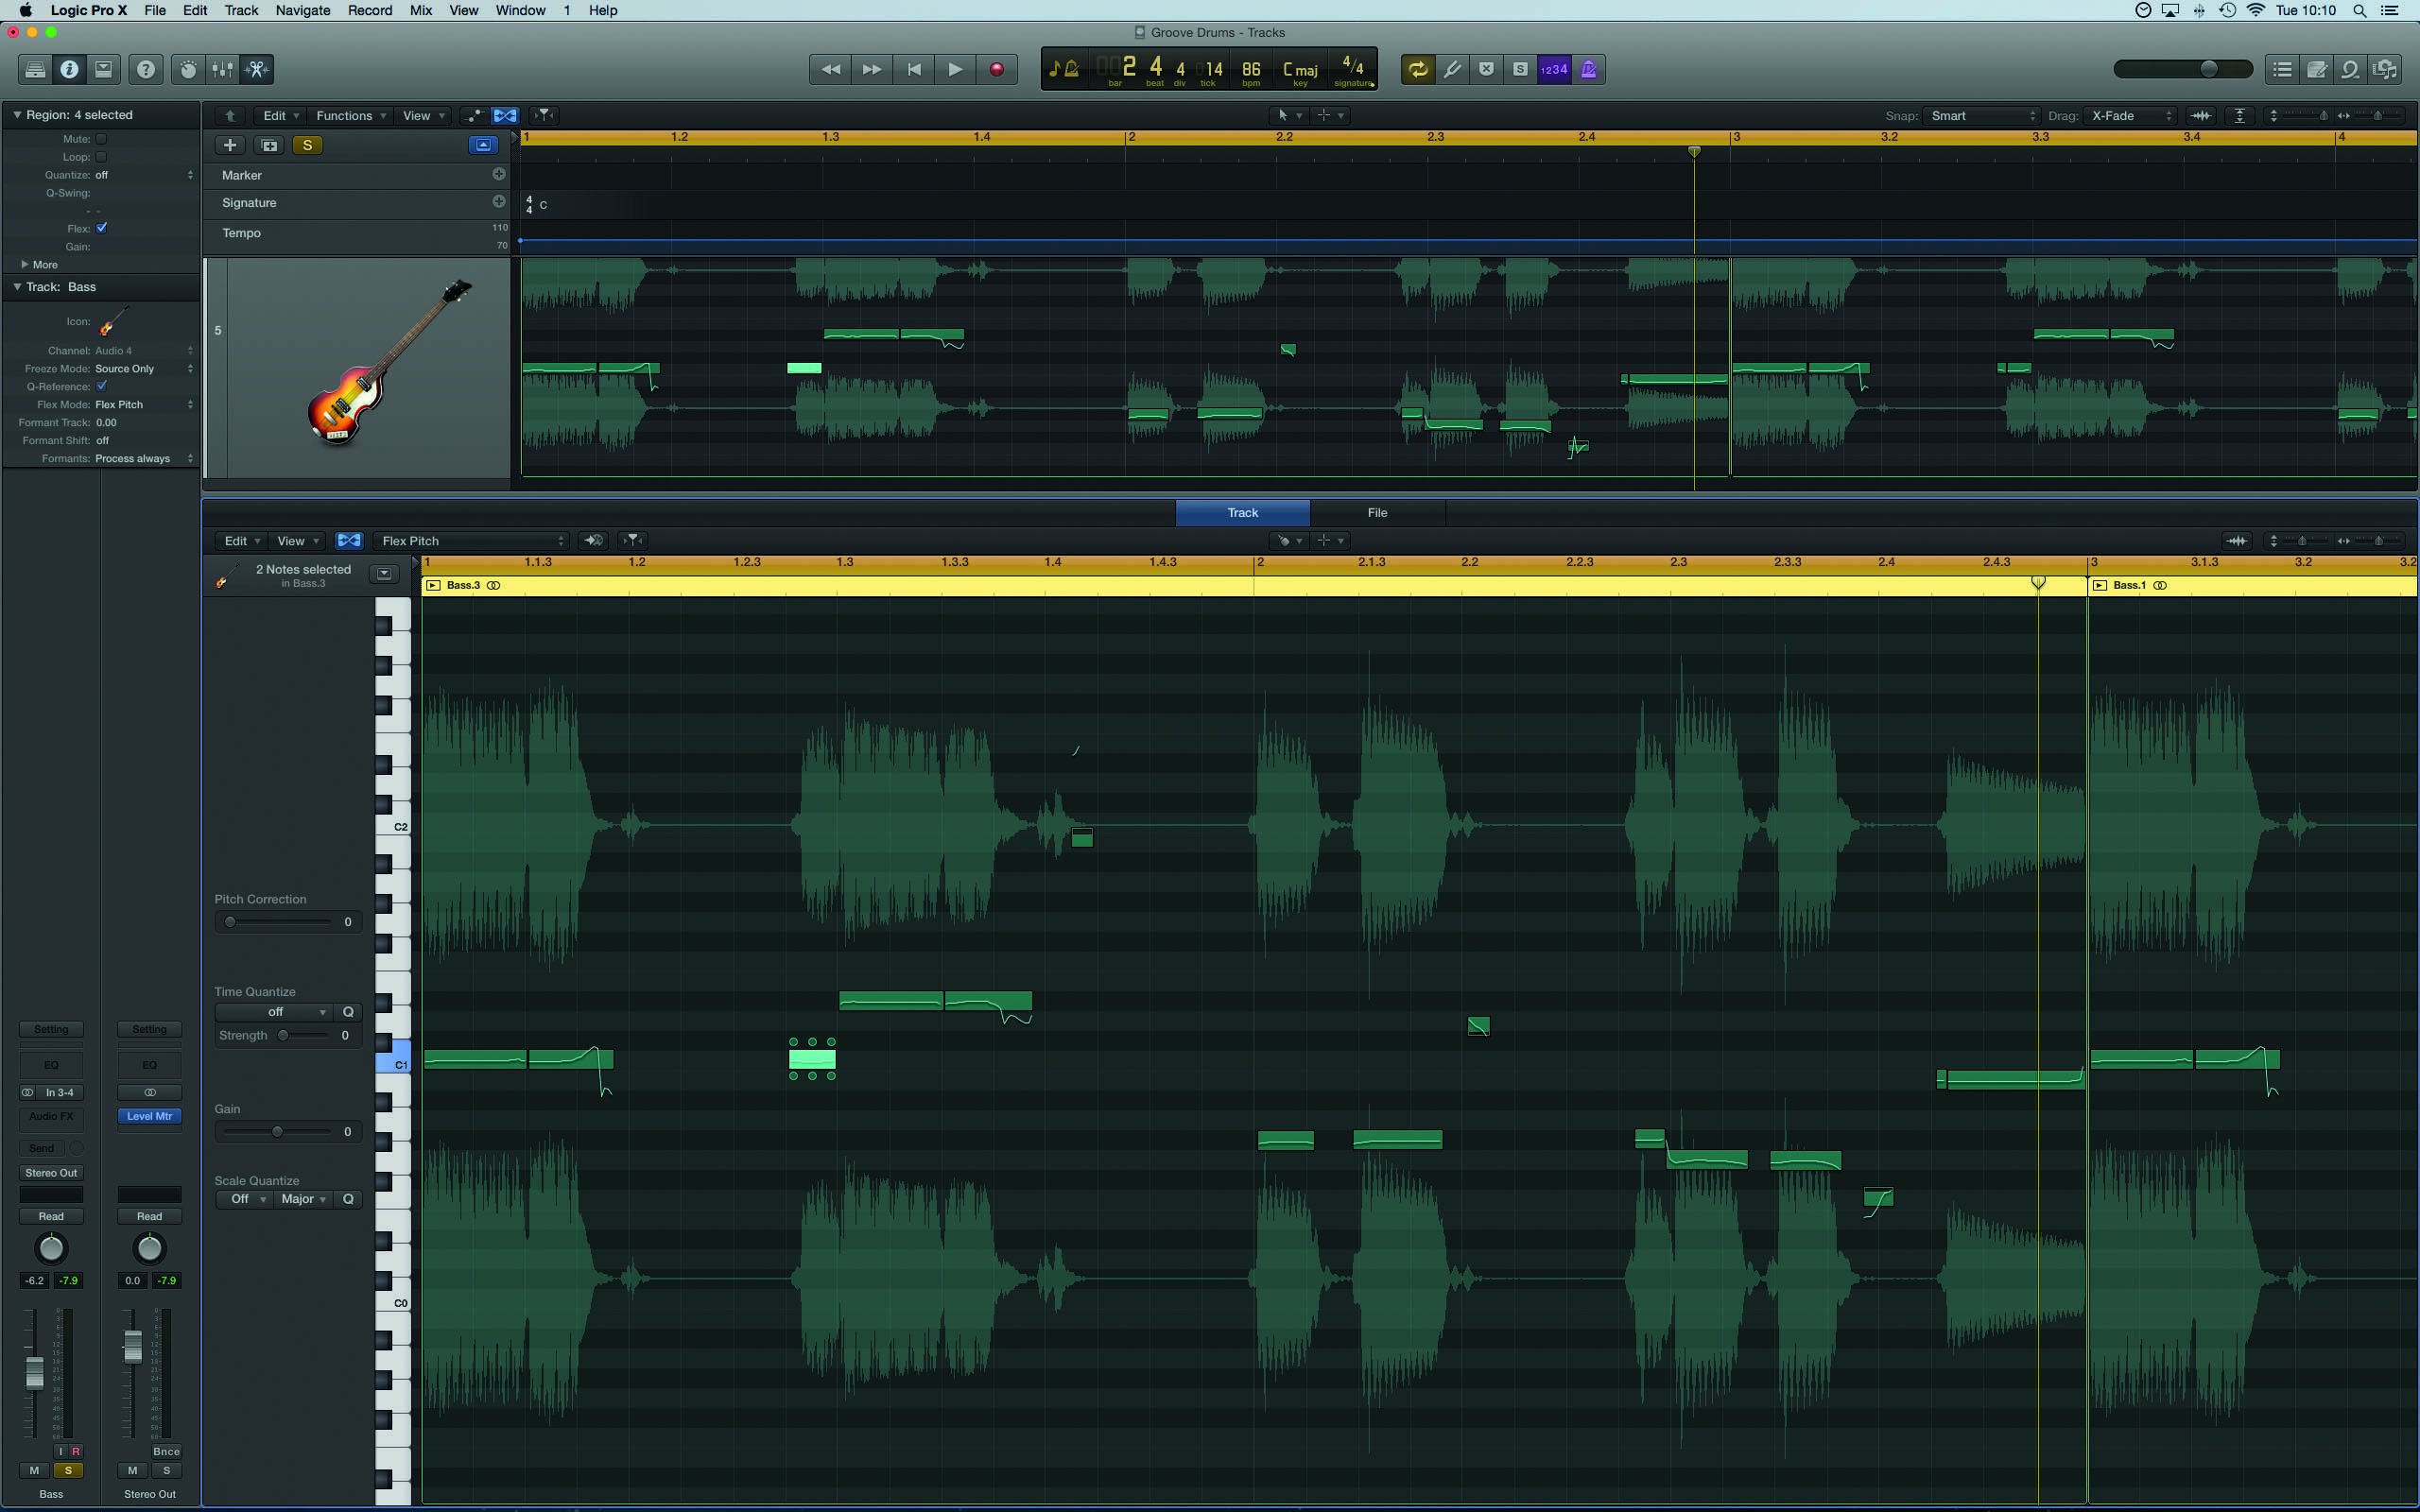
14. Double-clicking the bass region will take you into the Track Editor. The analysis generally has some mistakes – you can either remove unwanted notes, or merge double triggers.
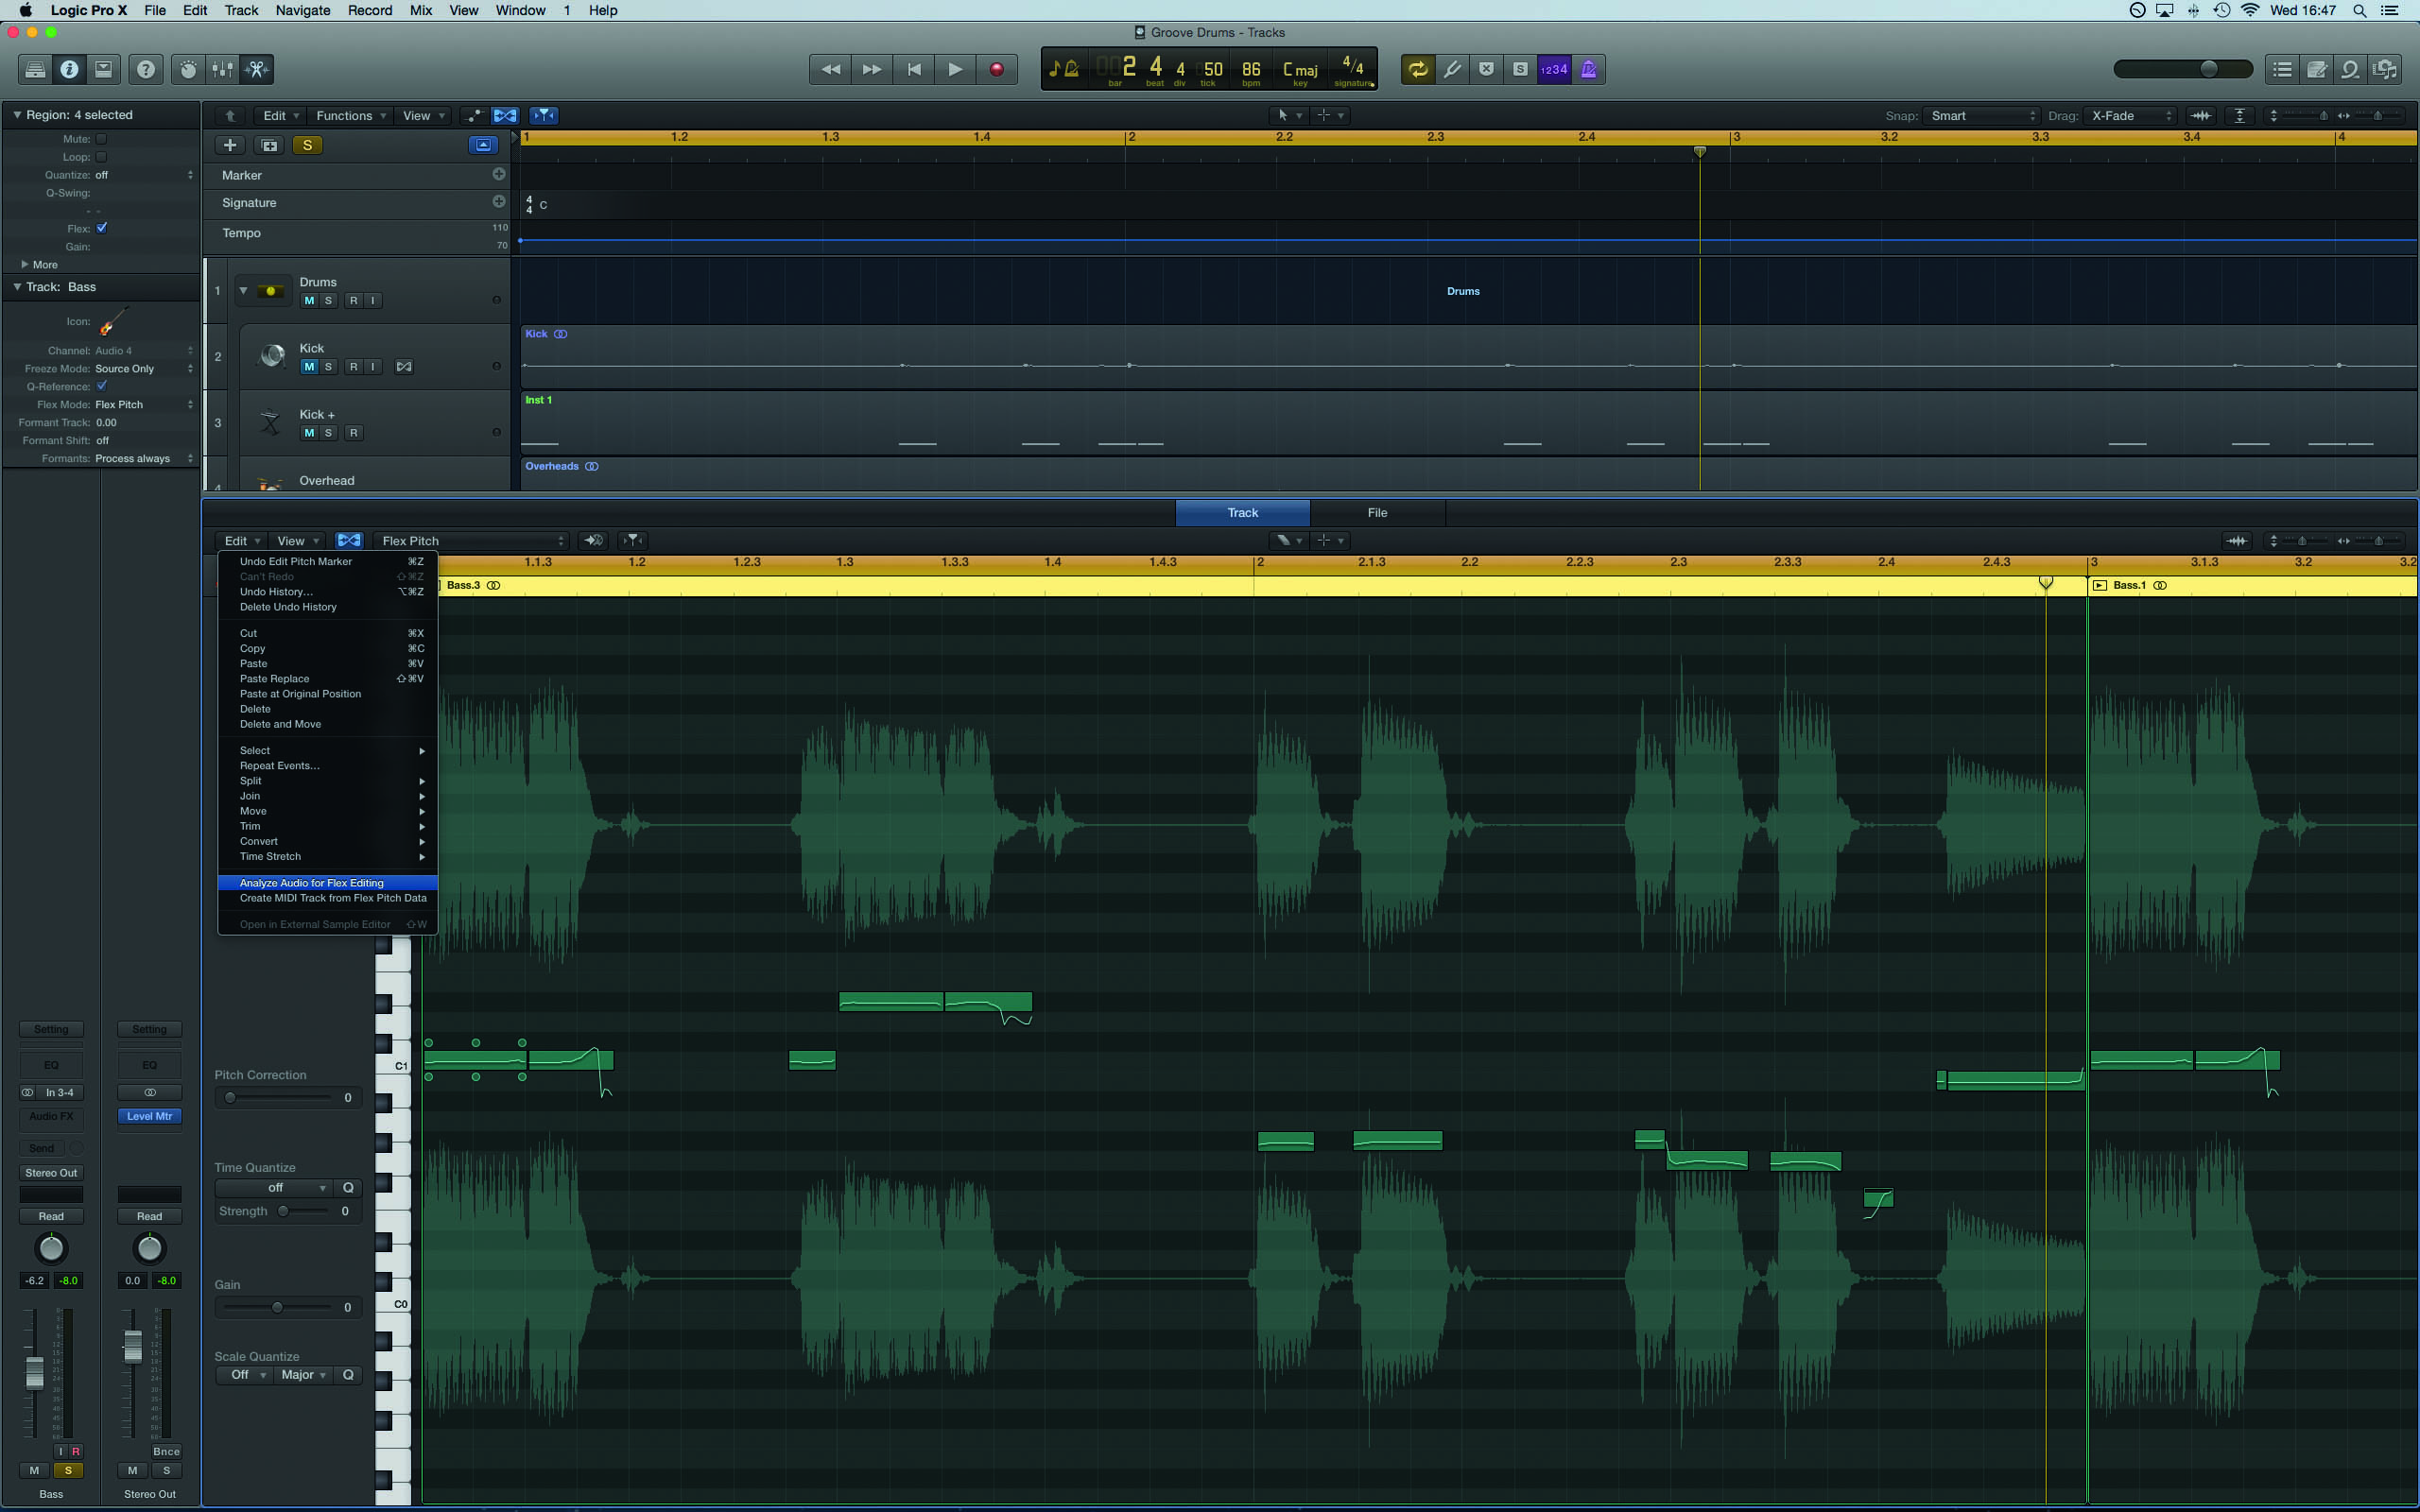
15. Using the local Edit menu, select Create MIDI Track from Flex Pitch Data. Logic will create a new track and MIDI region from the audio file’s Flex Pitch data. Use an ES2 to audition the extraction.
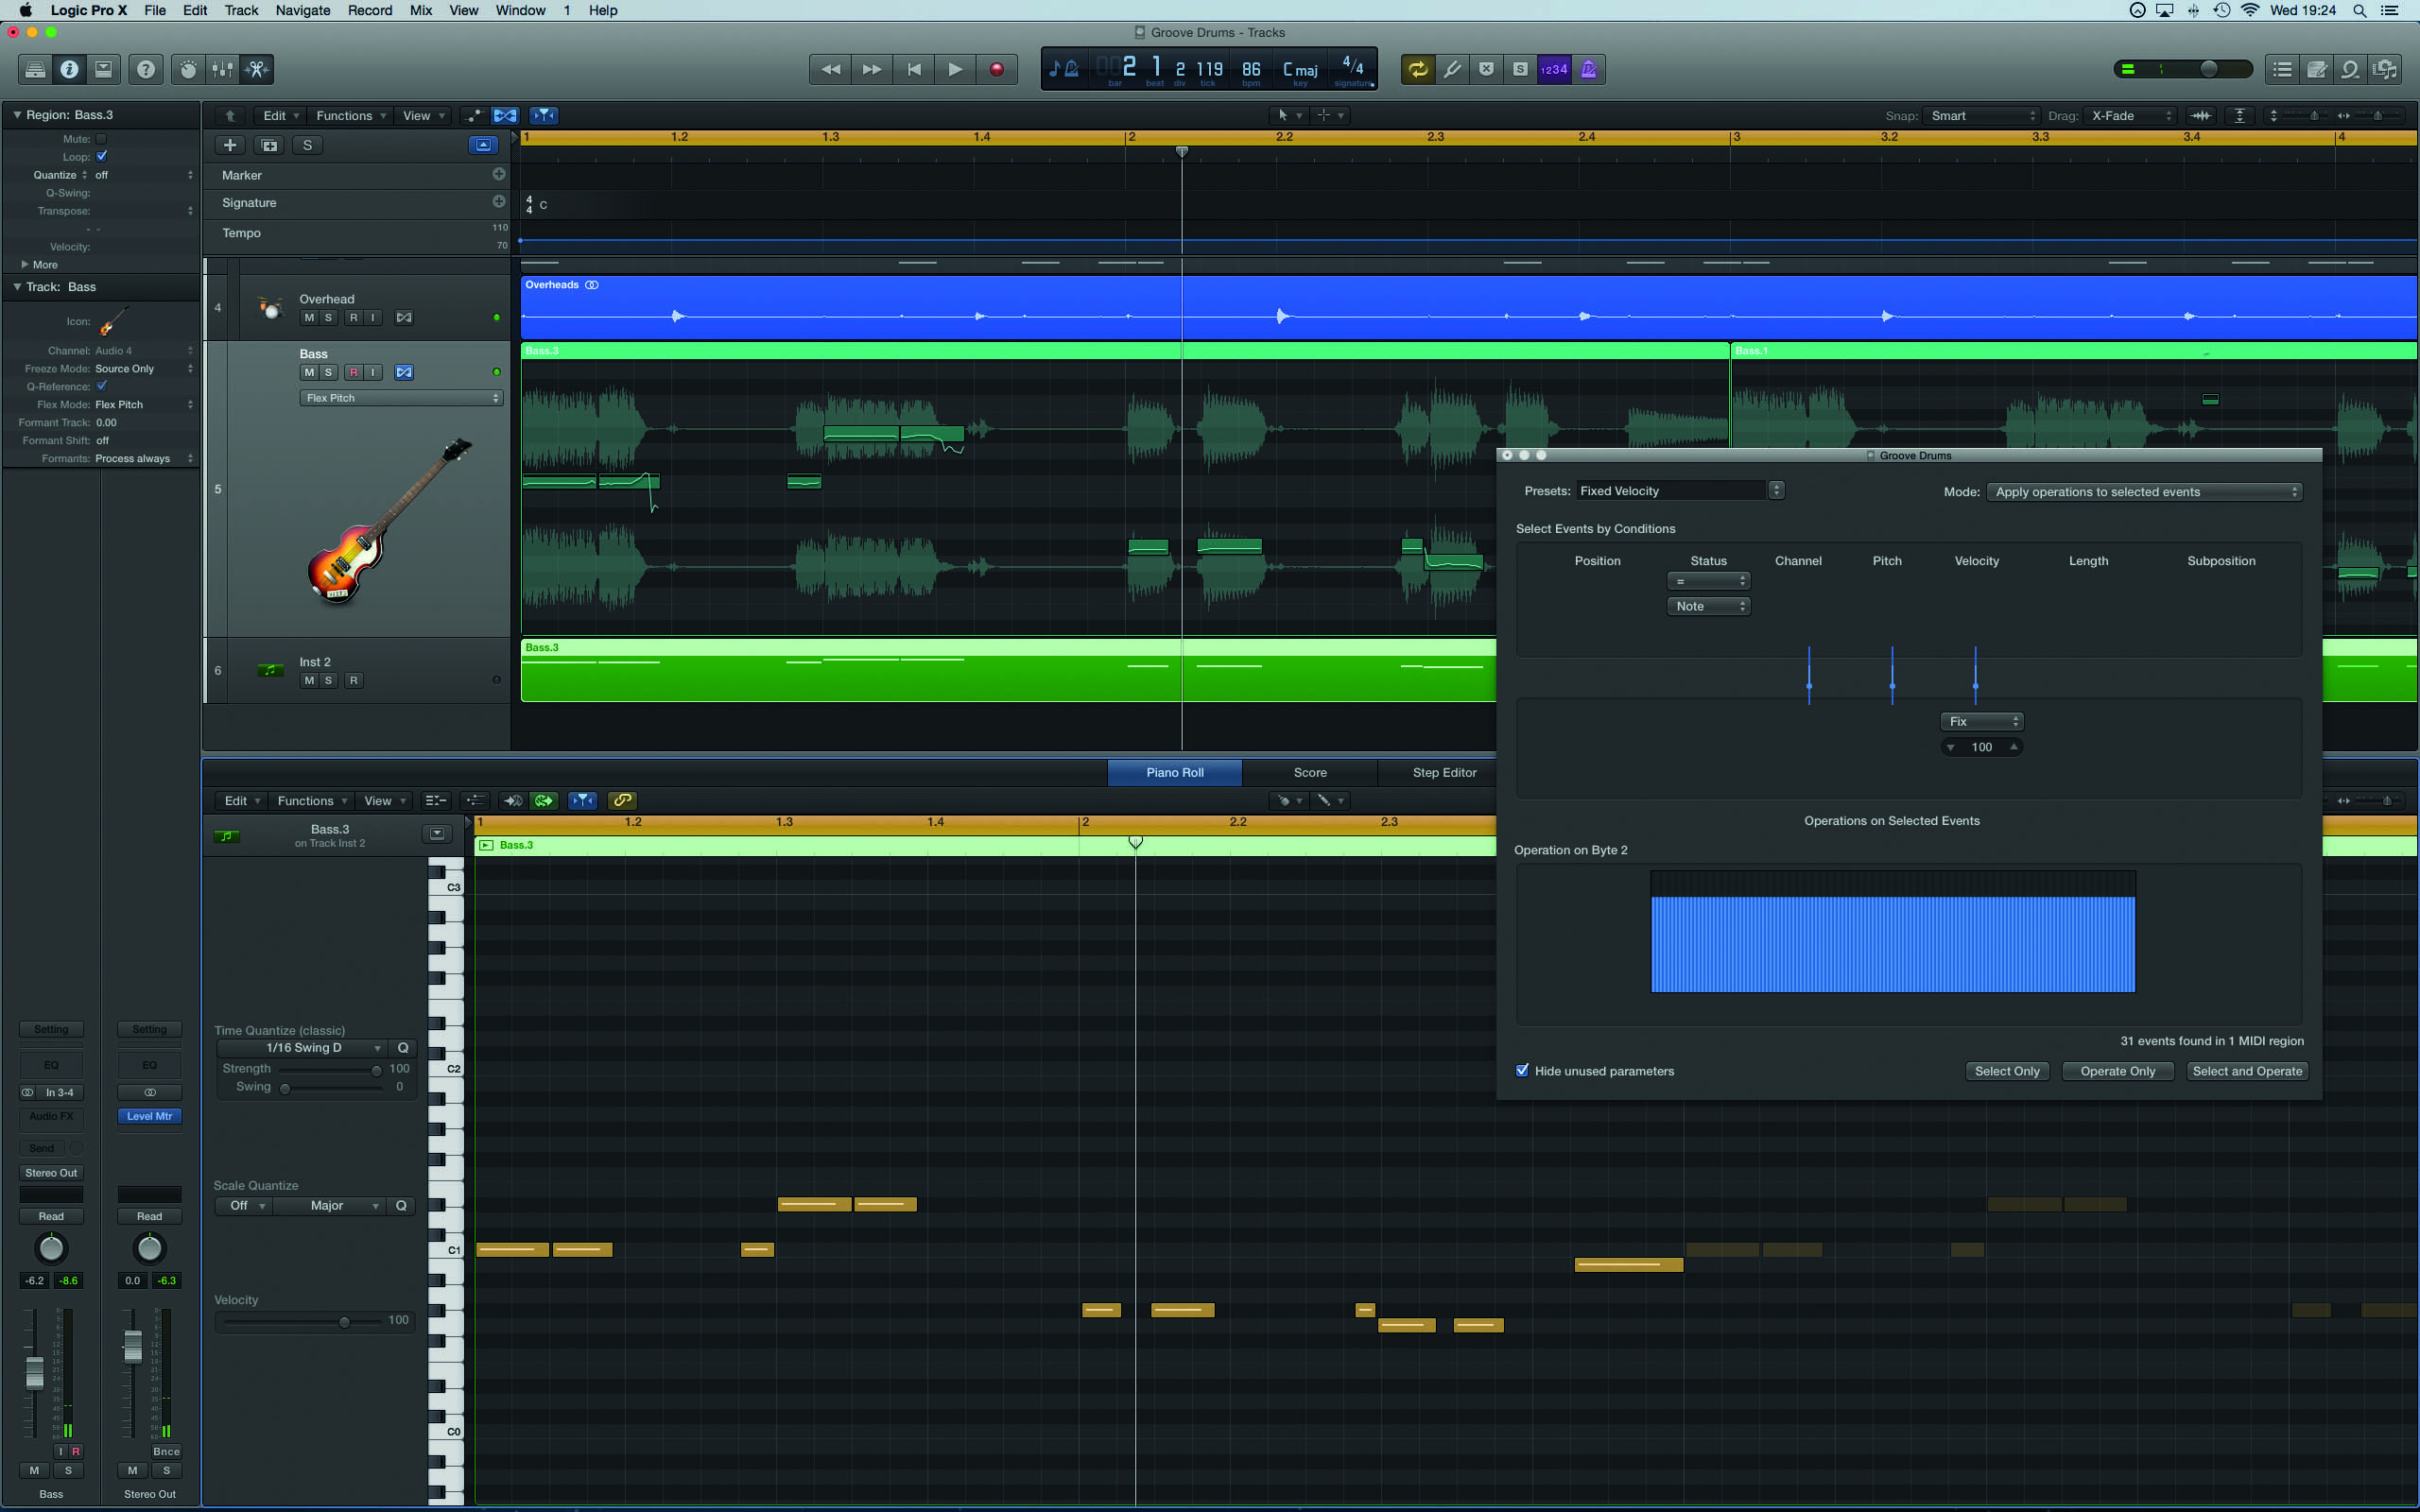
16. Although the extraction is generally good, there’s always a degree of tweaking to the MIDI data itself. This might involve changing the note duration, etc: use the MIDI Transform Editor to fix velocities.

17. As with the kick drum, a simple Sine wave patch works best for subsonic note doubling (remember to disable the subsonic double on the kick for now!). Add Drive in the Filter section for weight.
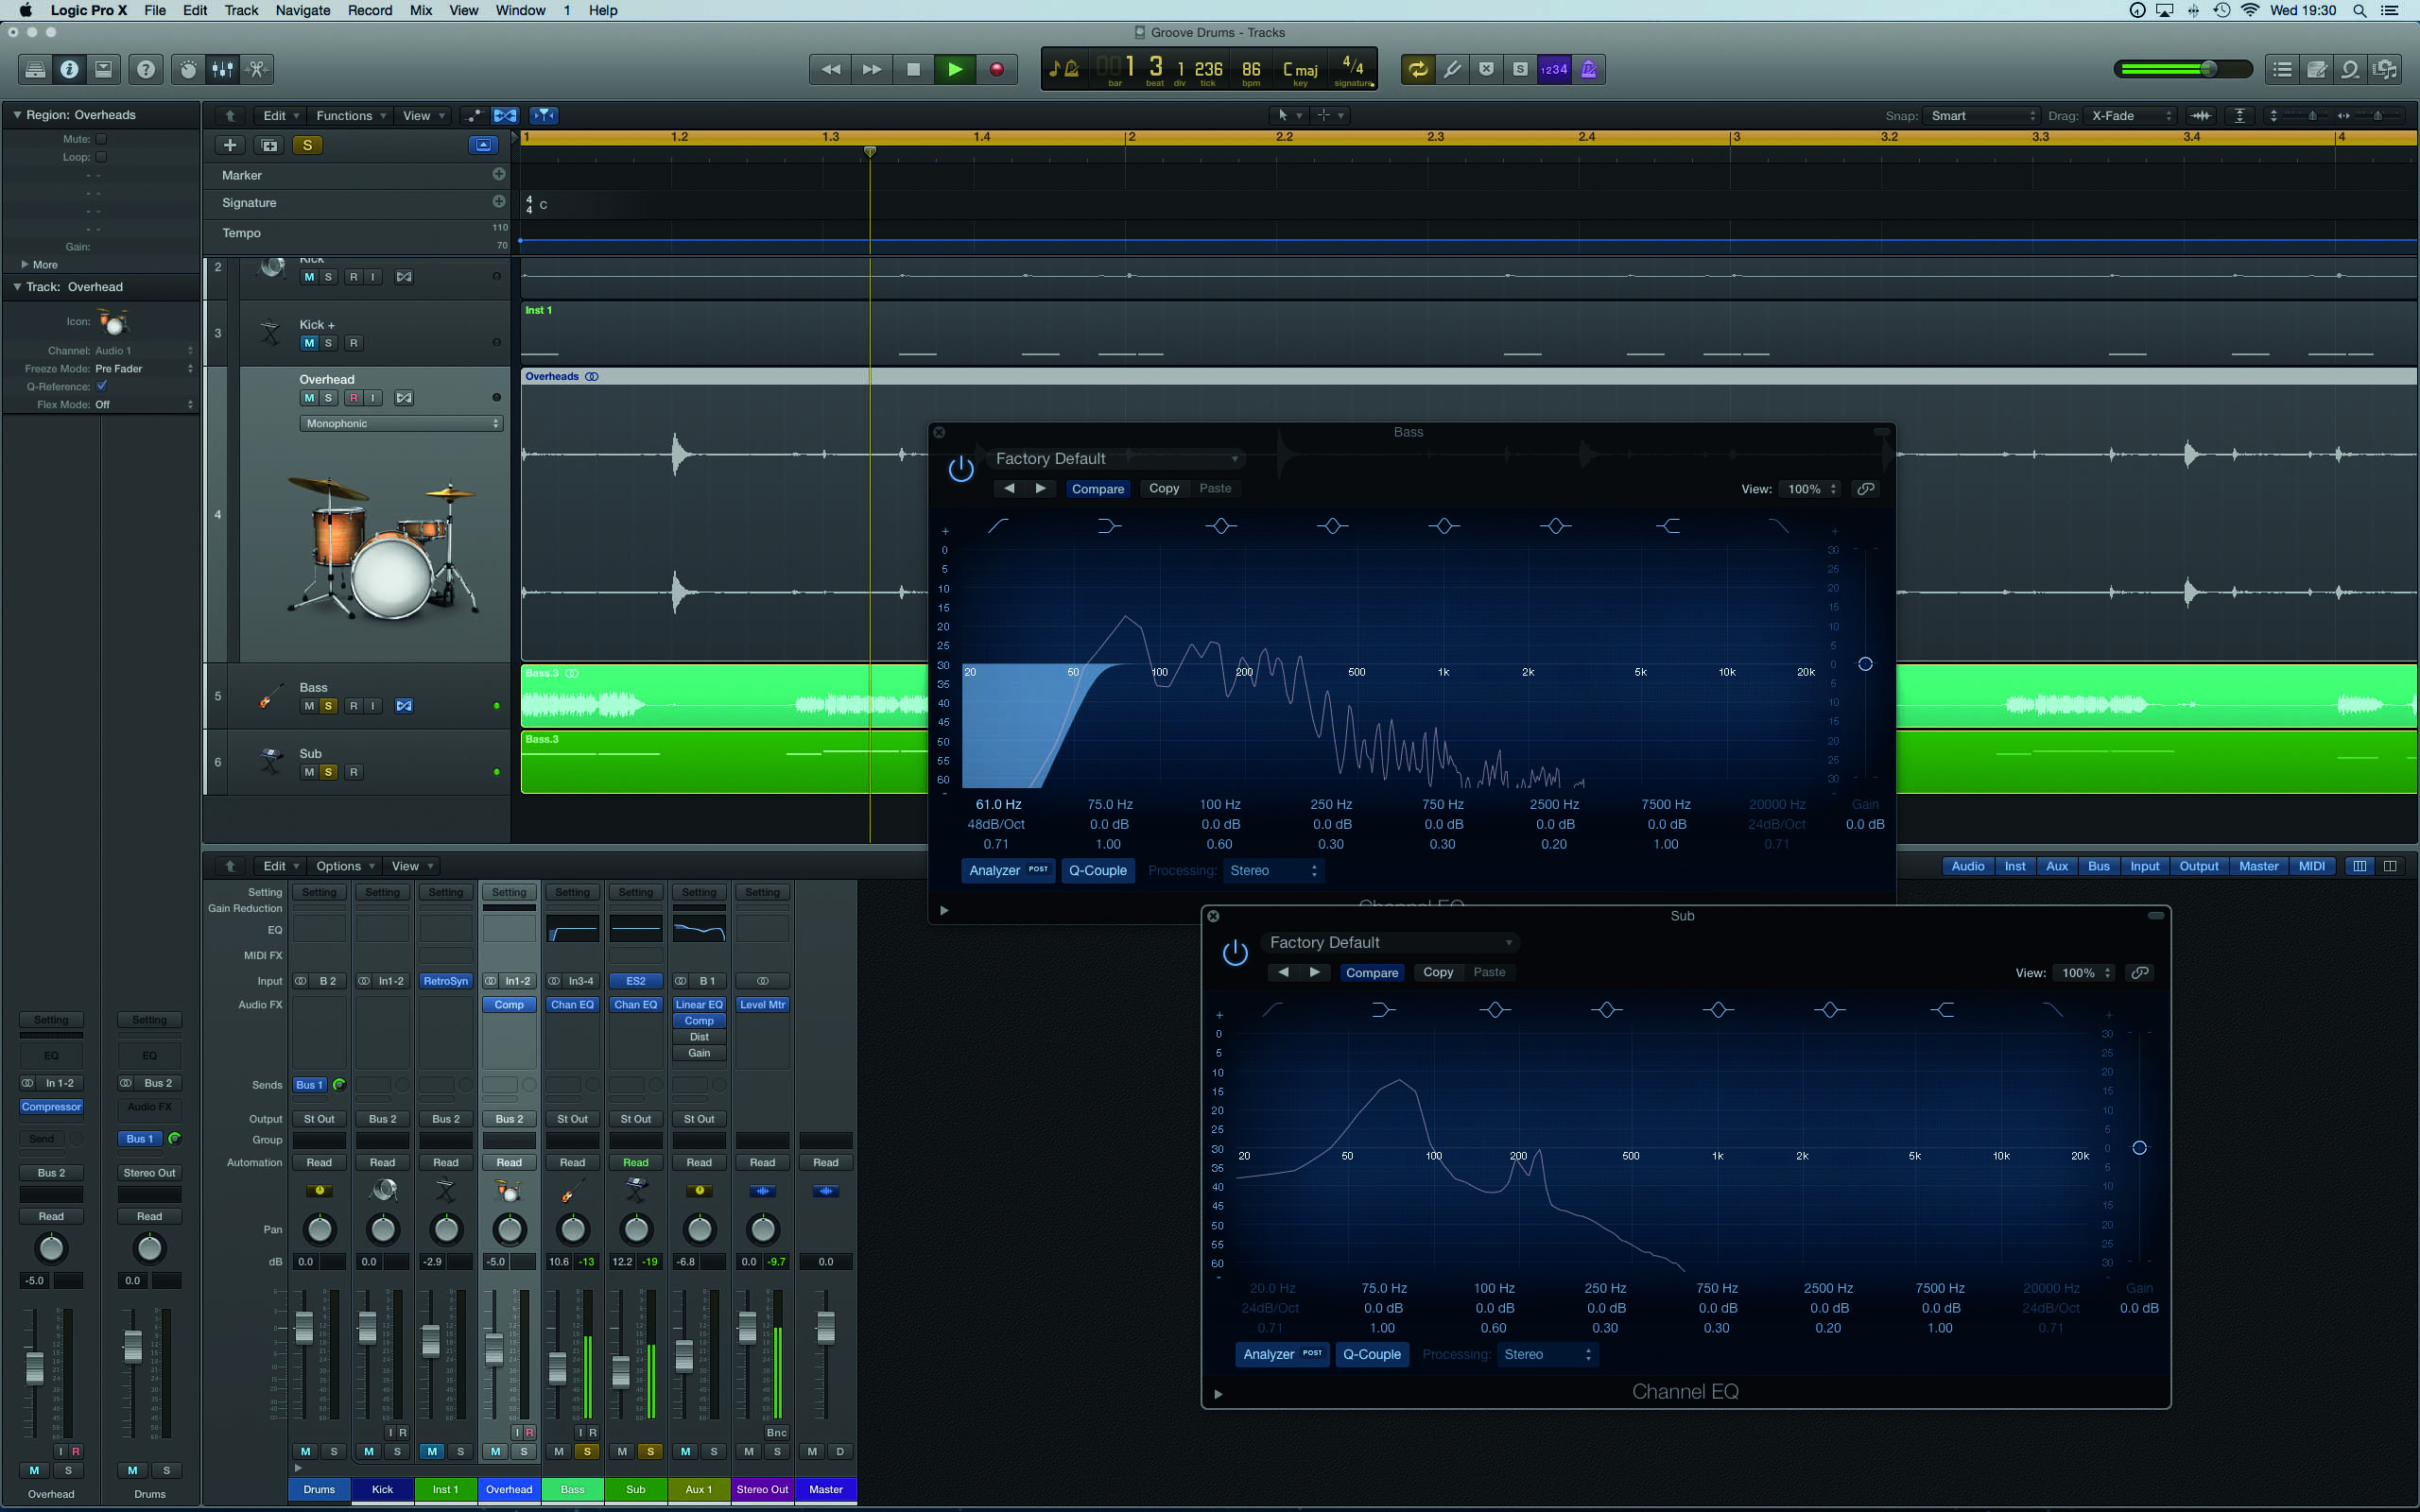
18. When doubling a bass guitar, follow the principles of ‘good bass’, leaving timbral space for each instrument. A 60Hz high-pass filter on the bass clears space for the subsonic double.
