Big Synths In Logic Pro X
There’s more to a mix-filling synth sound than simply pressing the Unison button. Mark Cousins shows you how to add real scale to your patches… Once upon a time, ‘big’ synth sounds meant equally large budgets – with only the wealthiest musicians able to stack together multiple polyphonic synths in the aim of creating mix-filling […]
There’s more to a mix-filling synth sound than simply pressing the Unison button. Mark Cousins shows you how to add real scale to your patches…

Once upon a time, ‘big’ synth sounds meant equally large budgets – with only the wealthiest musicians able to stack together multiple polyphonic synths in the aim of creating mix-filling synth lines. In the world of virtual instruments, however, this level of excess is much easier to achieve, as even basic software setups have access to a number of different poly synths.
What quickly becomes apparent, though, is that the process of creating these big synth sounds is more than just layering multiple instances of the same synth patch. Creating a truly ‘big’ synth sound requires a considered and thoughtful approach, arguably exploiting a number of different synthesis techniques.
To understand what makes a sound ‘big’, we need to break down the various ways this can be achieved. This will involve considerations like pitch, detuning, stereo positioning and effects, all knitted together to form distinct layers of sound. Although the end listener hears a singular patch, in reality, you’ll need to construct this from three or so separate layers, each making
a distinct and separate contribution.
![]()
Pushing The Envelope Try experimenting with different release settings across the three layers, looking at both the amp and the filter. You could, for example, let the high-end ring out more with a slower release, or favour the warmer part of the sound spectrum by extending the Mid and Low patches.
Perfect unison
Your quick-and-easy starting point for big synthesiser sounds is the Unison feature, found on both Retro Synth (which we’ll focus on for simplicity) and the ES2. Unison imparts instant stereo width and body to a sound by adding additional voices, each slightly detuned and positioned across the stereo image.
In the case of Retro Synth, for example, you can specify the number of additional voices (two, four or eight) as well as the relative amount of Voice Detune and Stereo Width. Balancing these three key parameters – voice count, detune and width – is what you use to define the scale of the patch.
One key point to remember with Unison is that bigger isn’t always necessarily better. Larger voice counts tend to smear the effect, whereas some of the best results come from the two- or four-voice settings, with a more aggressive amount of Voice Detune. As effective as Unison is, though, you soon realise there’s a distinct limit to the scale you can reach.
The problem is that there’s no real distinction between the layers, so that every oscillator is just a slightly different version of the main sound. The trick is making each layer unique – a similar-sounding patch, of course, but different in some way.
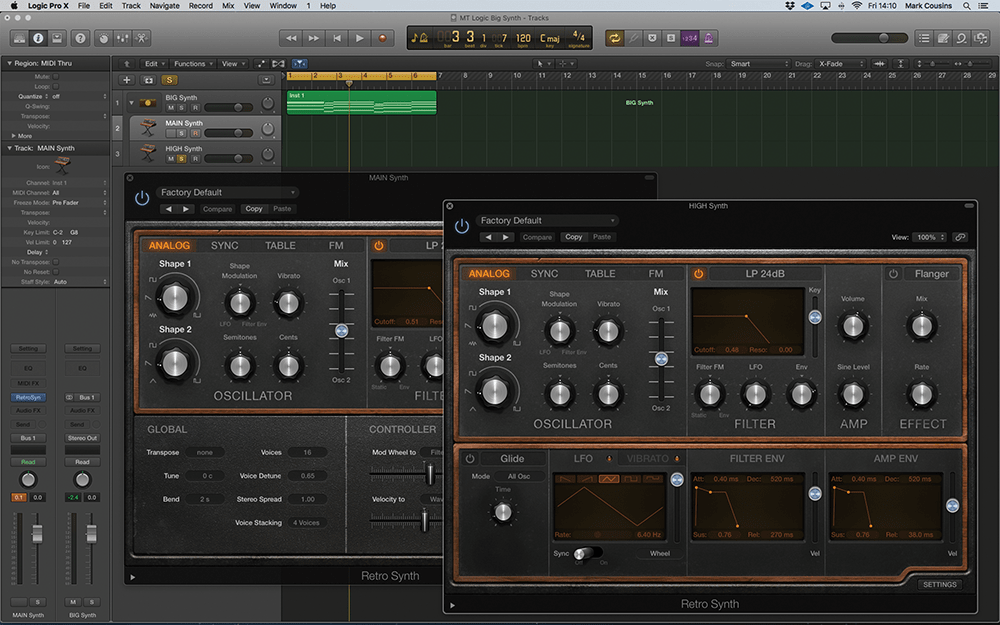
A really obvious starting point is octave transposition, which has long been used in classical music to add power and body to the sound. In addition to the main patch, therefore, I usually add two additional layers, an octave above and below the main unison synth line. These ‘high’ and ‘low’ doubles then need something to distinguish them from the main sound.
In the walkthrough, for example, the top layer is ‘pitchier’ than the main patch, with pronounced vibrato and glide. The lower patch, on the other hand, uses PWM (Pulse Width Modulation), which has a similar musical effect to the warmth of Sawtooth waves beating against one another, but with a distinctly different tone and timbre.
When it comes to effects, the combination of a cathedral-like reverb and some tempo-synced stereo delay tends to be the default choice for these types of synth sound. Again, though, try to think of some distinction between the layers – maybe keeping one part relatively dry while other layers are drowned in reverb.
Also, pay close attention to the colour of your reverb when using long settings like this. Using darker reverb settings, as well as a touch of high-pass filtering, will ensure your reverb sits in a distinct part of the sound spectrum rather than eating up a chunk of the mix.
The use of pan can help define the soundstage, arguably adding the default ‘distributed stereo’ voice assignment as part of the Unison feature.
![]()
Thickener Effects Effects like chorus, flanger and phaser have long been used as means of fattening synth sounds. With access to almost limitless polyphony, though, these effects aren’t so common, but their unique sound (especially for 80s-flavoured lines) is still worth exploiting.
Stacking shelves
One really useful feature in Logic is the Track Stack feature, which offers a number of benefits. Once the synth tracks have been packed into a summing Track Stack, you can use a single MIDI region (on the top level) to trigger to whole stack. Collapsing the stack, of course, reduces screen clutter, especially where you’ve used multiple instrument instances.
The final benefit of Track Stacks is the application of insert effects – like the ability to EQ the summed synth parts en masse, or to route them all through a filter. The distinction to make here is between processing applied to single instruments to create definition between the layers; and insert processing applied across the Track Stack, to assist in shaping the broader qualities of the musical part.
Although the walkthrough focuses on Retro Synth, the techniques here work best when you exploit a range of different soft synths, each bringing their own unique flavour to the mix. With each layer, always follow the mantra of ‘similar but different’, ensuring there’s a musical continuity between the sounds, but that each layer contributes in its own way.
Hopefully, following these simple guidelines will make a big difference to the scale of sound you can produce, and, therefore, the scale and impact of your music.
Big synths: Step-by-step
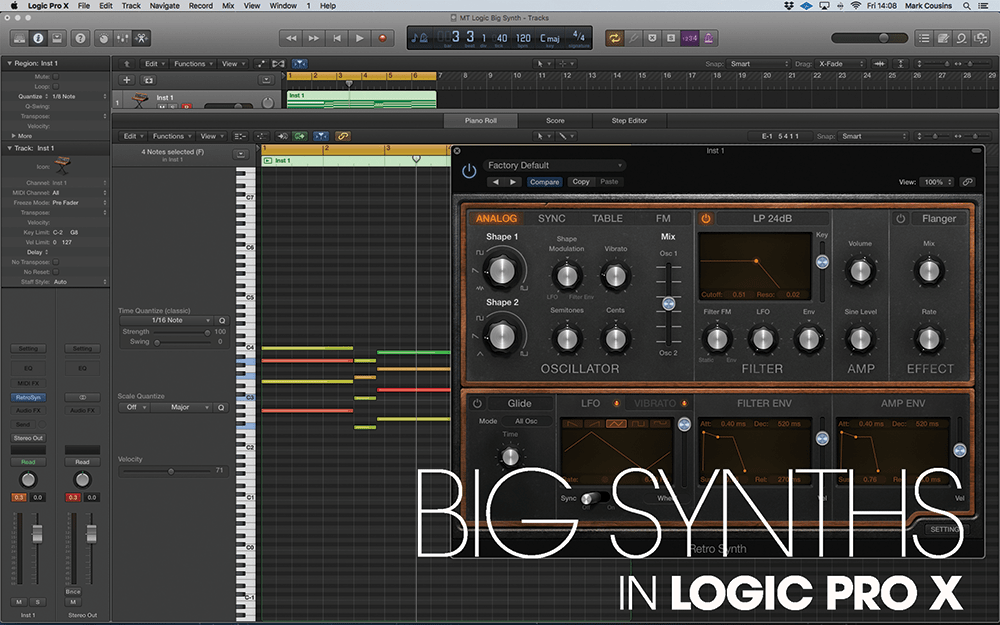
1. Open the Logic Project included on the DVD. The starting point is a basic chord sequence alongside an instance of Retro Synth set to its default setting. Open the Settings tab in the bottom right-hand corner.
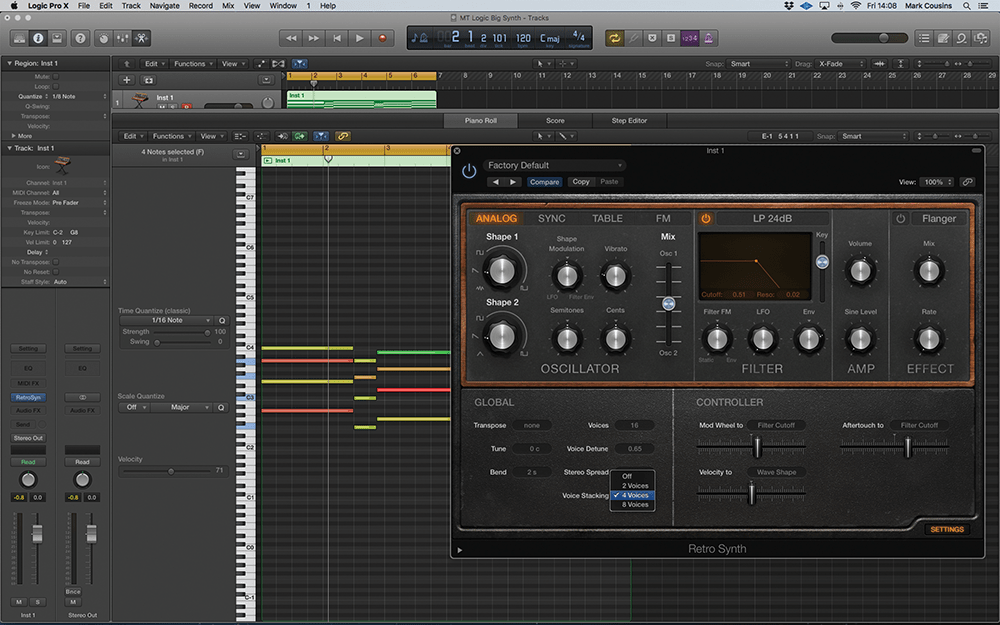
2. By default, Retro Synth includes some basic patch-doubling features found under the Global Settings. Set Voice Stacking to four voices and set the amount of Voice Detune to around 0.65 for a thick, unison sound.
3. Create a new instance of Retro Synth. Assign both instruments to their own Track Stack using the menu function Track > Create Track Stack. When prompted, create a summing stack and drag the MIDI to the uppermost tracklane.
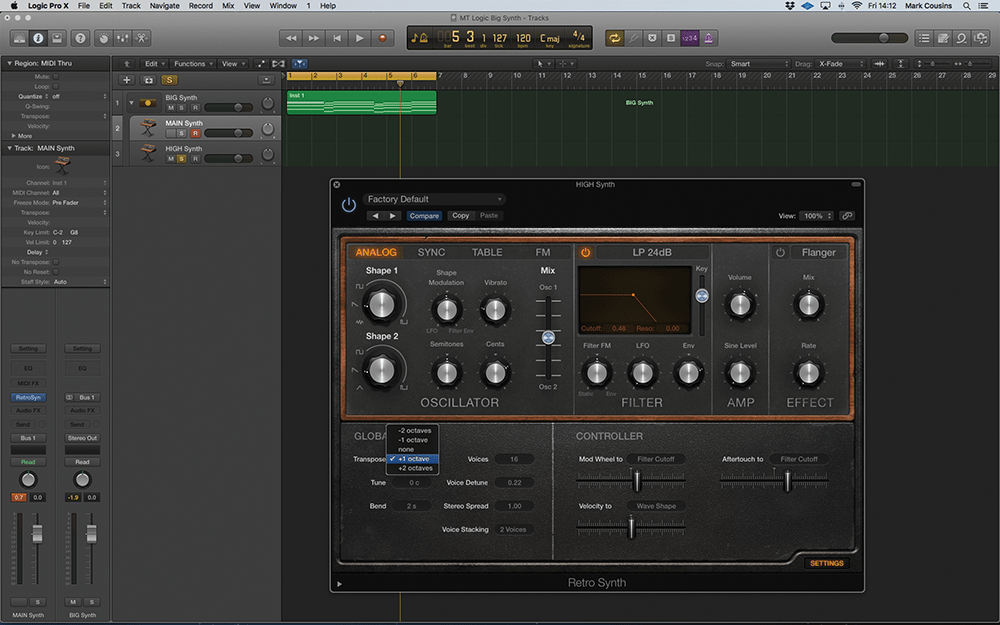
4. This second synth will work as the high-octave doubler. Use the Transpose feature under Global Setting to shift it up an octave. Raise the Cents control in the Oscillator section to add a rich detune effect.

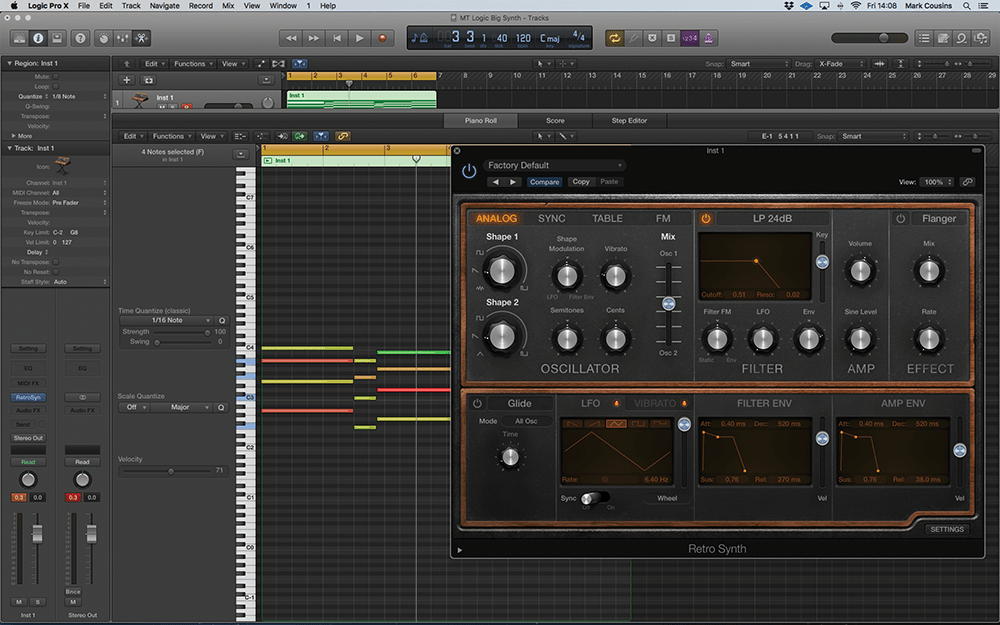
5. The top layer will have lots of pitch-based effects, including glide and vibrato. For vibrato to work, you’ll need to lower the wheel control so that the mod wheel doesn’t control the depth of the effect.
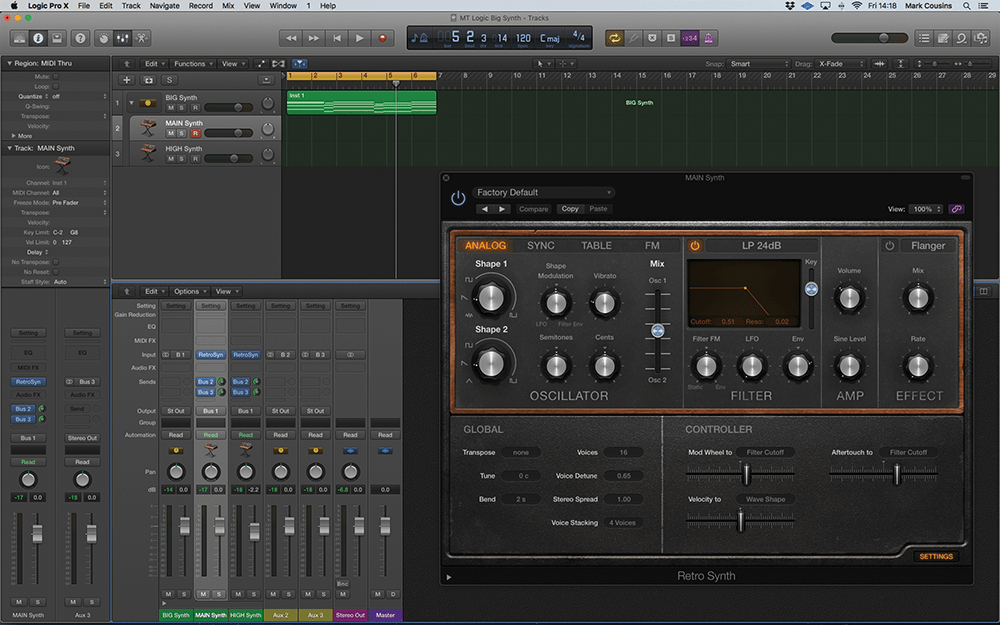
6. Now let’s look at the mix. Reduce the volume of each instance of Retro Synth (found in the Amp section) so that the average level is around -12dB, and then create bus sends for each instrument.
Click here to continue creating big synths
