Breathing Life Into Synthesis Tutorial
Synthesis technology has progressed rapidly over the last decade, and as computing power increases exponentially, we are seeing synthesisers that offer incredible sound design and performance possibilities. Yet, despite the awesome potential provided by today’s synth powerhouses, you may find that your synthesised sounds still lack a certain something. A major criticism of synthesised sounds […]
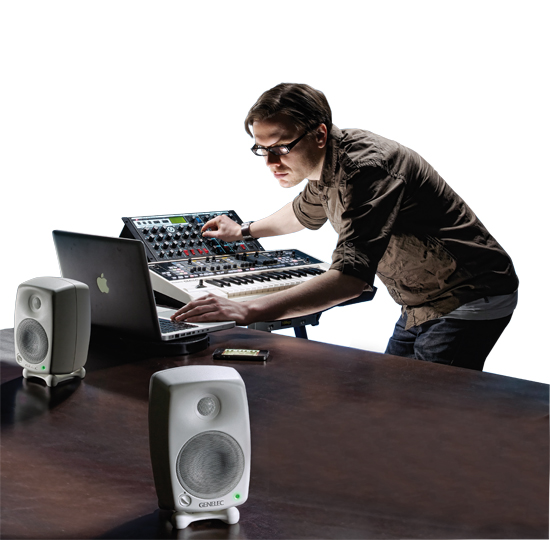

Synthesis technology has progressed rapidly over the last decade, and as computing power increases exponentially, we are seeing synthesisers that offer incredible sound design and performance possibilities. Yet, despite the awesome potential provided by today’s synth powerhouses, you may find that your synthesised sounds still lack a certain something. A major criticism of synthesised sounds – and electronic music in general – is that they often sound static or lifeless when compared to real instruments.
So, what makes real instruments sound so ‘real’ and how do we capture and re-create this energy in our synthesised sounds?
The first step is to consider what makes a real instrument sound animated and expressive. On the most rudimentary level, when a musician plays an instrument they are producing a sequence of musical notes, with variations in timing and volume. However, there is much more going on under the surface. The performer will exert different forces and pressures and utilise a range of playing styles to create many timbral variations. For example, a guitarist softly plucking a string will result in a soft, pure and somewhat muted timbre. A pluck with greater force may lead to a sharp, harsh attack and a loud ringing decay, with the higher frequencies sounding much more prominent. Alternatively, the guitarist may pull the string tighter to bend the pitch or create a vibrato effect. These playing techniques allow the guitarist to create expressive performances, utilising a range of timbres and intensities. Human hearing is highly responsive to subtle changes in timbre and a performance that varies in timbre effectively is likely to instigate a greater emotive response in the listener. Therefore, in order to animate our synthesised sounds we must create a patch that responds to the performer’s actions. To do this we will appropriate a number of modulations that react to different playing styles and techniques. In this feature we will discuss how to create these subtle variations and expressive elements, bringing your synthesised sounds to life.
Talk To Me
A truly expressive instrument responds to a player’s actions and a player responds to the sounds created by the instrument. It is this two-way dialogue that makes real instruments or a well-designed synth patch so ‘playable’. With that in mind, let’s take a look at how we interact with electronic instruments.
MIDI is an acronym for Musical Instrument Digital Interface, the standard protocol that enables computers and electronic musical instruments to communicate and interact with one another. It was developed in the early 1980s, addressing the need for a standardised specification by which electronic instruments could be connected together. Revolutionary at the time and still in everyday use even now, MIDI plays a key role in defining performance possibilities.
Performers interact with electronic instruments using a MIDI device such as a MIDI keyboard. The MIDI system does not transmit audio signals, rather, it is a system that carries event messages and control signals that describe parameters like pitch, volume, pan and vibrato. The device receiving the MIDI messages will create the actual sound based on the information received. Event messages are sent when the user plays keys on a MIDI keyboard or other MIDI device, and may include note on, note off, velocity and aftertouch. Control messages are sent when the user adjusts a pitch-bend wheel or slider/dial. So, even the most basic performance will consist of a range of different MIDI messages, and while some, such as note pitch, have a pre-determined function, almost all can be assigned or re-assigned to different parameters. And, given the extensive modulation options offered on most synths, there is lots of scope for creating those subtle, expressive variations; there really is no need to simply stick to using velocity to modulate amplitude (volume).
MIDI is a well-established interface and you will find all kinds of devices that will allow you to interact with your synthesizer in different ways. Keyboards are the most common kind of MIDI device, these will often feature a range of control options such as sliders, dials, wheels, X/Y pads, buttons, drum pads and so on. In addition, you will also find other MIDI devices such as MIDI guitar and wind instruments, and also software, such as Celemony’s Melodyne, that can convert audio to MIDI data, allowing you to use any pitched audio source as a potential control device.
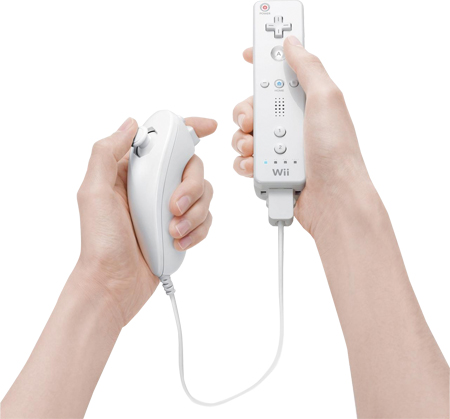
Innovative performance controllers such as the WiiMote and Nunchuck enable you to control your synthesisers using accelerometers and other sensors
Beyond MIDI
While MIDI was a ground-breaking technology at the time, it has been almost 30 years since the initial specification was proposed. There have been a number of revisions over the years, but the technology is now quite dated. While MIDI is still the standard, it does suffer many limitations and the industry is crying out for a more advanced technology to take its place. MIDI’s most significant limitation is its serial communication protocol, meaning that two notes played at the same time will actually be transmitted one after the other. Usually, this does not cause a problem, but if many messages are sent at the same time, MIDI struggles to keep up. Another vital flaw is that MIDI control values range from 0–127, which is a very small resolution for most applications. For example, a common MIDI assignment is to control cut-off frequency via a slider or dial. Cut-off frequency could potentially have a range of 1–20,000Hz, so splitting this large range of values into 128 steps doesn’t offer much in terms of precision.
While the need for an improved system is very apparent, the industry has seemed reluctant to move to alternative technologies in the past, though we are starting to see considerable progress in this area. The most widely supported of these alternatives is the Open Sound Control protocol (OSC). OSC has been around for some time now, though it is only recently that we are seeing greater support from commercial developers. The advantages of OSC over MIDI are numerous; primarily, OSC offers greater speed and more effective transmission of data, vastly improved resolution and network connectivity. In recent years, some of the most exciting implementations of OSC have been those found on modern touchscreen devices such as smartphones and tablet computers. As an example, Touch OSC is a popular implementation that allows you to remotely control, and receive feedback from, OSC-enabled software (sequencers, synthesizers and so on) using your smartphone or tablet computer. Faders, rotary
controls, XY pads and more can all be used to remotely control your software; you can also use the phone’s accelerometer for control.
While not all music/audio applications support OSC directly, the protocol is becoming increasingly popular. What’s more, there are methods of translating OSC messages into MIDI messages, so all is not lost if your sequencer/synthesizer does not yet support the protocol.
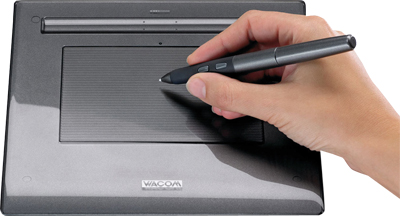
Wacom’s graphics tablets have proved popular control choices in the past
Basic Modulation
Once you have determined how you will physically control your synthesisers, it’s time to consider how you will assign each of the controls to synthesis parameters. Typically, synthesiser patches will already have a few controls automatically assigned, such as velocity modulating the volume, or the pitch-bend wheel modulating the pitch. These modulations are very much standard in synthesis parlance and, in most cases, should form the basis of any expressive instrument you create. However, do consider altering these modulations as you will often find that adjusting their ranges results in a much more ‘playable’ instrument. For example, presets often have velocity modulating volume across the full range, but ask yourself: is this really necessary? Do you need to play the sound at absolute maximum and absolute minimum volume? In most forms of music, this is almost never the case, so change it! Bear in mind that all MIDI control messages range from 0–127, so assigning velocity to a smaller volume range will result in greater precision.
In a basic performance set-up, additional MIDI controllers such as dials, sliders and the mod wheel will be assigned to various parameters on the synthesizer, offering the performer direct, hands-on control. However, unless you need to have direct control over a specific parameter, this method of controller assignment is not usually the most effective for a number of reasons. Primarily, it is too indirect – turning a dial is completely unrelated to playing the keys, so this set-up does little to emulate the responsive nature of a real instrument. Also consider the physical limitations when you are performing a part in a recording or live situation. When you’re playing a MIDI keyboard, you will need at least one hand to play the keys (ideally, both hands should be on the keyboard). Even if you record the part first, you still have only two hands to control dials, which offers little scope for adding these subtle variations. So, you will need to find ways to make the various parameters respond to your actions automatically.
Velocity And Key Scaling
Consider what happens when you play a key on the MIDI keyboard: a MIDI event message is created that sends pitch (or note number) and velocity information to the receiving instrument. Therefore, the most direct assignments that we can create are those that have pitch or velocity as a modulation source, as these require that we do nothing other than play the MIDI keyboard. Of course, in nearly all cases pitch will still modulate the oscillator frequency and velocity will still modulate the amplitude (volume); however, these MIDI messages can also modulate other parameters if desired.
When you’re designing an expressive instrument, velocity should be the modulation source for most of the modulations you set up. Velocity is immediate and results in a direct and appropriate response from the synthesizer (if the modulation parameters are correctly assigned, of course). Given the situation and what you are trying to achieve, velocity may be assigned to practically any synthesis parameter. Typically, filter cut-off, resonance, oscillator pitch, envelope amount, distortion amount and FM frequency would all be viable options.
Another interesting use is to assign velocity to the attack stage of the amplitude envelope in such a way that soft notes result in a sound that gradually fades in, while hard notes begin immediately. These sorts of assignments will often lead to a greater variety of sounds when different playing styles are employed, so be sure to experiment.
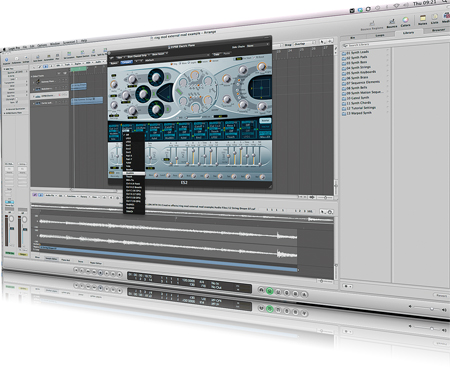
Logic’s ES2 enables you to control the dynamics of a performance over time
Need For Speed
Along with velocity, the pitch or note number should hold equal importance when considering modulation options. When using pitch to modulate synthesis parameters, this is often called key scaling (or key tracking) and you may find that some parameters already have key scaling modulations set up. The most common is to modulate the filter cut-off frequency, gradually increasing the filter cut-off as the pitch increases. This ensures that high notes do not sound quieter than low notes when a low-pass filter is applied.
You could also use key scaling to change the volume and tone of each of the oscillators or alter elements of the amplitude envelope. For example, you could modulate the release stage of the amplitude envelope, resulting in long, gradually decaying notes in the bass register and short stab sounds in the higher registers (ideal for arpeggio playing). This approach would mimic various guitar playing techniques. Again, these ideas lead to a more ‘playable’ instrument with much greater potential for variation.
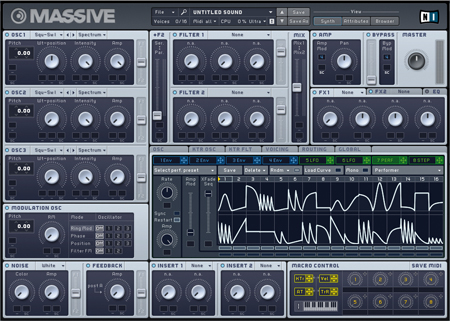
Native Instruments’ Massive allows you to draw step sequences of envelopes which can then be used to modulate synthesis parameters of unique patterns
Dubspot has quite a few handy Massive tutorials that can help you get the best out of synthesis:
Performance Techniques
Vibrato and tremolo are two performance techniques that instrumentalists employ heavily to enhance performances with greater expression. Vibrato is a subtle modulation of musical pitch; tremolo is a subtle modulation of amplitude (volume). In the digital realm we can emulate these techniques by using a low-frequency oscillator (LFO) as a source of modulation. So, in the case of vibrato we will assign the LFO as the modulation source and pitch as the modulation target. LFOs enable you to modulate synthesiser parameters via a repeating pattern. Usually, the pattern that the LFO follows will be the classic oscillator waveshapes, which are sine, triangle, square/pulse and sawtooth. Sine waves are the most appropriate for vibrato and tremolo effects but the others are worth exploring too.