Building Custom Synth Sounds Tutorial
The world of synths isn’t all lullabies and happy melody lines – there’s also a feast of disturbing and aggressive sounds to be explored. Liam O’Mullane shares his techniques for building a synth sound with attitude.


In this feature we’ll be exploring these types of synth sounds more closely, showing you how to craft lead lines, bass parts and pads that ooze attitude. We’ll work with the most basic of tools to start with – tools that everyone should have in their studio – before bringing more advanced techniques and tools into the equation. We will also show you how to control the instrument in a dynamic and lively way, so that once a listener’s attention is caught, you can maintain that interest through educated programming.
A Subtractive Core
One flavour of synth that can usually be found in any software- or hardware-based studio is the trusty subtractive synth. Even in its most basic form it will have an oscillator that can generate some or any of the following waveforms: sine, triangle, sawtooth and square. Following that is a filter, which is used to carve out a tone from the chosen waveform. In reality, though, most modern subtractive synths have features that go far beyond these basics. Take Reason’s Subtractor, for instance. This has two oscillators, enabling you to blend different waveforms or take your first step into creating something ugly-sounding, using two of the same waveform.
The square and sawtooth waveforms are the most immediately gratifying in this respect as they are rich in frequency content, and therefore ideal for creating big sounds. A sawtooth wave is full of harmonic frequencies and sounds quite musical, whereas the square wave contains only every other odd harmonic, giving it a dense yet hollow sound.
To get started, select two of the same waveform on your synth (either a square or sawtooth). Now use the cents or fine-tuning controls for each oscillator and tune one up by 15 cents and the other down by 15 cents. By pulling them apart you will still hear the central pitch in the middle, but you will also perceive a thickening effect (like that of any instrument when double-tracked). We’ve started here at a distance of 30 cents apart as it’s at 25 cents and above that the tuning starts to sound ugly. Lower values will create a thickening effect, but the tone will still be quite pleasant. We also set the amount of cents going up and down to the same values, so the central perceived pitch stays in-tune with your other instruments.
If available, another option is to use a single oscillator’s Detune control. This mimics the detuning of two oscillators (saving on the use of other oscillators). This also detunes them equally up and down for you. Another area worth exploring is detuning the oscillators but then separating them by an octave. This will still yield an aggressive sound at higher detune values, but you’ll be able to discern the pitch of the instrument a lot more easily. In particular, moving an oscillator up one octave also gives you a denser top end to play with when it comes to filter and amplitude modulation stages.
Before we get too carried away with the sound-shaping tools, a critical decision you’ll need to make is whether this synth is going to carry the main melodic components of your track or be used alongside other sounds as part of a sonic collage. If it’s unsettling discordant sounds you’re after, we’d happily set a distance of 80 cents or so between oscillators. But these extremes are best used on occasion – for contrast within a collection of other sounds, or within a melodic part. You’d struggle to get any melodies across to the listener when playing a part with an instrument this unmusical.
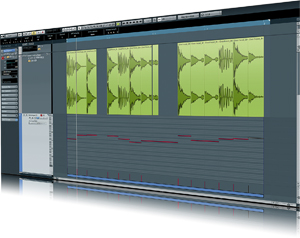
You can try and use other instruments in your songs to aid the parts being played by your synths. Try using the kick or percussion parts in your rhythm track to sync with the rhythm of your synth. If this is a little too much, use higher-sounding elements like high-hats instead
Making Waves
Many modern synthesizers cater for a lot more than the four simple waveforms discussed so far. Synths such as Massive, Albino and Z3TA – to name but three – provide many more custom waveforms. These instantly offer more variety than the classic set of waveform sounds and can save a lot of time and the need to use multiple oscillators when creating sinister tones. As every additional waveform on offer from one synth to the next is unique, it’s worth taking the time to explore the options available.
While you do this, explore all octaves across the keyboard, as each waveform has an optimum pitch (some are best-suited to midrange/higher tones; others sound best when played low, near the point where they sound like they’re on the brink of breaking up). A common trick for making a raspy-sounding instrument is to have one or two oscillators playing high enough to carry the notes of the melody, while a sharp-sounding oscillator waveform (a sawtooth, for example) plays incredibly low – so low, in fact, that it no longer sounds like a musical tone; it instead sounds like rhythmic ticks as you hear the individual cycles of the waveform repeating. Try turning off the synth’s keyboard tracking option so this super-low oscillator plays at the same pitch regardless of the notes being played, keeping it ticking at a constant tempo as you play the melody.
Movements using the pitch bend wheel to one or two octaves can also exploit this super-low oscillator effect. Try holding the pitch wheel fully down at the start of a note and immediately releasing it – you should hear a rasping start to the note, which then jumps to the normal playback pitch, at which the listener can hear the notes being played.

Vowel-like filters on a synth sound are easier to discern when used in the higher registers. Applied to lower-pitched elements they can generate a lot of movement in a sound
Frequency Modulation And Wavetables
Frequency modulation and wavetable synthesis are features common to most modern synths and are excellent ways of getting screeching lead synth sounds and noisy FX. FM enables you to control the pitch of one oscillator via the frequency of another, effectively making the frequency of one oscillator act as a vibrato or LFO to the pitch of another. However, as the frequency of an oscillator is in the audible range and at a much faster rate than vibrato or an LFO, new frequencies are heard from the oscillator being frequency-modulated. This is key for getting dense and coarse-sounding lead sounds.
You can investigate the scope of the sounds available through FM by first slowly raising your FM dial. You’ll hear a mild distortion at the smallest amount of FM, which rapidly becomes more metallic and noise-like as you increase it.
Experiment with both the amount of FM being applied as well as the tuning of the modulating oscillator. Flicking between octaves on the oscillator providing your frequency modulation will give you musical changes in terms of how high or low the new tones being created are. The same goes for changes in semitones at harmonic intervals. To understand what this sounds like, try using just a sine waveform for your modulation oscillator and applying FM to a sawtooth wave. This will already sound quite severe when you move the FM dial, but now set the sine wave oscillator up two octaves or more and you’ll start to hear some really interesting-sounding higher harmonics.
Now put the sine wave up seven semitones so that when you apply FM you’re moving from the starting note to a perfect fifth harmonic. This is similar to the feedback-type of tones guitarists get when they let their guitars ring out next to a cranked-up amp. If you explore even higher octaves for your sine wave oscillator you’ll get less audible additional notes; instead you’ll get a glassy top end that will give the sound a crisp edge. A quick way to inject movement into a sound (before we look at parameter modulation options) is to detune the modulating oscillator by a few cents again. This will create a beating tone that will increase in speed the more you detune.
If a more distorted tone is what you’re after, switch the modulating oscillator to a noise waveform rather than a pitch-based one. Just the slightest amount of noise-based FM will give you a bumble bee-like tone that can work really well on higher lead parts, giving them a unique character while helping them to sit within your mix.
Wavetable synthesis is another option for harmonically interesting tones. The process enables you to play a small portion of a longer and varied oscillator waveform file. So, rather than the oscillator being a single squaretooth waveform, it can be a sound moving through various tones, and the wavetable position enables you to slide through various points in the waveform. This makes drastic changes to a sound easy to achieve with one oscillator and the right choice of wavetable (again, these are unique to each synth, so take the time to explore them to find out which might give you the types of sounds you’re after).
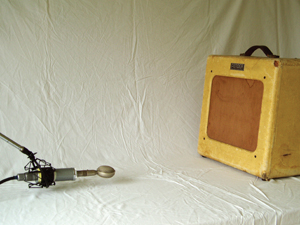
You don’t have to stay within the box when making unique synth tones. Try re-amping it through a hi-fi or guitar amp and recording it. This will add the unique characteristics of the amp, speaker, room and mic to use alone or mix in with the original sound.
Modulation Options
Apart from the beating movements of detuned oscillators, we haven’t dug into the crux of creating a synth sound with movement that can be interacted with as you write your synth parts. Every synth has some form of modulation options, and you’ll find that you use them quite a lot when making something that sounds angry yet not flat and tiresome to the listener. Some synths are restricted to a few hard-wired modulation options such as filter, amp and pitch envelopes, with perhaps an LFO or two to assign to amp, filter and pitch controls. Other synths, however, enable you to assign envelopes or LFOs to pretty much any parameter available.
When it comes to moulding an aggressive sound, we suggest you start by looking to modulate the parameters that have the most drastic impact on your sound. In preparation for this stage, it’s worth having an LFO to hand when working with your oscillators, FM settings and so on from the start so that you can quickly assign the LFO to any cool-sounding parameter. This enables you to hear how they will sound when modulating while you focus on tweaking the parameters that work best for this current sound. You can always look at fine-tuning the existing LFO or using a different modulator (such as an envelope) when you’ve already established the general sound you want.
When it comes to modulation design, first let’s look at the most obvious contenders: pitch, amplitude, filter cut-off and FM. As part of the oscillator stage, applying some pitch modulation can really help to make things a little meaner-sounding. Applying an incredibly fast, unsync’ed LFO to your oscillator pitch by a few semitones or more can create a distortion effect that sounds a little cleaner in pitch than the noise-based FM distortion we discussed earlier. Alternatively, you can imitate the unstable tuning of old analogue synths by setting an incredibly slow LFO to let your synth’s pitch slowly wander up and down by 15 cents or so. This is good for adding a slightly uncomfortable feeling throughout a song.
Another effective use of pitch modulation is for creating a pitch-bend over time from an envelope (this is how you can create those obnoxious-sounding higher lead parts). Create a triangle shape with the attack and decay controls of an envelope (be sure to set the sustain level fully down). Set the envelope strength to pull up the pitch by three or four semitones for a very angry sound, or a smaller pitch range to maintain the clarity of each note while still adding a little attitude. The famous Hoover synth sound uses the extremes of an octave or two in pitch modulation.
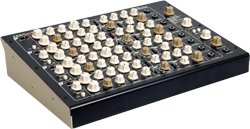
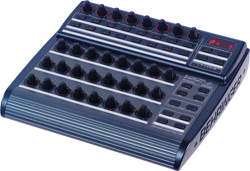
Using a hardware device or correctly mapped MIDI controller will give you hands-on access to the sounds and parameters available in your synth, enabling you to quickly assess presets and tweak them to taste, or build your own sounds from scratch.
Fast Amp’ing
Amplitude modulation sounds great at rhythmic speeds on a brittle sound created by your oscillator, as it breaks up the period of time that the listener is exposed to this potentially fatiguing sound. For a lot of softening use a sine wave LFO on your synth’s master volume control, then set the LFO to sync to tempo and automate the rate for rigid rhythmic effects, or leave sync off and find the best rate settings to automate between through trial and error. The non-mechanical timing with sync turned off can really add some funk to an otherwise vicious-sounding synth.
Conversely, you can add a harder edge to a soft sound by using a less smooth LFO (a square or sawtooth wave), giving more drastic-sounding changes in volume.
In a similar way to using small amounts of FM, amplitude modulation can also be used to create a distorted sound. Set the LFO to its highest frequency rate, then pull downwards to hear different distortion tones before it slowly becomes a noticeable flickering of volume change. As the rate of the LFO remains fixed, the pitch of the distortion will also remain the same, so it can be quite effective if you tune the distortion by ear to correspond with a note in your melody, emphasising that particular note each time you play it.
Filter Fun
So far we’ve covered a lot of ways to create aggressive and unpleasant synth tones, and filtering is yet another way to reduce exposure to a less than pleasant synth sound. A classic technique is to apply a low- or band-pass filter and use an LFO or envelope to modulate its cut-off position. A triangular envelope (like that used for pitch modulation earlier) is good for getting the sound to quickly approach and disappear again. Or, as with amplitude modulation, you can use an LFO to give rhythmic movement to a part. Increasing the resonance on the filter will give an edgier sound, so this needs to be balanced with how sharp your existing synth sound already is. As with slower-rate amplitude modulation, the most detuned and non-melodic sounds can be given a smoother character via some low-pass filtering.
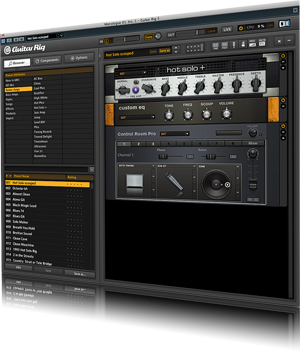
Using amp and cabinet emulation software can help bring a unique tone to each synth part. Taking the metal approach of very high gain levels can yield a nasty sound from even the humblest-sounding synth.
An Aggressive Future
As you can see, there are many different ways of creating aggressive synth tones – just explore your options on a synth-by-synth basis, as this is why certain models are better suited to certain tasks than others. If you want to create less melodic, aggressive sound-based sequences using multiple synths (much like the pitch variations we’ve discussed) try off-setting the tuning of each synth a little bit so there’s another element of imperfect tuning, all of which adds to the aggressive tones in your track as a whole.