Ableton Live Tutorial: Creative Clip Management With Push 2
Ableton’s Push hardware controllers – especially Push 2 – interact with Live’s Session View clips in ways that no other controller can achieve. Martin Delaney explains how to get creative… For this tutorial you will need the project file – download it here It’s not often we run a tutorial that’s dedicated to one controller […]
Ableton’s Push hardware controllers – especially Push 2 – interact with Live’s Session View clips in ways that no other controller can achieve. Martin Delaney explains how to get creative…
For this tutorial you will need the project file – download it here
It’s not often we run a tutorial that’s dedicated to one controller but, of course, Push isn’t just any piece of hardware – it’s built by Ableton itself to complement its Live software, which it does with unmatched depth.
This means that there are enough Push users and Push-curious Live users out there to justify this kind of workshop coverage. Push is primarily focused on Session View which is, of course, all about clips – and we’re focusing on those here. But let’s not claim that this is ‘everything you wanted to know about Push and clips’, as that would be kind of dangerous, especially given Ableton’s ongoing habit of adding new features.
As Ableton stated in the past: once you create your clips with Push, and browse and load instrument and effect devices, then record a little jam or performance, maybe you’ll be better off putting Push to one side and working more directly with your computer.
What Push does is provide a more dynamic, hands-on, ‘instrument’ vibe for that brainstorming creative process; that physical part of it is based around the controls – the encoders, buttons, and the control strip – and maybe most importantly, the dynamics and excitement that come from the way Push lets us get hands-on with audio and MIDI clips.
Audio clips used to be a kind of a poor relation on Push in some ways. But not any more, as with Push 2, we can view waveforms for samples contained within Simpler and also for regular audio clips. This is a major advance in terms of a full ‘DAW’ experience from the hardware.
Our example Live set contains a selection of audio and MIDI clips for you to tinker with. You’ll need Live 9.6 or later to open this set, as we need to be right up to date to make the most of Push. Any necessary Push firmware updates are included within Live software updates – the Push display will let you know what’s going on!
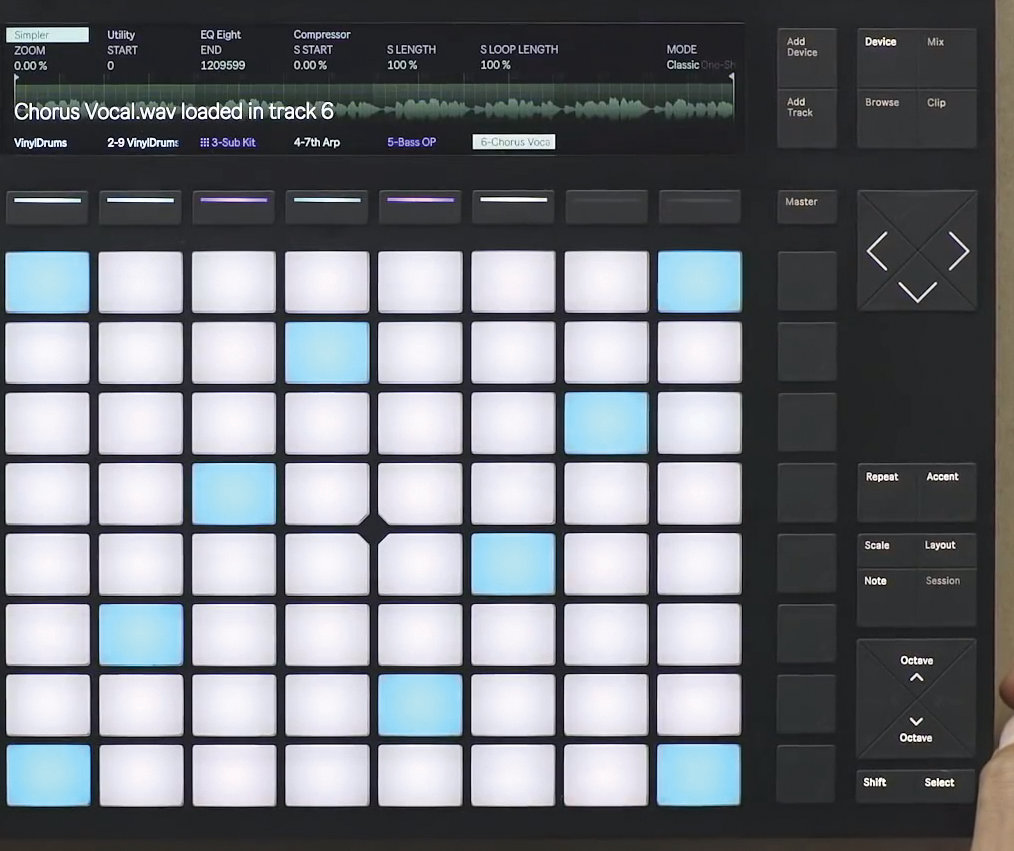
In Session mode, Push does a good job of reflecting the contents of your Live set’s Session View and you’ll get clip positions and colours clearly laid out, ready to launch with a single tap. The colours should be reasonably close to what you see on the computer screen. Get familiar with what’s in the example set by tapping any of the clips to start them playing.
If Live isn’t already running, launching a clip will start the transport. If Live is already running, the pad will flash and wait until the start of the next bar before playback begins. If you ever want to play loops in Live without starting the transport, you can do it from the Looper and Simpler devices.
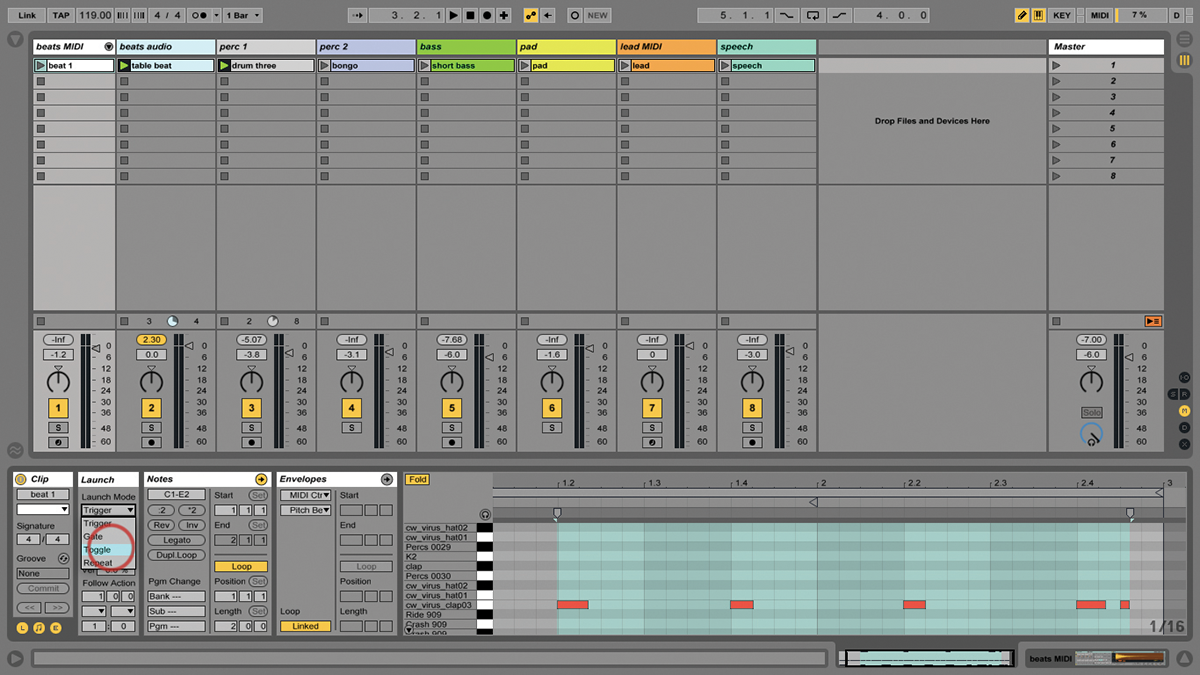
In the walkthrough, we see how launching clips from the Push pads will reflect launch mode settings you’ve made. Live’s default launch mode is Trigger mode, which is fine most of the time, but it does require you to tap elsewhere or use the Stop button when you want the clip to stop, but Live’s transport to continue.
If the clip is set to Toggle, it’ll simply stop when you tap it again, which is generally a much smoother behaviour when you’re using hardware with Live clips. You can even change a clip’s launch mode from Push, which is great for mid-gig changes of direction.
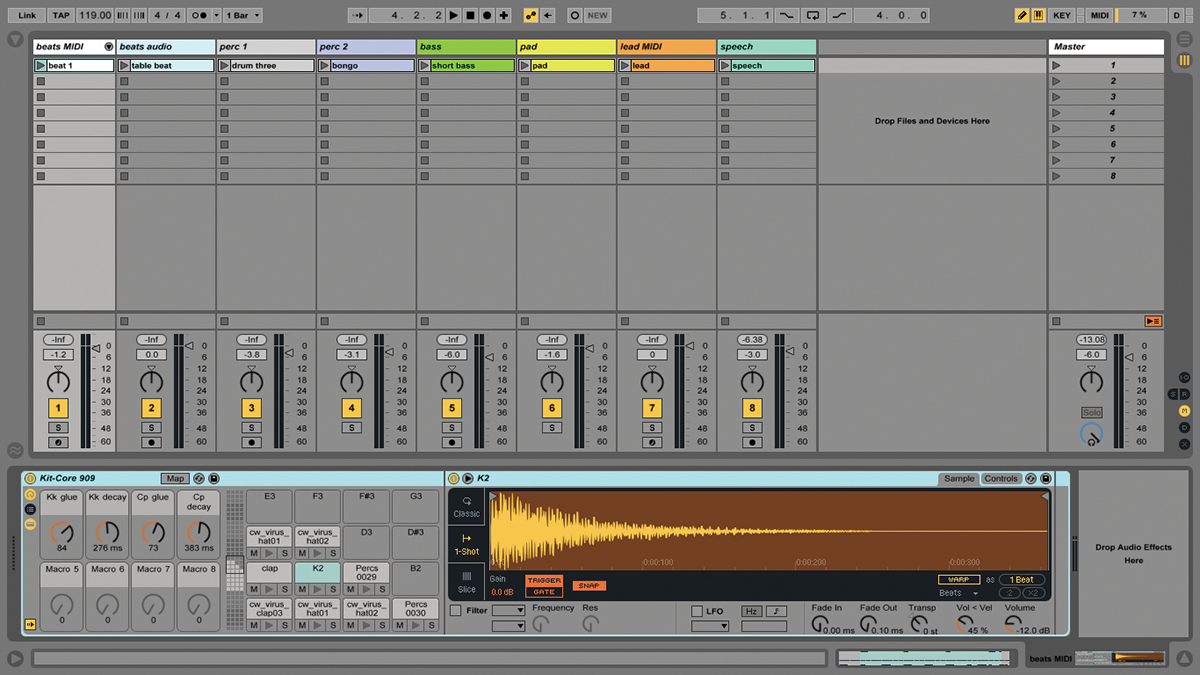
In Session mode, there’s no way for Push’s pads to send velocity, so you can’t use them to change how loud or quiet a clip plays upon launch. There are two ways to deal with this: one is to use another controller instead – anything with a MIDI keyboard or drum pads will work, although of course there are significant trade-offs in other areas. The other is to use Simpler, which has become arguably the most important device in Live.
Not only is it a great tool for hosting one-shot samples or building sample-based instrument patches, it’s a fantastic loop host as well. Drop an audio clip in there and you can immediately trigger that loop from the pads on Push and dial in as much velocity response as you desire.
Simpler works brilliantly well with Push 2, especially as you can view the waveforms, and you may build entire Live sets where all audio material is contained within Simpler – working like this opens up a lot of potential for building instrument racks containing audio loops, and building your tunes in a whole new way. Personally, I find I’m doing this more often. And while I’m on it, don’t forget to click on Simpler’s little ‘expand’ button when you want to get a really large-scale view of what’s going on.
Simpler fans will love the Convert button on Push 2. This has different functions depending on what mode Simpler is in, but it is all about creating new MIDI tracks based on the currently selected clip. If you have an audio clip selected, it will build a new Simpler track containing that clip, which is a nice fast way to get that task done.
There’s no such thing as the perfect Live controller, principally because we all use Live in different ways. However, what we’re enjoying here are the things that Push does better than other hardware controllers (if they do them at all) – the features that best make use of Ableton’s ability to develop hardware and software side-by-side.
Focus On Going Out Of The Box
Push isn’t the only hardware solution for Live. You can use MIDI keyboards, apps, or other pad-based controllers from people like Akai and Novation. Push is the ideal all-rounder, though, and many Live newbies buy it on day one, as it’s the obvious choice, and there’s nothing wrong with that.
However, you might prefer another controller because of price, portability, or some unique feature that it has. I reckon the biggest competition is Touchable on an iPad Pro – the iPad is the only Live controller where you can see the clip names and colours on the control surface.
Step-by-Step – Using Push 2 For Clip Management
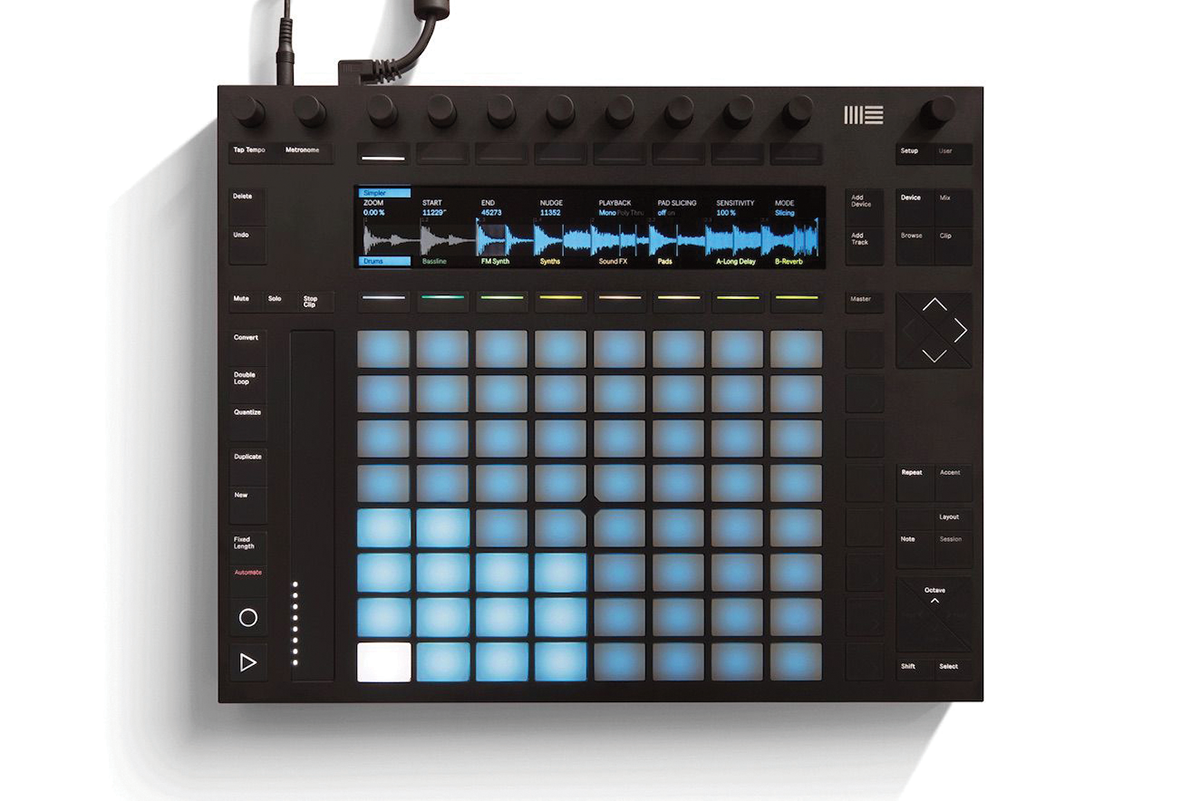
1: This is one of our rare Push-only tutorials, so you’ll need a Push to make the most of it (ideally Push 2). Load our example Live set, which has some clips ready for you.
2: Tap the Session button, so the Push pads are ready to launch the clips contained within the focus box displayed on your computer screen. You’ll see the clip colours are the same as onscreen.

3: Launch some of the clips in the set – it doesn’t matter which for now. They are exhibiting the default Live/Push launch behaviour. They’ll flash before playback starts and flash while they’re playing.
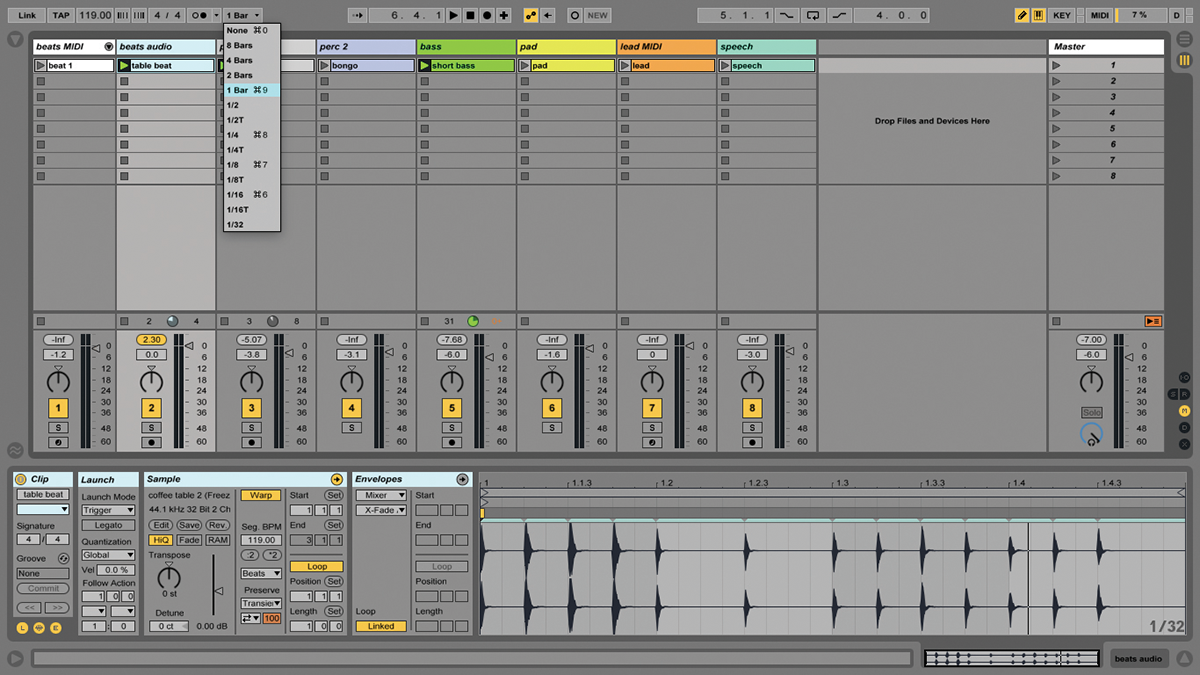
4: That’s because they’re following Live’s global quantise settings, which you’ll have to change from the software, as Push can’t do it – not yet anyway (you can change record quantisation from Push).

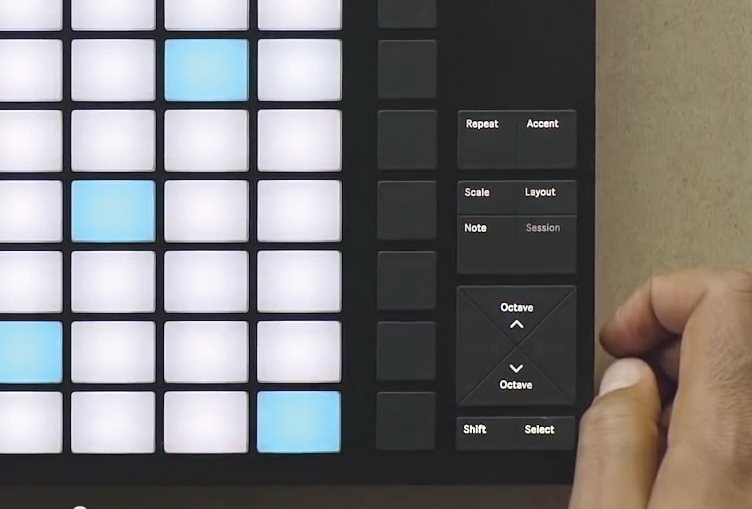
5: To stop a clip, press a pad to activate an empty clip slot in the same track or use the Clip Stop button. You could also use Stop transport or (on Push) Stop All Clips with Shift then Stop.
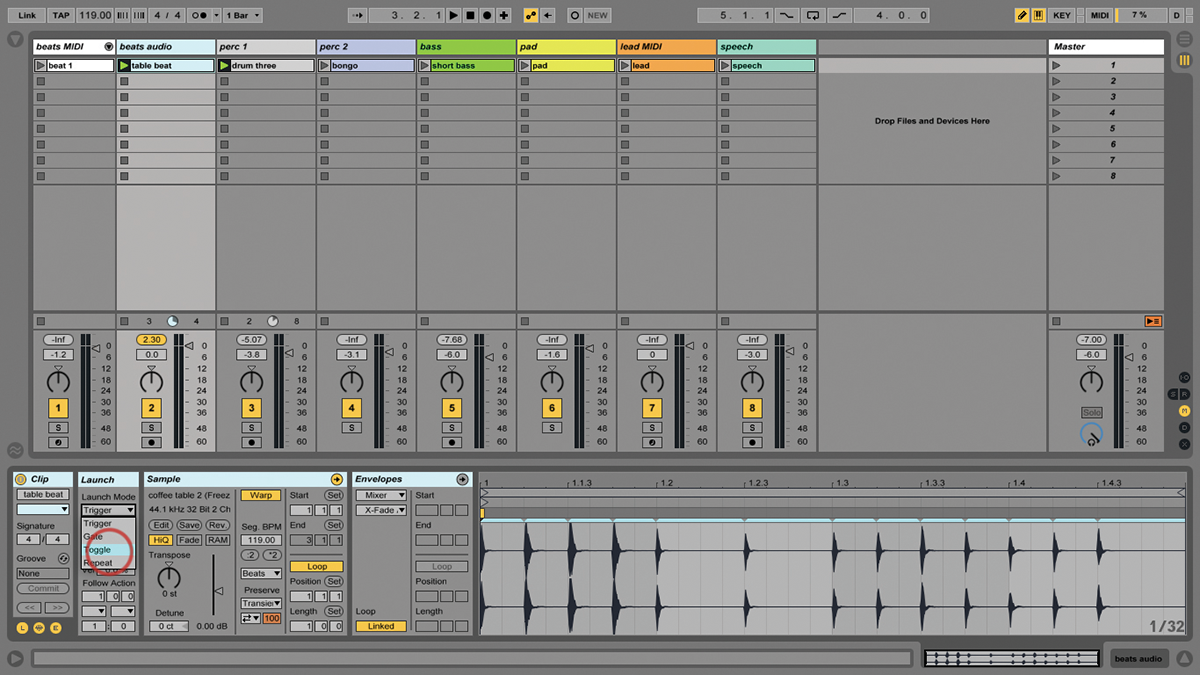
6: Live clips can be assigned different launch modes – behaviours such as Toggle and Repeat – and Push recognises these. Toggle’s very useful, because a second tap of the same pad will stop the clip.
Click Here To Continue
