Pro Tools Tutorial: Cutting Edge Production Techniques – Delay Based Effects
Delay is a crucial tool, and it can be used for far more than just producing simple echoes. Mike Hillier plays with time… Delay is one of the fundamental effects we can apply. A short slapback can thicken a signal, while longer settings can add rhythmic and tonal interest, as well as a sense of […]
Delay is a crucial tool, and it can be used for far more than just producing simple echoes. Mike Hillier plays with time…
Delay is one of the fundamental effects we can apply. A short slapback can thicken a signal, while longer settings can add rhythmic and tonal interest, as well as a sense of space, similar to reverb.
Delay is also the tool behind several other effects, including chorus and flanging. We’re going to look at re-creating a variety of different delay-based effects using simple plug-ins and a little automation.
With a basic setting, the length of the delay itself will change the way we hear the effect. Very short delay times, between 20-50ms for example, will create an artificial doubling effect, as if two voices are performing the same part. Of course compared to a well-tracked double, artificial doubling can sound, well, artificial.
The Times They are a-changin’
Lengthen the delay a little and you’re into slapback territory. Anything from around 60-120ms will produce a slapback delay effect. Tape-based slapback effects are the go-to effect for surf-rock guitars, but can also be useful for rock ’n’ roll vocals, and used subtly can evoke a sense of space similar to a small room but without the muddiness of a small-room reverb effect. Keep the feedback control down, as usually only a single repeat is needed.
Longer delay times are often referred to as echoes. These are distinctly audible as a repeat of the performance. Longer echo effects produce a sense of scale closer to larger halls and stadiums and can be timed to the tempo of the music to produce rhythmic effects.

In the modern era of click-tracks, heavy drum-editing and quantized performances, the tempo-sync’d delay is an easy-to-use tool, and many plug-ins don’t even require you to do any maths to work out the delay time. However, leaving your delays free-running rather than tight to the beat can often work in your favour, adding a sense of movement as well as sounding more natural. With longer delay times, more repeats dialled in with the feedback control can help to place the delay in a natural space.
An often ignored but interesting effect can be had by inverting the polarity ofthe delayed signal. This has more of an effect on shorter delays, and can sometimes help to remove muddiness from the low end of the thickened signal.
Time is on Your Side
The above effects all use delay as a simple, fixed line. However, by adding modulation, either with an LFO or automation, to the delay time we can produce some unexpected and interesting effects.
Changing this parameter continuously will produce a pitchshift. We won’t get into the maths here, but the amount of pitchshift is proportional to the speed at which the delay time is changing, not to the actual delay time itself. So while the delay time is getting longer, the pitch will drop, and when the delay time is getting shorter the pitch will rise.
A single delay line with a sine-wave LFO modulating the delay time will create a constantly shifting pitch in the delayed signal. If we remove the dry signal then we have created a simple and effective sine-wave vibrato effect. Changing the sine-wave LFO for a triangle wave or sawtooth wave will create similarly differing vibrato effects.
Note that square waves are not particularly good at this, as the delay time only changes instantaneously twice per wavelength and is stationary at all other times, and for pitchshift to work the delay time must be changing continuously.
Put the dry signal back in and you can create a chorus or flanger effect. Flangers use a very short delay of less than 20ms, and this very short delay time will cause some frequencies to be comb-filtered. The continuous motion in the delay time moves the filtered frequencies up and down creating the effect of flanging.
With longer delay times, around 20-60ms, the comb-filtering has less of an effect, and the changing delay time has more of an effect on the pitch, creating a combination of doubling and vibrato, which is the chorus effect.
The mathematically inclined reader may have noticed at this point that all these delay-based effects occur after the initial sound. For obvious reasons this is the only type of delay effect that can be used in real time, but with recorded sound it is possible to use delays that occur before the original signal.
If you bounce the delayed versions of your source to a new track in your DAW you can then drag that track on the grid so that the first delays happen before the original signal. As well as cleaning up any timing issues that may arise from delaying the signal this has a more obvious effect on the flanger, creating a type of flanging effect known as ‘through-zero flanging’.
Because the delayed signal now passes directly through the original signal the flanging goes through a point where it completely reinforces the signal at all frequencies (or nulls it completely, if you have the polarity inverted) and as it approaches this point higher frequencies are reinforced or nulled.

Pro Tip: Flanging effects work best when there are more frequencies to work with. Try adding an overdrive or saturation effect to the original signal, with the aux set up as a post-fader send. This will help to add lots of additional material to the signal for the comb-filtering of the flanger to catch on to and reinforce or null.
Creating Different Delay-Based Effects

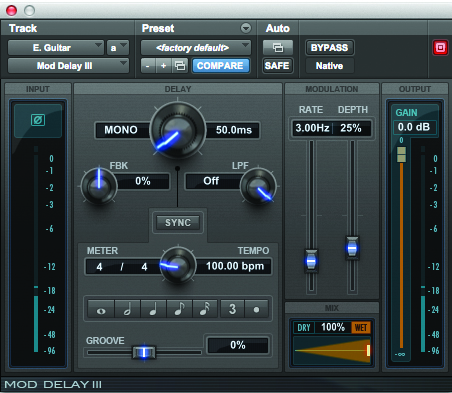
1: We’re using the built-in Mod Delay III in Pro Tools, but any basic delay plug-in should suffice. We’ve added the Mod Delay as a send effect to the E. Guitar track, and set up a basic doubling with the guitar panned left and delay panned right
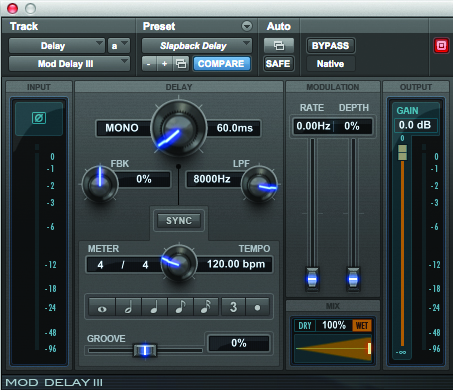
2: To widen this out into more of a slapback delay, bring the time up and consider rolling a little of the high end off using the built-in low-pass filter. You could also add a tape saturation effect before the delay in the aux channel for a more authentic tape echo
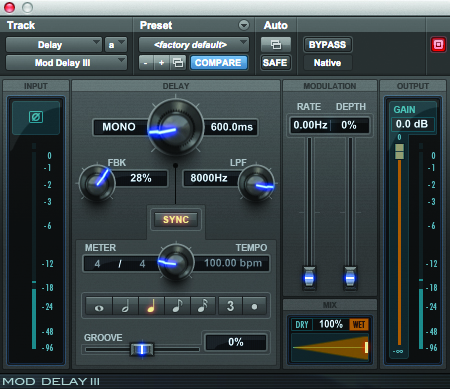
3: For a longer echo, delays can really give a dramatic sense of space, but keeping them in tempo with the main performance can be useful. Engage the sync tool, and then highlight the quarter-note icon in Mod Delay. Experiment with feedback for a more natural sound.

4: To create a vibrato effect, place the Mod Delay directly on the track, rather than as a send effect, and keep it 100% wet. Use the LFO to dial in movement. Faster LFO rates will produce faster vibrato, while boosting the depth will increase the amount of pitchshift.

5: Turn your vibrato into a flanger by simply turning the dry/wet mix knob down to around 50%, or by placing the effect back onto the aux channel. Low depth levels on Mod Delay, around 8-12%, produce great effects.

6: To experiment with inverted polarity delays, simply click the polarity inversion switch on the Mod Delay plug-in input section. If your delay plug-in doesn’t have a polarity switch, add an EQ with polarity inversion before the delay.
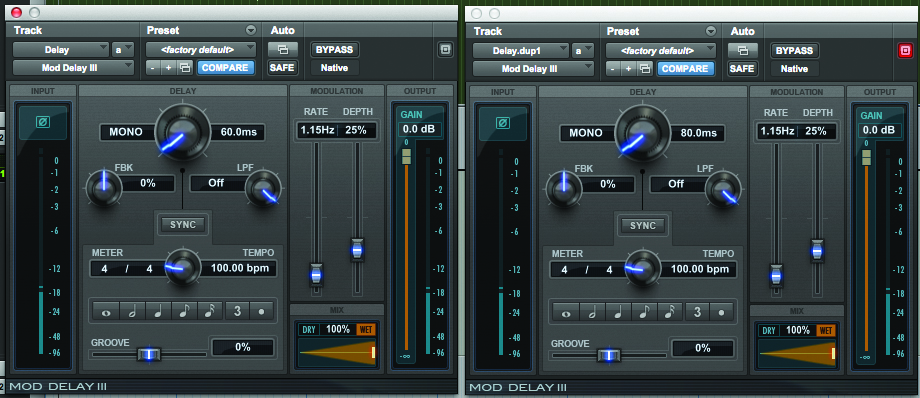
7: To create a chorus effect we’ve duplicated the aux send, panning one hard left and the other hard right. Extend the delay time differently on each side: we’ve gone for 60ms left and 80ms right for a wide chorus effect
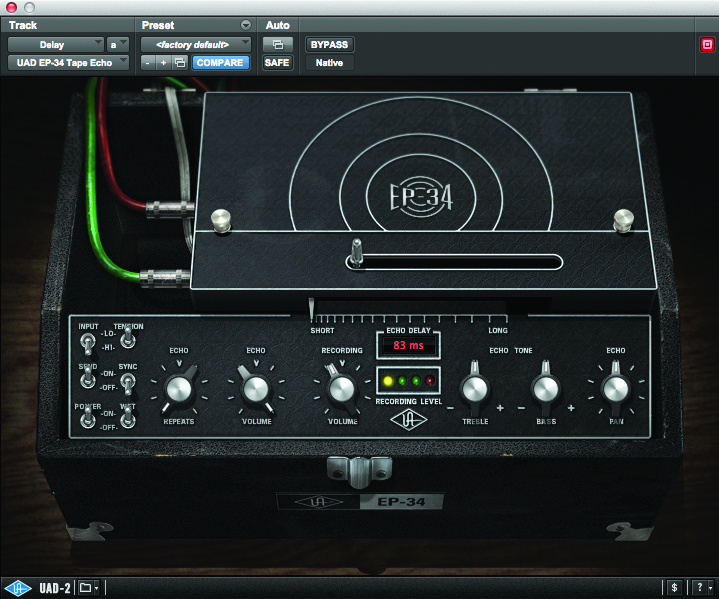
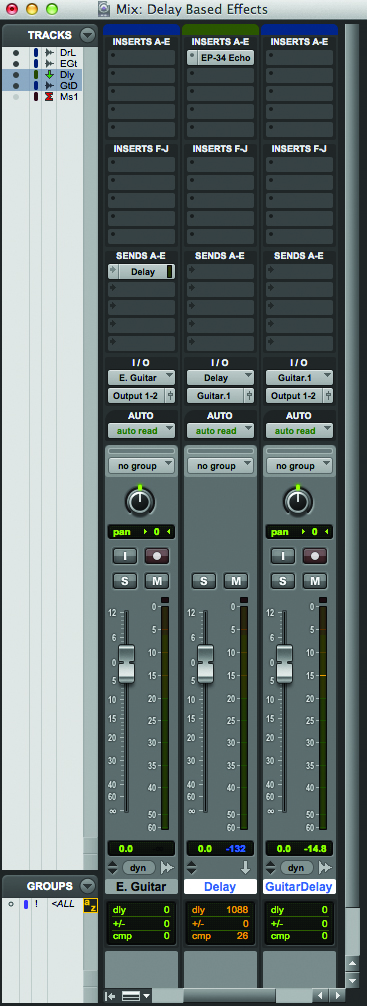
8: Not all delays have a built-in LFO, but by automating the delay rate you should be able to create your own modulations to re-create these effects. Here we’re using the UAD2 EP-34 Tape Echo.

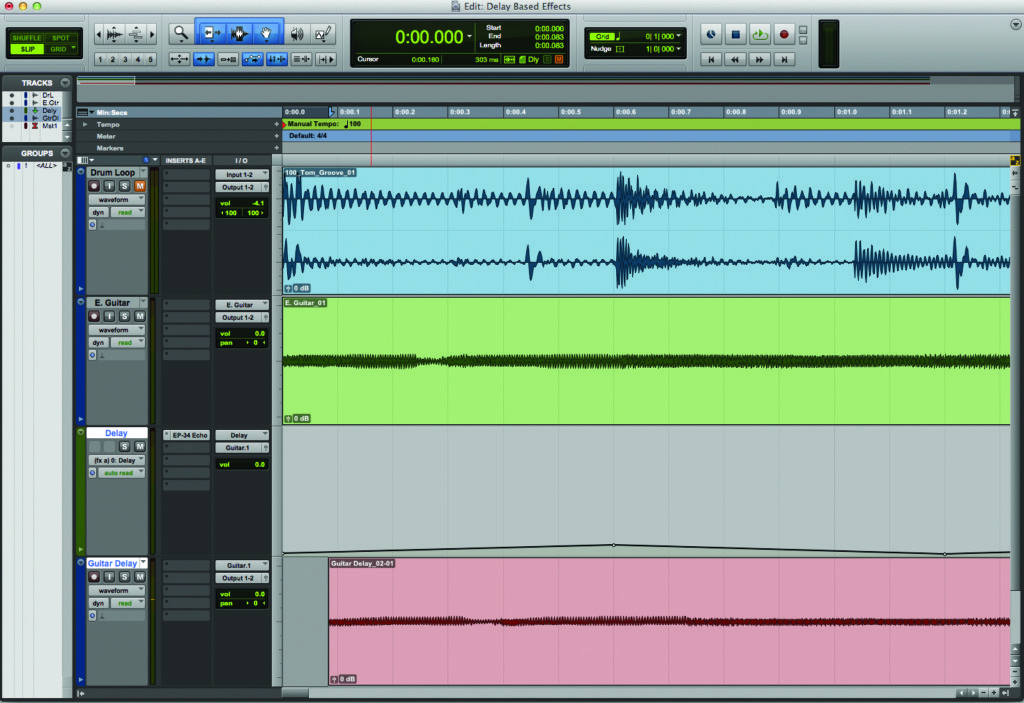
9: We’ve assigned automation to the delay rate and have used the pen tool to draw in triangle waves at regular intervals
10: The EP-34 has a minimum delay of 80ms, but we can still use it for simple vibrato effects by bouncing it down to a new channel and moving the clip ahead by 80ms. This will also make the part sit much better with the groove
11: Similarly we can create flanging like this, and even through-zero flanging, by just moving the clip ahead. If you’ve modulated between 80-120ms try moving it 100ms ahead, so it moves from 20ms before the beat to 20ms after the beat as it modulates

12: When creating choruses, try drawing the automation in differently on each channel, perhaps starting one at 80ms moving up to 120ms, while the other channel starts at 120ms and moves down, rather than up, in its first cycle to 80ms

