Create a complex multisample instrument from sounds around the house
With all this time spent indoors, here’s a way to make a unique sounding instrument without ever going out.
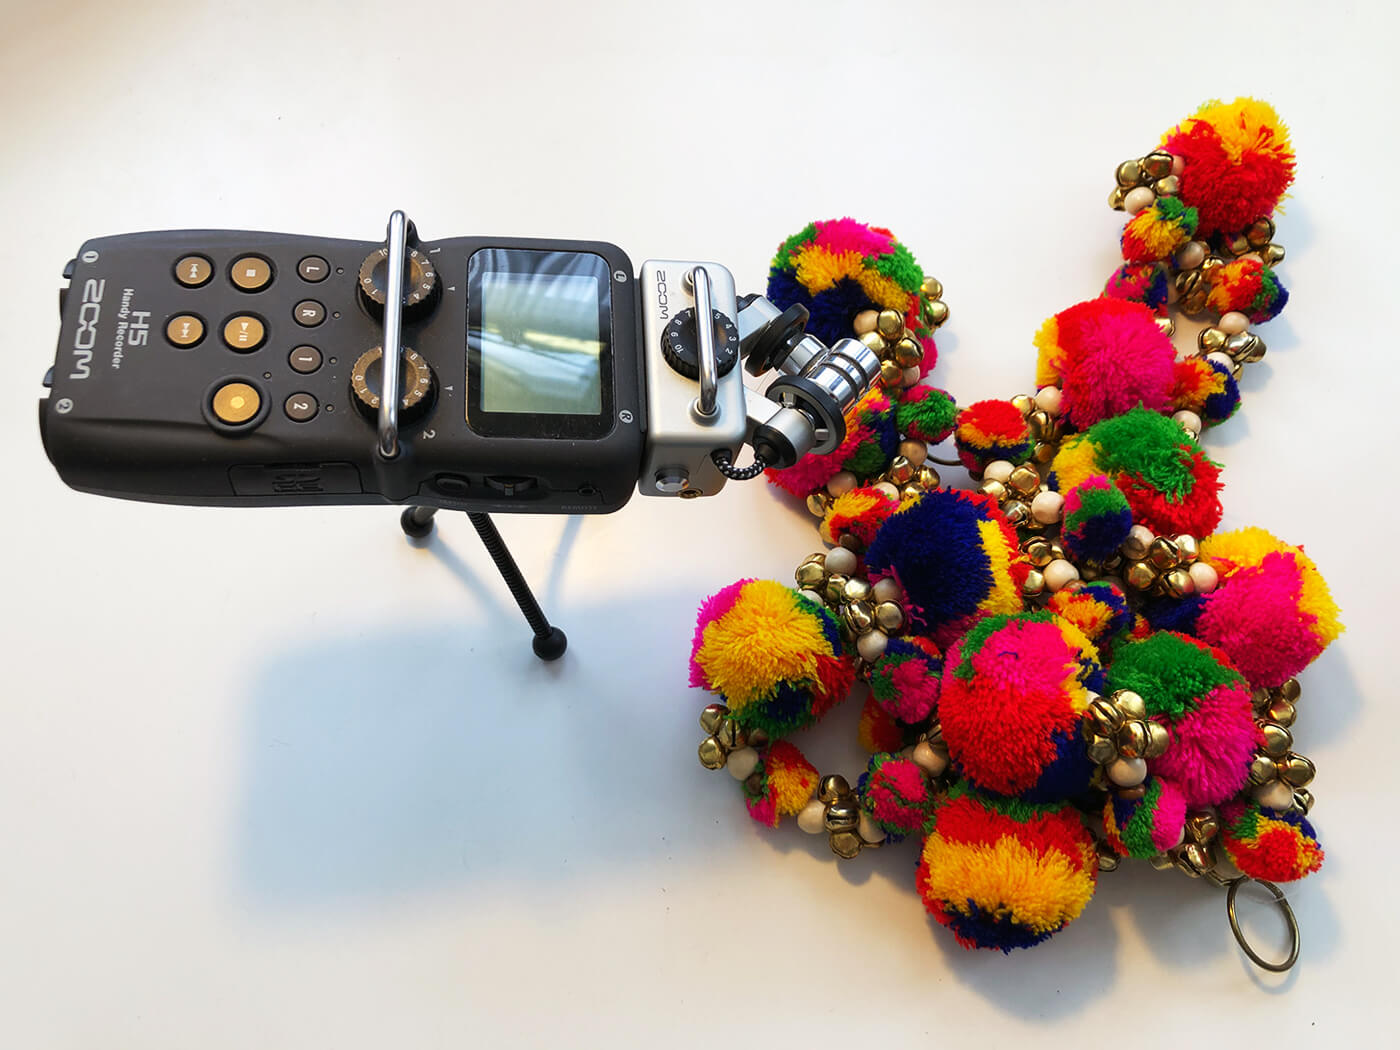
Zoom H5 recording household object
Welcome to the first of our Weekend Workshops, a weekly series that aims to give you a meaty music-making mission to work on while social distancing. Specific software may be necessary for certain tasks, but the vast majority of MusicTech’s Weekend Workshops are platform and DAW agnostic.
In this workshop, you’ll build a multilayered instrument from household objects. We’ll cover recording, editing, a bit of esoteric sound design and the process of building a sampler instrument using the elements we’ve created.
You should end up with a huge-sounding instrument you can use in your productions that nobody else has, and that’s entirely come from you and your surroundings.
What you’ll need:
- A microphone / portable recorder / phone
- A DAW
- A tuner plug-in
- A sampler VSTi – we use Kontakt in this tutorial, but you can use any sampler that can deal with multisamples, such as the freeware TX16Wx Software Sampler.
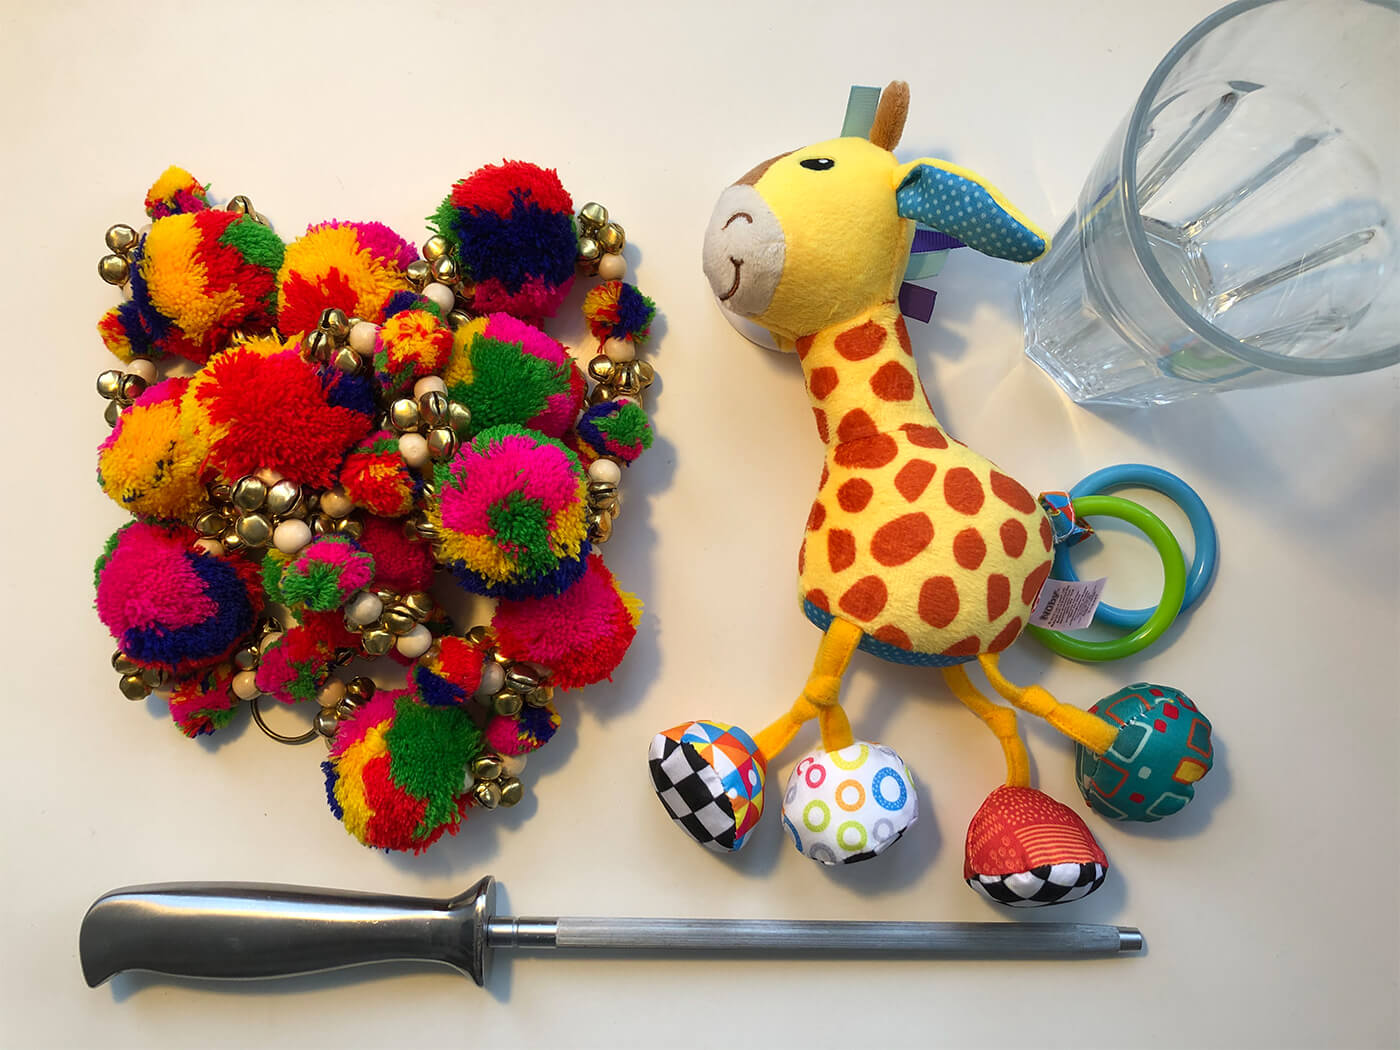
- Household objects to hit / strike / rub / shake to make sounds
- Paulstretch aka Paul’s Extreme Sound Stretch (donationware for Win / Mac)
- A quiet room to record in
1. Source your sounds
Get your sound sources together. You want a variety of sources: something you can strike, something that has a sustained sound with a distinct pitch to it and also something you can rattle or scrape for a sustained texture. You don’t want the sounds to compete for space, so sounds that compliment each other, but are different in nature, are best.
I ended up using a pom-pom chain decoration that has a rattle to it, a baby’s giraffe toy that has musical sounding bells in the feet, a glass that I struck with a knife sharpener and my own voice for a sustained “aah” sound.
The struck glass is a percussive sound so it should fit nicely with the sustained vocal, with the rattling sounds complimenting them as textural layers.
You will need to be creative with what you can find in your house, so don’t get too hung up on the idea of using a specific sound source.
2. Find a quiet space

Find the quietest room in the house, set up your microphone and get recording. It’s worth spending some time on this making sure you capture far more than you need, to allow for creaking floorboards, passing cars or birds chirping outside ruining your take, or just to get the best take of striking a glass. I’m no vocalist, so it took a few attempts to get a pleasing, sustained vocal sample with minimal wobble.
You’ll want to get as loud a signal as you can, but without clipping. Around -6dBFS is the level you should be aiming for as it’s pretty loud but allows some room for error. It’s worth experimenting with microphone placement, too. A struck glass can sound radically different depending on whether the microphone is pointing at the rim or the inside of the glass.
3. Import and edit sample selection
Once you are happy with the sounds you’ve recorded, import them into your DAW, if necessary, and you can start to process them. With the pom-pom chain and giraffe, I chopped out any parts of these sounds that were too spikey or stuck out too much and faded them together to make a more consistent texture. Aim to keep some variation but less difference between loud spikes and quieter regions.
4. Initial tone shaping
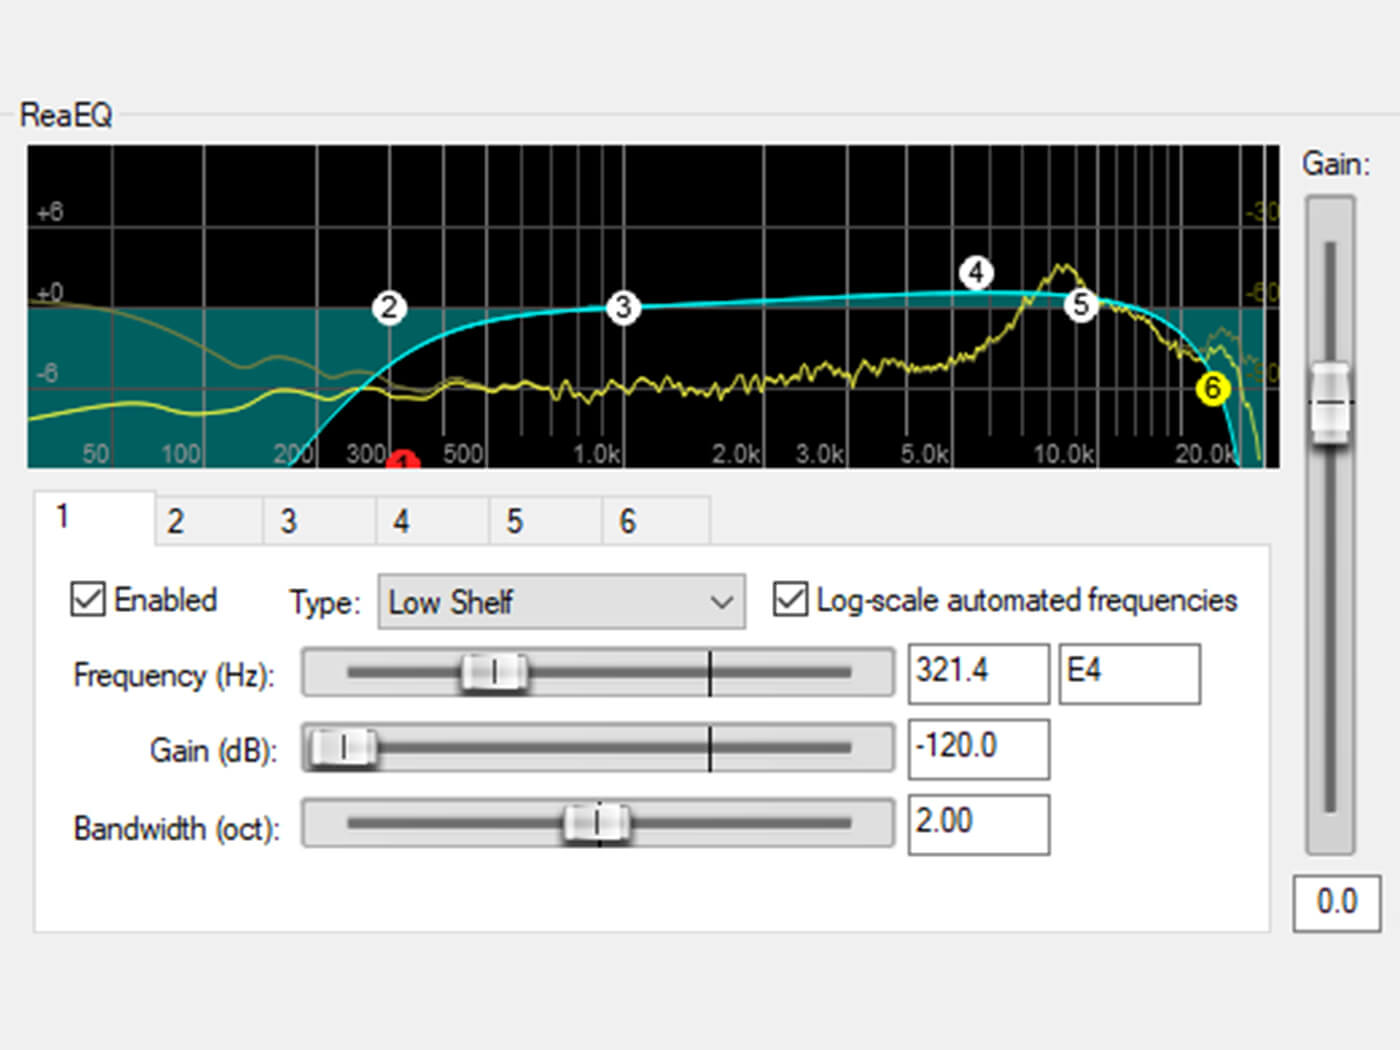
I used some EQ to roll off the lows and highs of the pom-pom chain sound and giraffe bells to keep these sounds light and airy with no low-end rumble.
I also added reverb to the bells to give them more space and smooth them out as they sounded a little dry.
5.Tuning
The pitched sounds will need to be tuned together. I’m using the Reaper stock tuner, but you can use whatever comes with your DAW, or a free tuner VST such as GTune. The vocal sample was very close to C3 by sheer coincidence, so I tuned it until it was as tight as I could get it. It’s important to tune your samples to the nearest note.
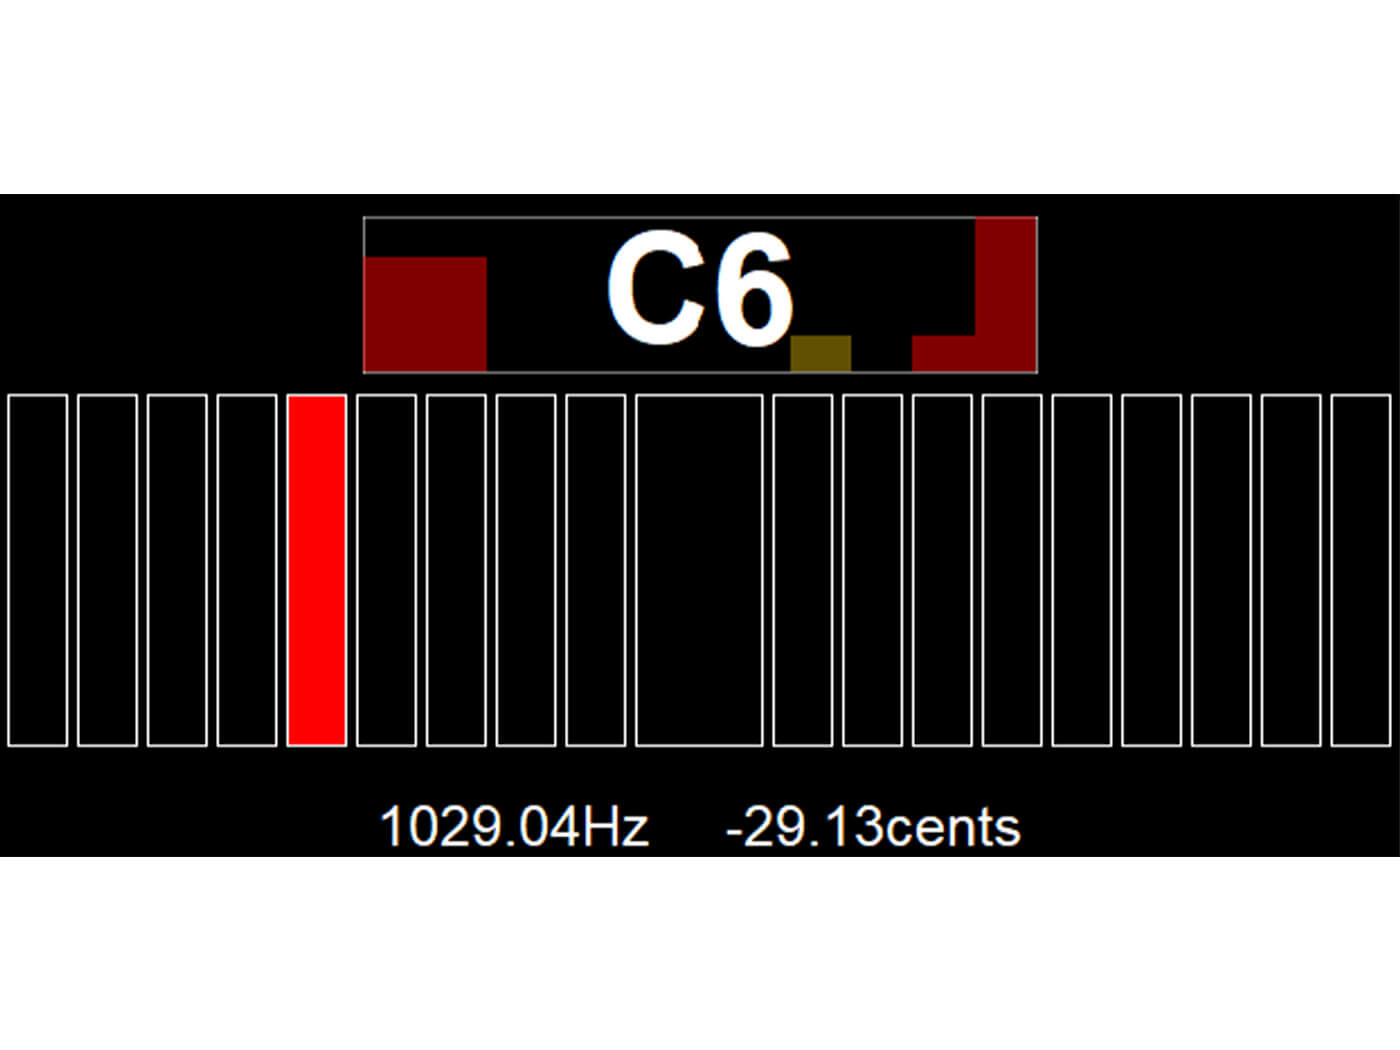
Due to the percussive nature of the glass strike, it’s a very short sound with little obvious pitch to snap to. This makes it hard to tune – either by ear or with a tuner. I resorted to trial and error – getting the tuner to wobble around the C6 mark. If you are struggling with your ears and tuner, it can be worth using a graphical EQ to look at where the fundamental frequency is hitting. It’s also worth tuning it against any other pitched samples you have – they are going to need to work together!
Once I was happy with the vocal and the glass strike, I also copied and pitched the vocal sample down a whole octave to allow for deeper and thicker tones. Here is the oval before pitching.
And here it is again after being pitched down by an octave.
6. Time stretching
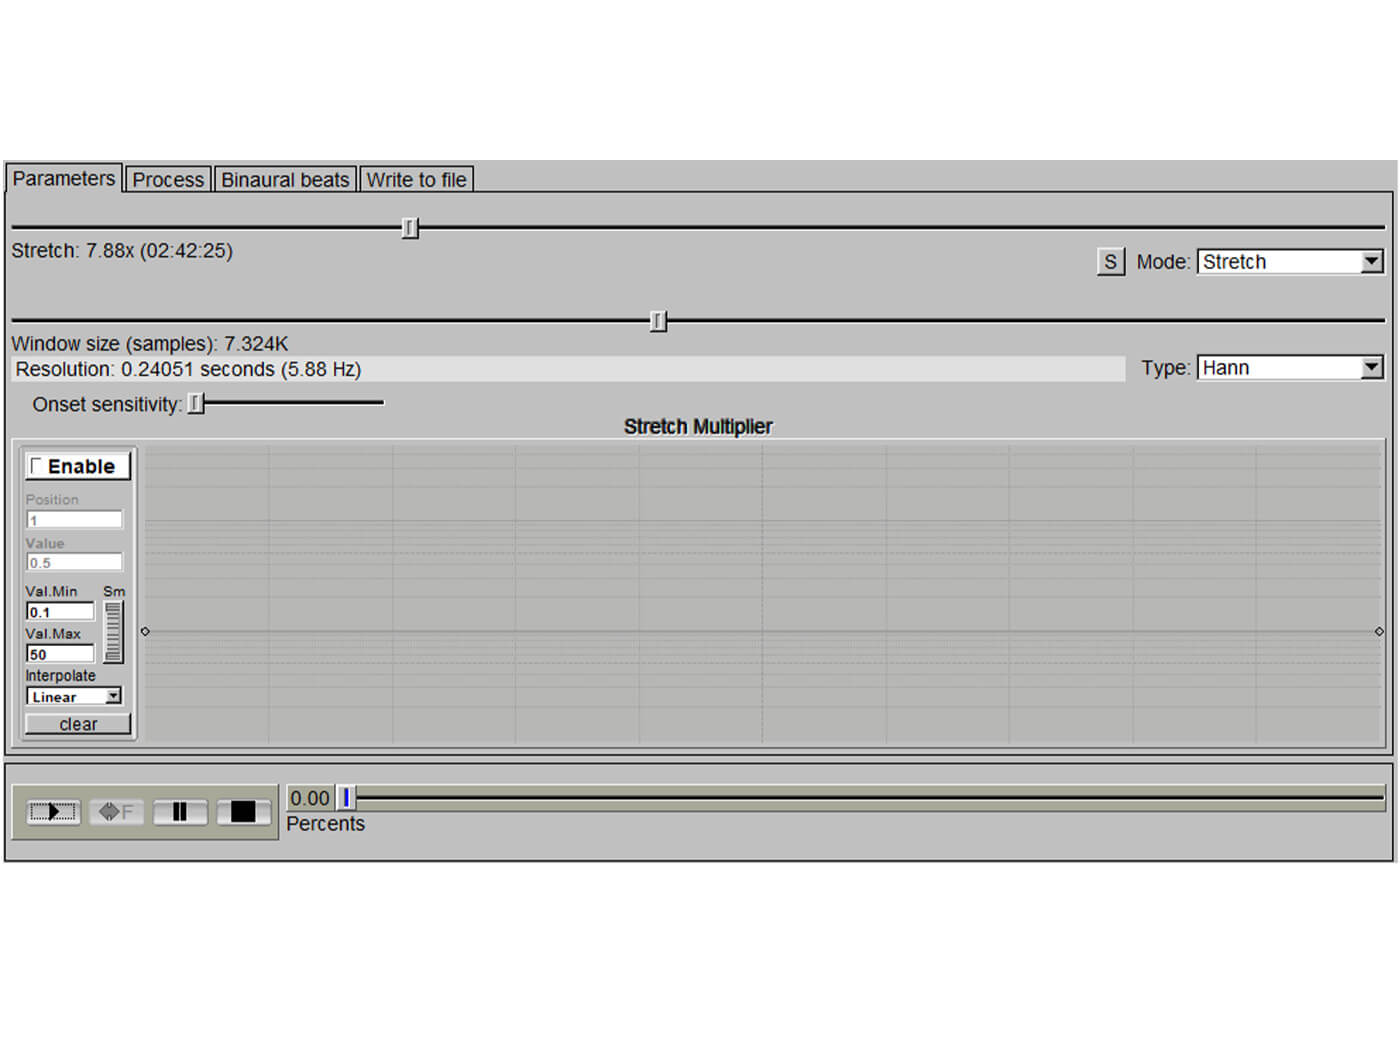
Export the sounds as 24 bit/44.1khz WAV files and then load them into Paul’s Extreme Sound Stretch. Paulstretch is a crazy standalone app for manipulating samples. It allows you to stretch sounds to play almost infinitely and also gives them an ethereal quality due to its granular nature. I tried all the samples with mixed results. The giraffe bells and pom-pom decoration didn’t come out very well, but the vocal samples and glass sounded fantastic when stretched to 800% length. So I rendered those out to disk as hugely long sustained sounds.
An alternative tool for this sort of work is the Akaizer.
The vocal samples – both the original tuning and the octave shifted versions – took on a large choir-like feel. Listen to them after processing.
Meanwhile, the struck glass developed a Tibetan singing bowl character.
7. Fine tuning
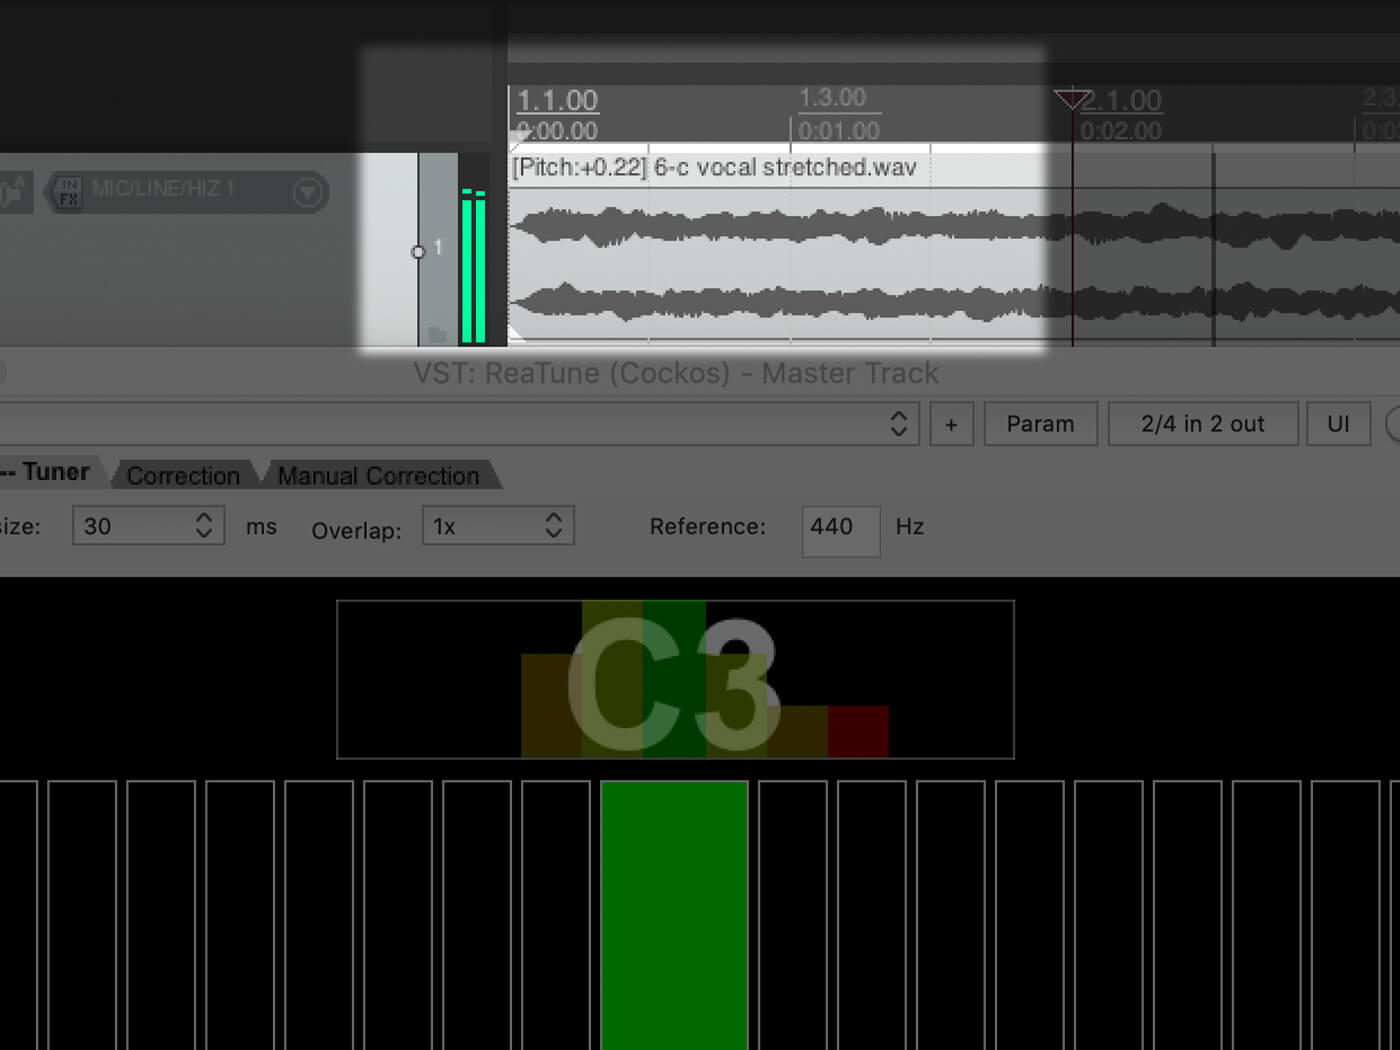
Re-load the stretched sounds into your DAW. Now the samples are so elongated it makes any wobbles in pitch apparent, and it’s far easier to tune them. I’m using the audio editing in Reaper for the fine tuning (Shift+7 to tune down a cent or Shift+8 to tune up a cent) but use whatever you have in your DAW.
I found the most consistent part of the vocal sample and fine-tuned it further, making sure it sounded in tune with the struck glass sound using the tuner and my ears. The stretched aspect of the sounds makes them feel less organic than they did initially and means the sustained texture sounds create a pleasing contrast. Aim for a similar contrast with your sounds.
8. Trimming your samples
I rendered the edited sounds out again, the tuned and stretched vocal samples and struck glass. I gave them a quick trim to ensure they all started instantly with no silence at the start and normalised them to -1dB in Soundforge, so they have a consistent level. If you’re feeling especially lazy, dBpoweramp Music Converter is an excellent tool for bulk processing audio files. It can remove silence and normalise audio, amongst other useful tools. There’s also a 21-day free trial available.
9. Assembling the patch
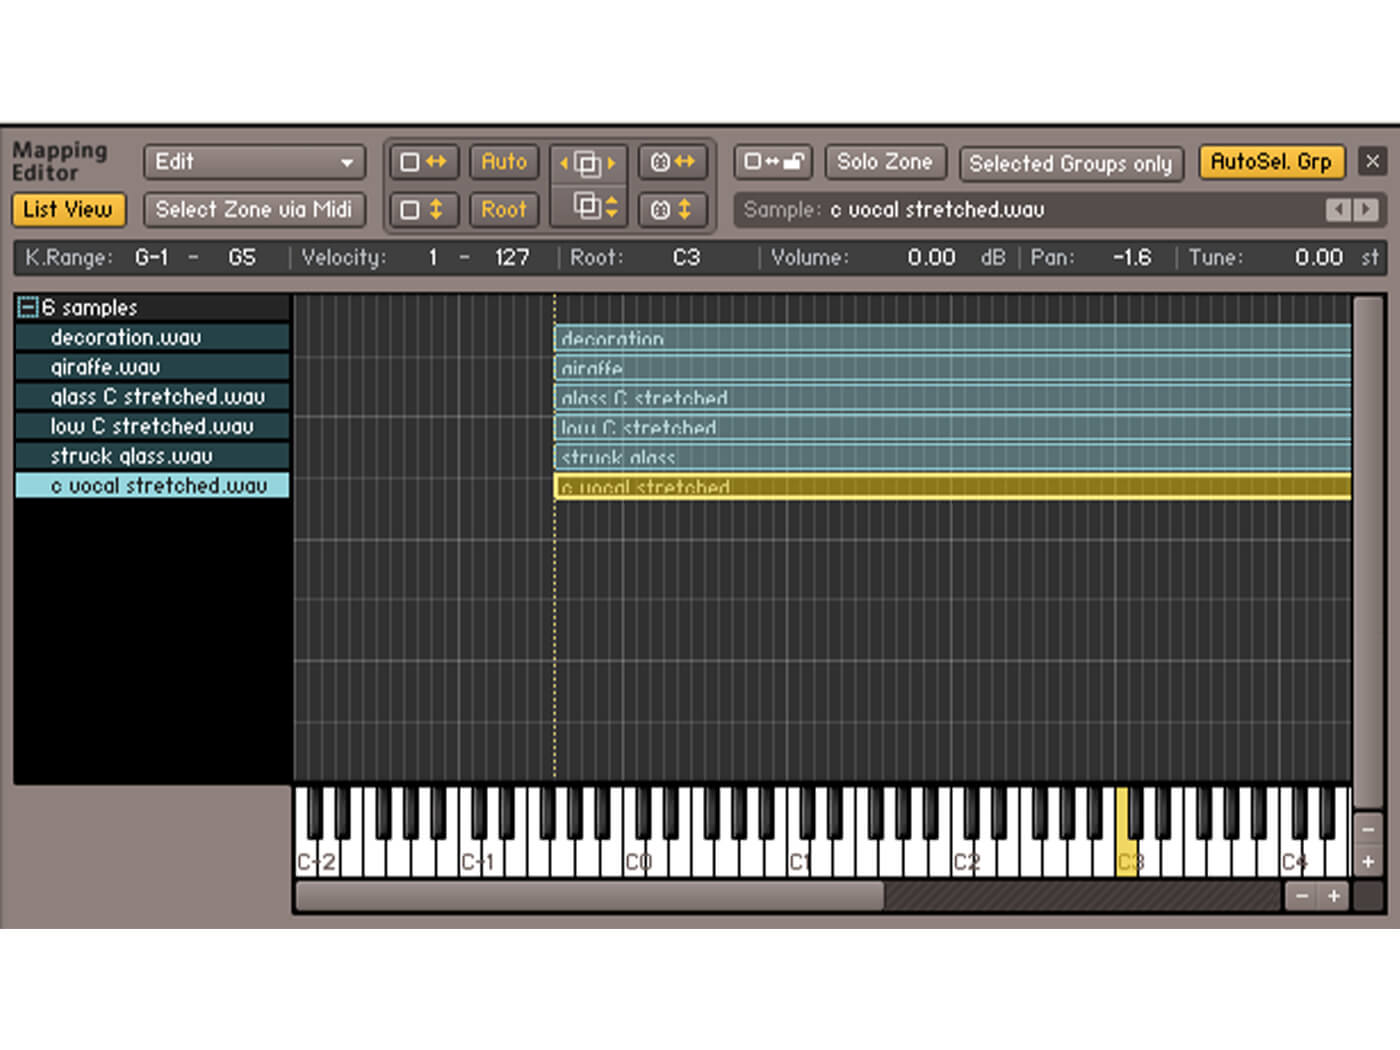
Now, it’s time to assemble all of your audio files in a sampler to create your unique patch! You can start to get even more creative with your sounds here, but you need to import them all into your sampler first. Make sure they all have the same root note (C3 in this case) and a wide keyspan (C1 – C5 or so) and full velocity span from 0-127 so you can easily play the composite sound on the keyboard.
I used Kontakt, but you can use whichever sampler you have to hand. Most DAWs have one built-in. The list view in the mapping editor can be invaluable for organising samples across the keyboard without it becoming too fiddly. Rather than audio files obscuring the keyzones when they sit on top of each other, the list view stacks the keyzones vertically with the settings for range, velocity, root note, pan and fine tune accessible at the top of the screen (see above). If you want to change the settings of any given sample, click it on the left-hand side, then tweak away.
10. Balance and panning
It’s now time to fine-tune the elements. What you do here is very much down to your taste. But, what I did was turn down some of the textural sounds a little bit to stop them from overpowering the more musical elements. I subtly panned the rattle and bell sounds left and right a tiny amount. I also turned down the deeper vocal sample slightly to stop it taking up too much space and also panned the two vocal samples lightly left and right to give the instrument a bit more space and depth – anything to widen the stereo field.
No matter what you do, it’s essential to keep the pitched sounds upfront as that’s the musical aspect, with the textural sounds forming a backdrop.
11. Envelopes
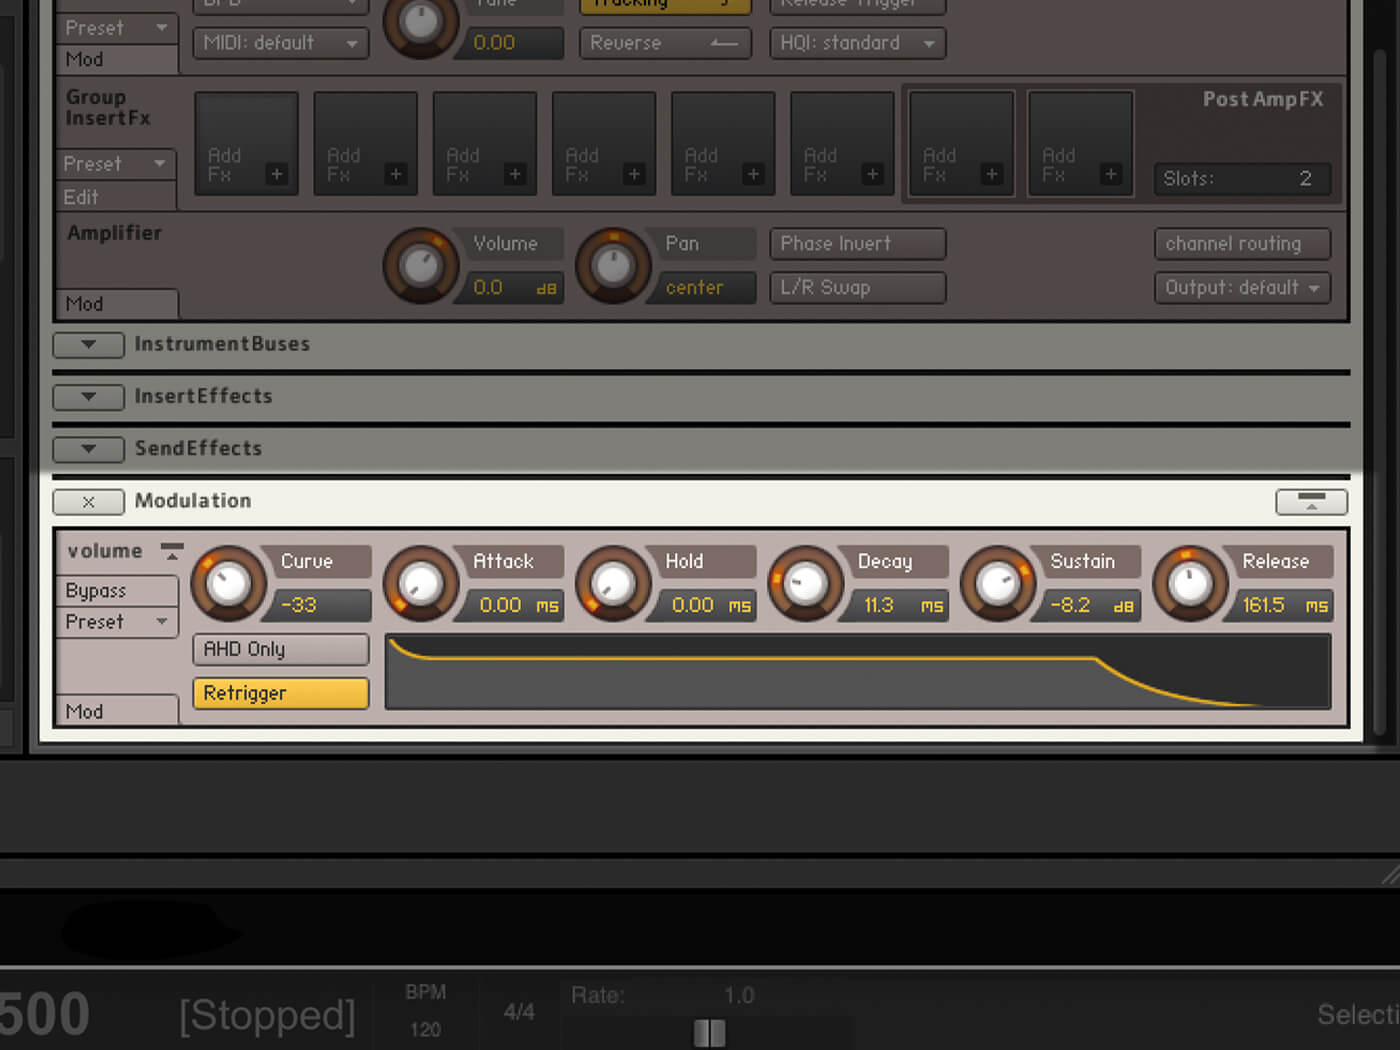
Once I was happy with the balance, I decided that the patch I had created should sound plucked. To achieve this, I used the struck glass as the attack with a tiny bit of sustain and release provided by the vocals and texture sounds, so I adjusted the volume envelope accordingly to sculpt the sound.
Changing the envelope makes the patch more playable, but demonstrates that it still lacks something.
The envelope of your sound may be dictated by the elements you’ve recorded, but it’s entirely up to you. You may want to create an even more percussive, tuned percussion sound with an instant attack, rapid decay and no sustain. Or you may want to try a slow attack with more sustain for a thick polyphonic pad patch.
12.Final effects and polish
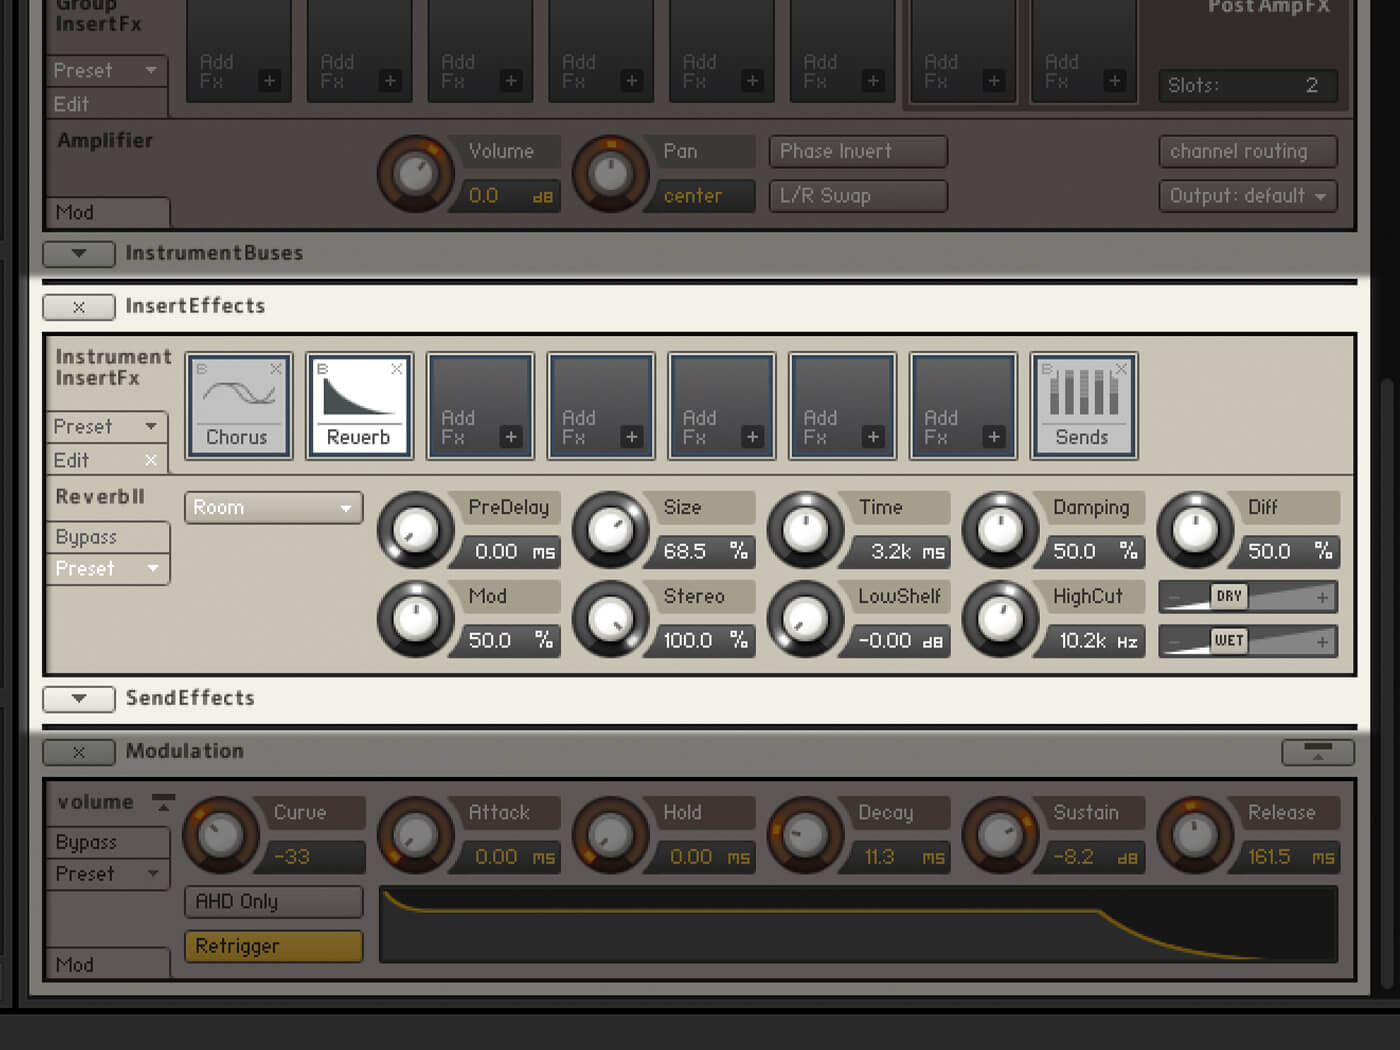
Finally, add some effects to help to round off the patch and give it a bit more depth. I find it’s worth using the inbuilt effects in your sampler before resorting to external effects plug-ins, for the sake of CPU usage. I applied some mild chorus to thicken the sound up and some reverb to give it more space. The effects you use will be down to personal taste. Still, reverb and delay will help give the sound some space. You can thicken the sound further with subtle warm saturation and sculpt the sound using low pass filters assigned to an envelope, too. This can work if you are looking at making a tuned percussion sound. If you want to go extreme, the Rotator in Kontakt is a great way to give your patch a super-wide Leslie cabinet effect.
This sampler instrument loop has no with reverb or chorus.
Here’s the same loop using the sampler’s built-in reverb and chorus.
And this is what the one-shot sounds like with the same effects.
13. Experiment
This workshop shows you one way of making a multisample instrument patch, but there are near-infinite methods you could use. Rather than stretching the vocals you could isolate and loop a tiny portion of the sound in a sampler before building the multisample patch. Alternatively, you could use a soft synth such as Serum and import the pitched sounds as wavetables and then add them as texture layers in the sample player.
The potential for experimenting with samples is truly endless, and the beauty is that no one else will ever have quite the same sound as you.
If you want to play the instrument that I created for this workshop, you can download it here as a .nki Kontakt 6 file. Happy sampling!
Check back next Friday for another Weekend Workshop.
Find more MusicTech tutorials here.