Ableton Live Tutorial: Creating Custom Drum Racks Step-by-Step
In this step-by-step guide following on from part 1, Martin Delaney examines the creation of custom drum racks in Ableton Live… 7: Now, let’s suppose we want to begin customising the kit, by replacing the kick. Drag the clip ‘909 kick’ from the Drum Samples track onto the existing kick drum pad to replace it. 8: […]

In this step-by-step guide following on from part 1, Martin Delaney examines the creation of custom drum racks in Ableton Live…
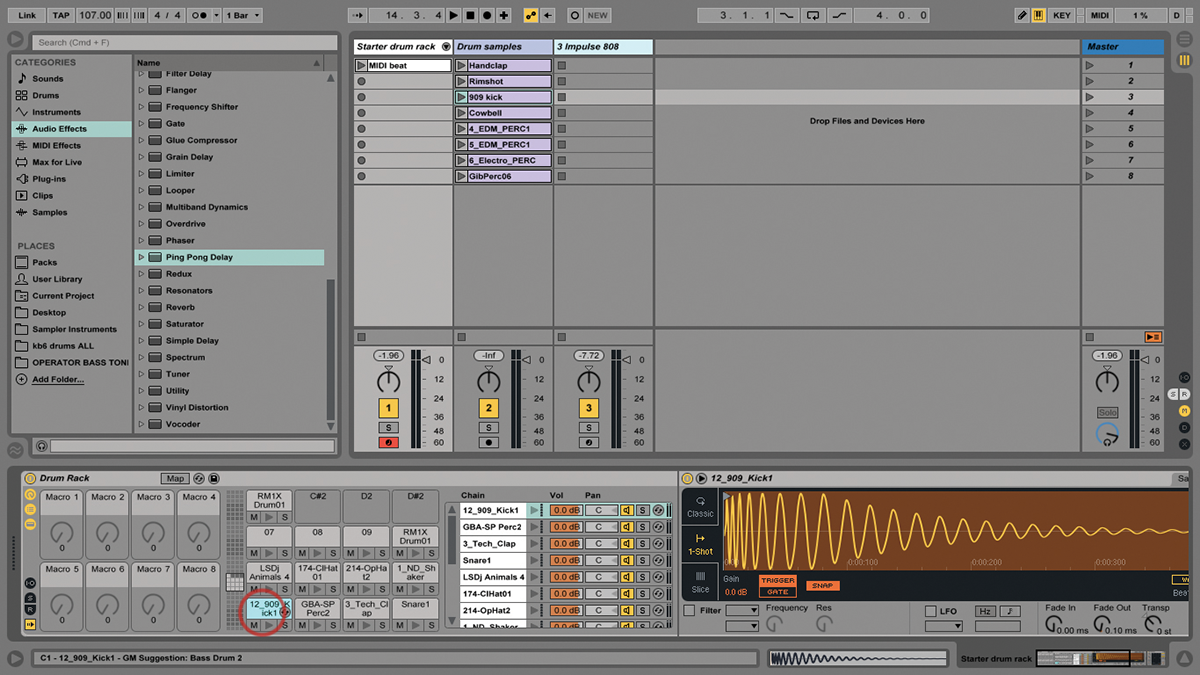
7: Now, let’s suppose we want to begin customising the kit, by replacing the kick. Drag the clip ‘909 kick’ from the Drum Samples track onto the existing kick drum pad to replace it.

8: We have more sounds in Drum Samples; try dragging those into the Rack. Empty pads show their note number, occupied pads reveal their note number in the status bar at the bottom of the screen.
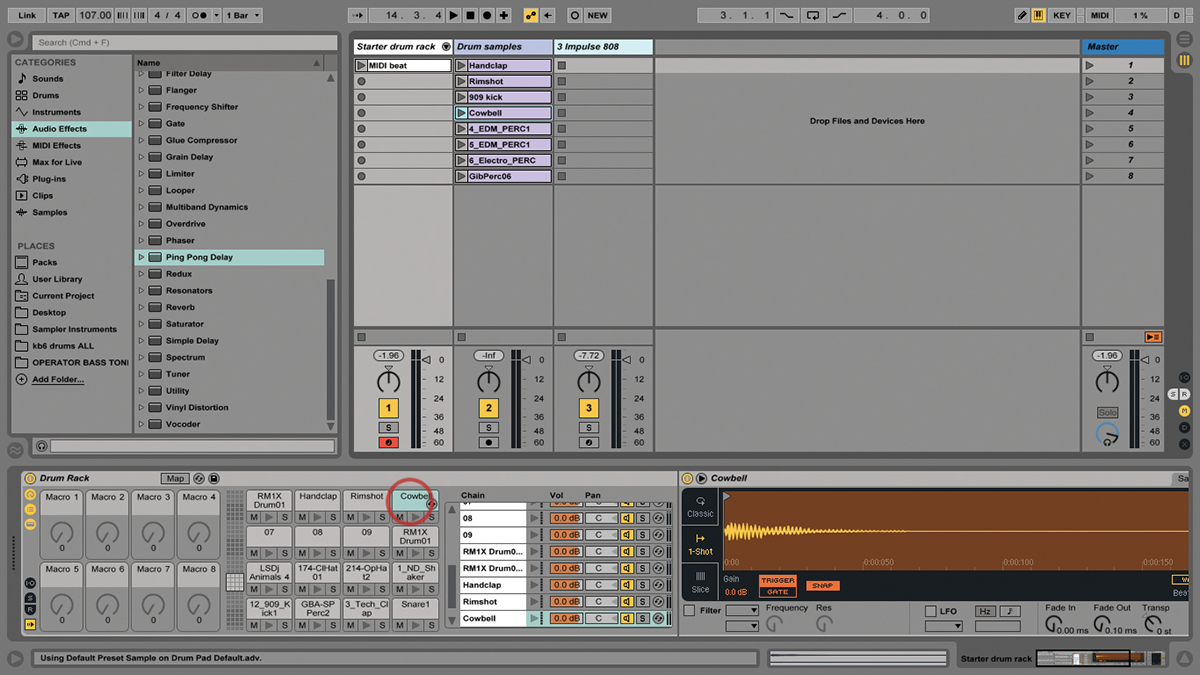
9: Our Drum Rack has 13 samples to begin, so there’s room to add three more samples to the 16-pad layout. If you keep adding beyond that, no problem, as Drum Racks have 128 pad slots.

10: Once you exceed 16 pads, you can navigate around them in blocks of 16. Use your mouse to click/drag in the left grid, or the control strip or octave up/down buttons on Push.
11: Push users, take note – if you’re in Note mode and you’re seeing the contents of a Drum Rack, press Layout twice to enter 64-pad mode, so you can access and trigger more pads at once.

12: Velocity response is a huge part of Drum Rack design, so don’t forget you can go into the Simpler instruments that are hosting your samples, and edit the Vel>Vol value in the Controls tab.
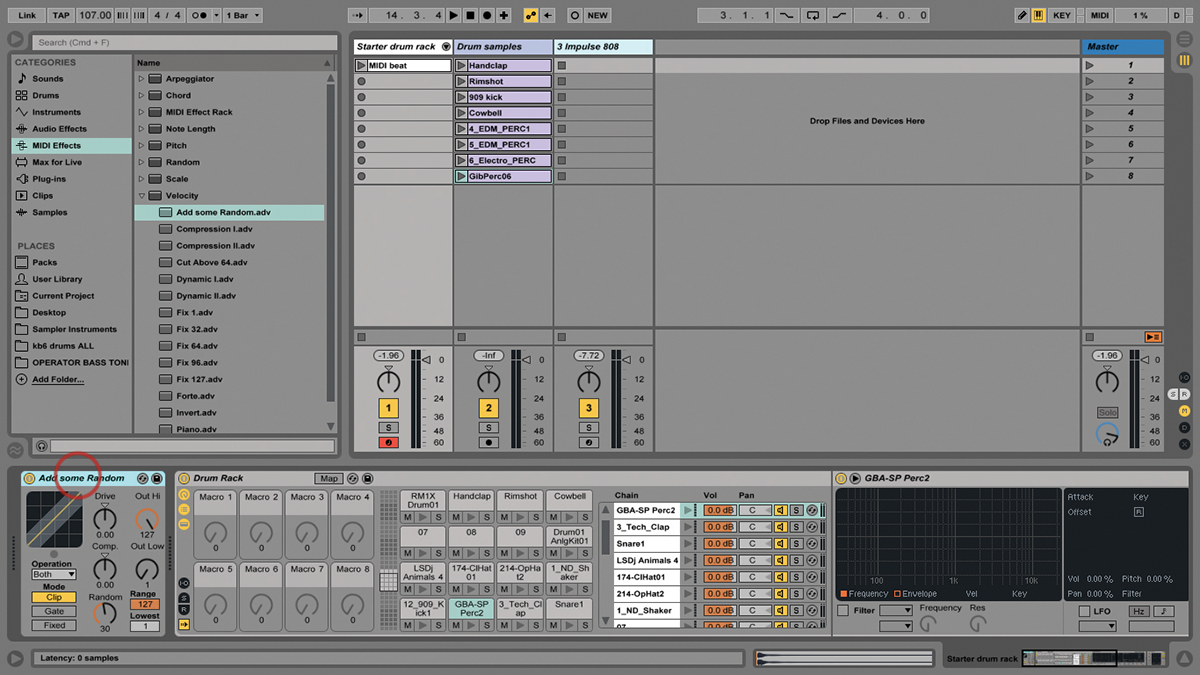
13: You could also add the Velocity MIDI effect device in front of the entire Rack if you needed to smooth out incoming velocities for some reason, or even go the other way, and randomise them!
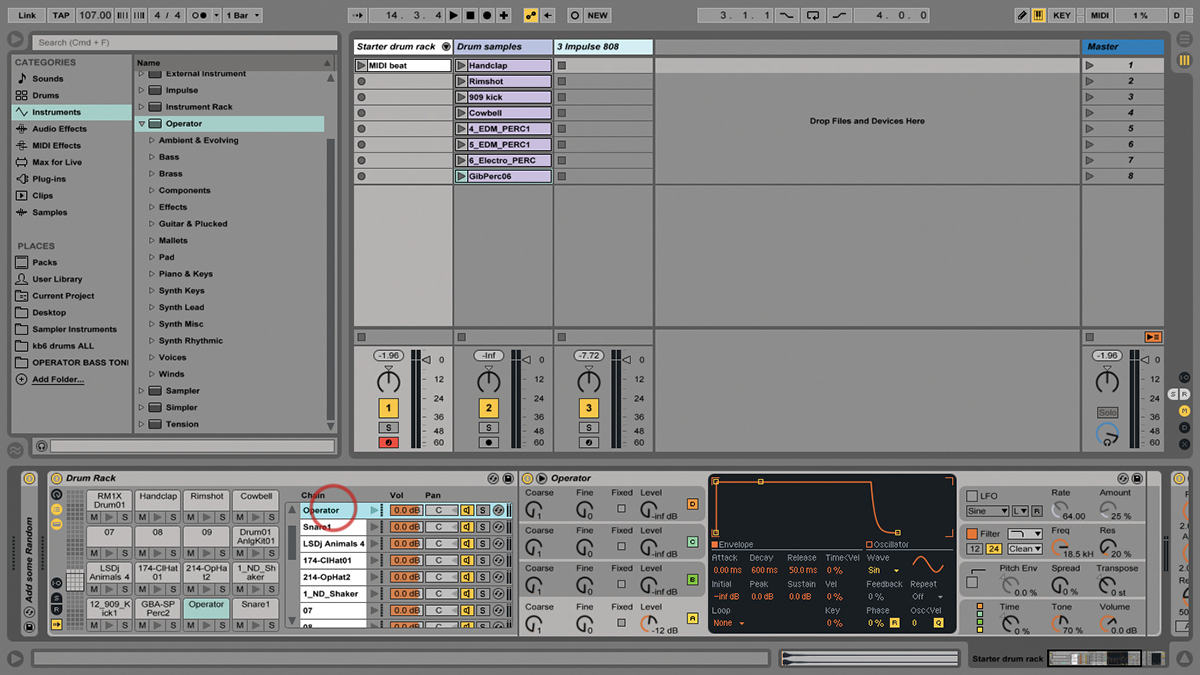
14: Using instrument devices and plug-ins other than Simpler is a great way to expand the sonic range of Drum Racks. Ableton’s Operator synthesiser, for example, is perfect for this.
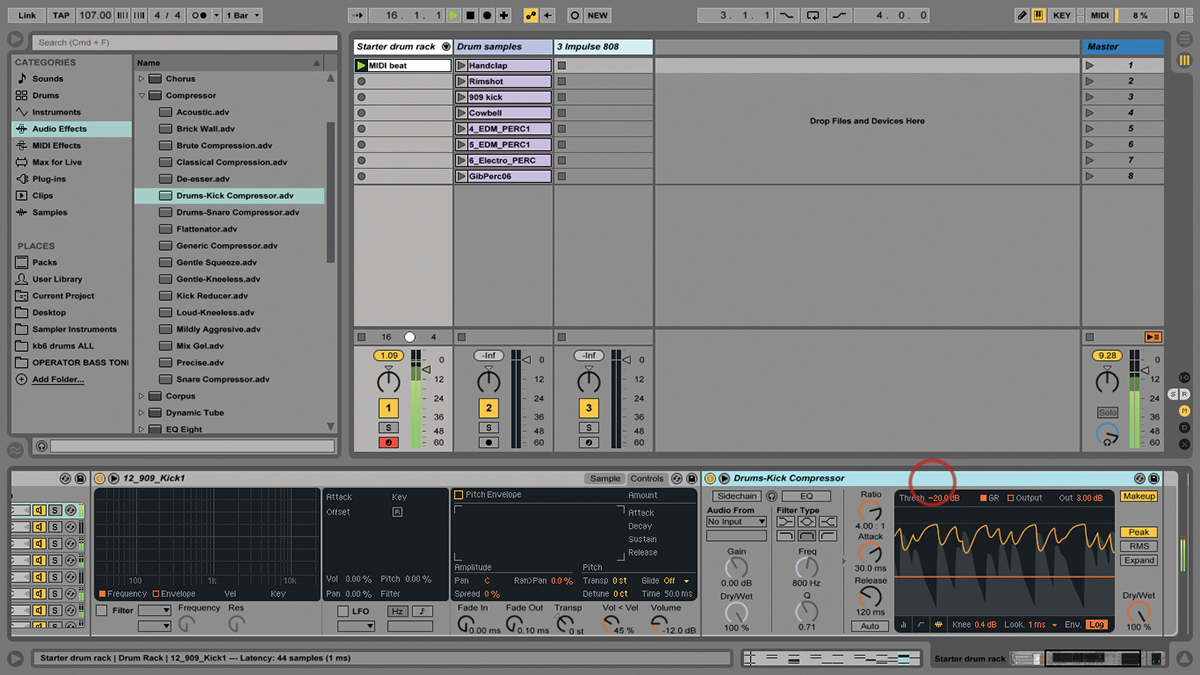
15: Audio effects can be placed at the end of a Rack so they affect the entire kit, or on individual chains; try some different compressor settings on the kick in our example Rack.
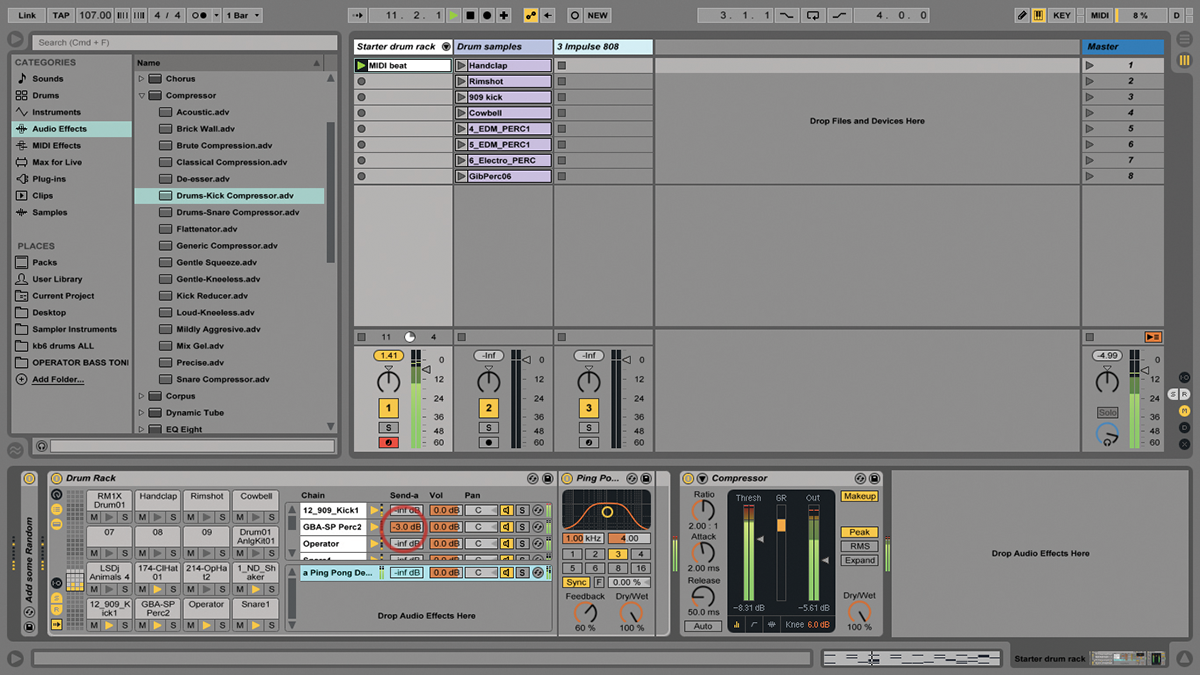
16: We also have the in-Rack effect sends – put a Ping Pong Delay in there and send some of the percussion sounds to it. Effects in here are also saved with your Rack presets.
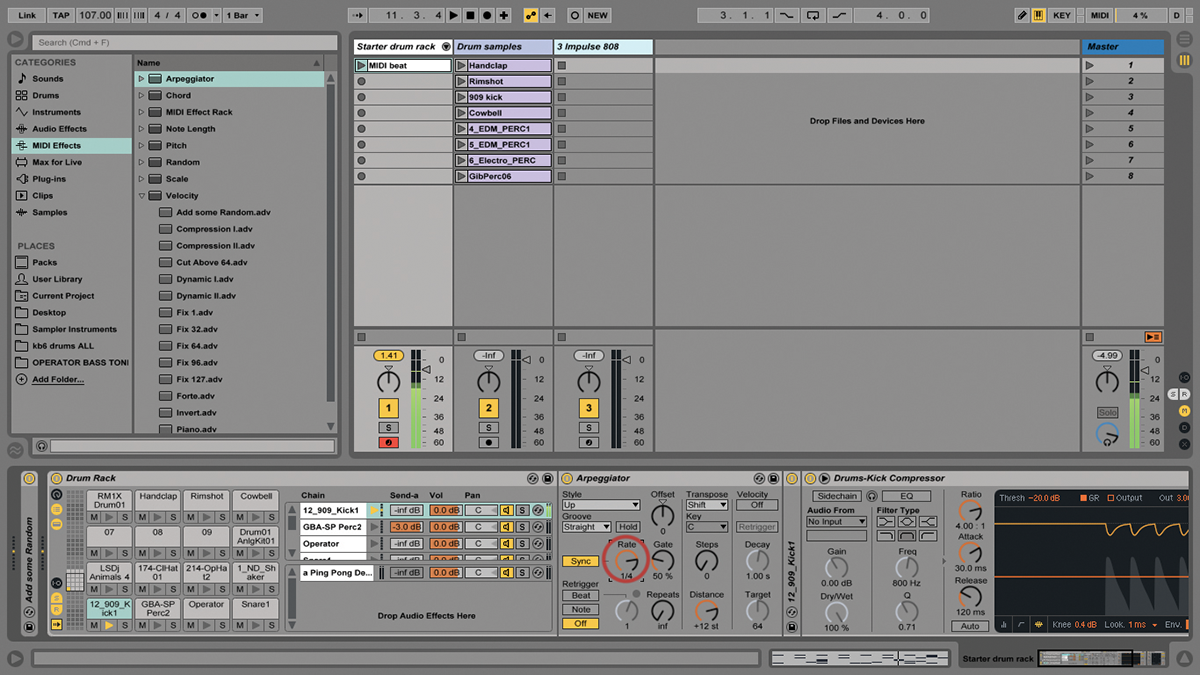
17: MIDI effects other than velocity can also be used inside Racks. Drag the Arpeggiator to the kick chain in our Rack and set the rate to 1/4 – when you trigger the kick pad, you get patterns!
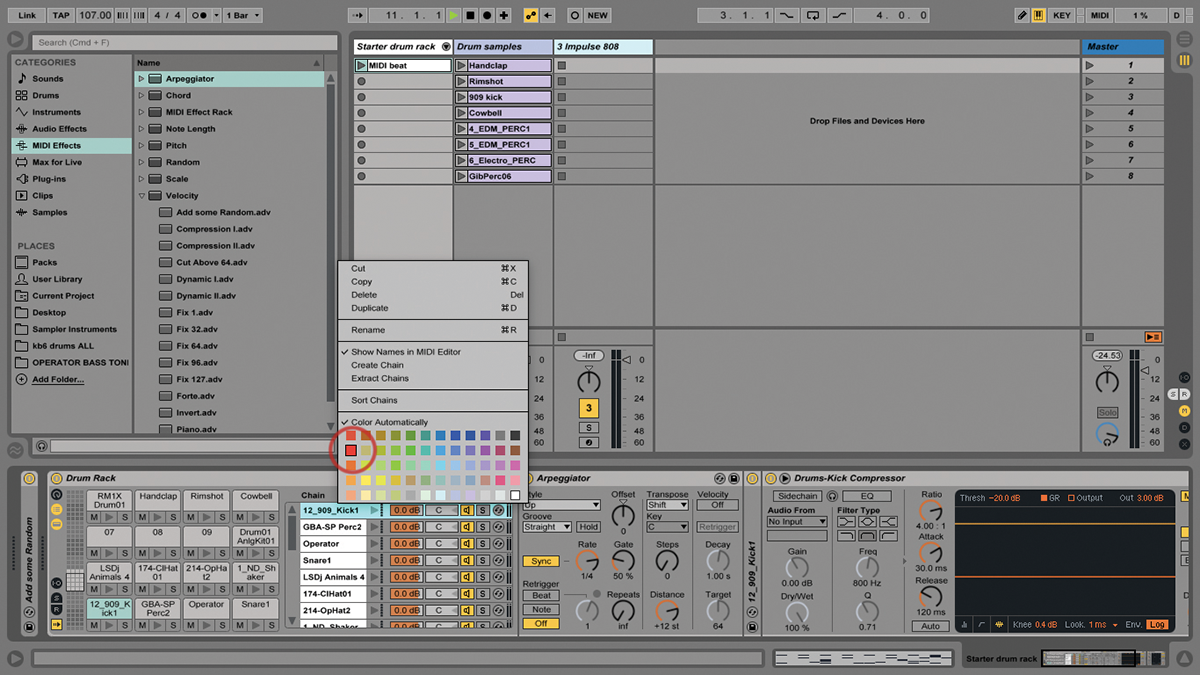
18: You can reorganise the chain list at any time by dragging them up and down to reorder them. You can also duplicate or delete, as well as rename and colour-code them.
