Creating Modulating Effects with Step FX
Logic 10.4’s new Step FX plug-in enables you to create rhythmic mayhem with your audio. Alex Holmes fires up some beats and steps to it… With version 10.4, Logic now has some sexy new FX plug-ins to help you further shape your audio, not least of which is Step FX. This powerful new multi-effects unit […]
Logic 10.4’s new Step FX plug-in enables you to create rhythmic mayhem with your audio. Alex Holmes fires up some beats and steps to it…

With version 10.4, Logic now has some sexy new FX plug-ins to help you further shape your audio, not least of which is Step FX. This powerful new multi-effects unit can create a range of sounds, from subtle rhythmic pulses to brutal trance gates and warped glitches via three independent Step Modulation Lanes.
Although it shares some DNA with the new Phat FX plug-in, the focus is more on creative movement and pulsating rhythms. The effects themselves are relatively simple, with a minimal number of parameters to control, but once you start stacking modules and modulations, things can quickly start to sound complex.
Filter improvements
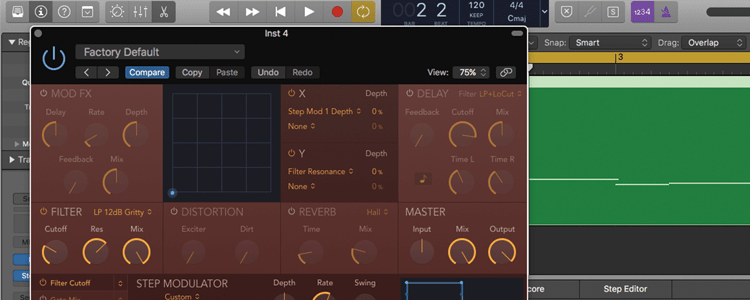
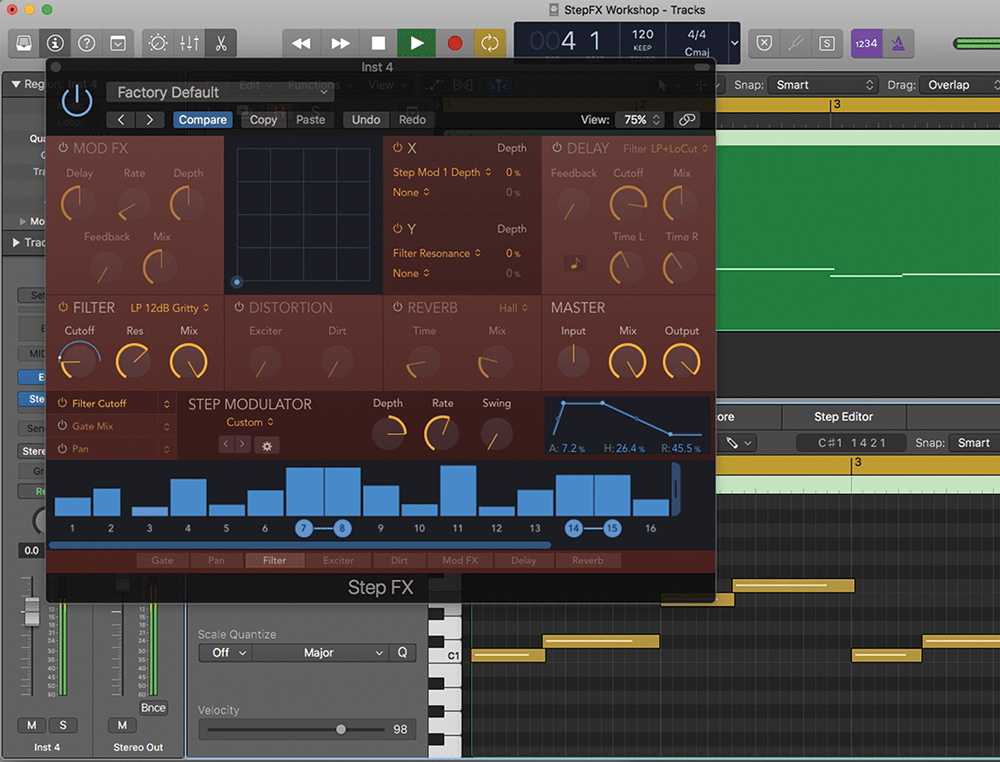
Let’s start with the modules themselves. There’s a Mod FX for chorus and time-based effects, a stereo delay with built-in filter, an Exciter for adding sheen, a Dirt distortion for adding grit, a simple reverb with nine algorithms, a multi-mode filter with a whopping 34 types, and a Master section with Input, Output and Mix controls. It’s worth taking note of this, as the Distortion modules will react differently depending on how hot the incoming signal is. Plus, you’ll most likely need to balance the output once you’ve applied various processors.
The Filter section is arguably the one you’ll end up using the most, and the superb new analogue-modelled filters are a definite step up from using the AutoFilter. Our personal favourite is the LP 12dB Gritty, which saturates at higher resonance settings, giving it a satisfying 303-esque squealing quality. There are also three new comb filter types – great for sound design – and Ring Mod, Bitcrush, Downsample, Mech and Tube settings, which adds some extra distortion options. The order of these effects can easily be rearranged by clicking and dragging on the Effects order strip at the bottom of the GUI.
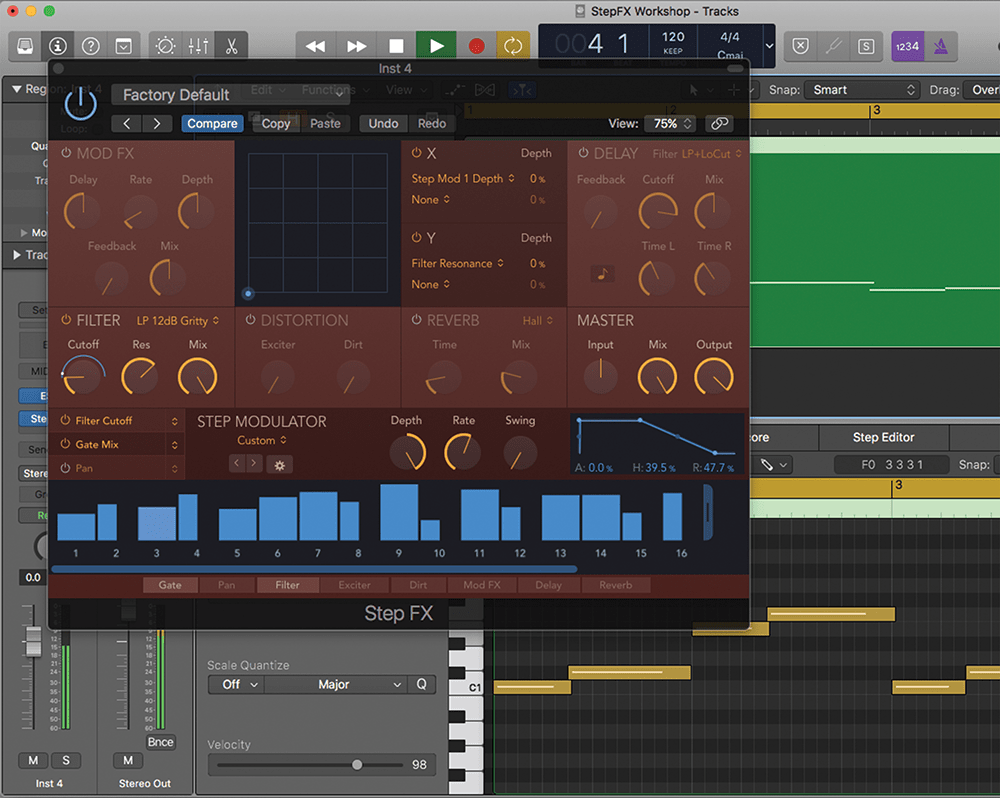
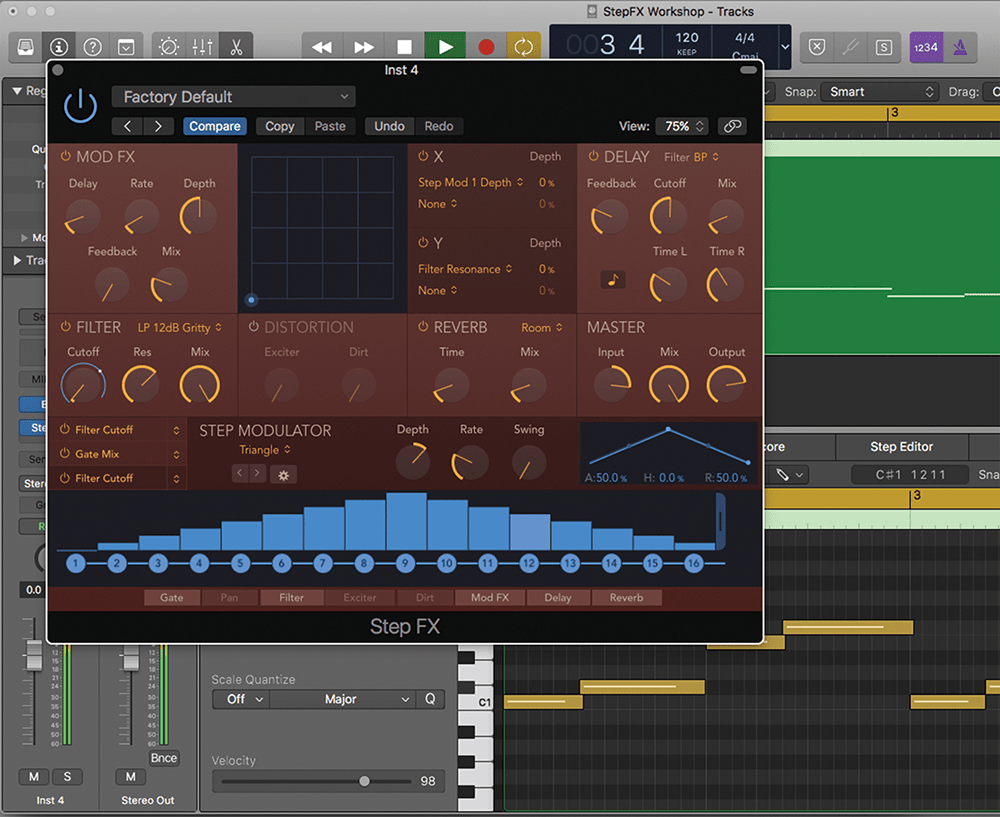
What really sets Step FX apart is the three Step Modulators that can be used to control a number of different parameters (including Gate and Pan), or even the same parameter, giving the option to stack up different lengths to create interesting polyrhythms and evolving patterns. Each Modulator can have up to 128 steps and you can change the length by moving the handle on the right, which also adds a scrollbar to move along the pattern.
Dragging up on a step increases the amount, and dragging left will shorten the gate in increments of 25%. If you want finer adjustment, you can simply hold Shift while dragging right or left. To create ties, you can drag to the right and it will link the steps, or you can also click in the gaps between the step numbers, or switch steps off entirely by clicking on the numbers themselves.
There are also a bunch of factory-preset patterns that include some simple LFO-style shapes, with the option to save your own, plus some pattern modifiers such as Randomise, Reverse, and Duplicate that can be accessed by clicking on the cog icon. This could be a good way to build up variations on your riffs, although you may need to either duplicate the track with the alternative instance of Step FX, or use automation to bypass in and out different instances, as you can’t automate the preset-change buttons themselves.
Once you’ve selected a modulation source and programmed a pattern, you need to set the Depth, Rate and Swing settings. To aid with setting the Depth, there are blue rings around the target dials that indicate the modulation range, with dots showing the current value. This becomes especially useful when you’re stacking Modulators, as you can see the combined movement of the modulation.
Each Lane also has its own Attack, Hold and Release envelope, which can be used to change the shape of each step from hard parameter changes, to smooth sweeps. Try stacking Lanes on the same parameter with one set to sharp steps and the other to smoother movement to get some interesting flowing modulations.
It’s not all about rhythms though, as Step FX also has an X/Y Pad that can control up to four parameters, adding an extra layer of performance to your patterns. The X/Y positions can be automated, as well, so you can set the appropriate track setting such as Touch, and then record your movements. Whether it’s quick edits that add incidental glitches, or slow sweeps as a part progresses, it’s definitely worth playing around with this feature to add a sense of progression. You’ll probably find that different combinations of parameters can create new sounds and ideas that you maybe weren’t expecting to discover.
Step FX is a great new addition to Logic that adds some much needed fun and creativity with its randomise features and performance pad. It’s a shame you can’t modulate the delay and reverb times, as that could create some wild effects, but there’s still plenty to get your teeth in to.
Try it out on drums, bass, vocals and instruments to add some movement to stale tracks.
Acid-bass filter: Step-by-step
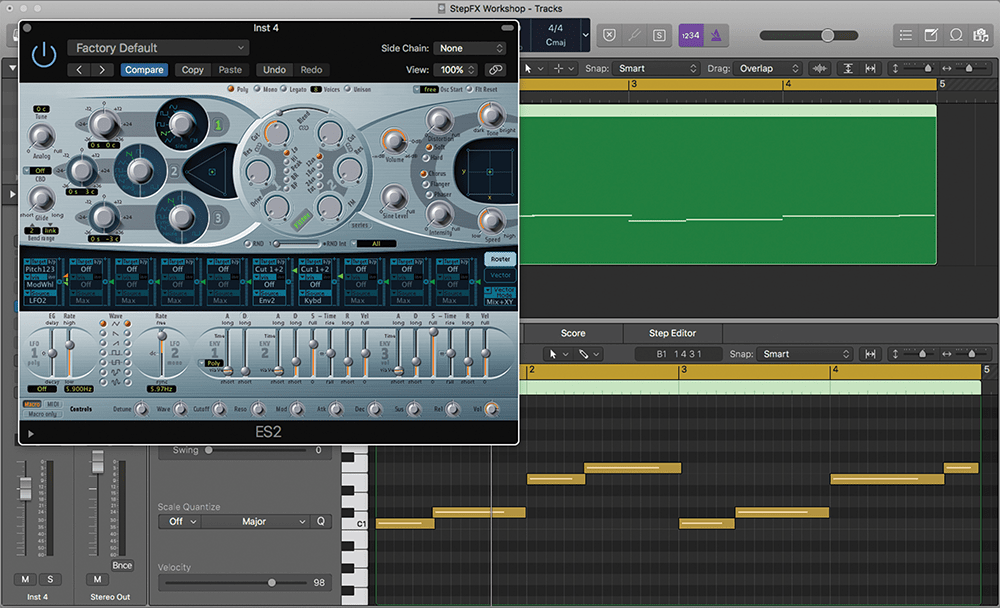
1. An obvious use of StepFX is to create a complex filter movement. Let’s start with a simple bassline using the ES2 synth. We’ve used the default patch and have turned off Oscillators 2 and 3 so we have a basic Saw bass.
2. Add an instance of Step FX, switch the reverb off and initialise Lane 1 by selecting Recall Default from the menu. Now try out the different filter types and pick one. We’re going with the LP12dB Gritty, with some increased Resonance.
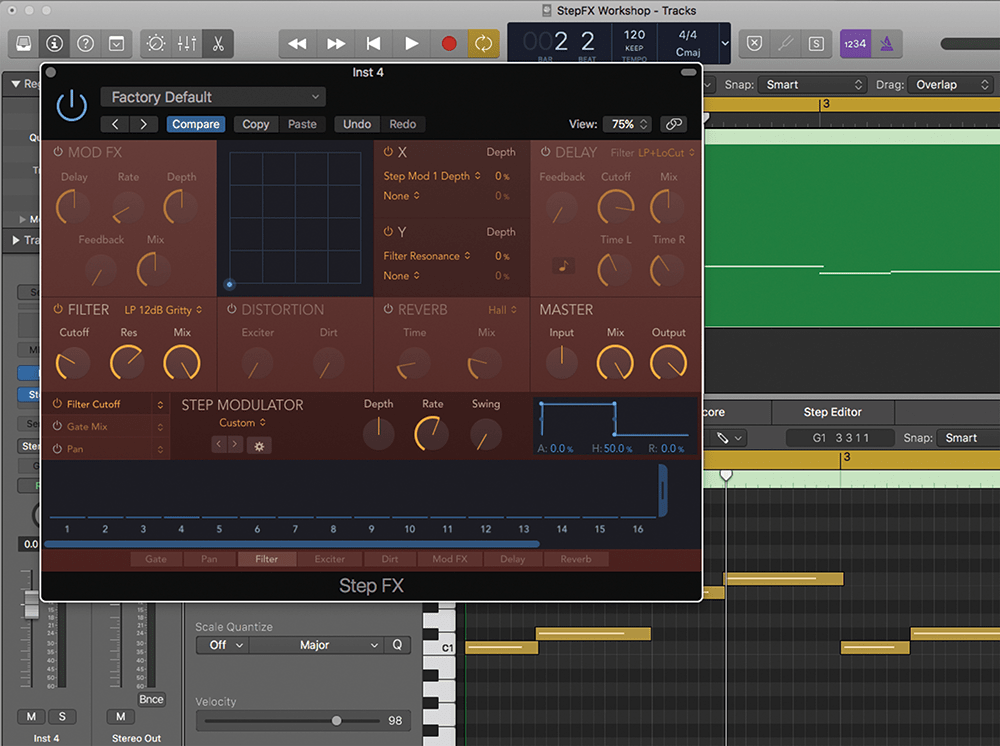
3. Next, we want to increase the Depth control and program a pattern to control the Filter Cutoff, with some ties to add some groove. Play with the Envelope shape to make the modulations sound sharper or smoother.
![]()
Ultrabeat step effects Tempo-synced filtering was already possible in Logic via Ultrabeat. If you load up the Side Chain Gate preset, and route audio through the sidechain input, you can program different filter and effects settings for each key and create patterns of notes with the sequencer.
4. Let’s add some extra rhythmic interest by switching on Lane 2 set to control Gate Mix, and program a pattern with different values and lengths and with some steps switched off. Again, tweak the Envelope to taste.
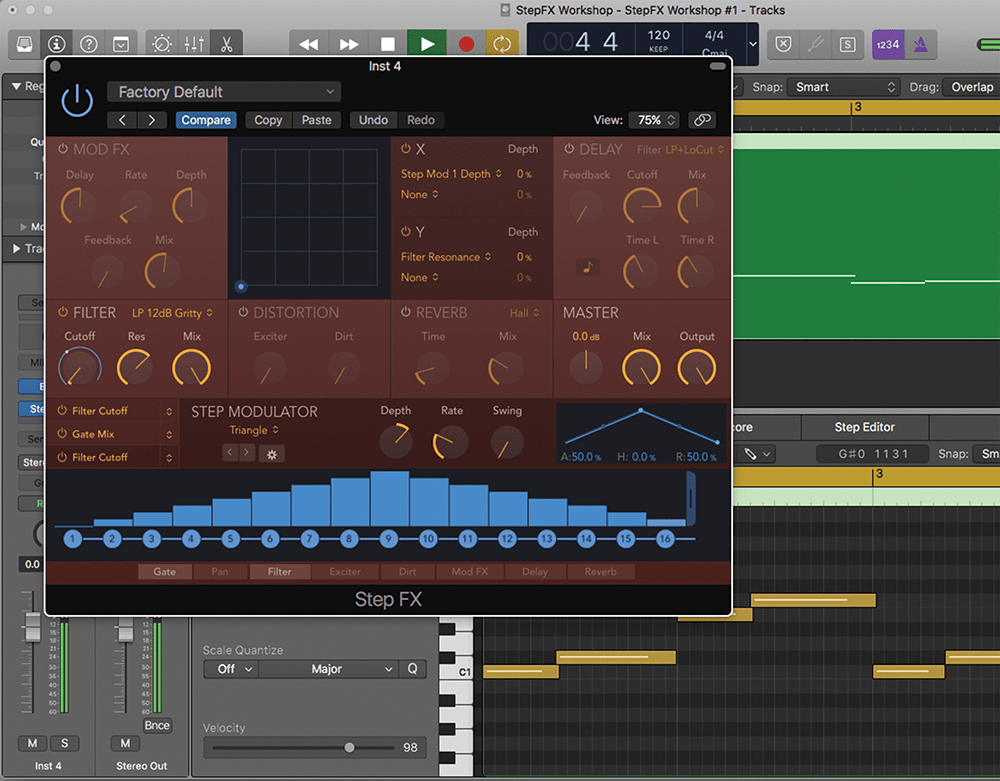
5. We can now add some extra Cutoff movement, by selecting Lane 3 with the Triangle preset and setting a slower rate of 1/4 or less, so that the entire Filter pattern slowly moves up and down.
6. To add a final touch, let’s apply a sprinkling of Mod FX, Reverb and Delay, and also increase the Input amount so that it drives into the Gritty filter algorithm and generates some nice squelchy saturation.
Click here to learn how to create Glitch beats with Logic’s Step FX
