Creating Pulsing Effects in Logic Pro X
Making your audio and instruments ‘pulse’ in time with your track adds a new level of sonic interest to your mix. Mark Cousins finds his pulse… The ability to turn a static sound into a pulsating rhythmic effect can add both rhythmic and chordal interest to your music. We’re going to create a range of […]
Making your audio and instruments ‘pulse’ in time with your track adds a new level of sonic interest to your mix. Mark Cousins finds his pulse…


The ability to turn a static sound into a pulsating rhythmic effect can add both rhythmic and chordal interest to your music. We’re going to create a range of pulsing effects using Logic Pro X’s audio plug-ins, which means it can be applied to an instrument in your mix – whether it’s something you’ve recorded, or a virtual instrument.
As you’ll see in the walkthroughs, there are a number of key plug-ins to create pulsing. The first of these is the Tremolo plug-in, in the Modulation plug-in folder. The Tremolo plug-in, of course, was primarily designed to process instruments like an electric guitar or Fender Rhodes electric piano, mimicking the Tremolo effect found on many guitar amps.
In its default setting, the Tremolo plug-in modulates amplitude, with a different phase offset between the two channels (left and right), so the sound appears to wobble between the left and right-hand speakers.
If we’re creating pulsing sounds, though, this movement between the two speakers is less relevant, so you’ll immediately need to turn your attention to the Phase control. With phase set to 0º, the amplitude modulation is the same across both channels, which gets us much closer to the pulsing effect we were looking for.
With the two channels in phase, we now need to consider the shape of the modulation, moving away from the soft pulsing effect and onto something with a more pronounced attack, using combinations of Symmetry and Smoothing.
Track to region automation
By default, Logic stores its automation data as a separate entity to regions. In theory, this means regions and/or track automation data can be edited and moved independently of each other. However, it’s possible to lock automation data onto a region using the menu option Mix > Convert Automation > Convert all Track Automation to Region Automation.
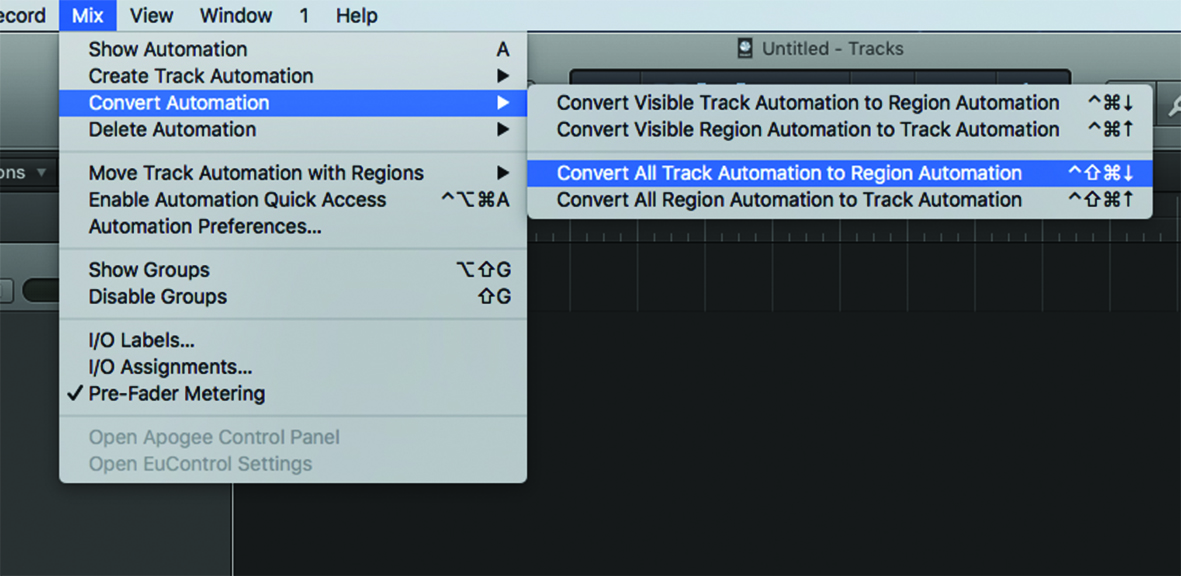
Moving track automation to regions makes a lot of sense here, where a set of automation moves become an intrinsic part of a region’s musicality. Move the region, and the automation data always moves with the part, without the need to manually confirm each time you move the region. Mix > Convert Automation > Convert all Region Automation to Track Automation can also reverse the process.
Perfect symmetry
On the whole, you’ll want to work with two contrasting Tremolo settings. Using the lowest Smoothing setting, for example, you can create a Square wave-like pulsing effect, with the relative width of the pulsing defined by the Symmetry. Set Symmetry to 1% and you’ll get an effect much like a retriggered AR envelope generator, with Smoothing now setting the relative length of the release. Finally, the relative Depth of the effect can establish whether it’s a subtle tempo-synced pulsing, or a more radical modification of volume.
Tremolo is the most immediate way of achieving tempo-synced pulsing effect, but there’s a clear limitation if you want to produce a pulsing effect that isn’t just a 1/8th or 1/16th movement. In this case, you’ll need to turn to the Noise Gate and a technique called Key Gating. For this, you need a spare audio track or instrument to work as the trigger for the gate. In most situations, this tends to be a short, percussive sound like a hi-hat. The trigger sound is then fed through to a bus with its output assignment removed.
The signal being Key Gated then has a Noise Gate inserted across it, which is then triggered, via its Side Chain input, using the signal on the bus. The main benefit of the Key Gating technique is you have precise control of the rhythm of the pulsing effect.
Another nice trick is varying the length of the sound used to trigger the gate, – easy if you’re using the aforementioned hi-hat. The trick is to set the Threshold correctly, so that the gate only shuts once the sound’s reached the mid-point of its release. Also, as with Tremolo, it’s worth adjusting the depth of the effect to vary between a soft pulsing, and a more extreme gating effect.
Having played with amplitude, it’s also worth exploring how a filter can be used to create a pulsing effect, this time modulating the timbral properties rather than the amplitude. You can approach the pulsing effect as a combination of both amplitude and timbre, maybe using a soft filter pulse setting followed by a hard gate, or vice versa. For pulsing treatments, AutoFilter includes a dedicated tempo-synced LFO section, opening up a wealth of creative possibilities.
Use the Ramp Down shape, for example, to create the repeating envelope effect we achieved both with the Tremolo plug-in and the side-chained Noise Gate. The other shapes – including Ramp Up, Triangle, Sample & Hold and Square waveshapes – all have their own applications.
Sample & Hold, for example, can produce a step sequencer-like effect, where each tempo division has a slightly different filter setting. You could even use two AutoFilters in series to created a hybrid movement combining the properties of two waveshapes.
Unlike the Tremolo and Noise Gate example, the AutoFilter includes two ways you can set the relative strength of the effect. Firstly, you can adjust the amount of LFO modulation applied to the cutoff. Rather than the LFO completely sweeping the filter, sometimes you can achieve the most musical results with relatively small LFO depth settings. The Dry Out option blends a proportion of the unfiltered signal back into the mix.
On the pulse
Having explored the three main ways of creating pulsing effects using audio plug-ins, it’s now just a matter of experimenting with further instruments, effects and features using these tools. In many ways, the most interesting results come when the three plug-ins explored here are combined with other elements: whether it’s a granular pad on Alchemy passing through a pulsating Tremolo plug-in, or an arpeggiated Retro synth passing the AutoFilter plug-in.
Step-by-step Pulsing FX
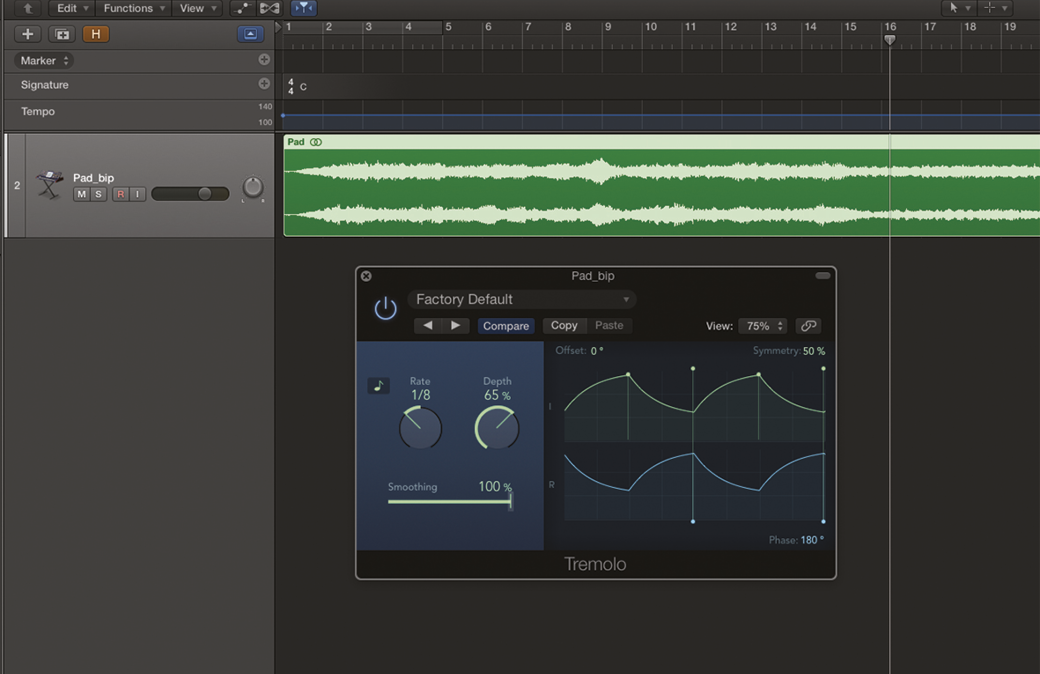
1. Working from the project on the DVD, load the Tremolo plug-in onto the Pad track. The default setting is a soft auto-pan Tremolo from left to right, using a tempo-synced time division defined by Rate.
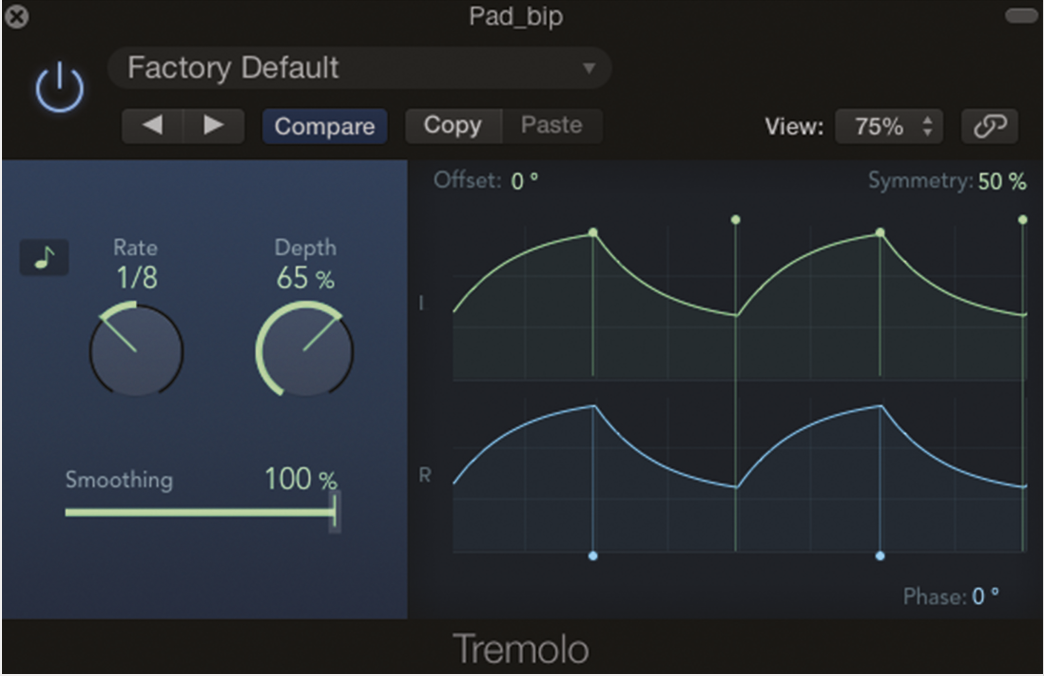
2. Changing the phase control from 180º to 0º means the effect is synchronised between both the left and right channels, creating a soft pulsing effect. Depth sets volume attenuation between steps.
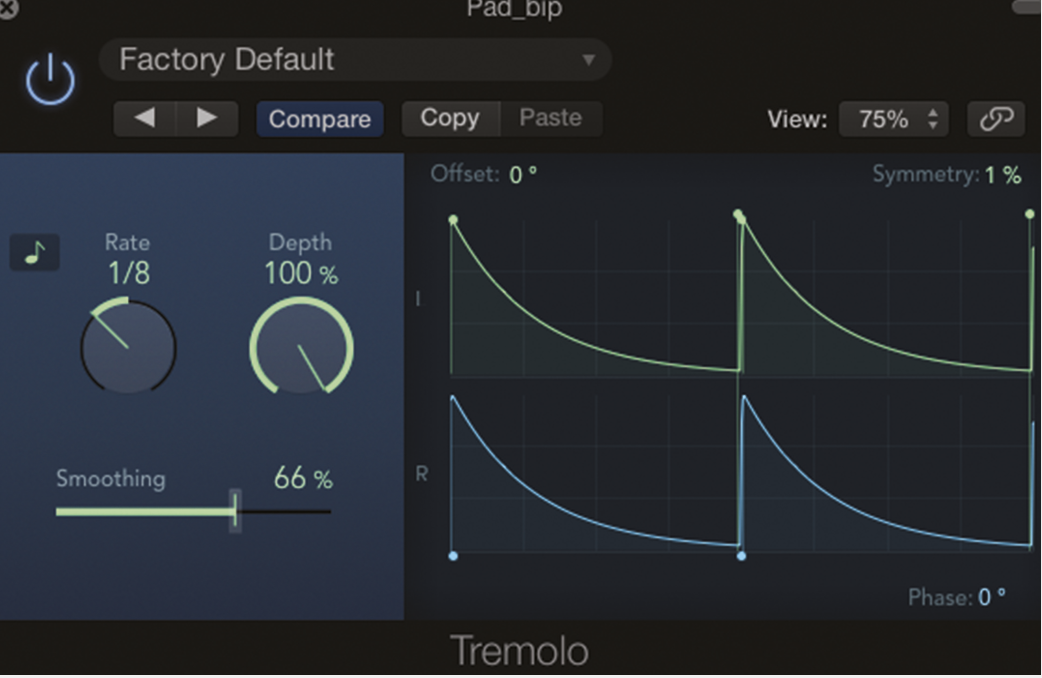
3. Symmetry and Smoothing extend the range of shapes for the pulsing effect. Try reducing Symmetry to 1% for a repeating AR envelope, using Smoothing to set the curve of the Release phase.
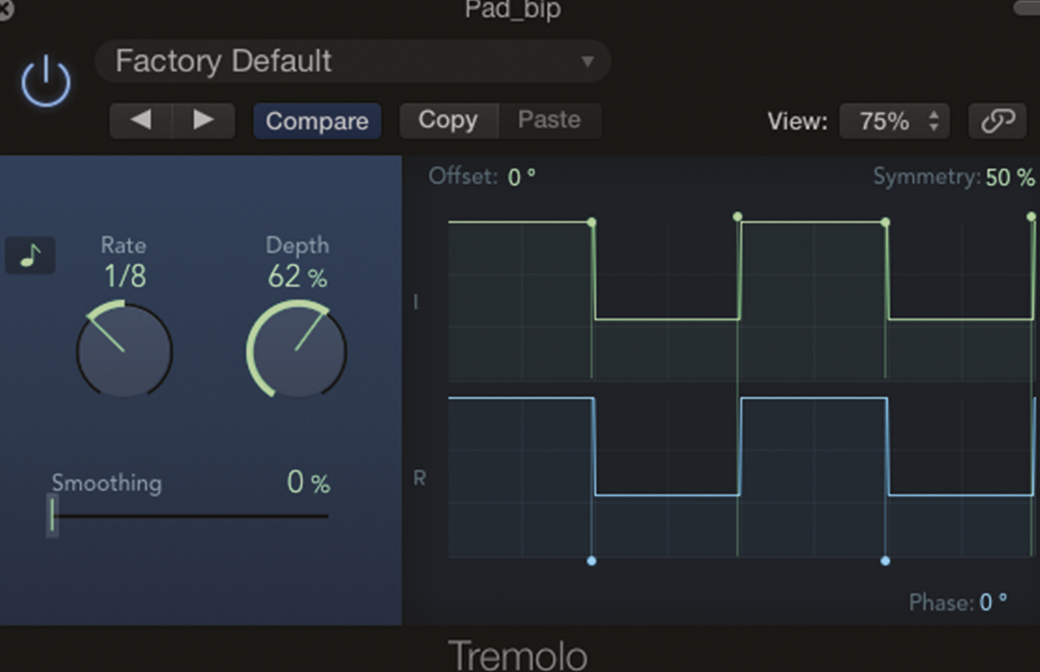
4. Smoothing at 0% will create a square pulsing effect. Use the Symmetry to set the pulse width of each step, moving between an ‘open’ setting at over 50% or a ‘clicky’ pulse as you go below 50%.

5. An alternative to Tremolo is to use Key Gating, if you want a sense of rhythmic interest. Start by programming a basic trigger pattern. We used a default EXS24 kit for a basic hi-hat pattern.
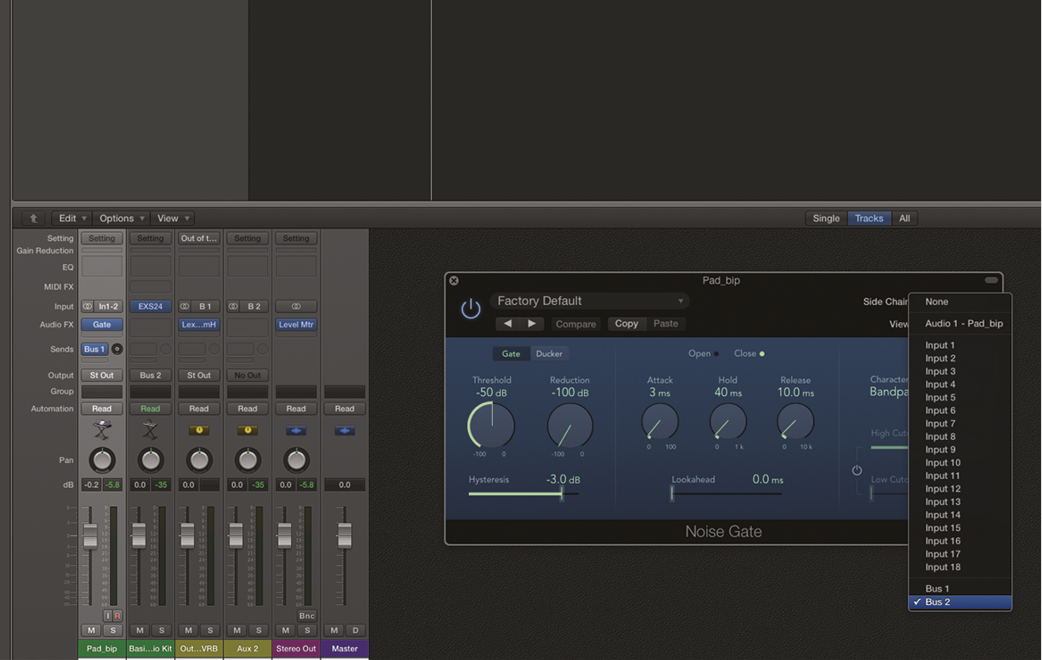
6. Route the EXS24 to a spare bus. Remove the output assignment from that bus (so we don’t hear the hi-hat). On the pad track, apply a Noise Gate plug-in. Change its Side Chain assignment to Bus 2.
