Cubase Tutorial: Getting To Grips With Chord Tracks
The Chord Track is one of the most powerful new features in Cubase 7. Hollin Jones shows you how it can turn even an inexperienced player into a maestro in this Cubase Tutorial Cubase has always had more tools for working with MIDI and notation than most other DAWs and this trend […]
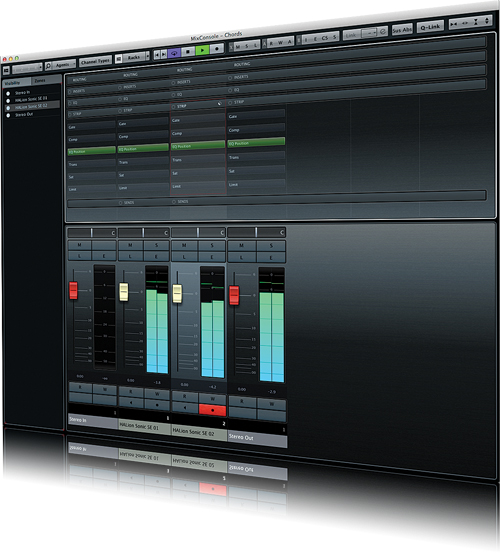
The Chord Track is one of the most powerful new features in Cubase 7. Hollin Jones shows you how it can turn even an inexperienced player into a maestro in this Cubase Tutorial

Cubase has always had more tools for working with MIDI and notation than most other DAWs and this trend continues in Cubase 7, which features Chord Tracks. These are a kind of MIDI track designed to aid composition by making it possible to create complex chords with just a few clicks. Better still, they are capable of far more than simply creating chords, and you get advanced scale, playback and even chord suggestion options to help you along.
Regardless of whether you’re a beginner or a professional looking to save time, Chord Tracks can be a great boost to your music-making. Let’s look at how they work in the first of our Cubase 7 Tutorials
Major Change
Chord tracks are essentially a form of MIDI Track, so they need to be connected to a sound source in order to make any sound. Start a new project and create an Instrument Track. Here we have loaded an instance of HALion Sonic SE (which comes with Cubase 7) and loaded a piano patch.
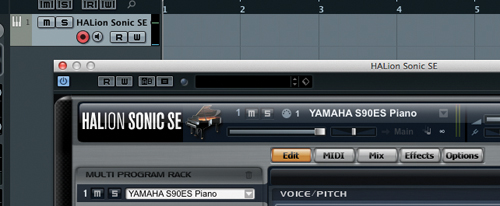
You can play in notes yourself, of course, but let’s assume that you’re not an experienced player or you want to generate some music in a different way from playing the keys. Right-click in the project window and choose Add Chord Track. On the track that is created, make sure that the Audition Chords button is on and the Auditioning menu is set to play the HALion instance that you just created. Finally, ensure that the Monitor button is active on the HALion track.
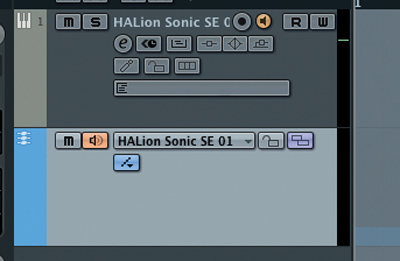
Select the Draw tool and click in the Chord Track. A block is created with an X on it. Switch back to the Pointer tool and click on the X. This reveals the Chord Editor window; clicking on any options here will play back the selected chord and variation. The column on the left is the root note; the second column is the chord type; the third column is the tension; the right-hand column is the bass note.
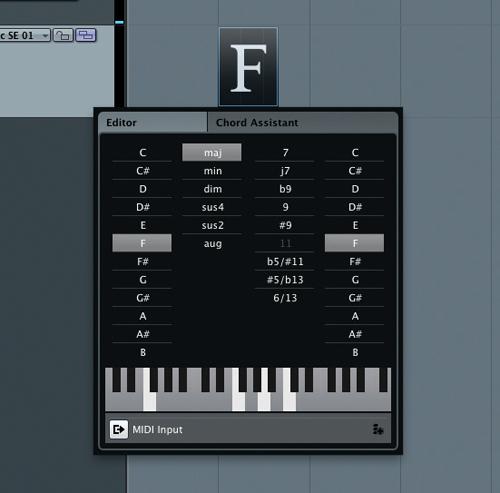
By clicking on different options in different columns you can create any chord and inversion you like; if you click on the MIDI Input button and play a chord on your keyboard, it will register and Cubase will tell you what chord it is.
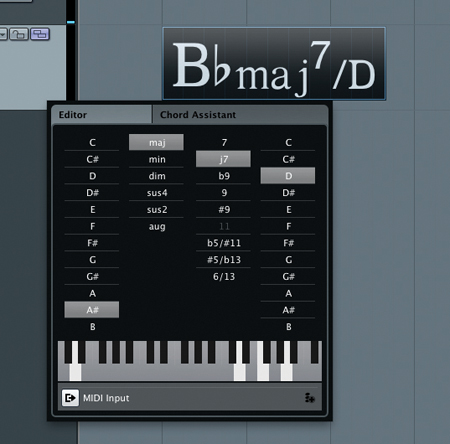
If you play in a chord by hand it is stored in the Chord Editor and you can then alter any of its characteristics. You could play in a custom chord, for example, then use the Editor window to put it into a minor key and give in a 7th inversion. It’s a good way to take your own playing but make the end results more advanced.
3 issues for £5Chord Assistance
If you click the Add button at the bottom right of the Chord Editor window it will place a new Chord Event at the start of the next bar or the next snap marker, and you can again enter values for it, so you could compose by simply building up chords in this way. Chord Events can be copied and pasted in the usual manner, and edited by clicking on them to change their settings.
Let’s imagine that you were looking for some inspiration for your next chord but coming up short. Create a new Chord Event and click on it, but this time, instead of using the Chord Editor, click on the Chord Assistant tab. This suggests possible next chords based on the scales and keys currently being used. You can see fewer or more options by moving the Complexity slider anywhere from 1–7. Clicking on a chord option will play it back.
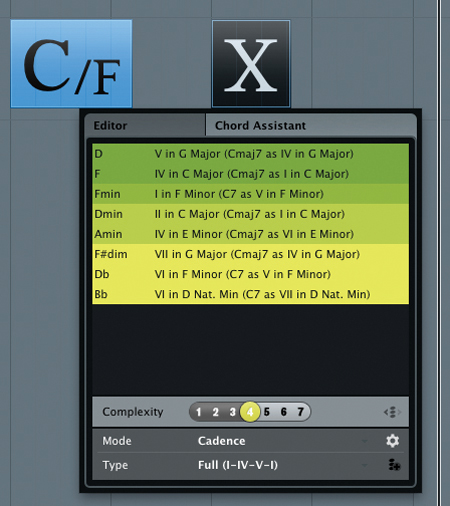
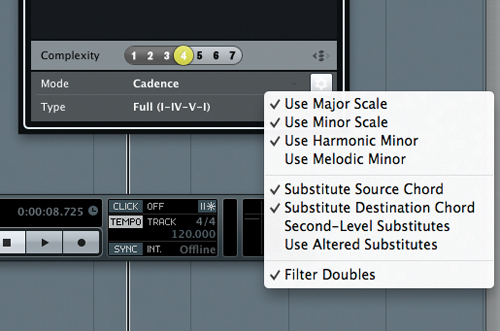
There are more options available at the base of the Chord Assistant window that change the way the chords are generated. The Cadence menu enables you to specify which types of chords will appear as options – minor, major, harmonic minor and so on, so you can restrict suggestions to only specific types of chord for faster selection. The Type menu can be used to further refine the list of options.
You’re not limited to just these options, either. If you go to the Inspector panel for the Chord Track you will see a number of further settings that can be made. At the top is the Voicings Library chooser. Click on this and you can choose from Piano, Basic and Guitar. A pianist and a guitarist will play chords differently, with different root notes and spacings. You can set this to Piano for anything keyboard-based, Guitar for guitar instruments or Basic for simpler options.
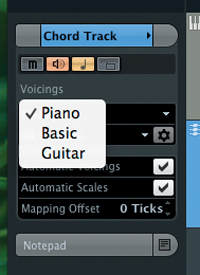
In the menu below you can set further voicing options, so for Piano you get a selection of styles available plus options to have the chords generated to be fuller or more sparse. For guitar these change to different style options.
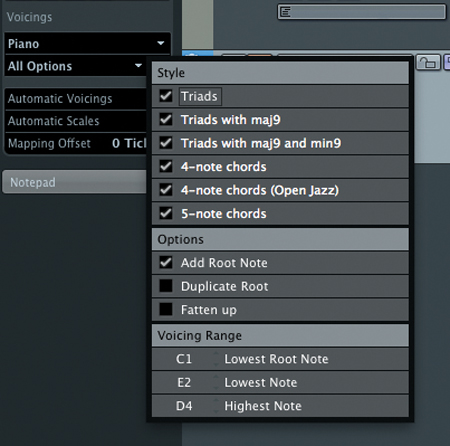
Composing With Chords
Remember that Chord Events follow the project’s snap settings so they can be placed anywhere you like, not just at bar markers. Set the project to use a lower setting such as 1/16 and you can easily overlap events to create more realistic-sounding sequences. To make this process easier to manage Chord Tracks have an option called Resolve Display Conflicts, which shows Events in a stack. This ensures that when chords overlap, you can still see what’s going on.
So far we have created piano chords, but now let’s try assigning the chords to play a second instrument – a guitar, for example. First we’ll need to convert the chord parts to MIDI to play the piano part, which is as simple as dragging and dropping the Chord Events onto the first HALion track to convert them to MIDI clips.

These can now be edited like any regular MIDI clip. Now create a new instance of HALion and load a plucked acoustic guitar patch. Here we have selected one called Nylon Finger Picking because it contains picking and movement rather than just a single note. Assign the Chord Track to play through this new instance of HALion, switch its voicing type to Guitar, and play back. You should hear that the piano and guitar parts both play back the same chords, though the guitar will use slightly different note layouts to do it, since this is how a ‘real’ guitarist would play it.
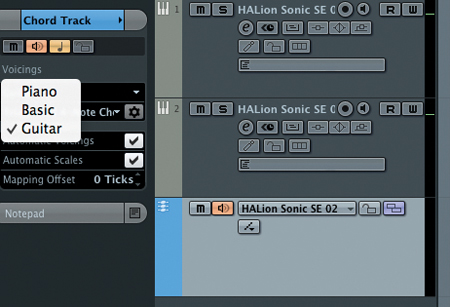
Since the piano chords now exist independently as MIDI, you can alter the Chord Events that are playing the guitar instrument without affecting other parts. Of course, if the Chord Track was set to play All Monitored Tracks, any changes you made would affect any connected instruments.
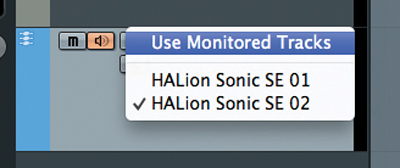
In this case, however, it’s not, so you can tweak the way any given chord is generated; when you’re happy with the results, convert these clips to MIDI by dragging them to the guitar instrument’s track and then repeat the whole process.
Further Uses
A project can contain only a single Chord Track, so you can either have it triggering multiple instruments or work on them individually and convert parts to MIDI before moving on. If you go to the Inspector panel for an Instrument or MIDI Track you will see a new Chord Track tab. Here you can tell a track to follow the Chord Track in a number of different ways.
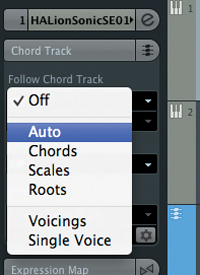
You can make MIDI data on tracks follow the Chord Track by forcing it to variously adhere to root notes, scales, voicings or the less rigorous ‘auto’ setting, whereby the intervals of the original chord or scale are maintained wherever possible. It’s a little bit like the Transpose Track, only now, instead of simply using root notes or scales, you can make MIDI data follow very specific chords in a variety of ways.
There’s a great deal more to the Chord Track than we have had chance to look at here, not least its ability to integrate with VariAudio 2.0 to make automatically harmonised vocal parts follow specific voicings and change over time, but you will be able to see the evident power of the Chord Track for quickly creating everything from simple progressions to advanced jazz inversions and suggesting chords for you based on existing data and on preset scales. For beginners it’s a great way to introduce some more advanced playing to your tracks; for professionals, it can save time when orchestrating parts that you may simply not have the time to record or program yourself. Explore Chord Tracks to see how they can improve your workflow and bring a new dimension to your music. Check out the audio on the coverdisc, and when you listen to it, remember that it was generated entirely without playing a single MIDI key, and without the use of any pre-recorded loops.
Here’s a chord-track tutorial from DV247TV