Cubase Tutorial: Become A Power User Part 2 – Creating and Editing Audio Recordings 2
Tim Hallas continues his look at the most efficient ways of creating and editing audio recordings in Cubase… Editing Audio From The Arrange Window 1. After your audio is tracked, you will need to edit it so that it fits within the project. Start by setting Snap (where the cursor makes the edits) to an appropriate […]
Tim Hallas continues his look at the most efficient ways of creating and editing audio recordings in Cubase…
Editing Audio From The Arrange Window
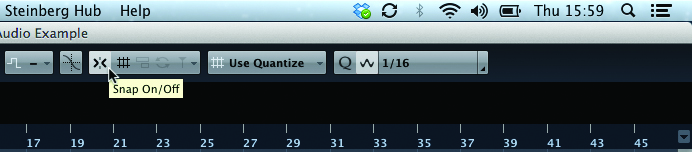
1. After your audio is tracked, you will need to edit it so that it fits within the project. Start by setting Snap (where the cursor makes the edits) to an appropriate level by clicking on the grid type and choosing a level of detail that allows accurate selection. Beat is usually detailed enough, but you can sync it to the quantize settings if you need to be more precise.
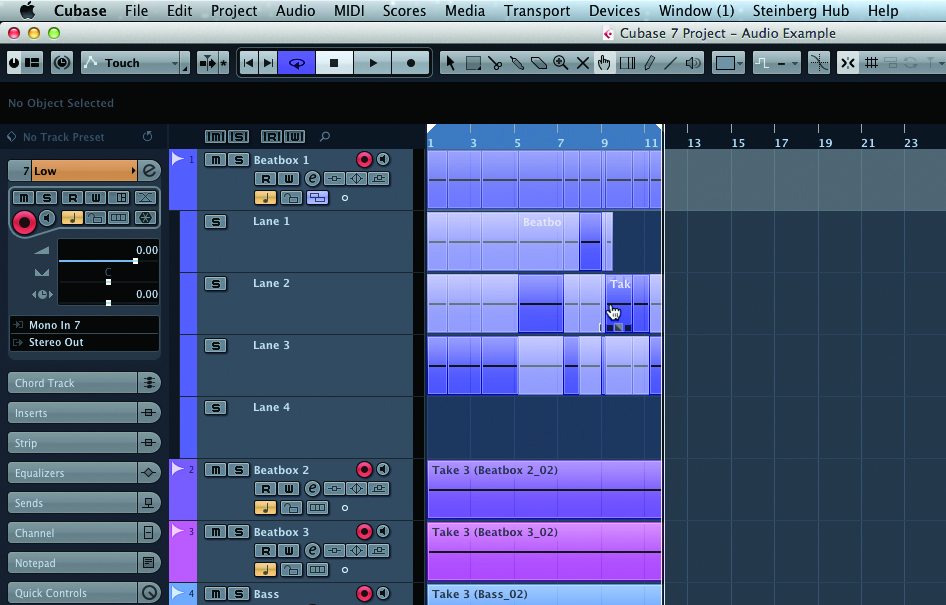
2. It is very likely that you will have multiple takes of each recording and need to create a composite of the perfect take. Start by clicking on the button in the track header labelled Show Lanes; this opens the takes below one another. Select the Comp tool (the finger) and simply swipe the different sections of takes that you like; Cubase will do the rest and make edits at the appropriate points.
3.If you haven’t comp’ed or are using multiple tracks for different takes, you will need to do some basic editing. To remove the end from an audio file, either use the Scissors tool and cut at the appropriate point. If you just want to tidy up the end of a file, hold the cursor over the bottom corners of the file and drag to shorten or lengthen an element in the Arrange window.
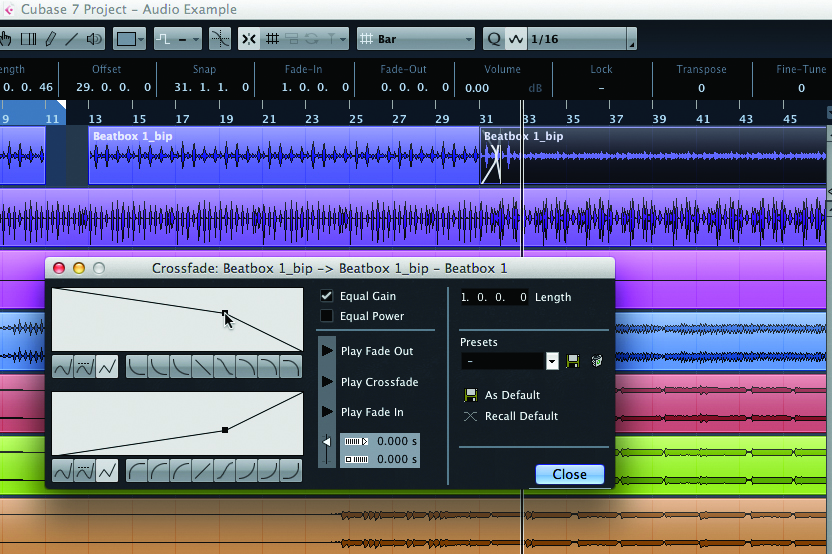
4. If you need to create a crossfade between two takes, make sure there is a little overlap between the two Arrange window items and drag them into place. When the two ends are overlapping, press [X] on the keyboard; Cubase will automatically add a crossfade. If you need more control, press [X] again and Cubase opens the Crossfade window, in which the fade curves can be adjusted.
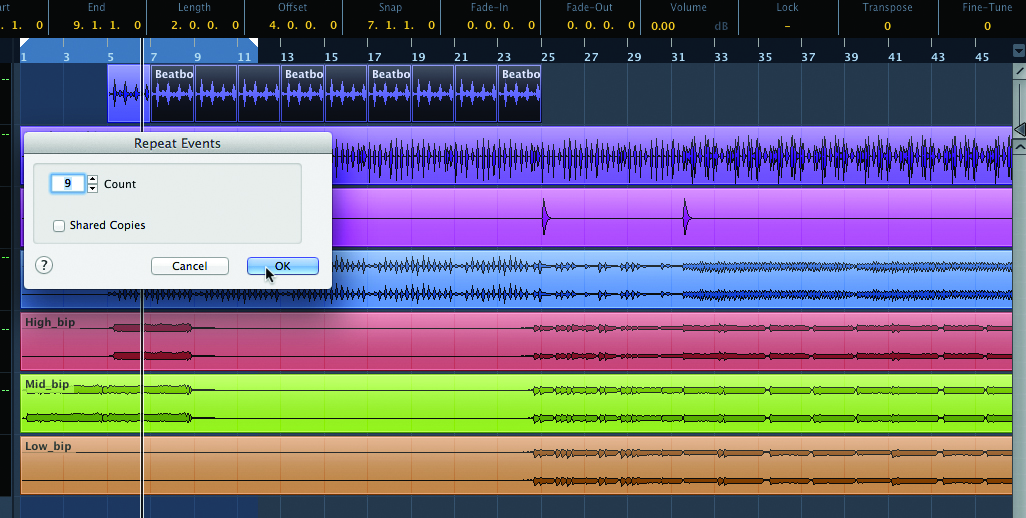
5.If a file needs to loop, select the item that you want to repeat and click on Edit>Functions>Repeat ([Ctrl]/[Cmd]+[K]). In the pop-up that appears, select how many occurrences you want. These are ‘proper’ copies rather than ghosts of the original, making them easier to edit later on.

6.The Arrange window is also where you find automation tools. Volume and any other parameter can be adjusted by dropping the little arrow in the bottom-left of the track header. To activate this, press the Read button on the track header and draw in adjustments in control that are needed. This is a great way to make manual crossfades between takes and cover up glitches that haven’t been edited out.
Editing Audio With The Sample Editor
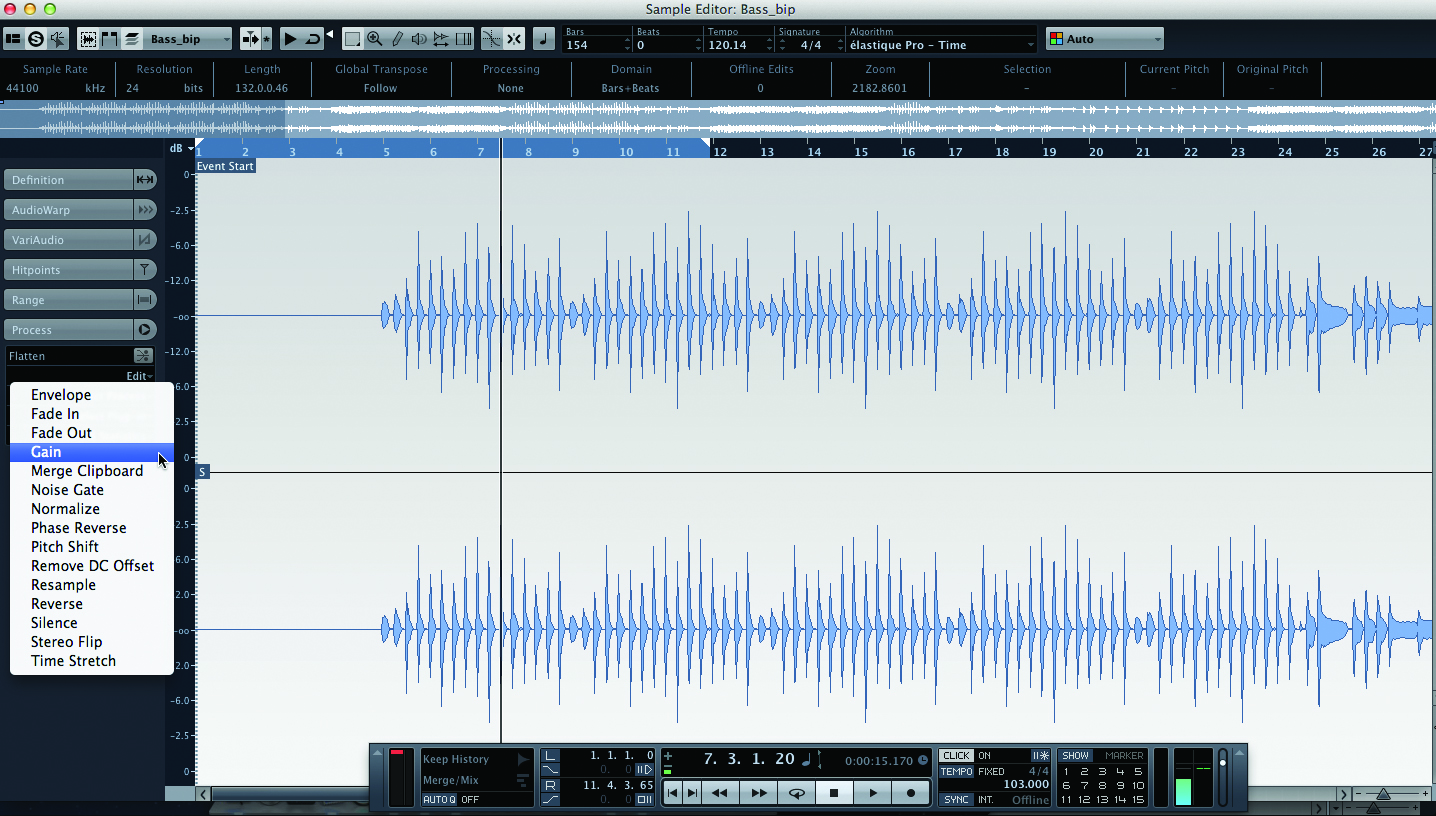
1.The Sample Editor (double-click on an audio file) is the window in Cubase that allows detailed processing of audio files. It gives you access to all the expert tools that can be used to make the elements of you project as good as they can be before they are assembled within the Arrange window.
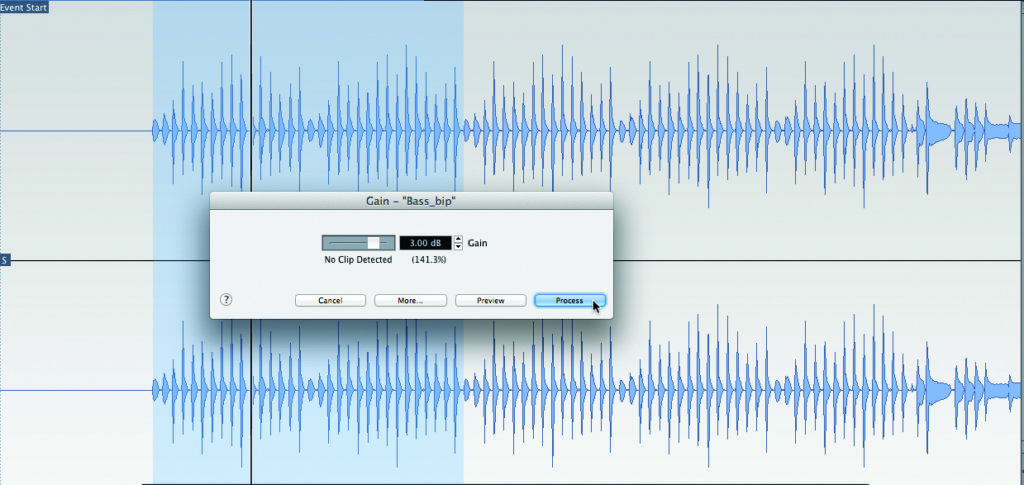
2.Try starting with Gain, often needed if a track has been recorded a little quiet. When selected, it opens a pop-up window that allows for settings to be adjusted; in this case, how much gain to add. Tread carefully as all the processes are destructive, so everything you do can’t be undone – once it’s done, it’s done, and can’t be bypassed in the same way as if you were using a plug-in.
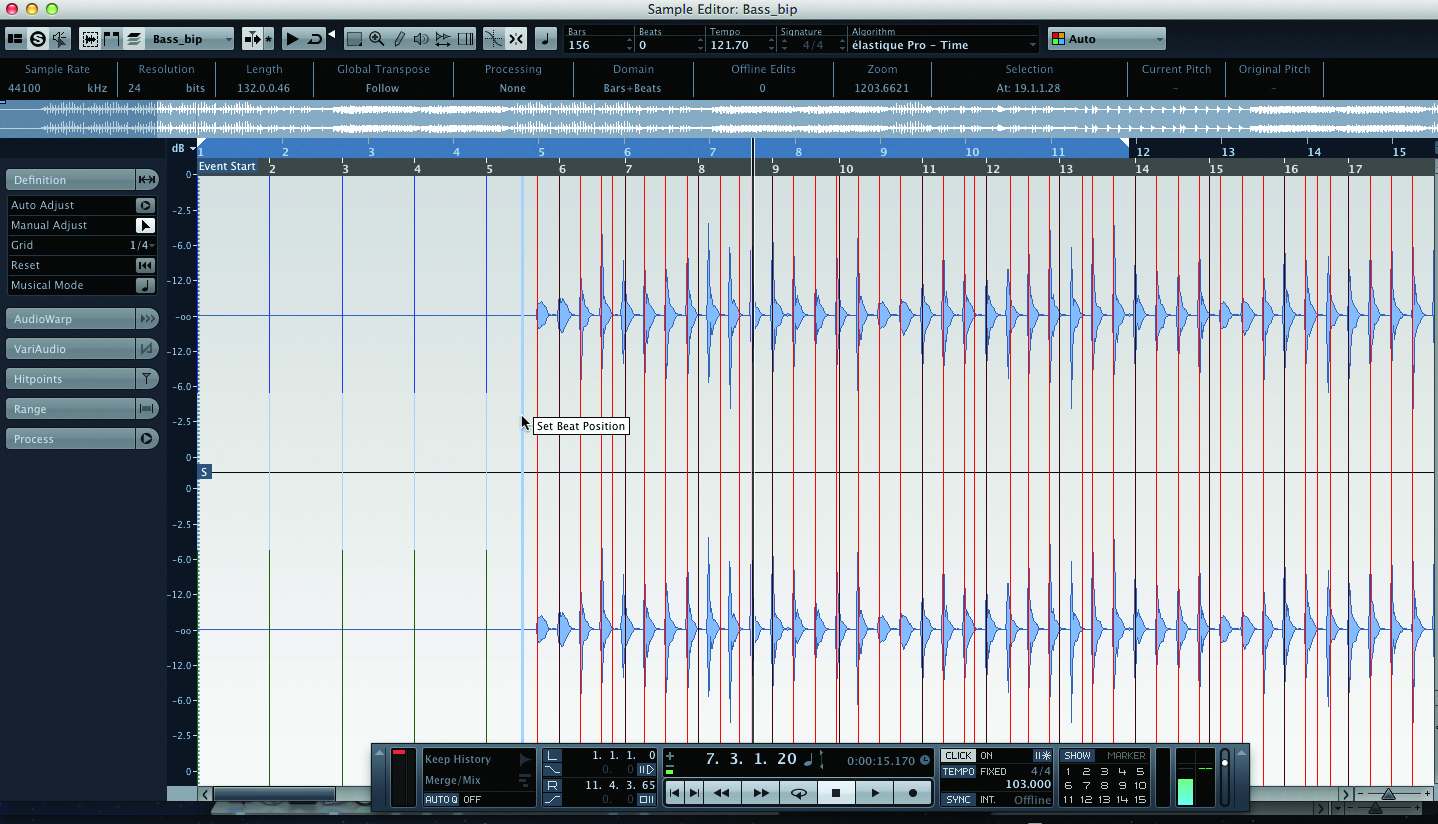
3.The Sample Editor also includes tools for audio quantisation. Start by selecting the Definition tab and choosing the level of detail that the grid uses – up to 1/16 (semiquaver) – then use the Auto-Adjust tool. This generates a template to synchronise the music to the project and tightens up the timing of a file.
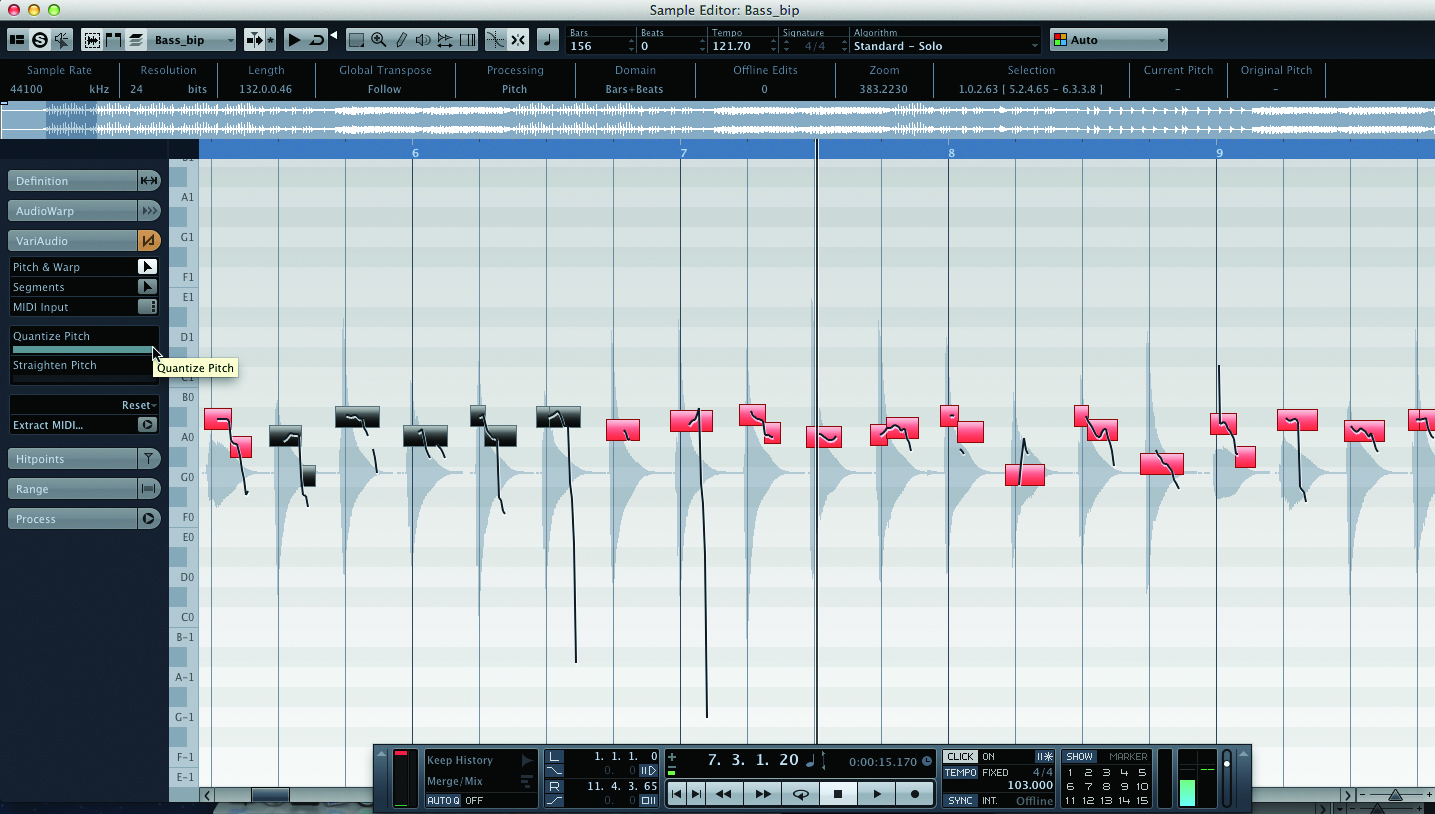
4. VariAudio is a tool that enables Cubase to correct the pitch manually when a performer is slightly out-of-tune. The Pitch and Warp tool analyses the notes and then draws blocks similar to MIDI data that the user can drag around (use the Quantise Pitch slider for multiple notes). The Straighten Pitch slider removes vibrato and other pitch variation from notes for a smoother sound.
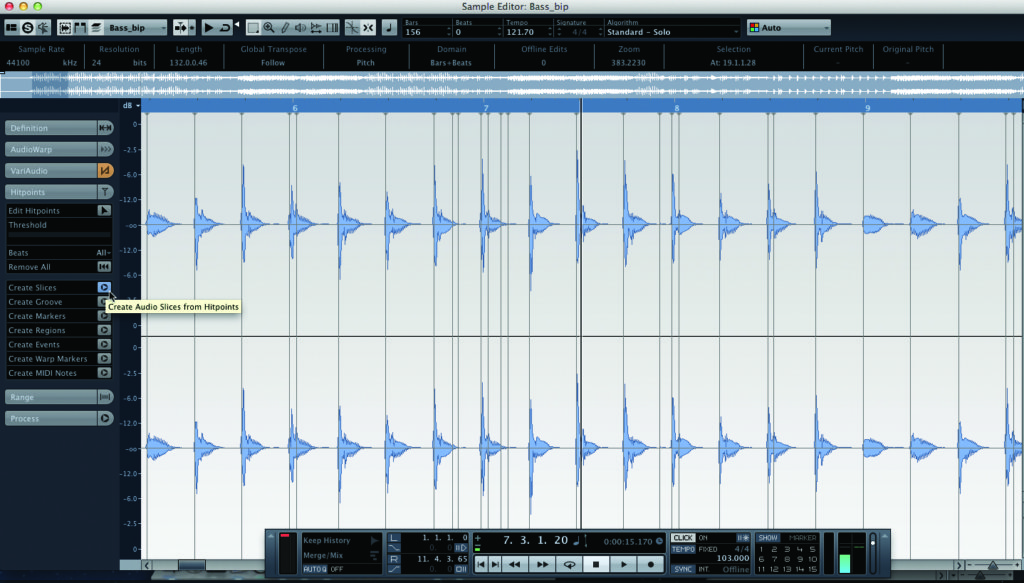
5.The Hitpoints tab enables you to generate slices of audio. This is particularly useful if you are turning audio into samples or chopping-up drum sounds for really mechanical quantisation. Click on the Create Slices button and Cubase will generate short audio files of each hit, placing the resulting slices into the Arrange window for further timing adjustments.
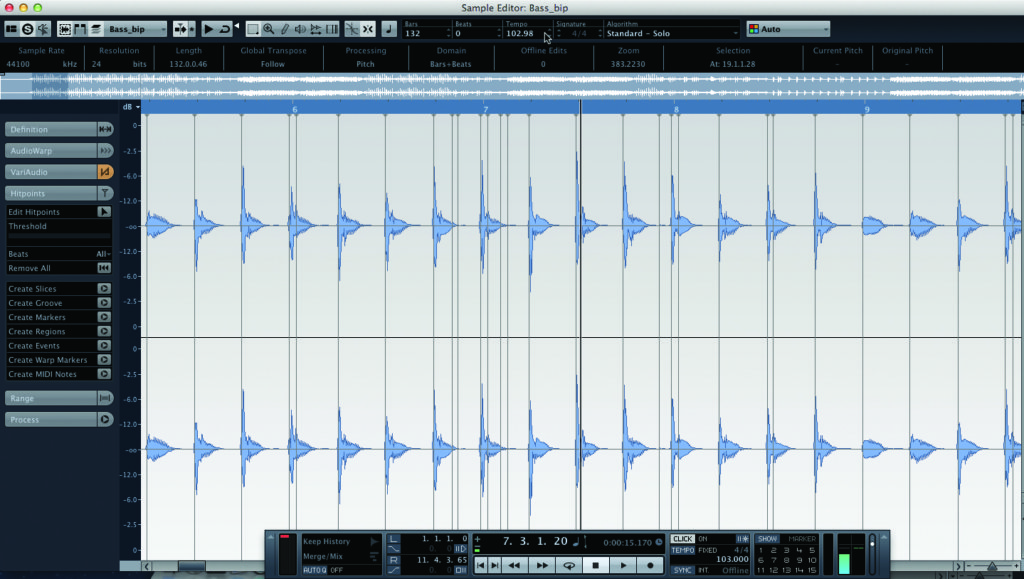
6. At the top of the Sample Editor window there is information regarding the file itself, including original tempo, number of bars and time signature. All of this can be changed – for example, if Cubase analyses the tempo incorrectly during the Hitpoints process, it can be corrected here. The panel also includes general information about the file, such as the resolution it was recorded at and so on.
Next time we’ll have more vital hints, tips and tutorials to make you even more of a Power User of Cubase!
