Cubase Tutorial: Become A Power User Part 3 – Creating and Editing MIDI 2
Tim Hallas continues his look at creating and editing MIDI in Cubase, now he looks at editing in the arrange window and piano roll… Editing MIDI in the Arrange Window 1: The editing that you are likely to do in the Arrange window is the basic stuff, such as slicing sections and moving them. To slice […]
Tim Hallas continues his look at creating and editing MIDI in Cubase, now he looks at editing in the arrange window and piano roll…
Editing MIDI in the Arrange Window
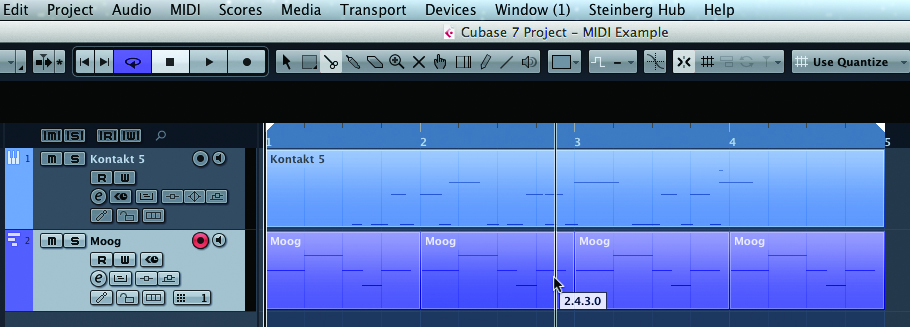
1: The editing that you are likely to do in the Arrange window is the basic stuff, such as slicing sections and moving them. To slice a section of MIDI you need to select the Scissors and an appropriate snap resolution. The main options are bar, beat and quantise. Pick an appropriate resolution for the piece you are working on.
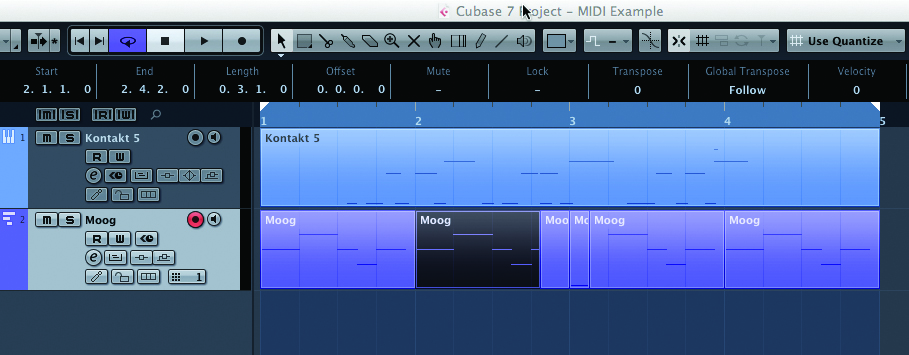
2: If your notes have been cut in half, Cubase will simply split at the cut point, play the section in the first half and remove the tail of the note. This can be retrieved via the Piano Roll, but will disappear from the Arrange window – an easy solution for removing notes that have accidentally been left hanging at the end of a take.
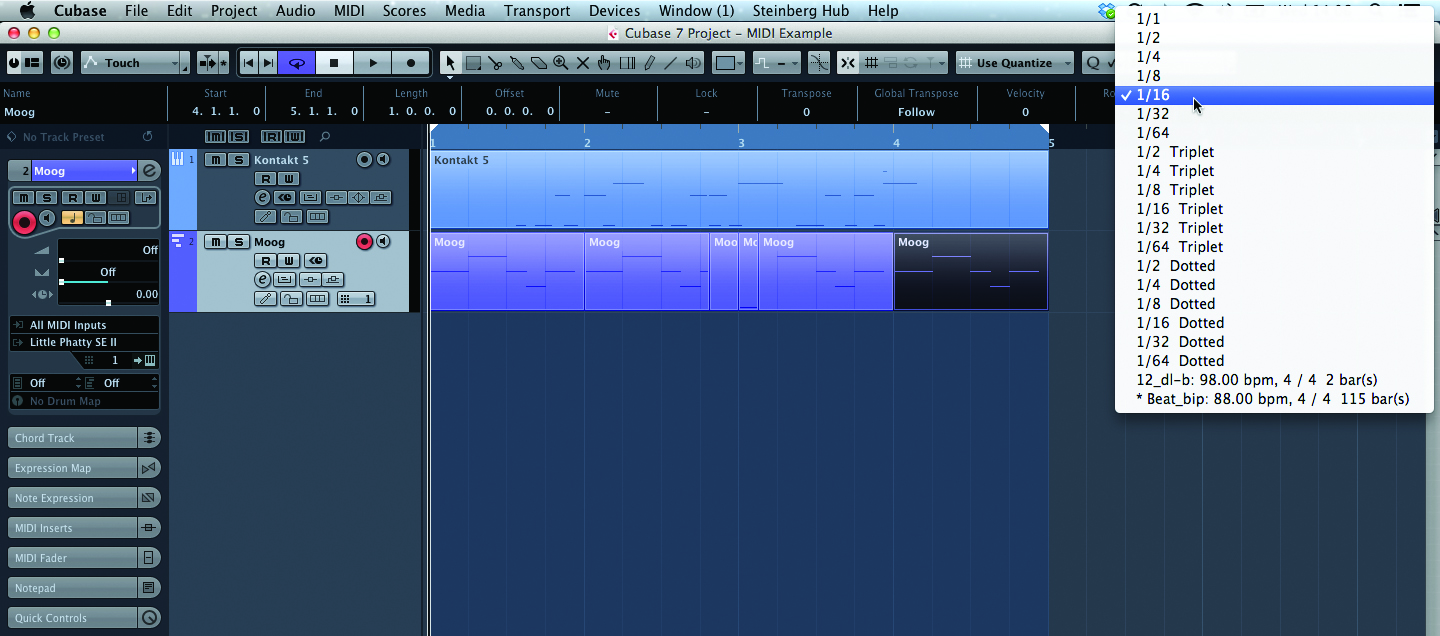
3: An alternative to avoid slicing notes is to quantise your data before slicing it. The quantise resolution is set at the top of the window and will default to 1/16 (semiquaver), but pick an appropriate resolution for your part. This is normally the shortest note denomination within the take. Select the block you are working with in the Arrange window and press [Q].
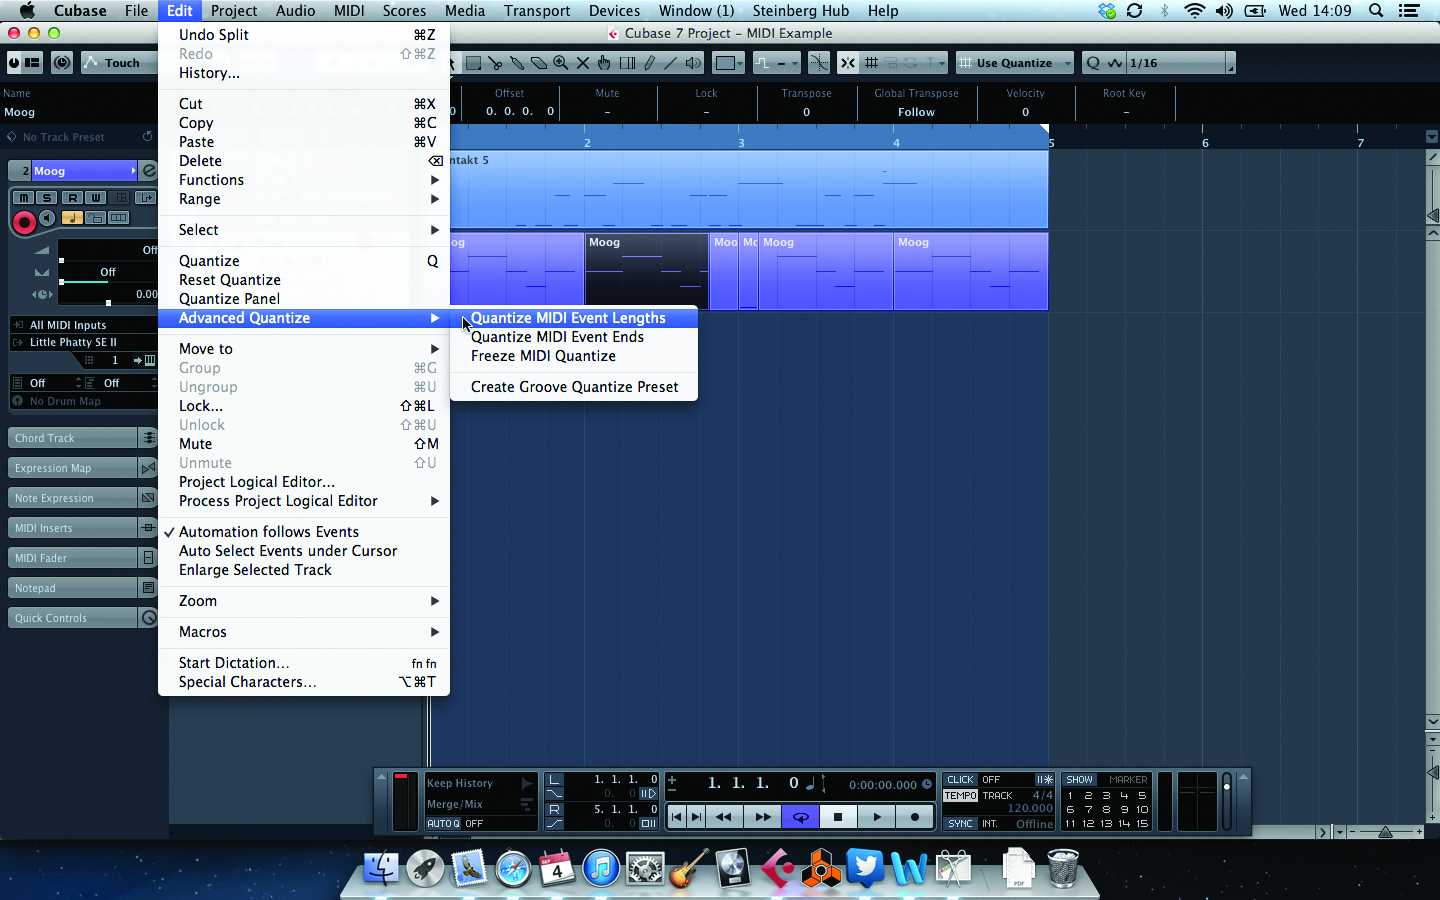
4: If this hasn’t done what you need, in Edit>Advanced Quantize there are two options to quantise note lengths and note ends to really tidy up the performance of your part. These are the tools for when you want a really precise-sounding MIDI piece, particularly if it is going to be looped.

5: To create a MIDI loop of your track and to add it to the MediaBay, select the chunk of MIDI you want and click on Export>MIDI Loop. This will bring up a pop-up window in which you can give it a name. Press Export and it is instantly added to the MediaBay library and can be reused at any time.
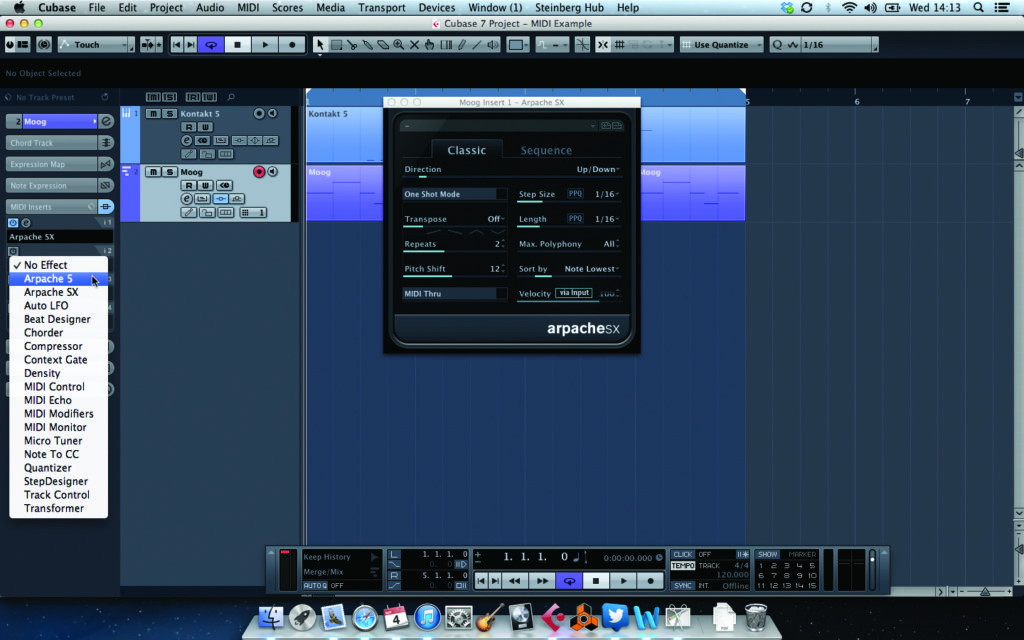
6: Cubase includes some MIDI plug-ins that can drastically change the sound of a part. To select these, choose the MIDI Inserts tab on the track Inspector and select the one you want to try. The arpeggiators (ARPache) are always a good choice and are a great way to reinvent a MIDI part.
Editing MIDI in the Piano Roll and List Editor
1: To get more control over the MIDI editing, you need to open the Piano Roll or the List Editor. To open the Piano Roll, double-click on a section of MIDI (the Piano Roll is so-called due to the resemblance of its appearance to the punched paper rolls that Pianolas use). The zoom controls are located in the bottom-right of the window, or you can use [H] and [G] to zoom in and out horizontally.
2: The pitches and note lengths can be edited from the top half of the screen by selecting notes and changing their size with the cursor. To move a note, drag it to its new location by grabbing it right in the middle. To change the length, grab either end to shorten or lengthen it. This can be done to groups of notes by selecting multiple notes by drawing a box around them with the cursor.
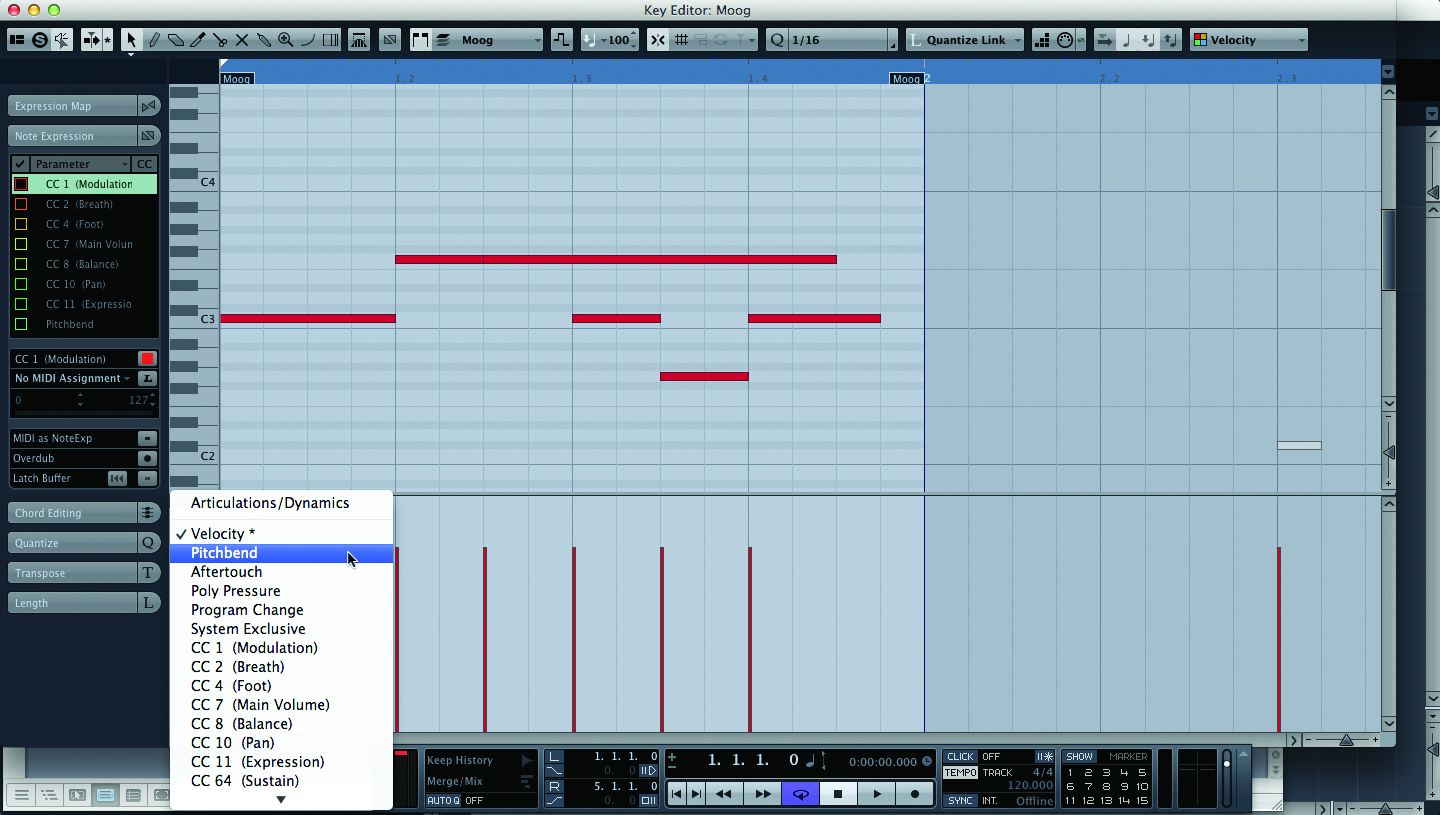
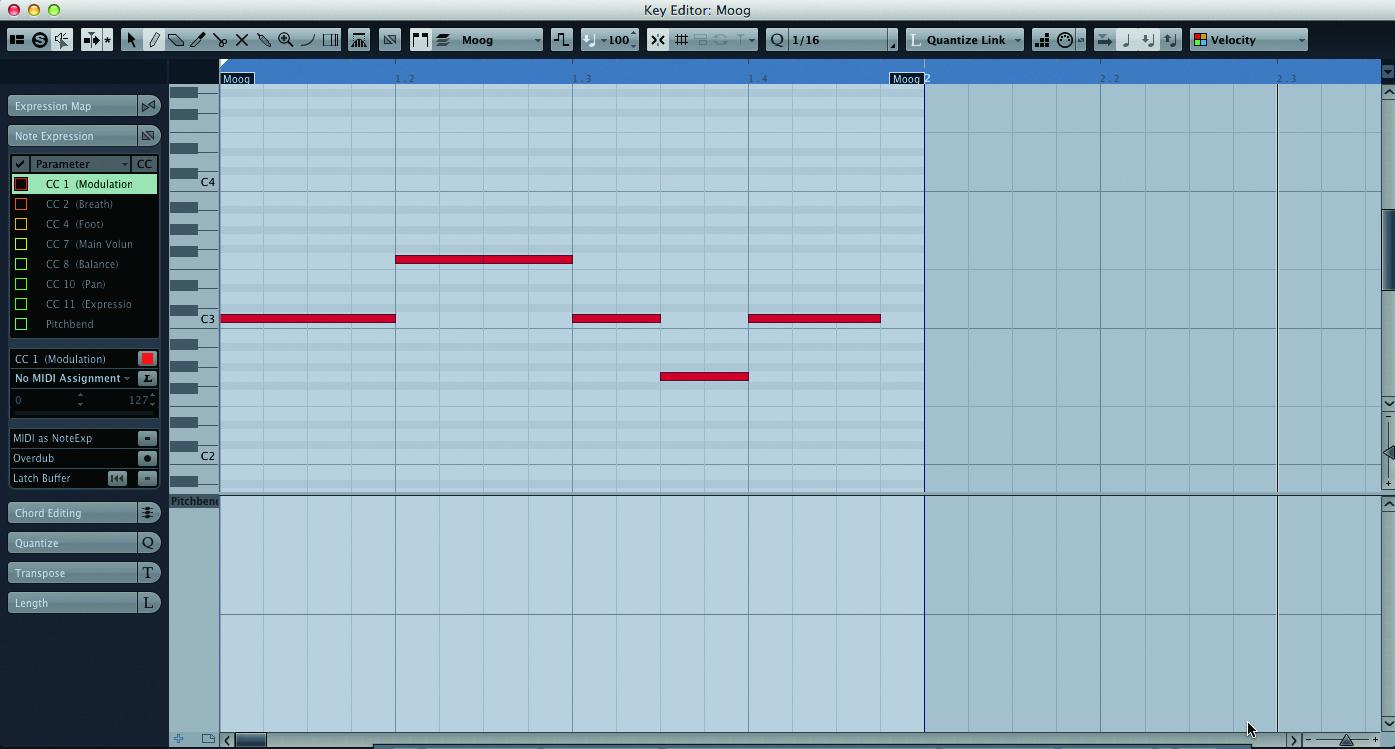
3: Velocity and controller data can be changed in the bottom half of the window. Note velocity is the default, but this can be changed by selecting the dropdown panel in the top-left corner of the controller section. This includes pitch bend and so on as standard, but any MIDI controller can be edited by clicking on Setup and moving the chosen controller to the right-hand list with the arrow button in the window
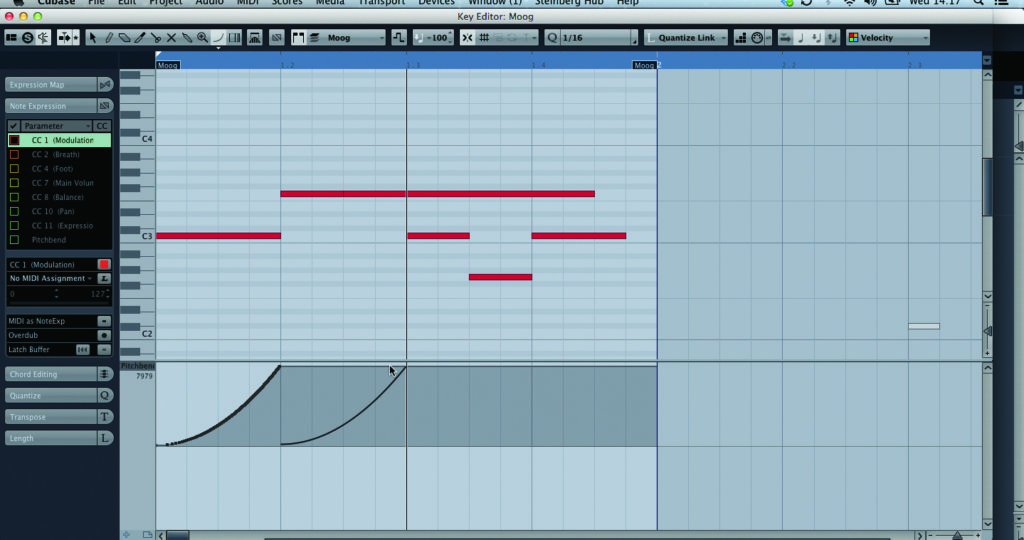
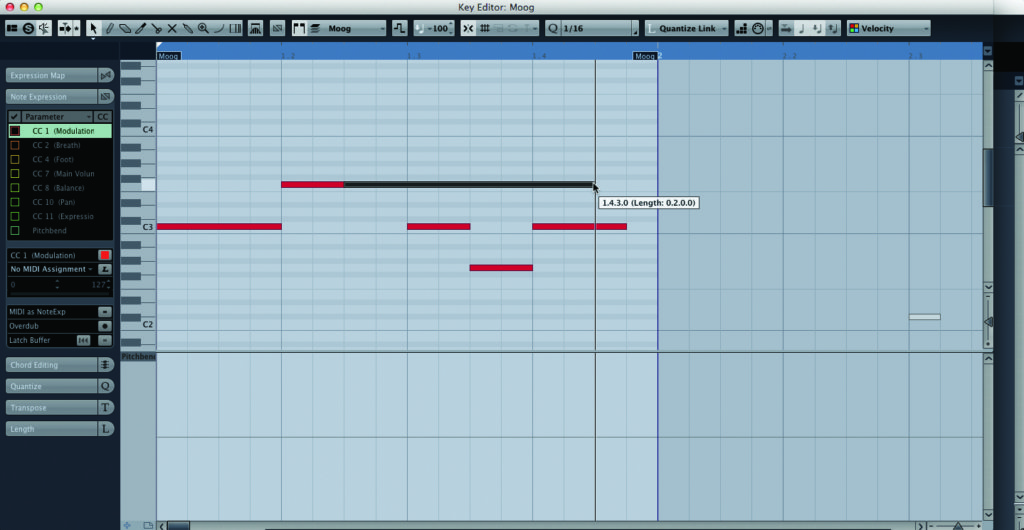
4: These can then be edited with the Pencil tool or, if you’re making bigger changes, the Line tool. The Parabola tool is useful for pitch-bend and volume changes. Fine editing can then be done with the cursor as needed as the Line/Parabola is a bit inaccurate.
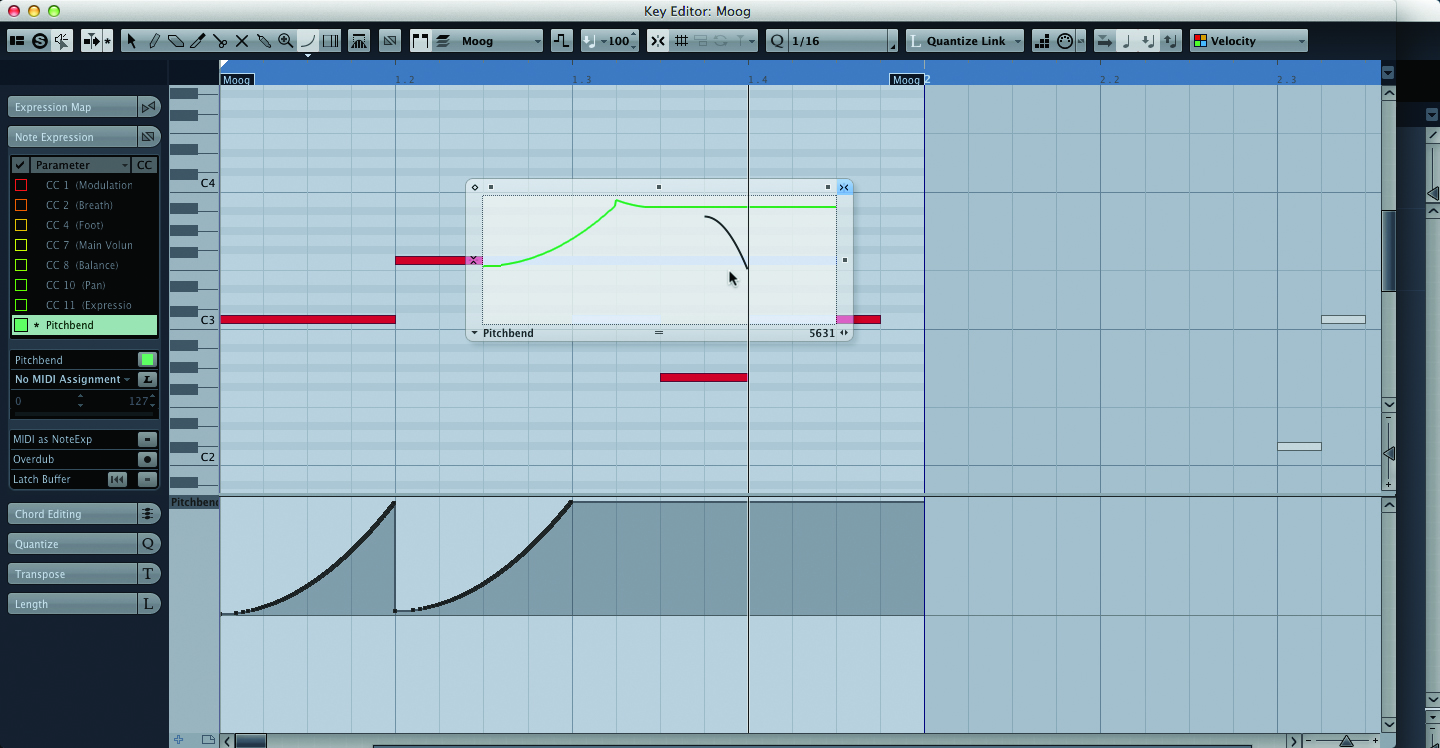
5: To edit controls on single notes – what Cubase refers to as Note Expression – double-click on a note within the Piano Roll and a small box will open. This is a mini version of the controller lane, and by selecting a controller from the Note Expression tab in the Inspector it works in the same way. Only certain synths respond to this – most of the sounds in Cubase do but third-party sounds probably won’t.

6: To open the List Editor, click on MIDI>Open List Editor. This opens a list of every piece of MIDI data that Cubase is dealing with. It is unlikely that you will want to do much in here, but it is useful if a particular controller needs a tweak that would be very difficult to do in the controller lane of the Piano Roll. I use it for tidying pitch-bends back to zero when I have failed to do this while editing elsewhere.
