Cubase Tutorial: Become a Power User Part 6 – Advanced MIDI Options
Last time, during our foray into the Sample Editor we revealed that audio can be treated in much the same way as MIDI. Here, In part six of our Cubase power user series Tim Hallas takes the same approach with MIDI itself… To my mind, Cubase is still a class-leader when it comes to MIDI […]

Last time, during our foray into the Sample Editor we revealed that audio can be treated in much the same way as MIDI. Here, In part six of our Cubase power user series Tim Hallas takes the same approach with MIDI itself…
To my mind, Cubase is still a class-leader when it comes to MIDI editing and processing, as its many features cannot all be found in other DAWs. And to prove this, the features that I’ll be looking at here are some that you won’t find elsewhere. The more standard features, such as quantisation and transposition, are readily available in all MIDI software, but Cubase offers slightly more flexibility in terms of the precision with which it enables you to quantise swing and transpose within keys and scales via the dropdown menus found on the left in the Key Editor. Some other DAWs offer preset levels of swing and transposition, but the flexibility with which Cubase does this is better than most (please feel free to investigate the more advanced versions of these in the Key Editor).
A couple of iterations ago, Cubase introduced Note Expression. I have covered it before, but it is worth looking at again as it is easily overlooked when you want to place a pitch-bend on a single note in a part or add a filter sweep to just some notes rather than all of them. It is worth remembering that Note Expression works only with a few soft-synths, but it does work with Cubase’s own synthesizers (Retrologue in particular works well with Note Expression). It is worth investigating how you might use Note Expression in conjunction with other global effects such as filter cutoff, moving in one direction globally and in the other direction for one note.
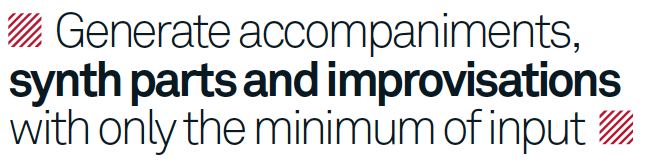
The addition of the Chord Track in Cubase 7 made tasks such as the creation of vocal harmonies easy. However, the impact that it has had on MIDI is even greater as Cubase can now generate accompaniments, synth parts and improvisations with only the minimum of input from the user. The Chord Track has revolutionised the way in which I think about MIDI parts in Cubase – the ability to quantise parts to the chords is amazingly useful for a terrible pianist such as myself.
These aspects of MIDI editing in Cubase are barely touching the surface of what it can do – I certainly encourage you to investigate further and come up with your own ways of working.
Advanced Quantisation and Transposition
1: Note Expression can be applied to any note within a MIDI or instrument part. To add it to a note, double-click on a part in the Arrange window to open the Key Editor and select the note that you want to add Note Expression to (double-click just that note to open the panel for adding the data as it takes forever otherwise).
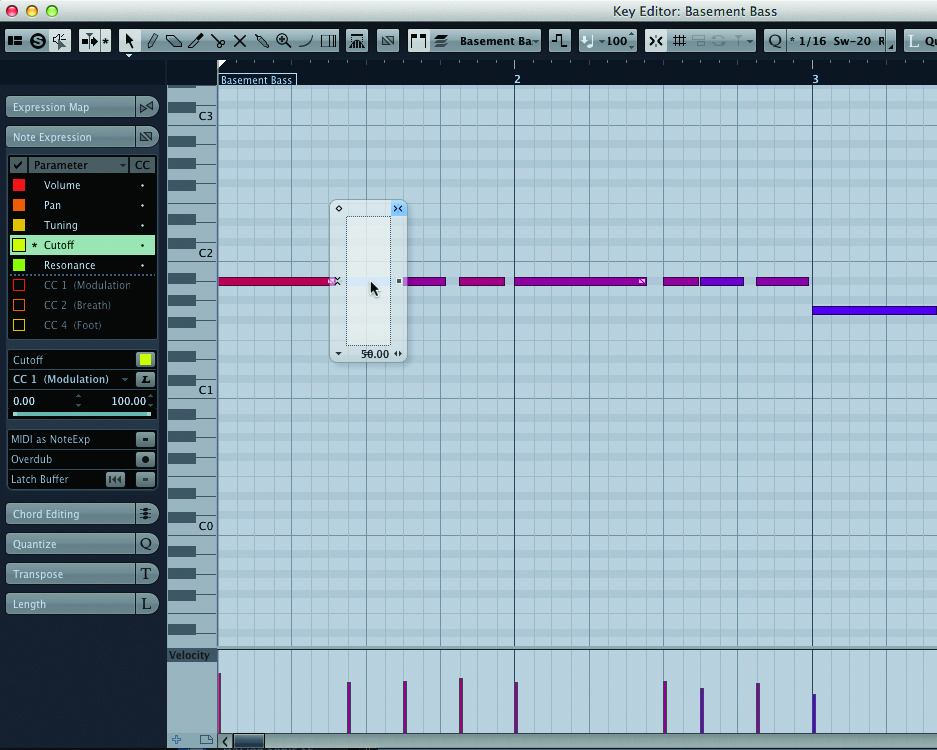
2: Once the window is open, select the controller that you want to affect for the selected note (they can be selected in the Inspector panel on the left) and activate the appropriate coloured marker for the various CC data that can be controlled. This brings up the data range available just below, plus any routing to external hardware that can be used, such as the mod wheel.

3: Select the Pencil tool and draw in the appropriate movement that you want the CC data on that note to have Note Expression. Cubase often defaults to a very wide zoom, so make sure that you zoom right in to see a decent level of detail. You can change the length of the Note Expression box, but obviously this won’t affect anything after the note has stopped playing

4: Once this data is in, select from the various parameters by clicking on the little dropdown arrow in the bottom left-hand corner. There are also controls to compress the range of data from the top-left and top-right if the effect is too intense, but you will want to maintain the ratio. There is also a control to change the release time in the bottom-right
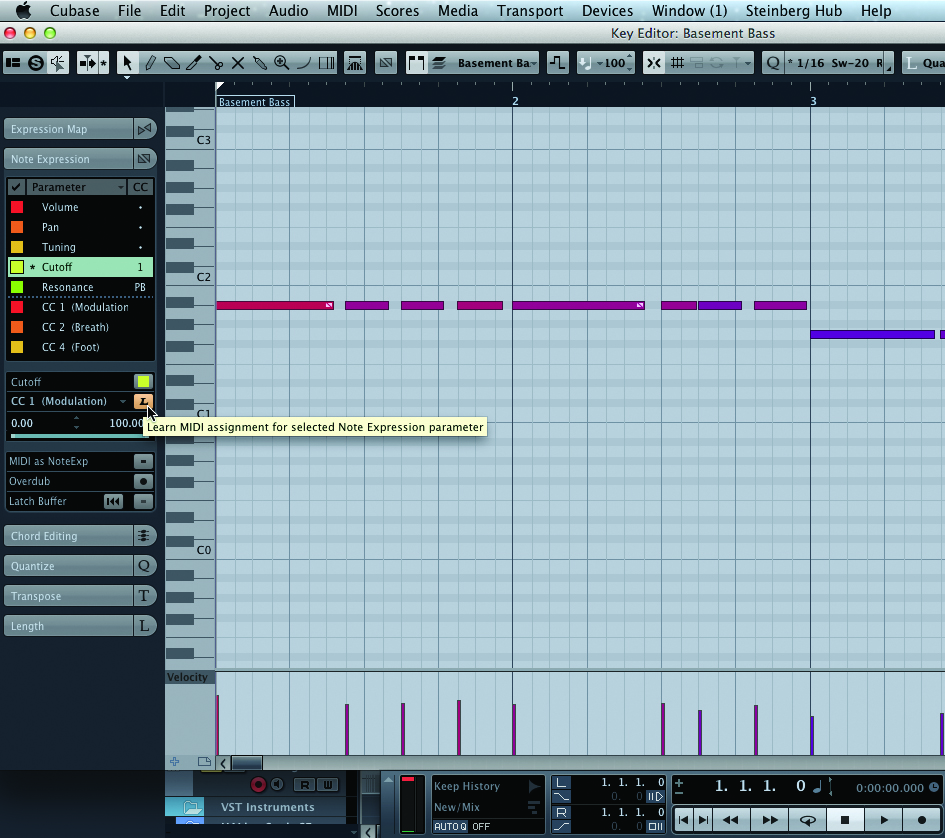
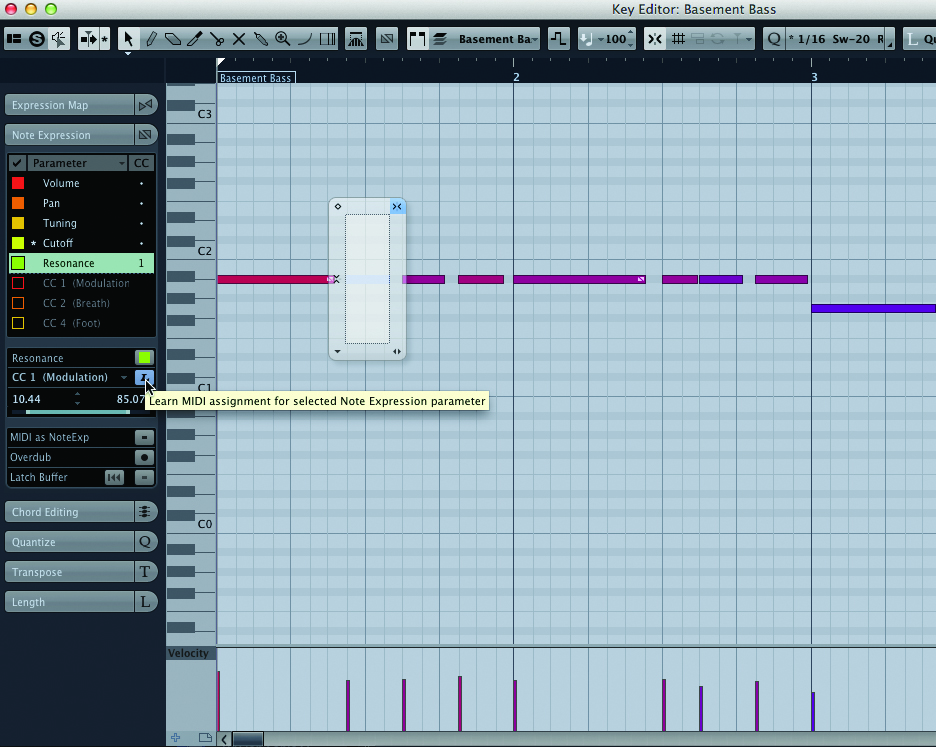
5: If you want to control Note Expression information in real time, there is a MIDI Learn control. By selecting it and moving the desired control on your MIDI controller you can assign that selected control to the hardware. Try using aftertouch (if your keyboard has it) so that it affects the note you are working on as you play it.
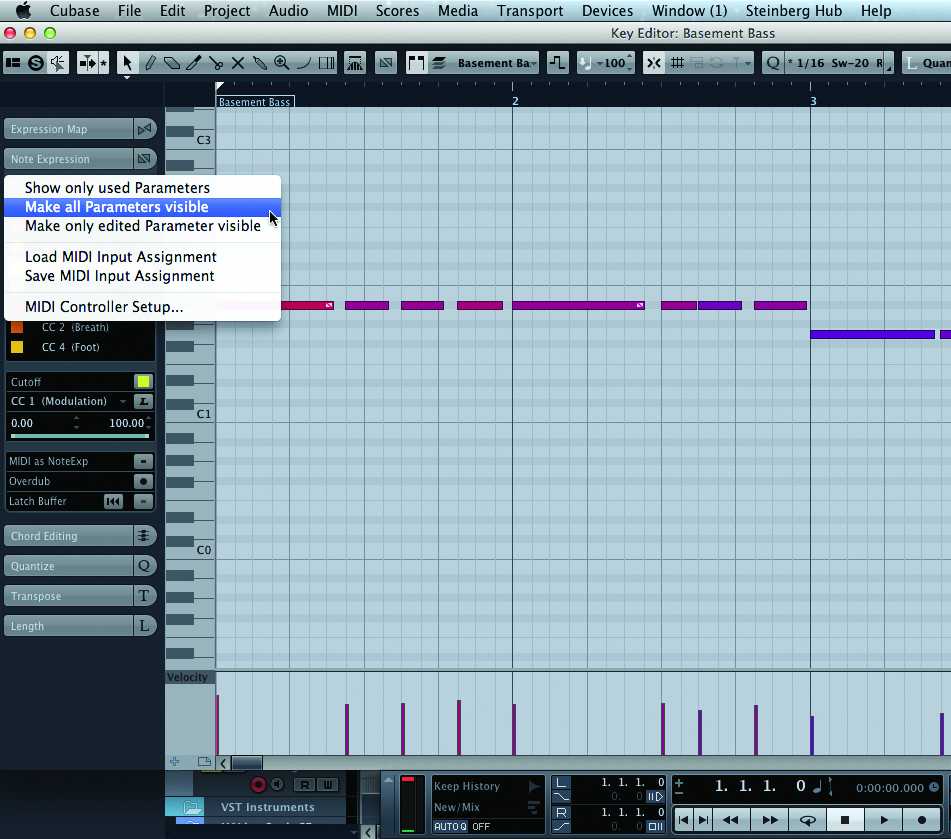
6: Cubase by default displays only a few of the Note Expression controllers that are editable. If you want to view the others (and some other controllers as well) click at the top, next to the word Parameter, and select the option Make all Parameters Visible. This gives you a whole load more controllers to edit and automate.
Editing Chords

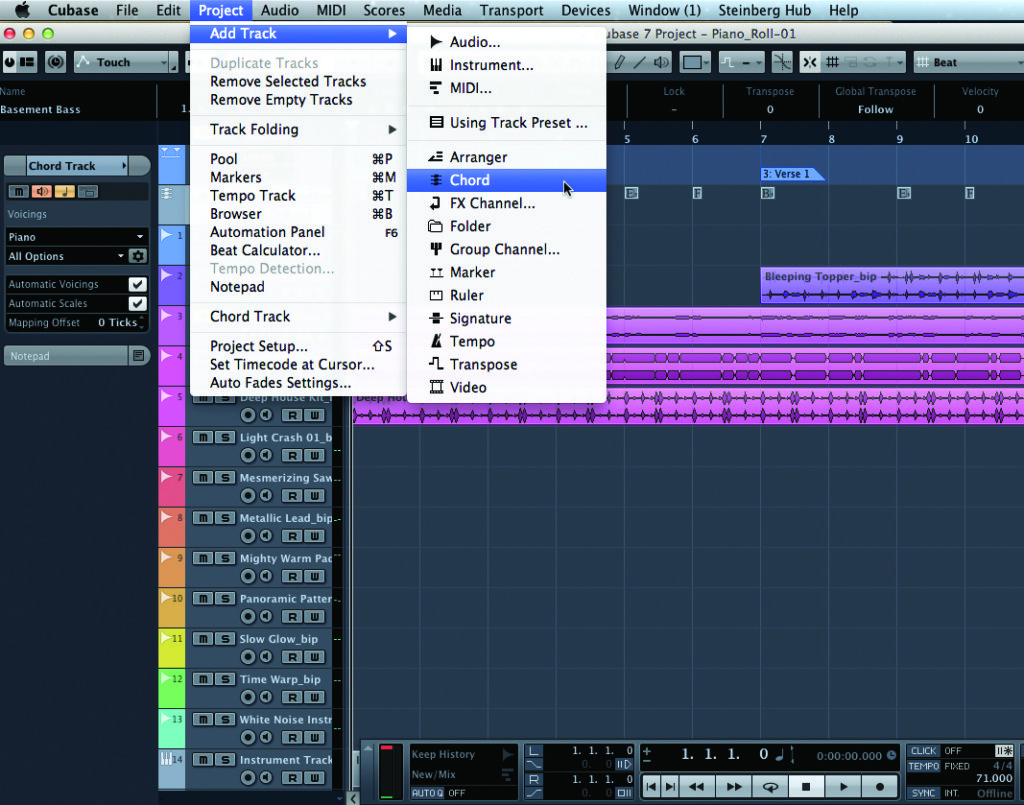
1: To add chords to Cubase, you first need to add a Chord Track, which you can do by selecting Project>Add Track>Chord. This will add an empty track into the Arrange window, ready to have chords added to it. To do this, click them in using the Pencil tool and add them at the appropriate points. They follow the Snap tool, so make sure that you have the Snap resolution at the setting you need.
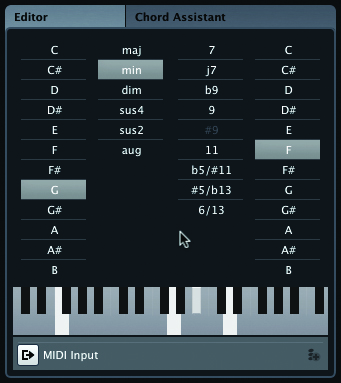
2: Once you have the blank chords in the project they will have an ‘X’ in them. Click on the chord and a dialog box will open showing the various options for chords. Select the chord root on the left, tonality in the middle, and bass note on the right for inversions and slash chords. To exit this box, click in the Arrange window.
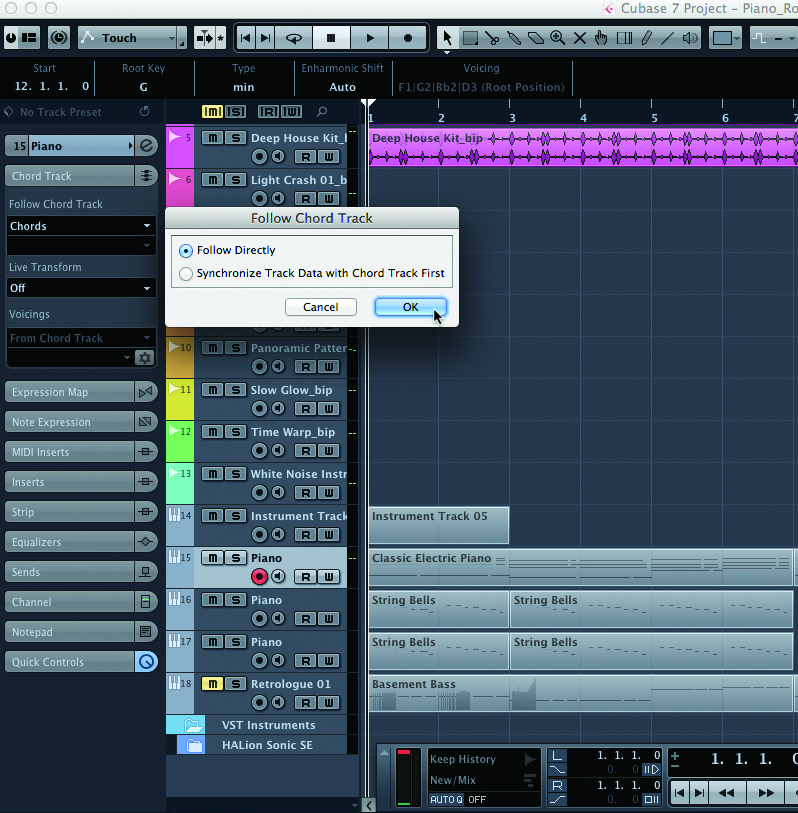
3: If you want a part that follows the Chord Track, select the Chord Track option on any MIDI or instrument track and from the dropdown select one of the options. This brings up a dialog to follow directly, or analyse the existing MIDI data. It essentially quantises the pitch to the relevant chords. To get a new track to follow, draw in a small area of empty MIDI data first; it will work as before.

4: To do the opposite and use a MIDI file to generate chords, select the piece of MIDI that you want to use. You can do this section-by-section or on a whole track by right/[Ctrl]-clicking (PC/Mac) on the track header and clicking Select All Events. Once your MIDI data is selected, click on Project>Chord Track>Make Chords. This analyses the MIDI data and adds the chords to the track.
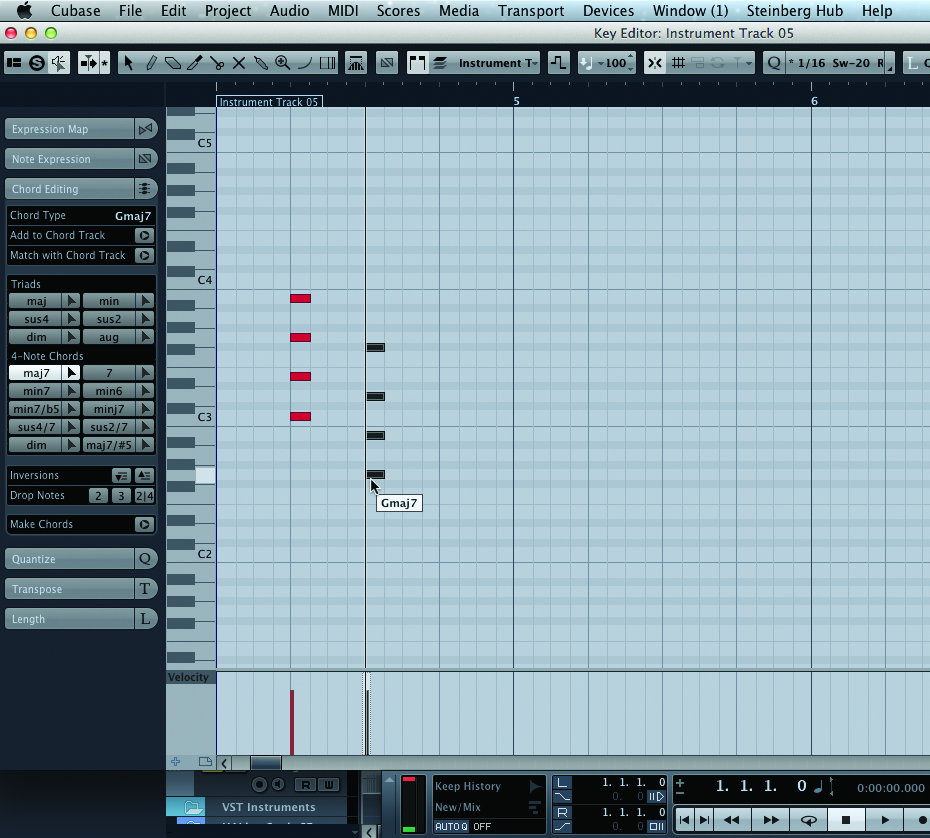
5: If you are working in the Key Editor and want to add a chord containing all of the notes of the chord, select the type of chord you want from the left; Cubase will add that chord when you click the root note with the Pencil tool. This saves time working out which notes are in which chord shape and worrying too much about the theory.
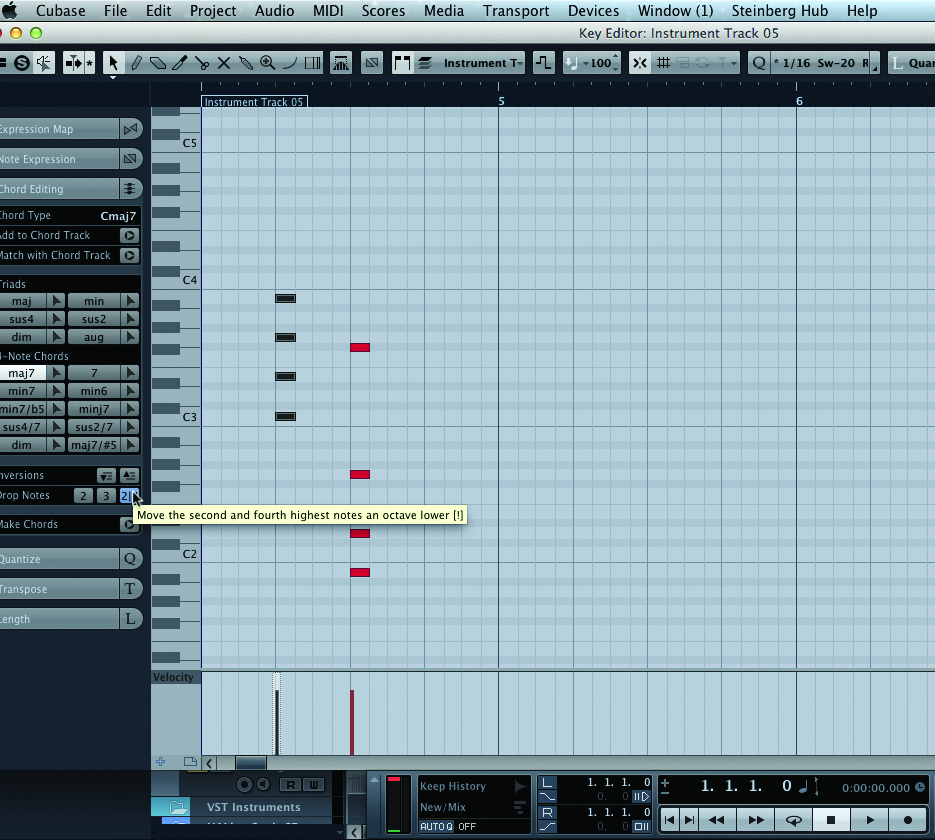
6: If you are unhappy with the inversion of the chord that Cubase has chosen, the Inversion button changes the chord from root position and moves the chord shape around. The buttons labelled 2, 3, 2/4 are designed to move the second, third and second and fourth notes an octave lower to give a different shape and sound to the chord.